Hi readers! Many of you have been loving the Exploring Square-Based Garments article, creating your own versions of the 6-square garments. Some of you have asked me questions about constructing the 7-square wrap top. Well, rejoice! This issue contains a tutorial that guides you through creating the wrap top using paper models — a risk-free way to understand construction before cutting fabric. I'll guide you through a series of pictures showing how I construct the 7-square wrap top. As a bonus, I will also cover the 10-square pants for an additional challenge!
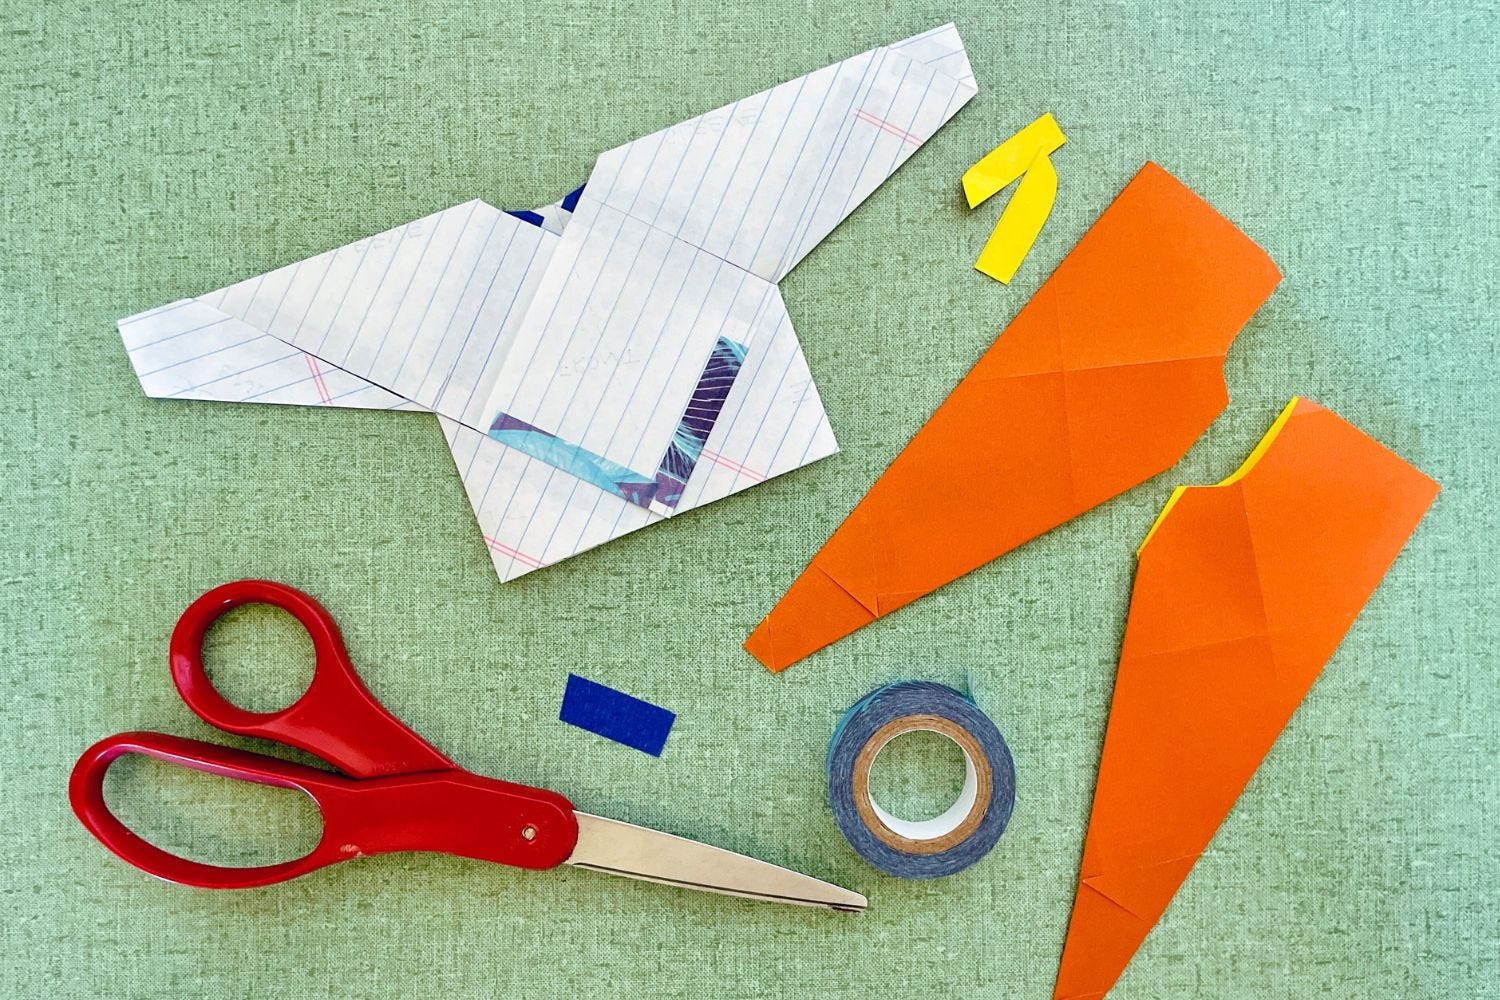
Grab your paper scraps, scissors, and tape. Let’s make these 7-square wrap top and 10-square pants paper models!
This is a long-awaited post for many readers, and I’m excited to share how I construct my 7-square wrap top. Instead of using fabric, I'll show you the how-tos using a paper modeling approach. Paper modeling is how I lay out and finalize my fabric square arrangements before I start cutting any fabric, so you’ll see how the pieces fit together (sans sewing allowance) without wasting a single scrap of fabric.
We'll focus mainly on that 7-square wrap top you've been asking about, perfect for those curious about how I make the front overlap section. And yes, I've included those 10-square pants as promised! So grab some paper, scissors, and tape — let's start deciphering these square-based garment constructions!
Making your square measurement in real life
Before we start with the paper model construction, I’d like to clarify how you make your square measurement when you’re making a square top in your size.
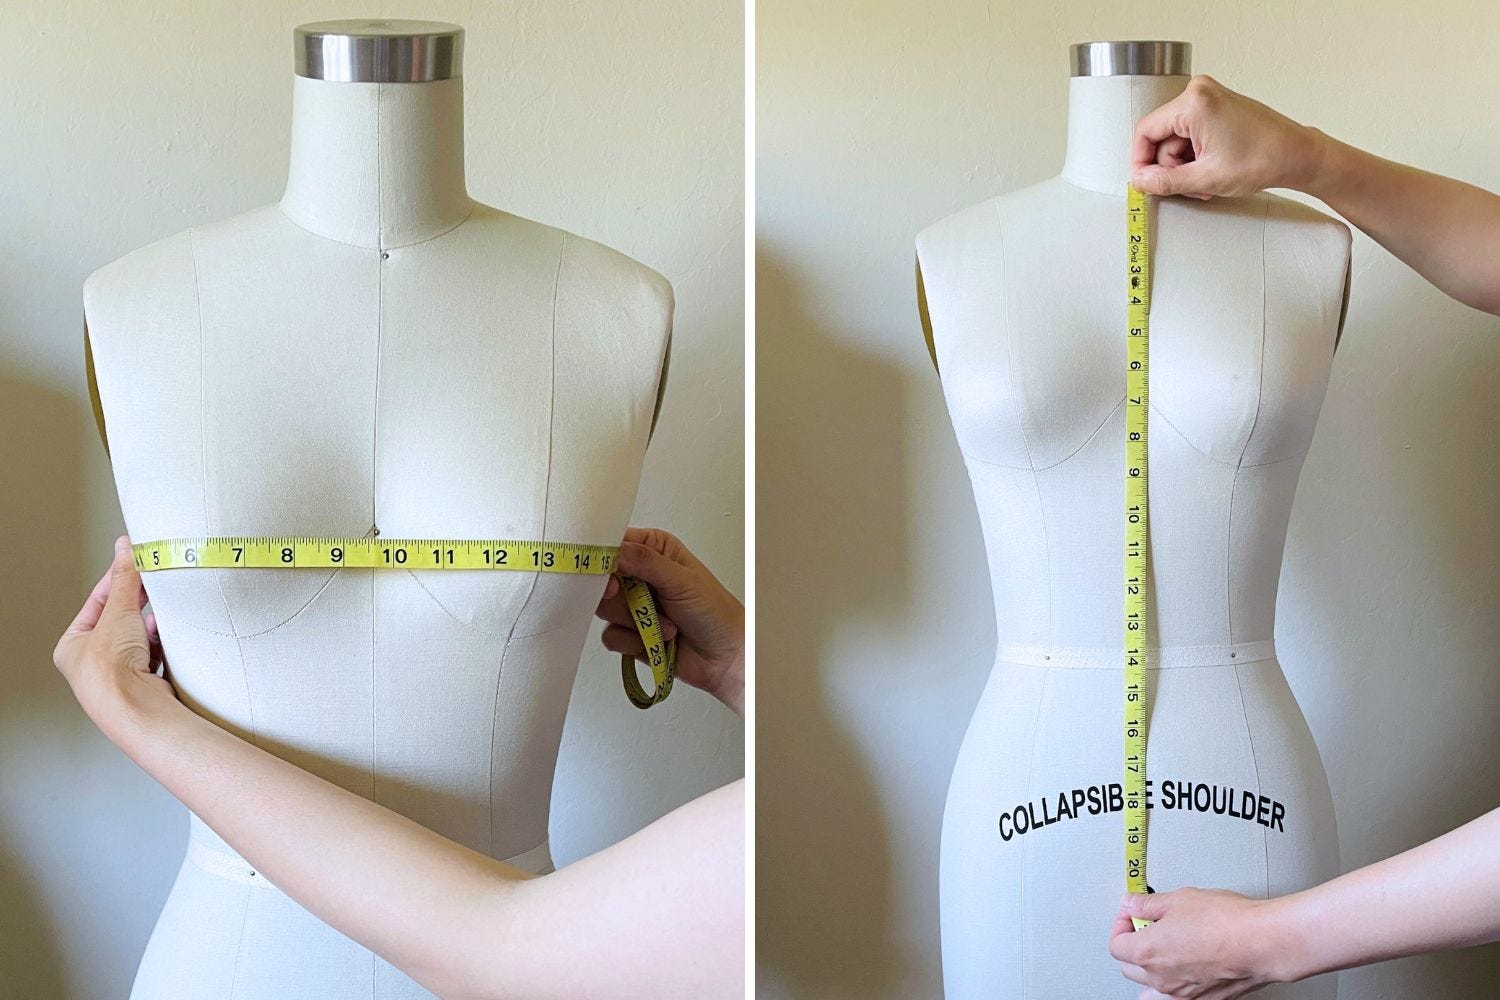
First, I do two measurements:
distance from armpit to armpit crossing the front bust,
distance from base of neck to the hip line, on or slightly above the widest hip circumference.
Two methods of measurements - pick what works best for you.
I use the latter method these days. Assuming I’m making one that fits my dress form, the measurement I use will be 18 or 19 inches.
Even though I measure to the hip, the finished garment will hit around the waist. This is because the measurement needs to account for the distance between the top of the shoulder line and the base of the neck (front).
If you measure the distance between the base of the neck (center front) to the waist line only, your top will be too small because you’re missing the shoulder - neck distance. You need to add that in by extending the measurement towards the hip line.
Or if you want to be precise, take a measurement from the top of your shoulder line towards the waist line - try it out and find out what works best for you!
Whichever measurement I use, I will divide it with 1.41 (the rounding for square root of 2) to arrive at the final measurement for the square side. 18 inches divided by 1.41 gives me 12.77, so I usually round it up to 13. My square sides will measure 13.5” if I want to use 0.25” seam allowance, or 14” if I use 0.5” seam allowance.
Hope that helps!
OK, now that the square measurement is out of the way, let’s create the paper models, shall we?
Making a 7-Square Wrap Top Paper Model
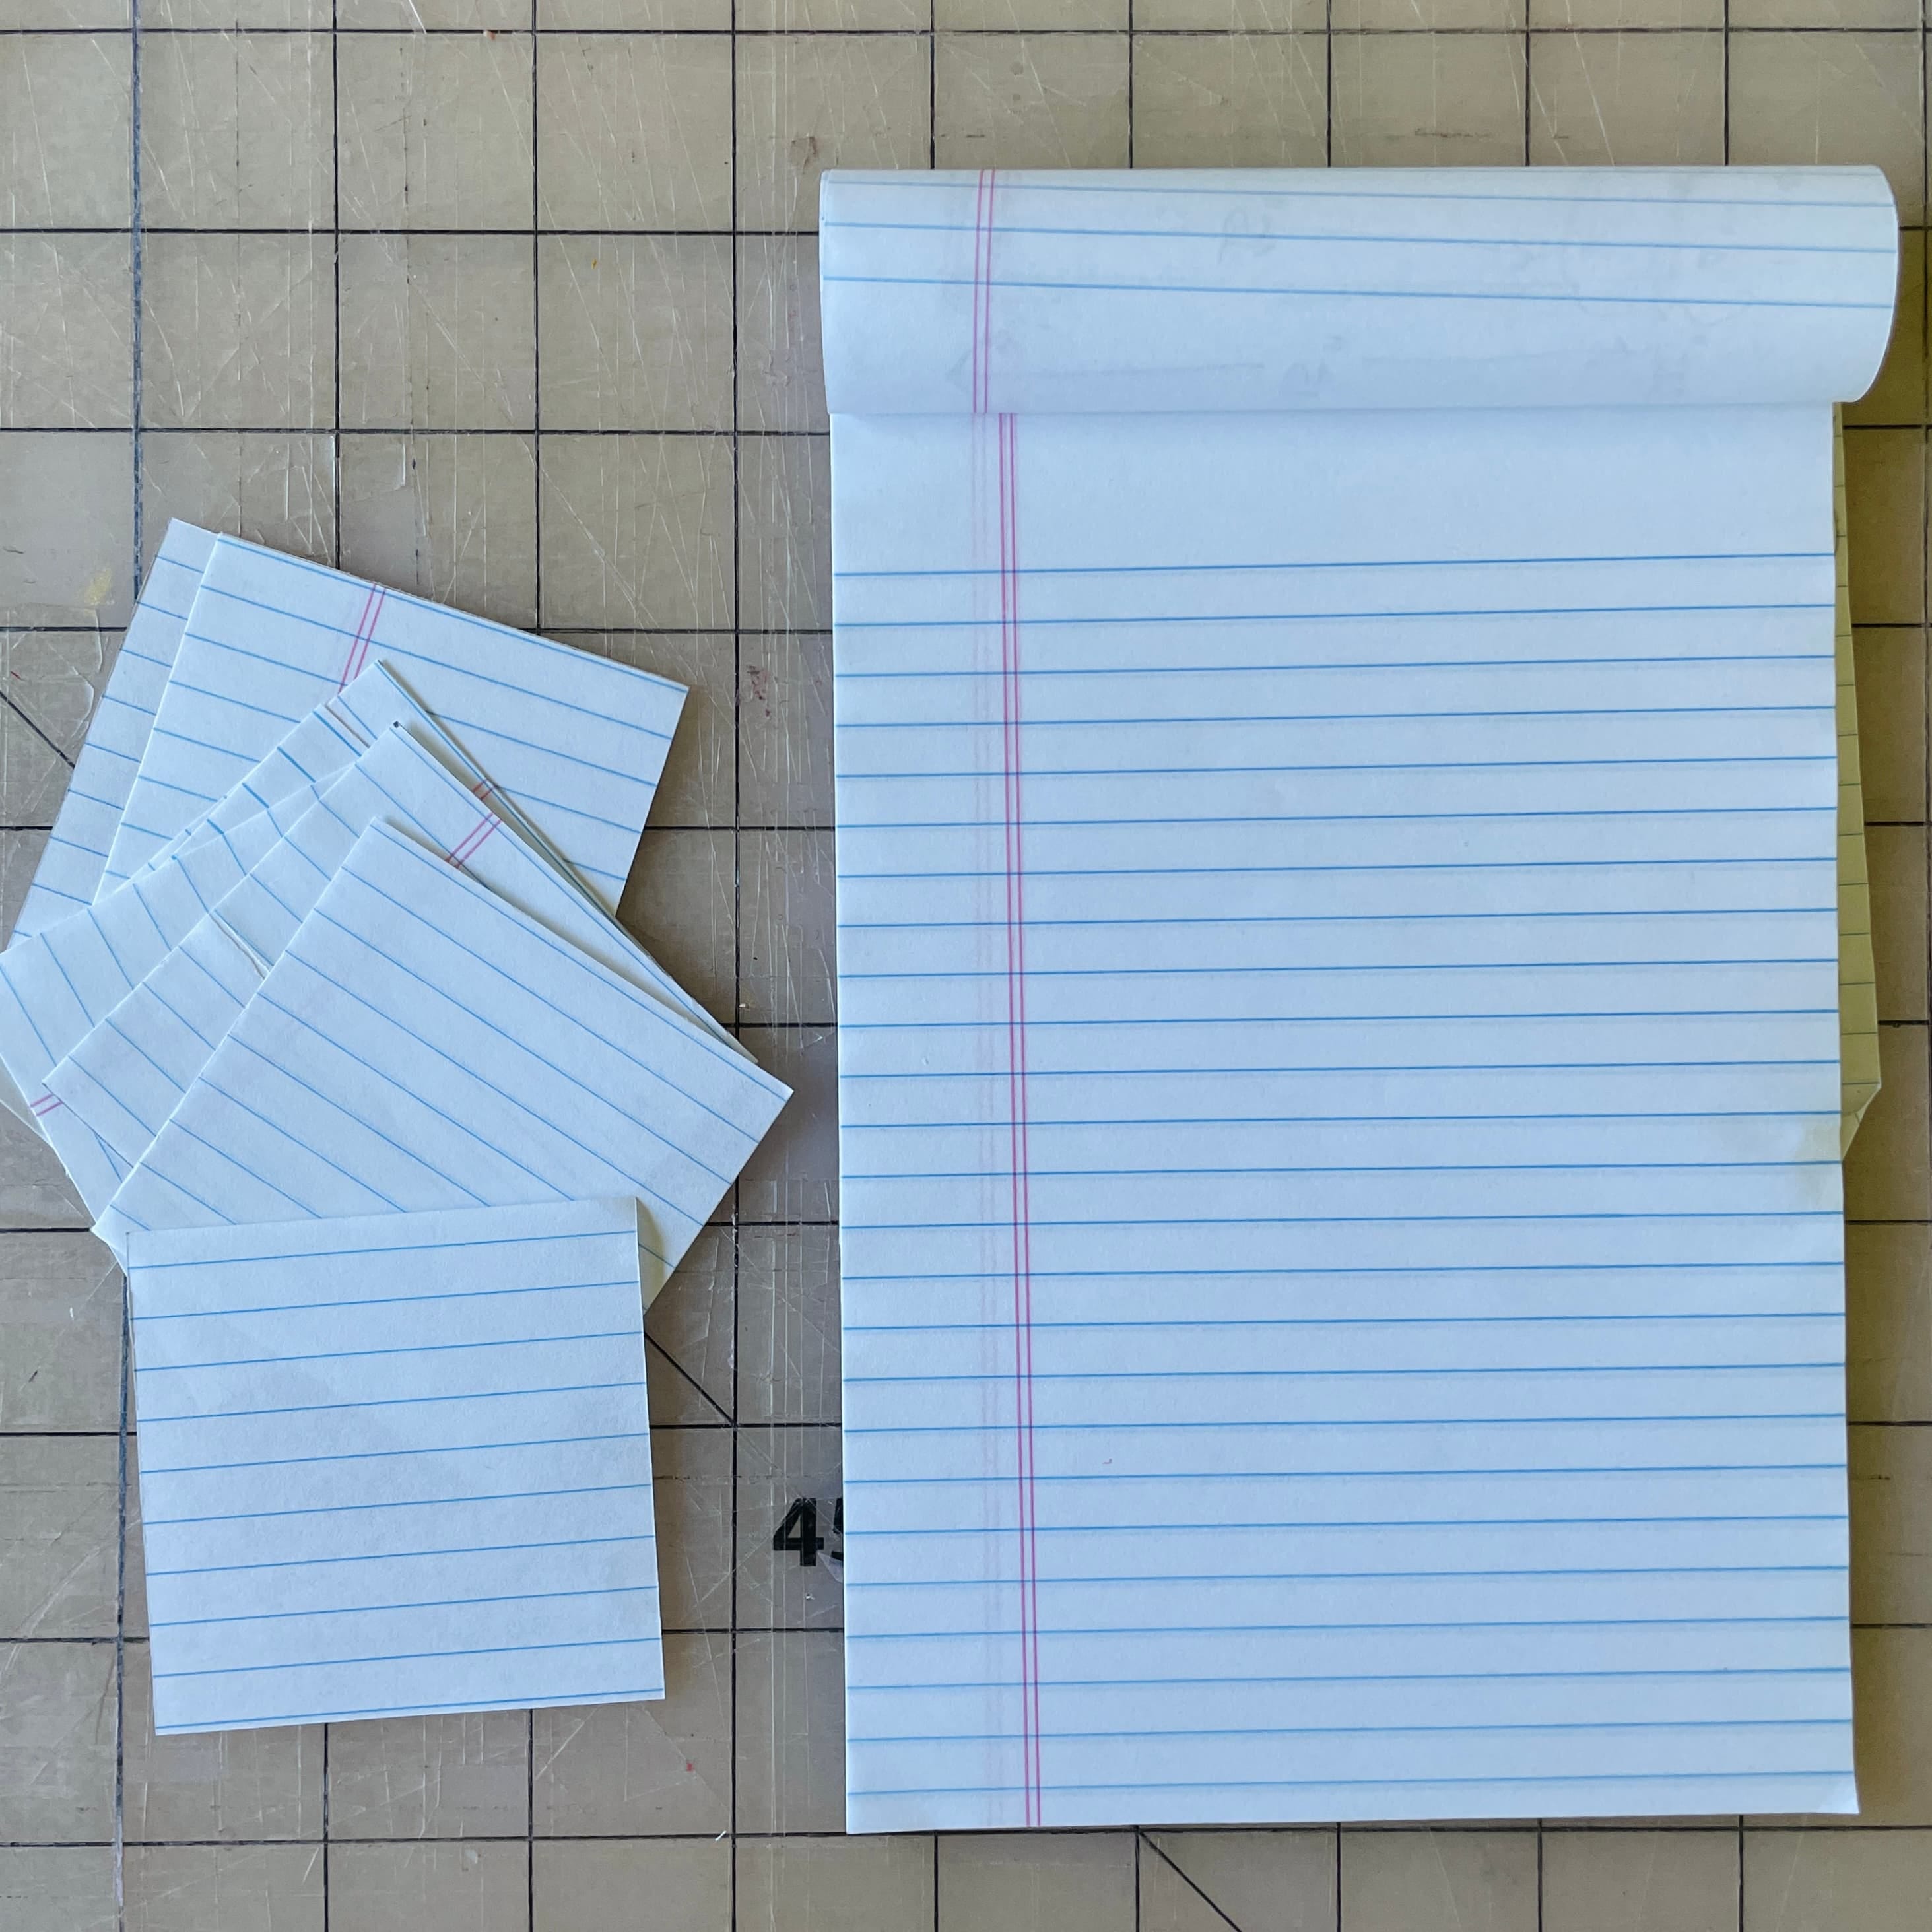
First, cut your scrap paper into 7 equivalent squares.
Cut up squares and my note pad
I chose to use some papers with lines on them so you can visualize a fabric’s grainline. When you attempt to create the top in your size, you’d want to have the drape of the fabric be uniform by having the grainline of all squares facing one direction.
In my earlier makes, I made the mistake of having some squares facing the crossgrain direction, and it affected the square’s overall drape and made the whole top unbalanced. So unless you intentionally want to place some squares in crossgrain direction, I highly recommend laying out your squares to follow its grainline alignment.
The Main Torso
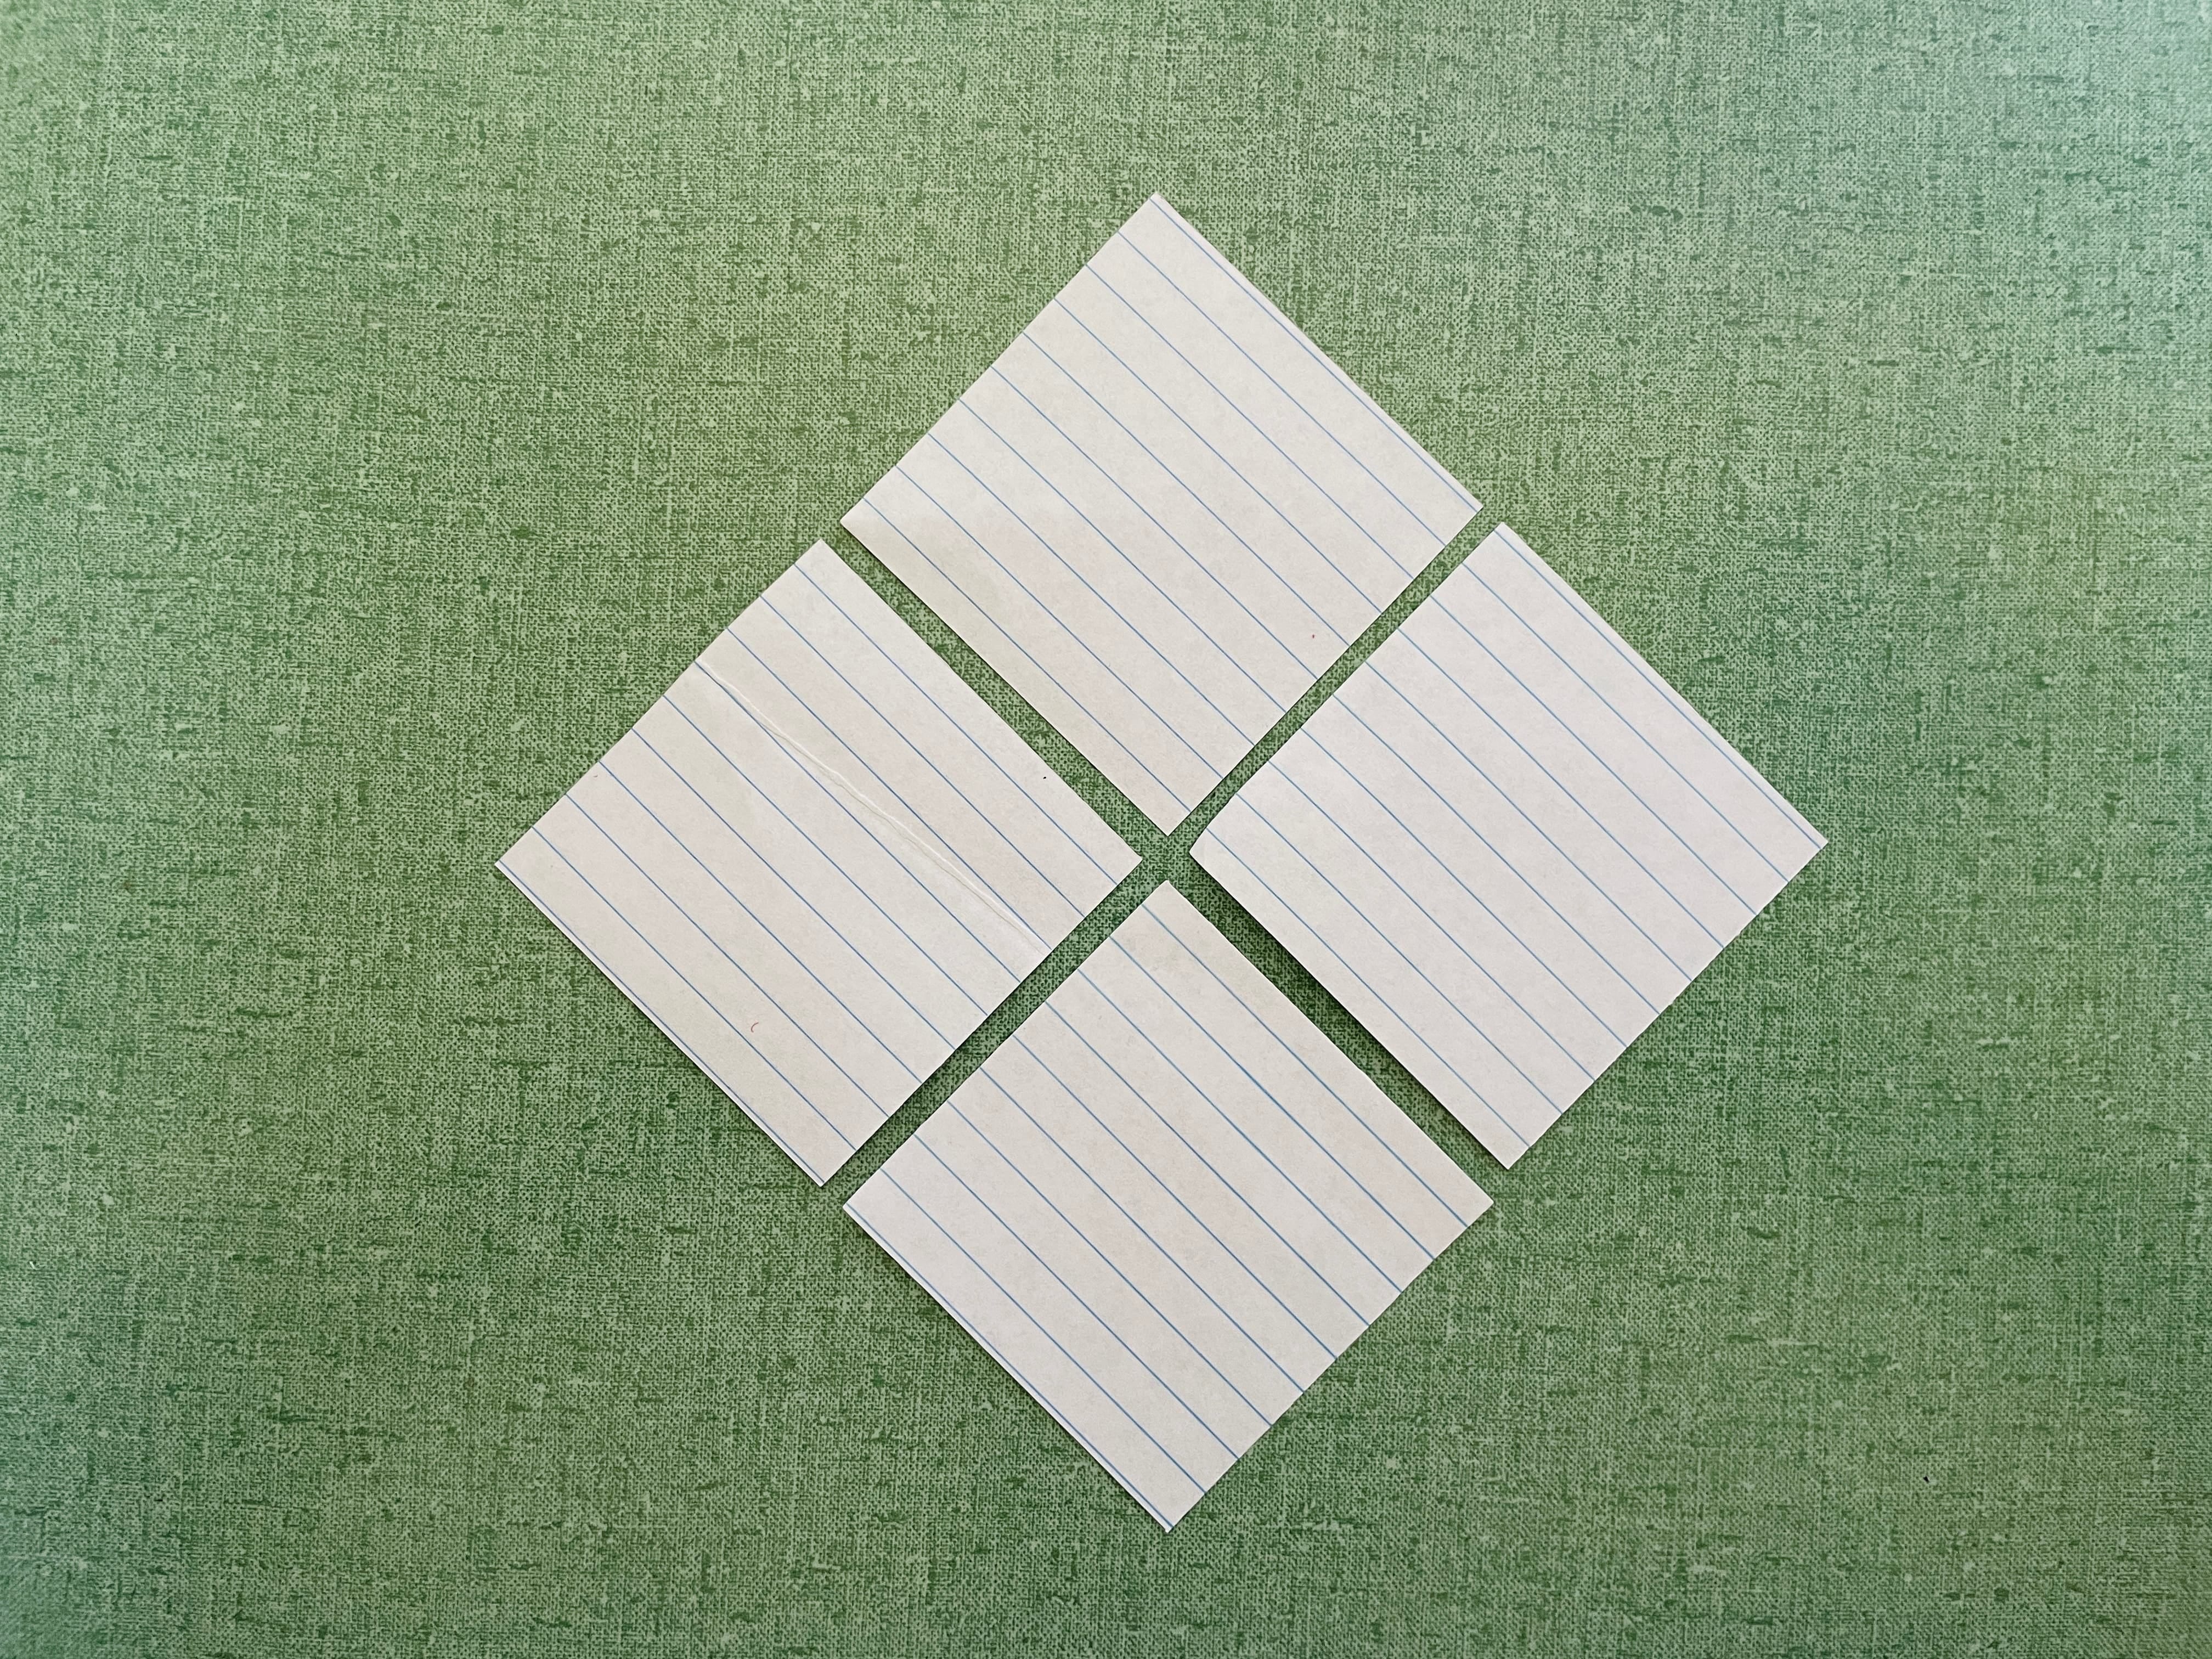
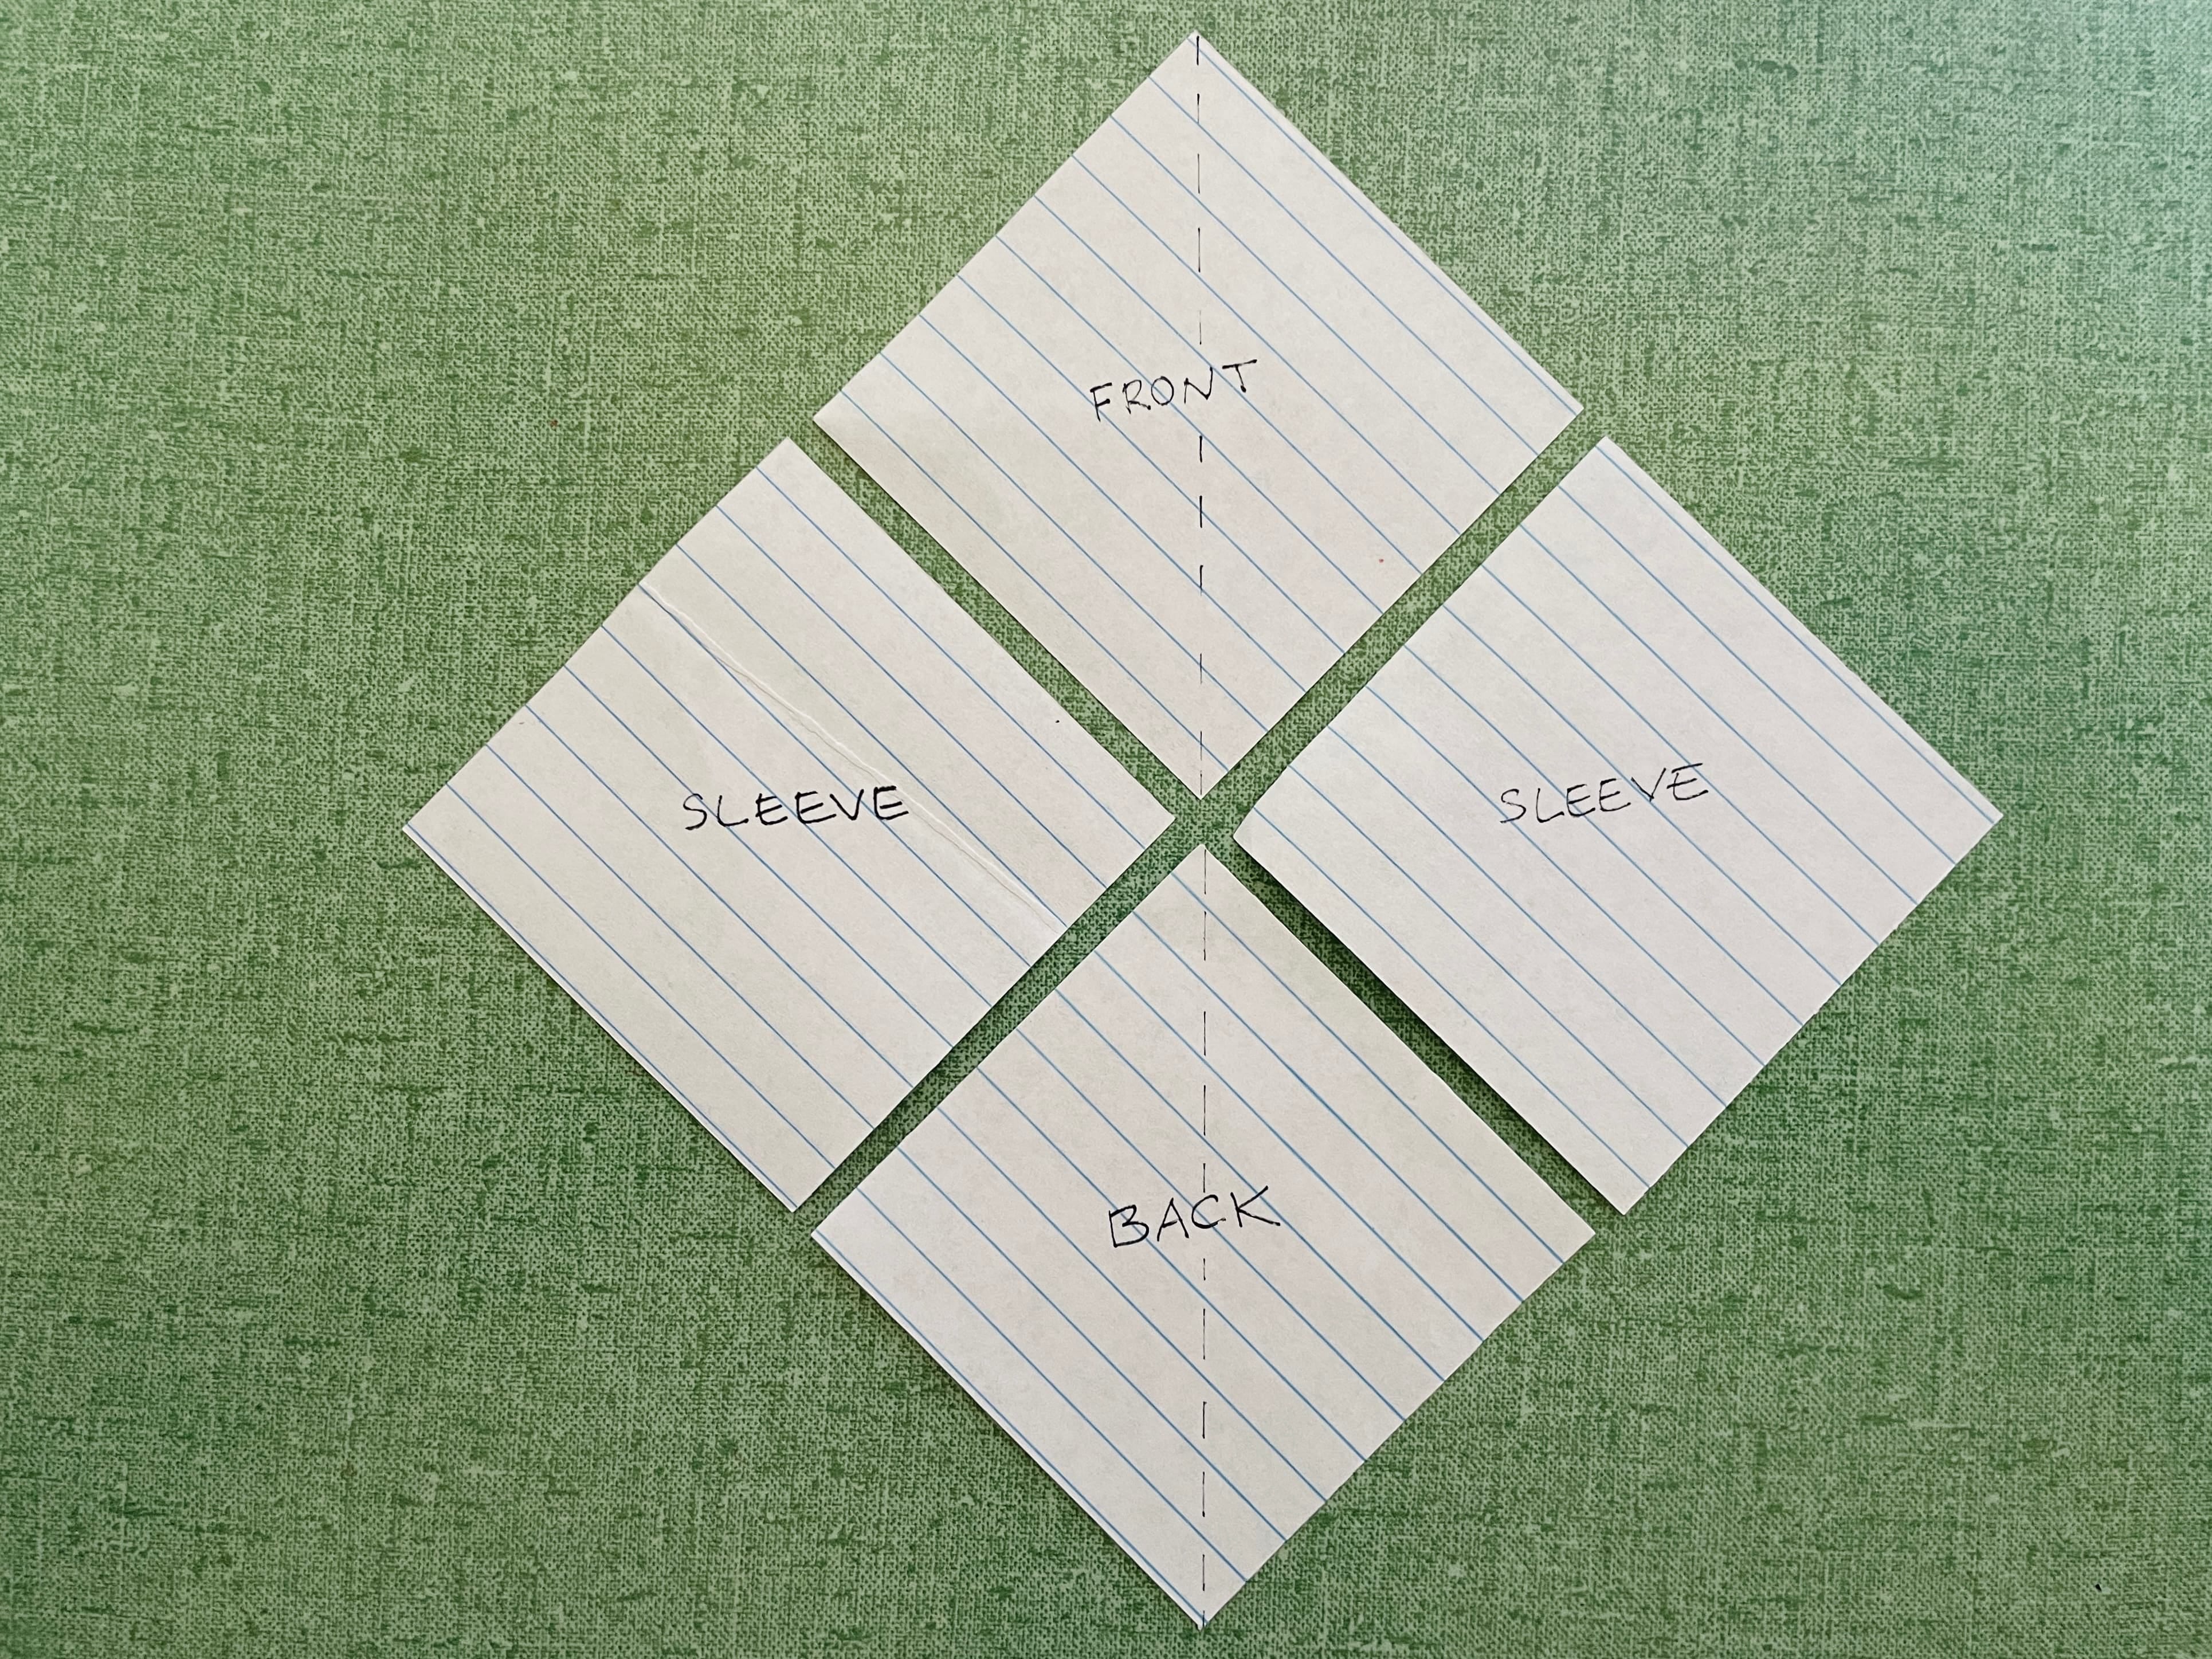
Once you have your 7 squares, take four and arrange them in this diagonal direction. Make sure your lines are facing the same direction.
Arranging the first four squares to establish the main torso section.
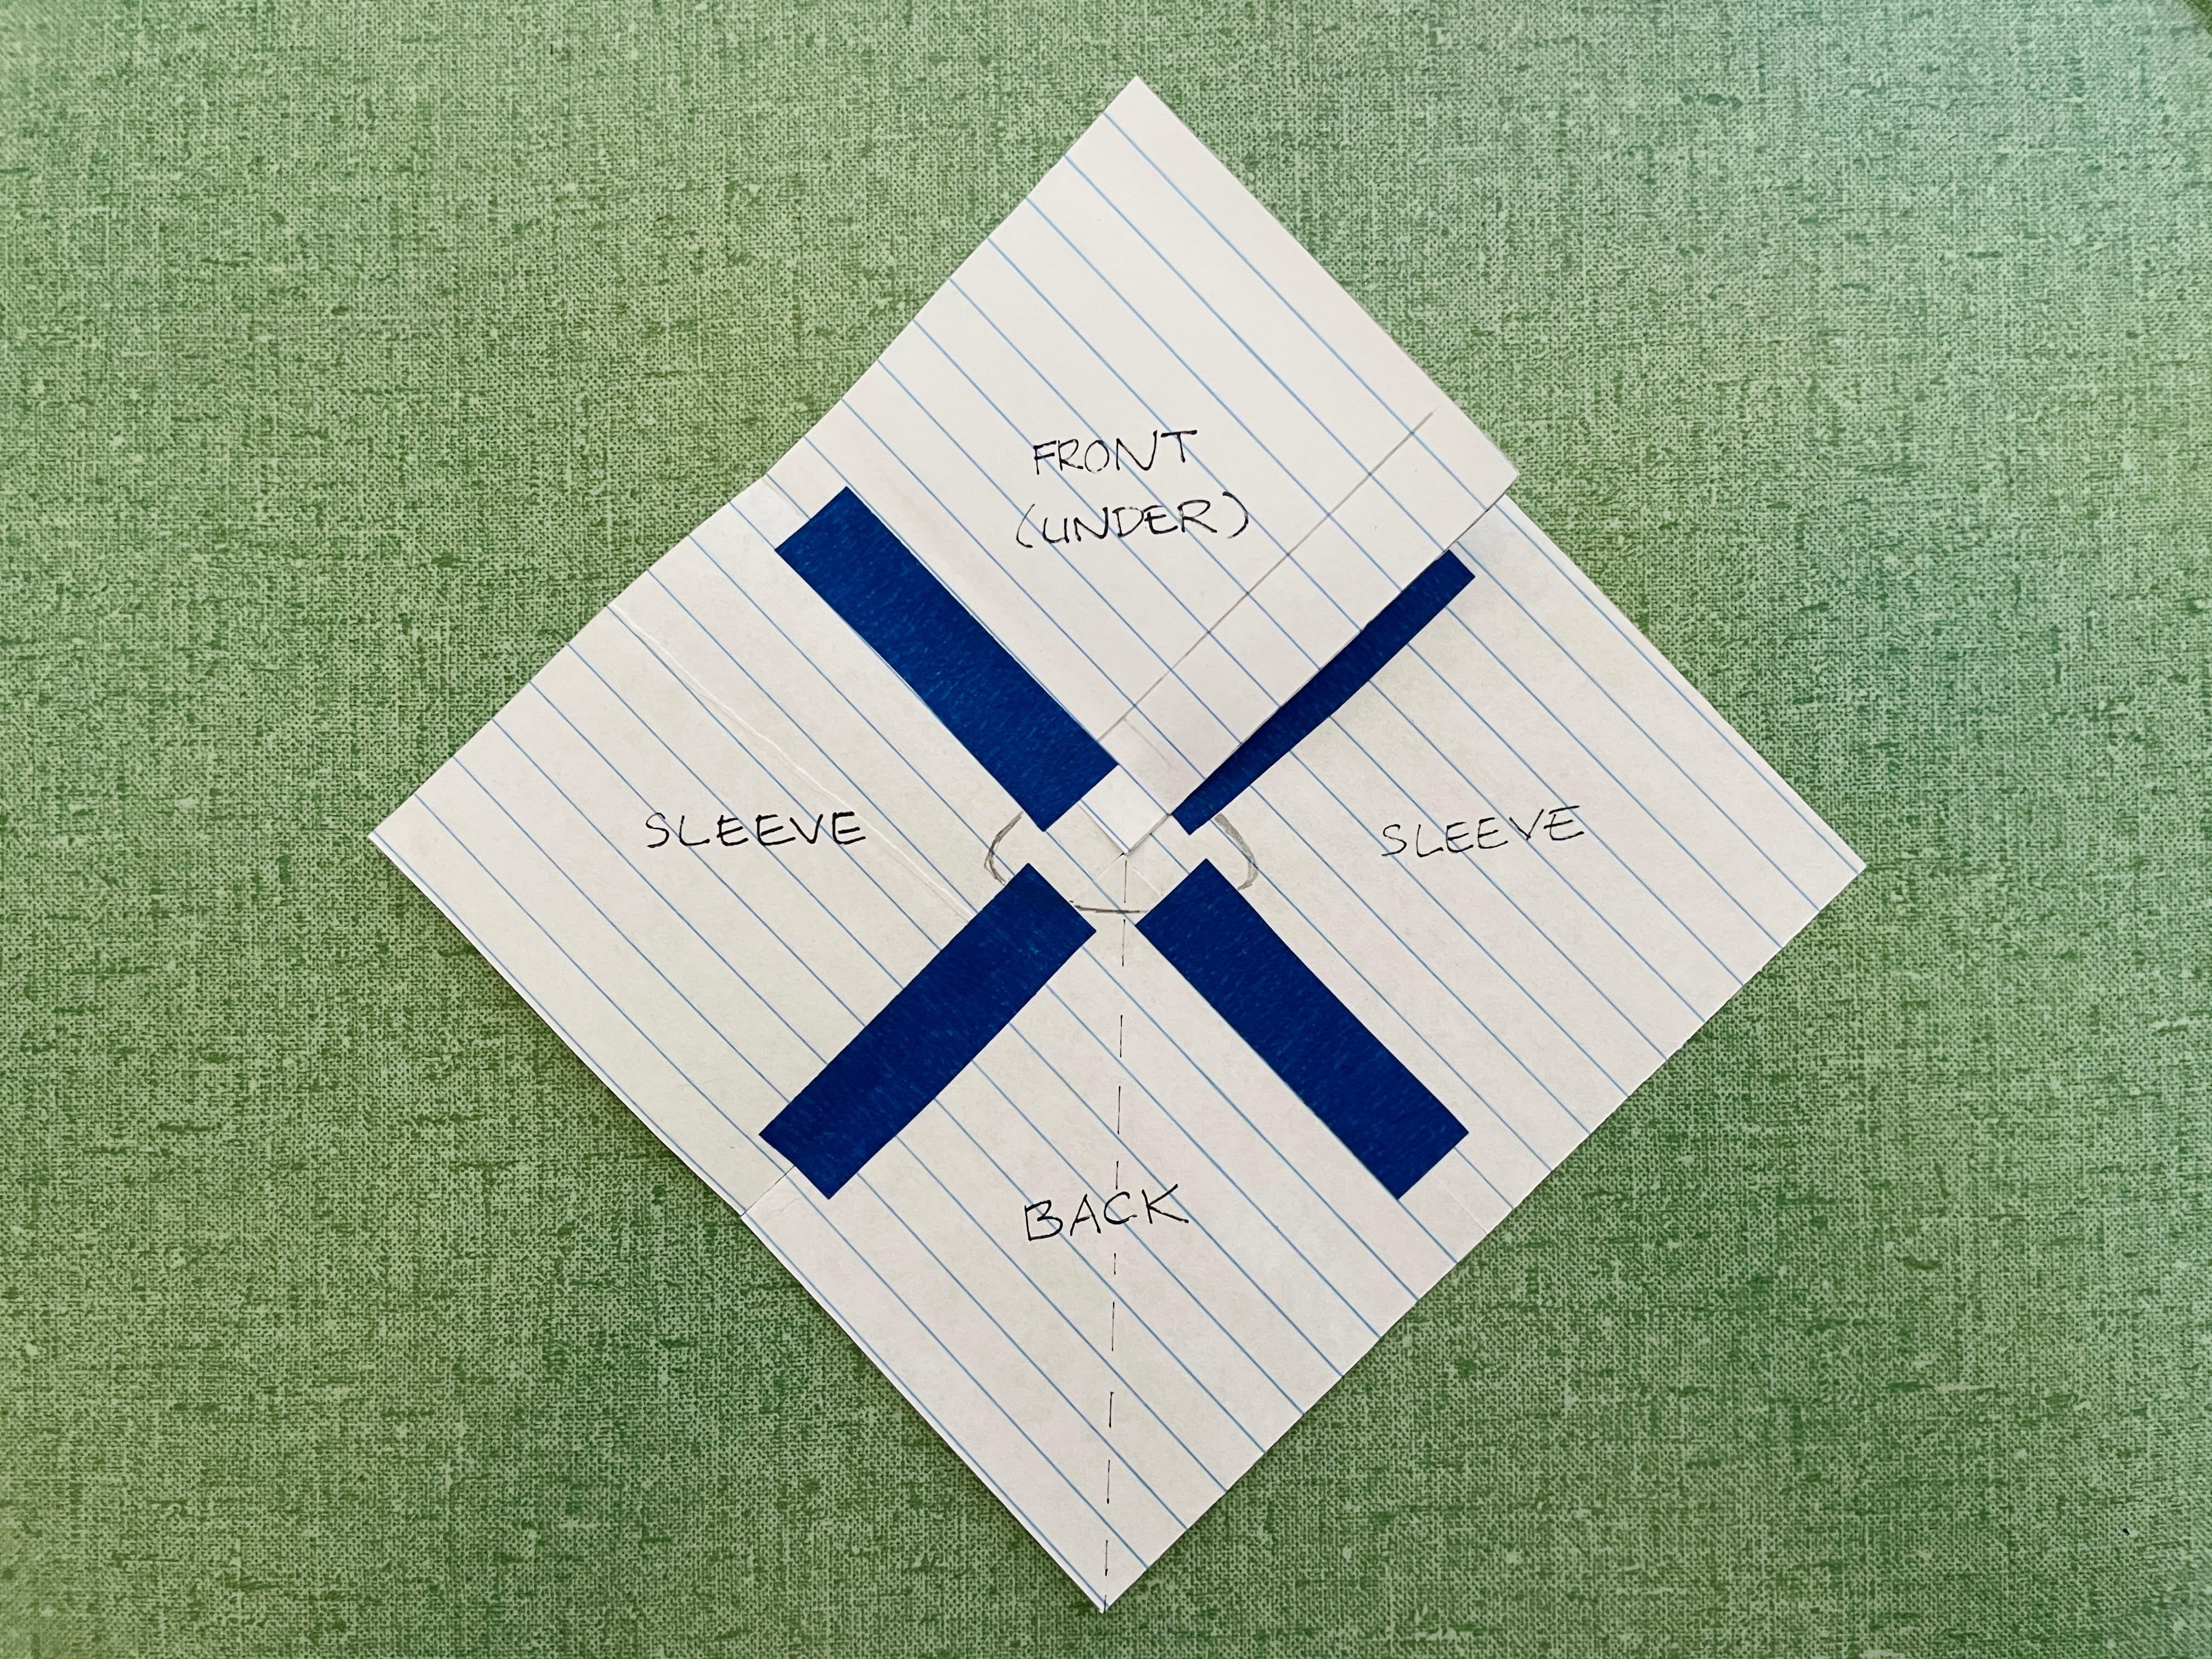
What you see is the “wrong side” of the paper, so let’s mark the sections to make them clearer: front, back, and two sleeves.
Can you see the torso parts clearer now? I made a dashed line to mark the center front and back.
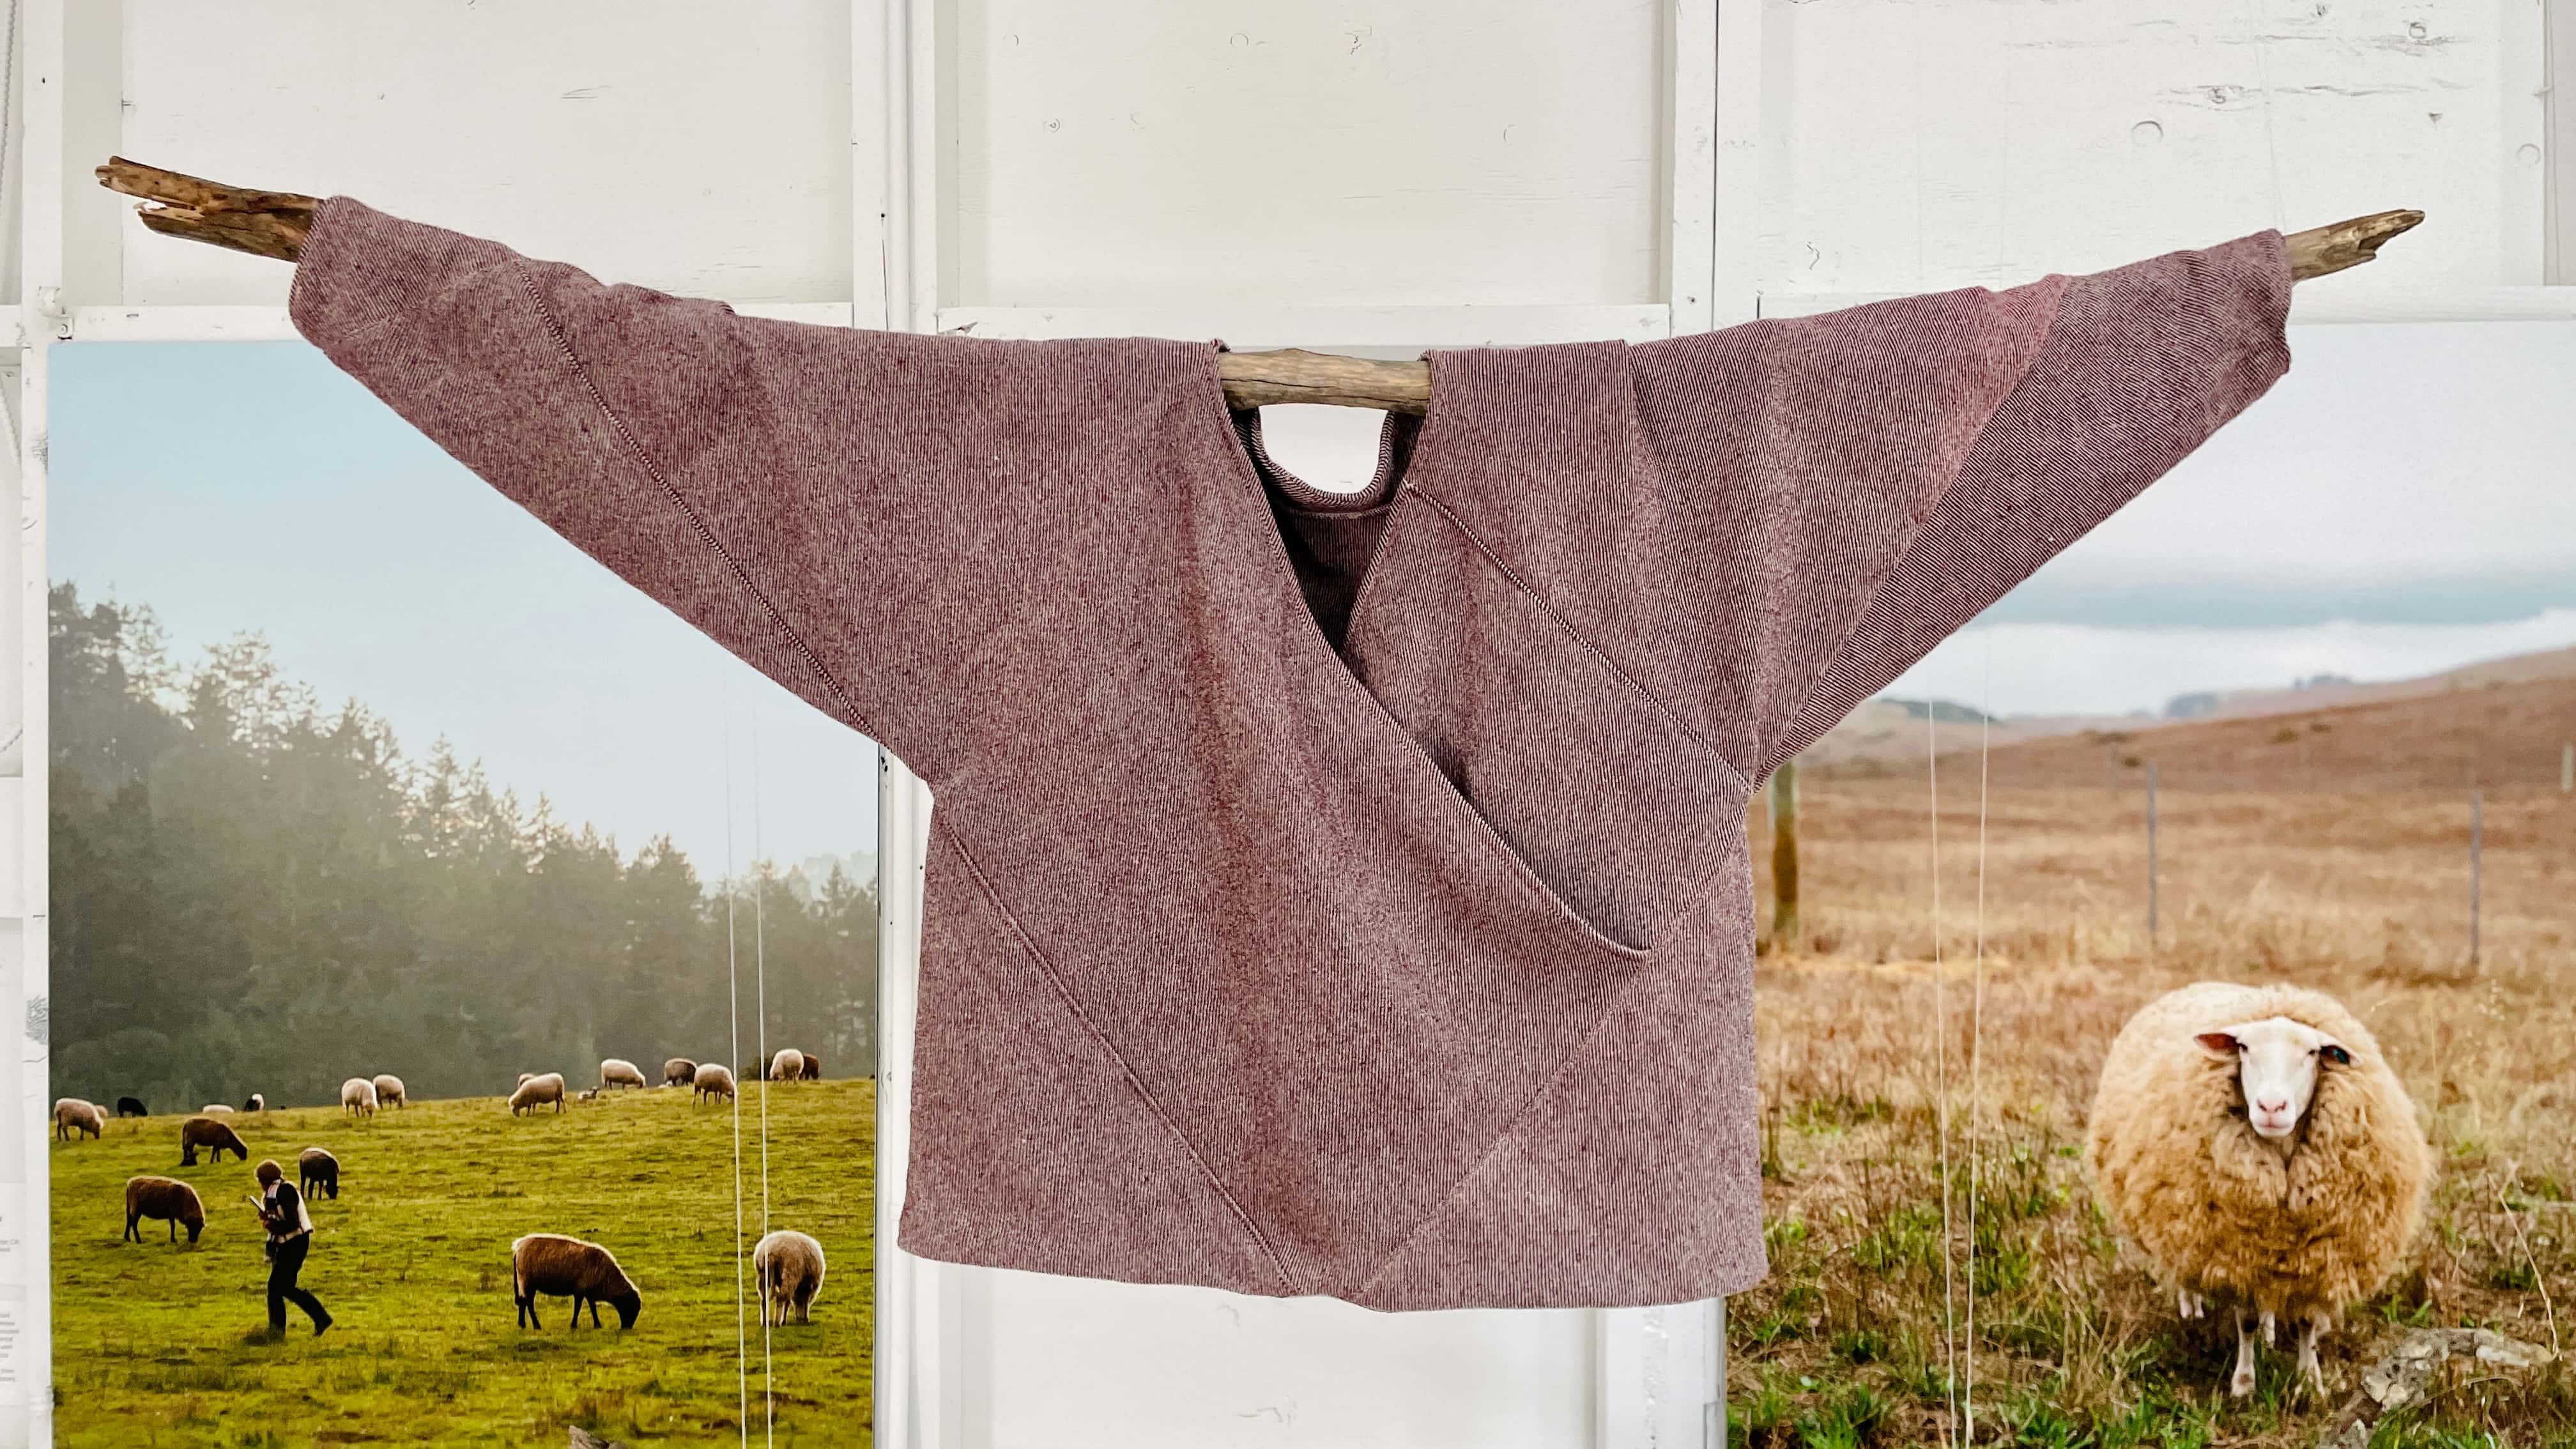
From here, you have a decision to make: where do you want your wrap top’s overlay panel to lay out - left or right? Notice that during the Fibershed Design Challenge, when I made the 7-square wrap top with Lani’s Lana rambouillet wool in lava, I chose to make the overlay on the RIGHT side.
This 7-square wrap top has the overlay panel on the right side. Photo by Paige Green.
Why is this decision important? Well, this overlay serves as a hidden big pocket, and the position of the overlay determines which hand will have easy access to it.
Yes, I’ve been storing my phone inside that pocket for many occasions, and the thickness of the fabric makes the content pretty much invisible from the outside. It’s super convenient to grab the inside of the pocket with my left hand, and it’s really comfortable to wear. With the overlay panel on the right side, this is perfect.
However, I notice that I’m instinctively using my right hand more to check pocket contents. So for this paper model tutorial, I will be showing how to make the overlay panel on the LEFT side. If you want to create the overlay panel on the right side, you just need to flip the placement of the two front panels.
The paper model will have the overlay panel on the left side.
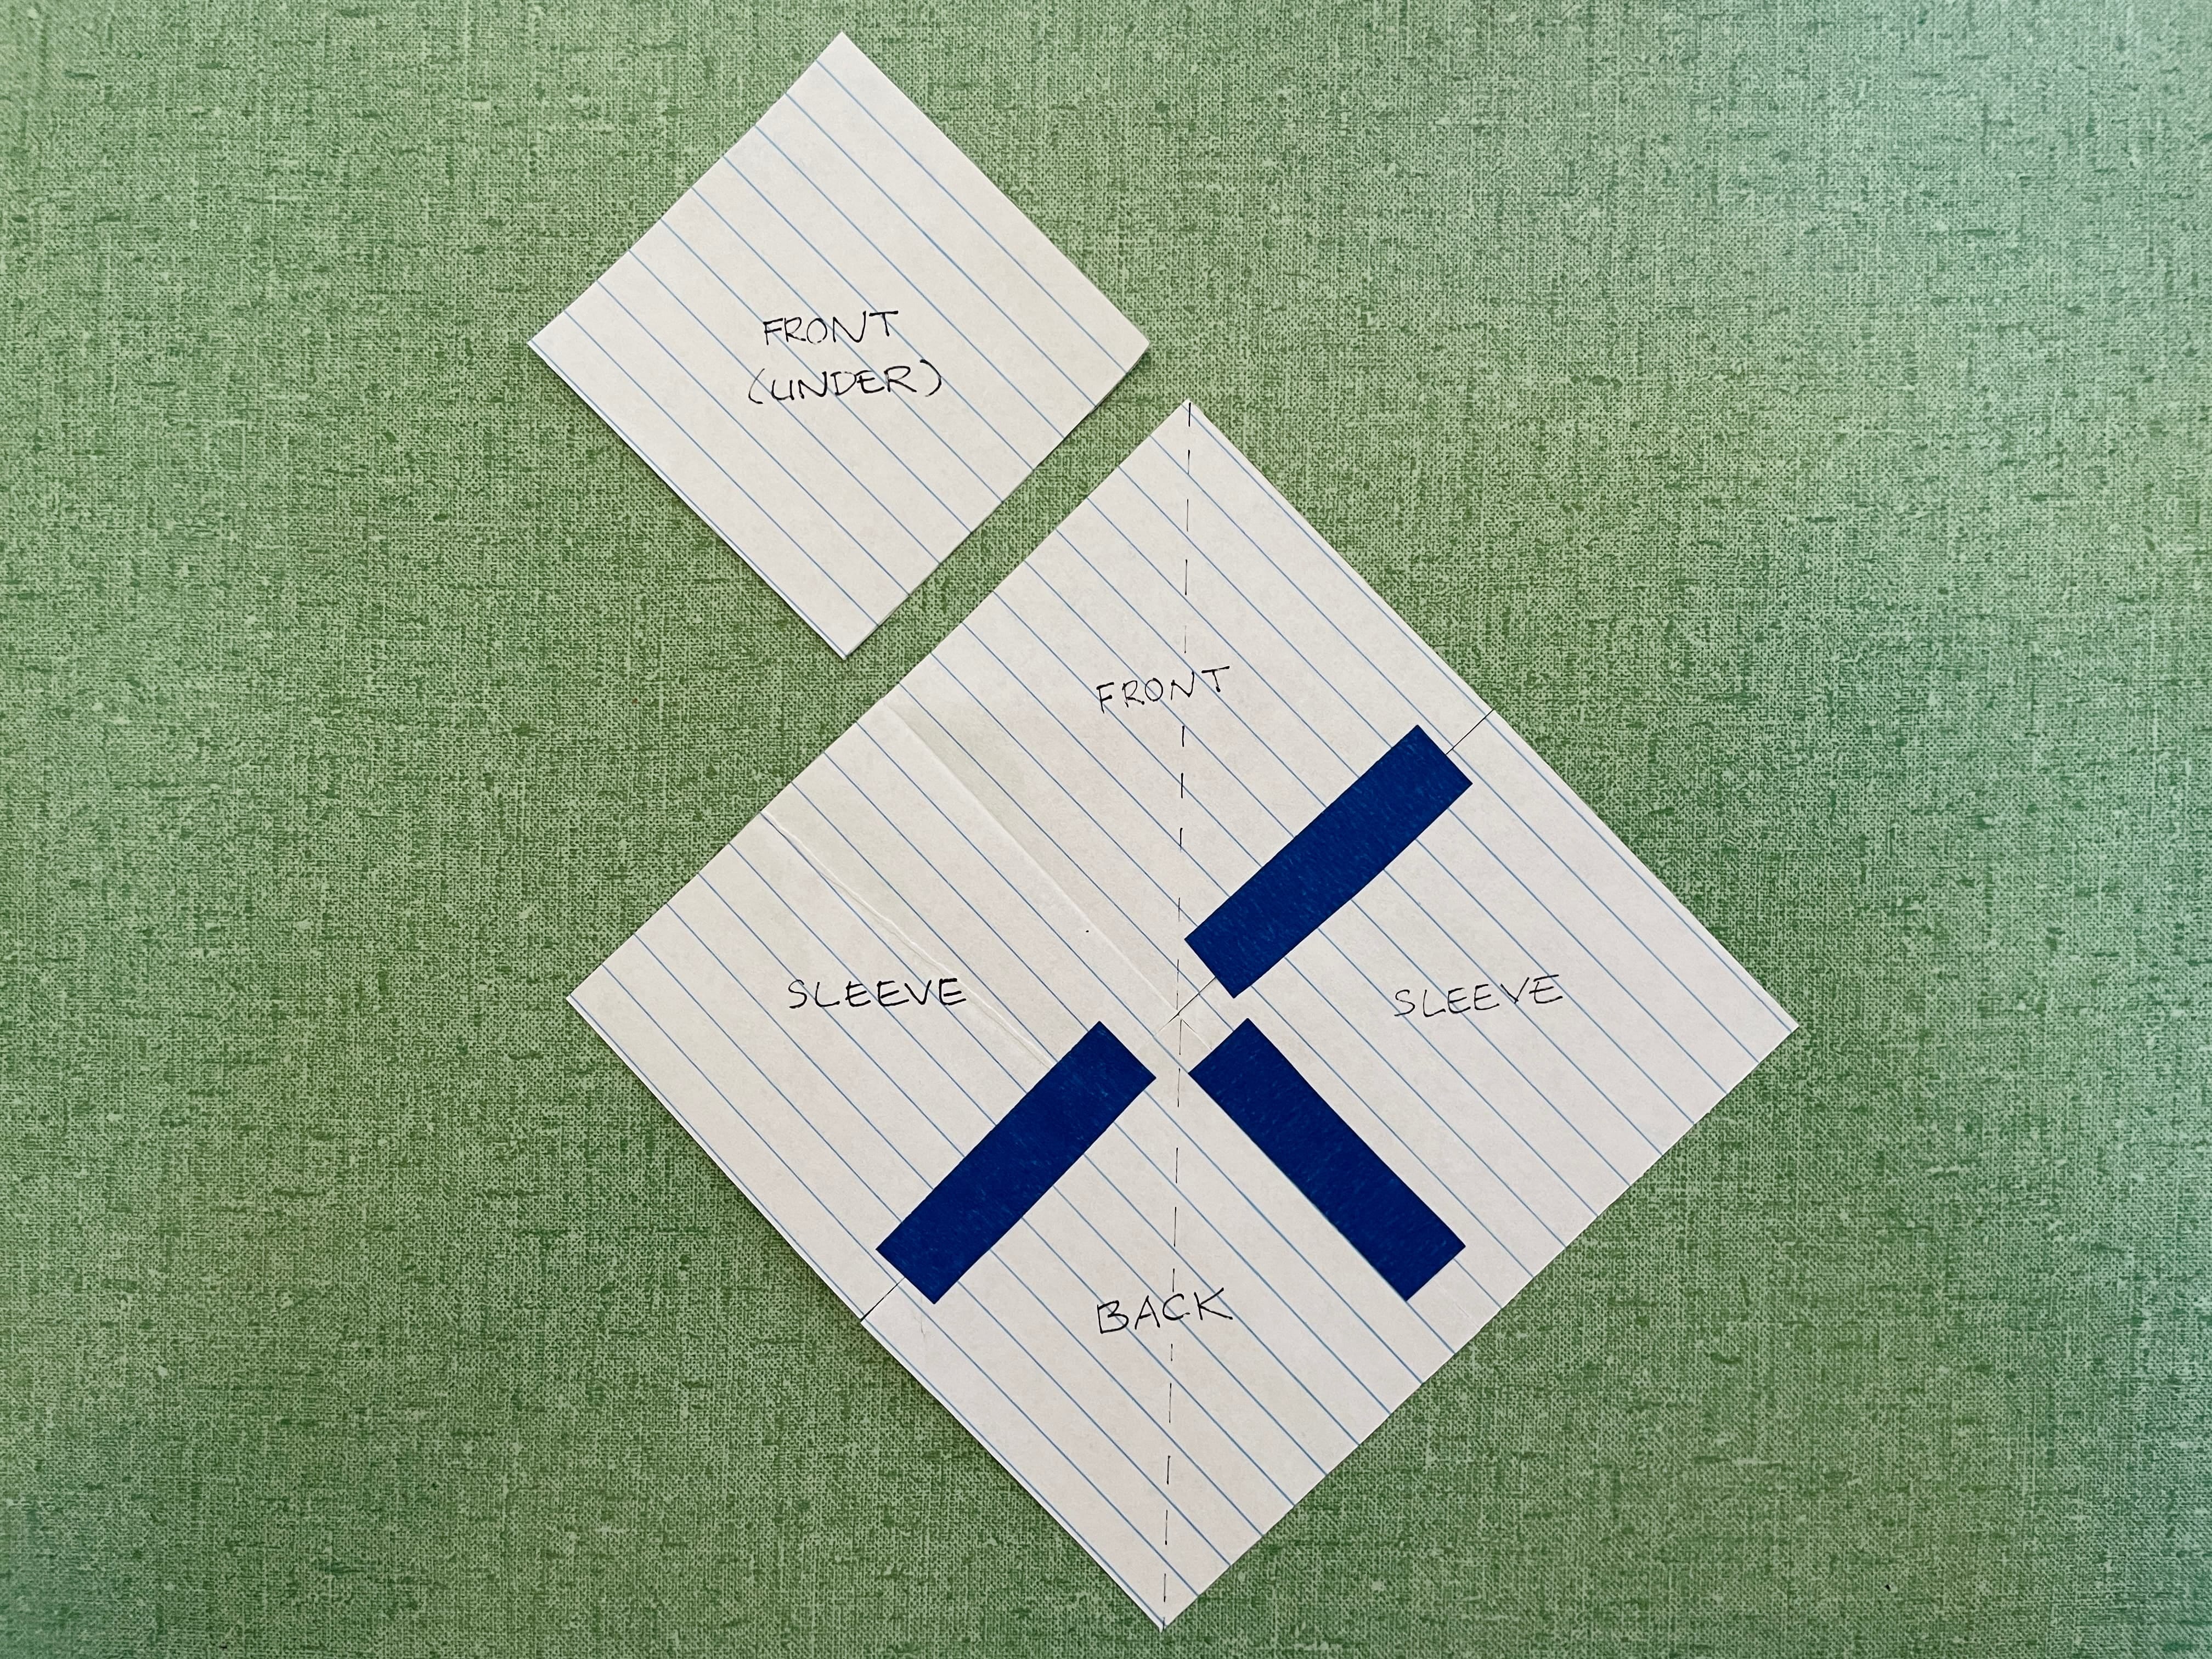
Now that the overlay panel decision is made, let’s connect the back square to two sleeve squares, and connect the left sleeve to the front square. This is the wrong side, remember?
Connecting the squares with tapes to mark the sewing lines.
Now, grab another square, make sure its lines are facing the same direction as the others, and mark it “Front (Under).” This is going to be the front layer that sits against your body.
Let’s get that 5th square in here to complete the wrap top’s torso sections!
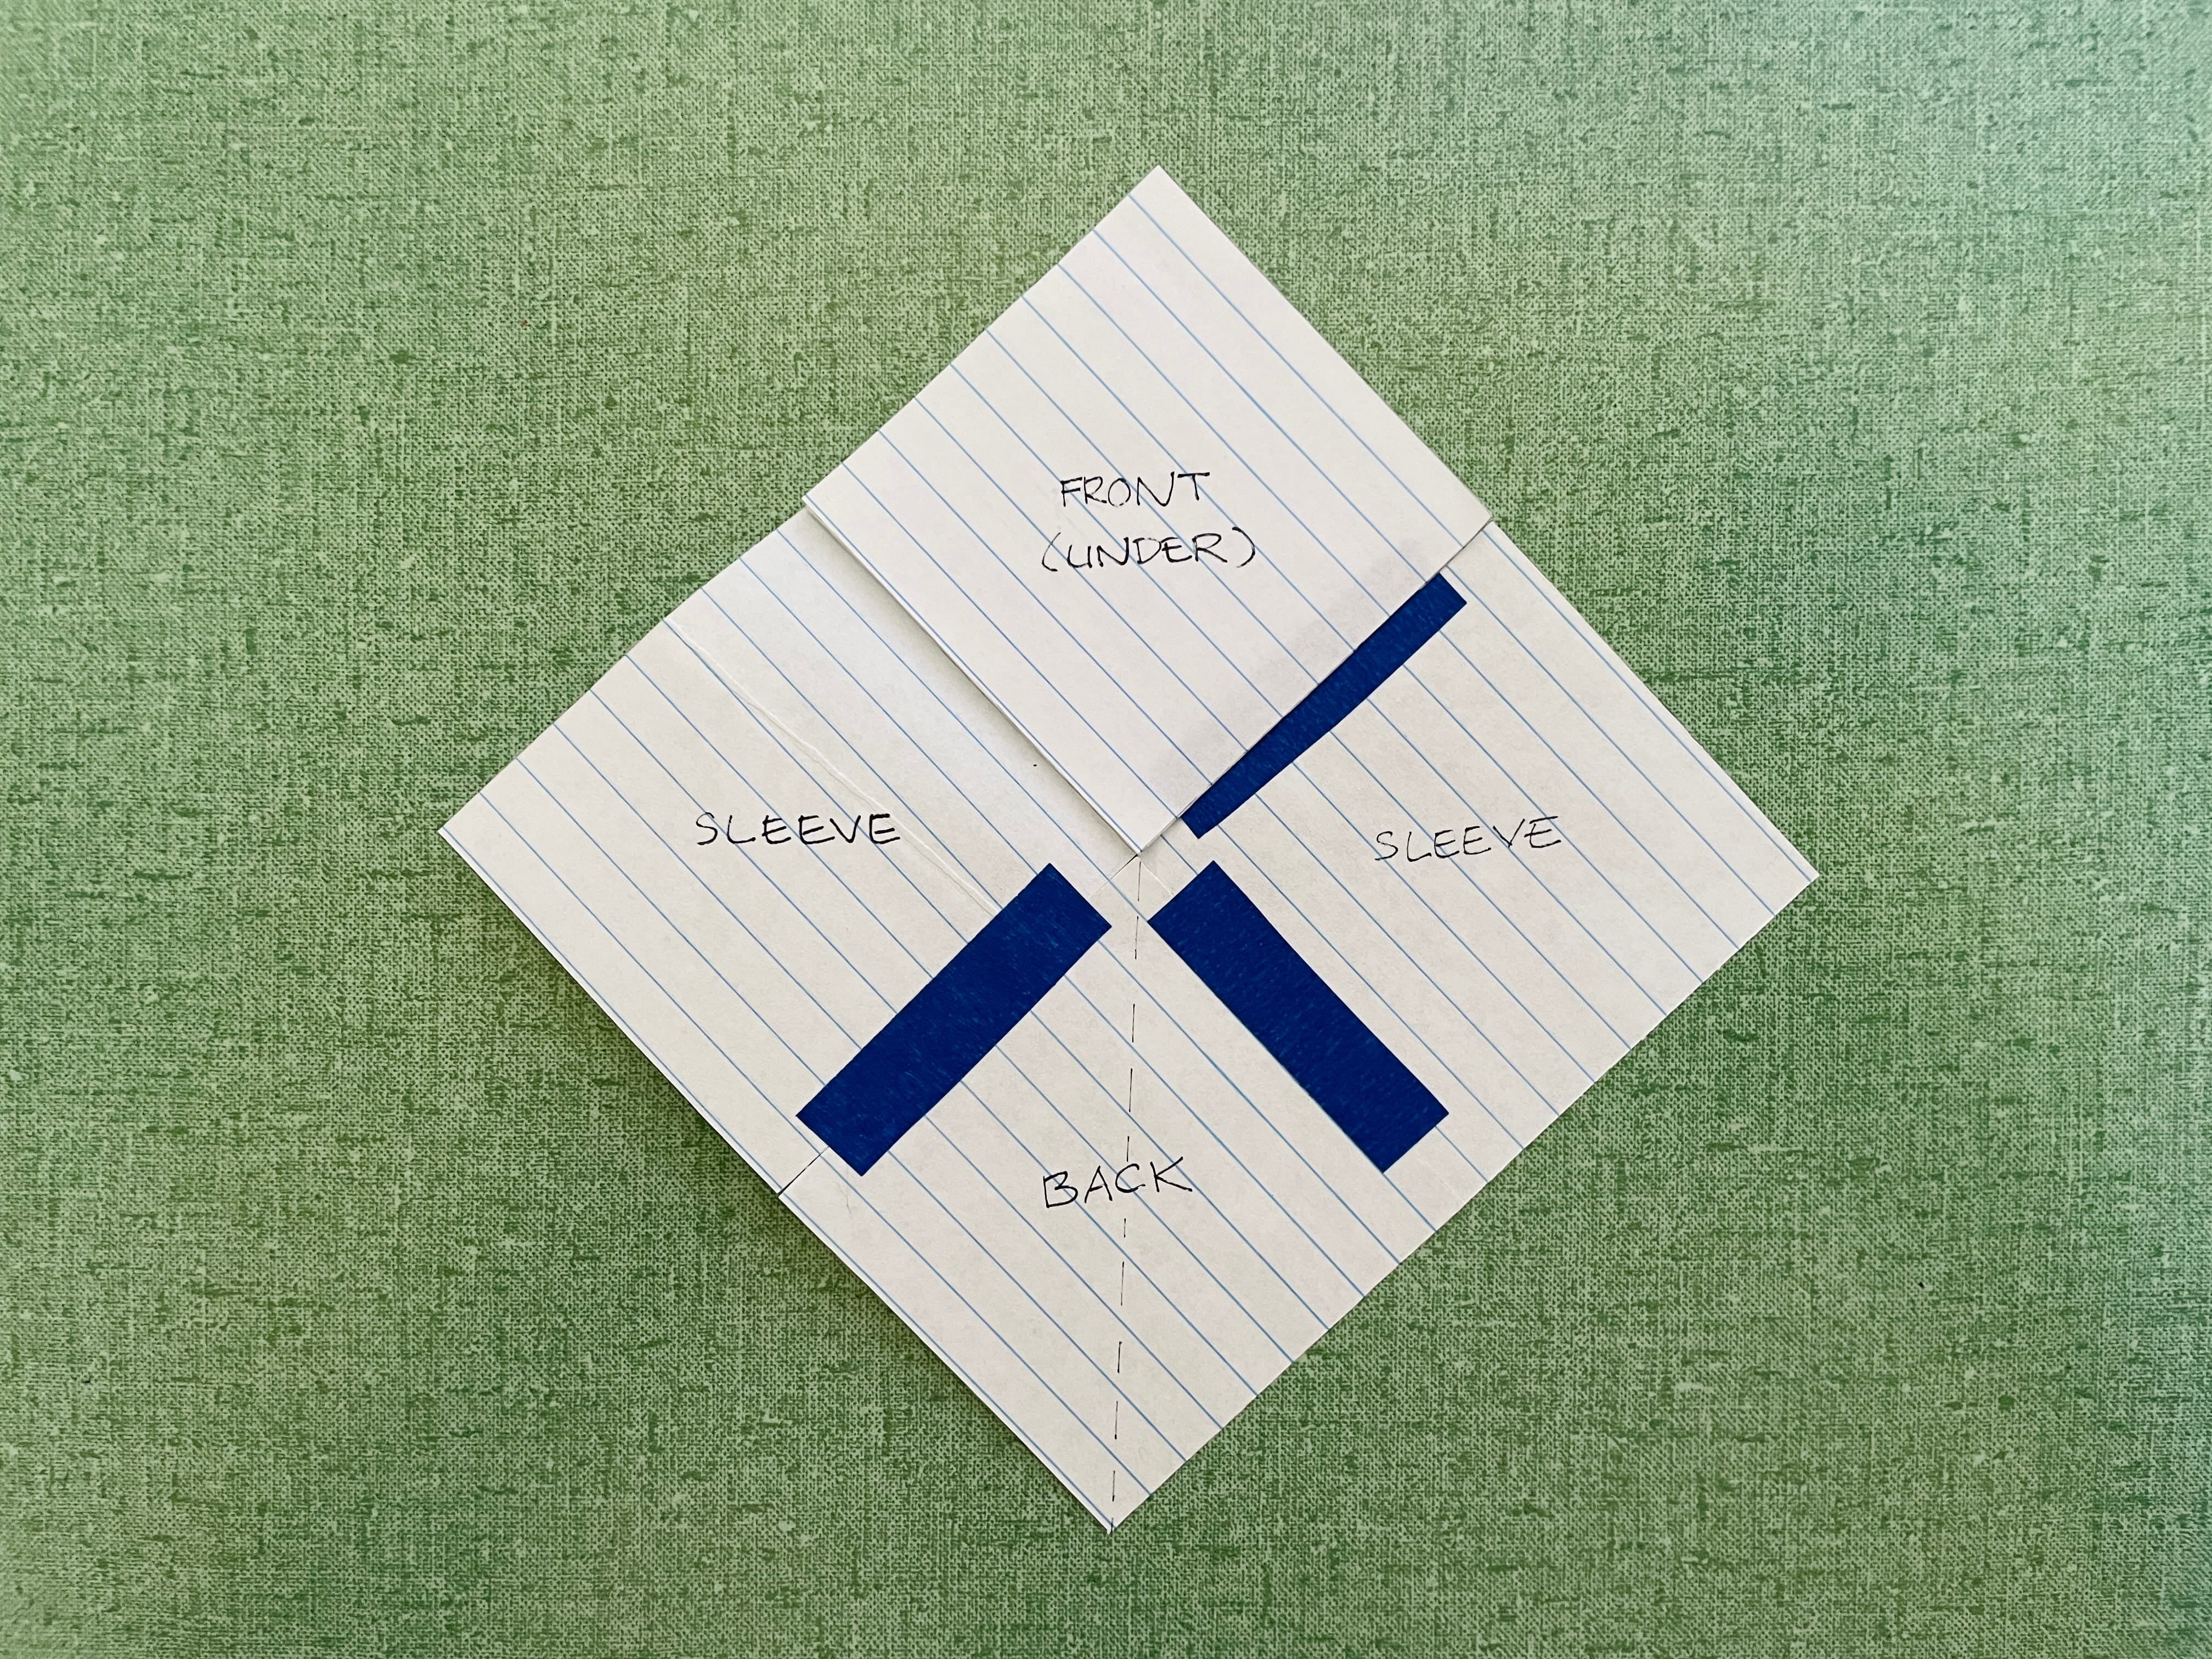
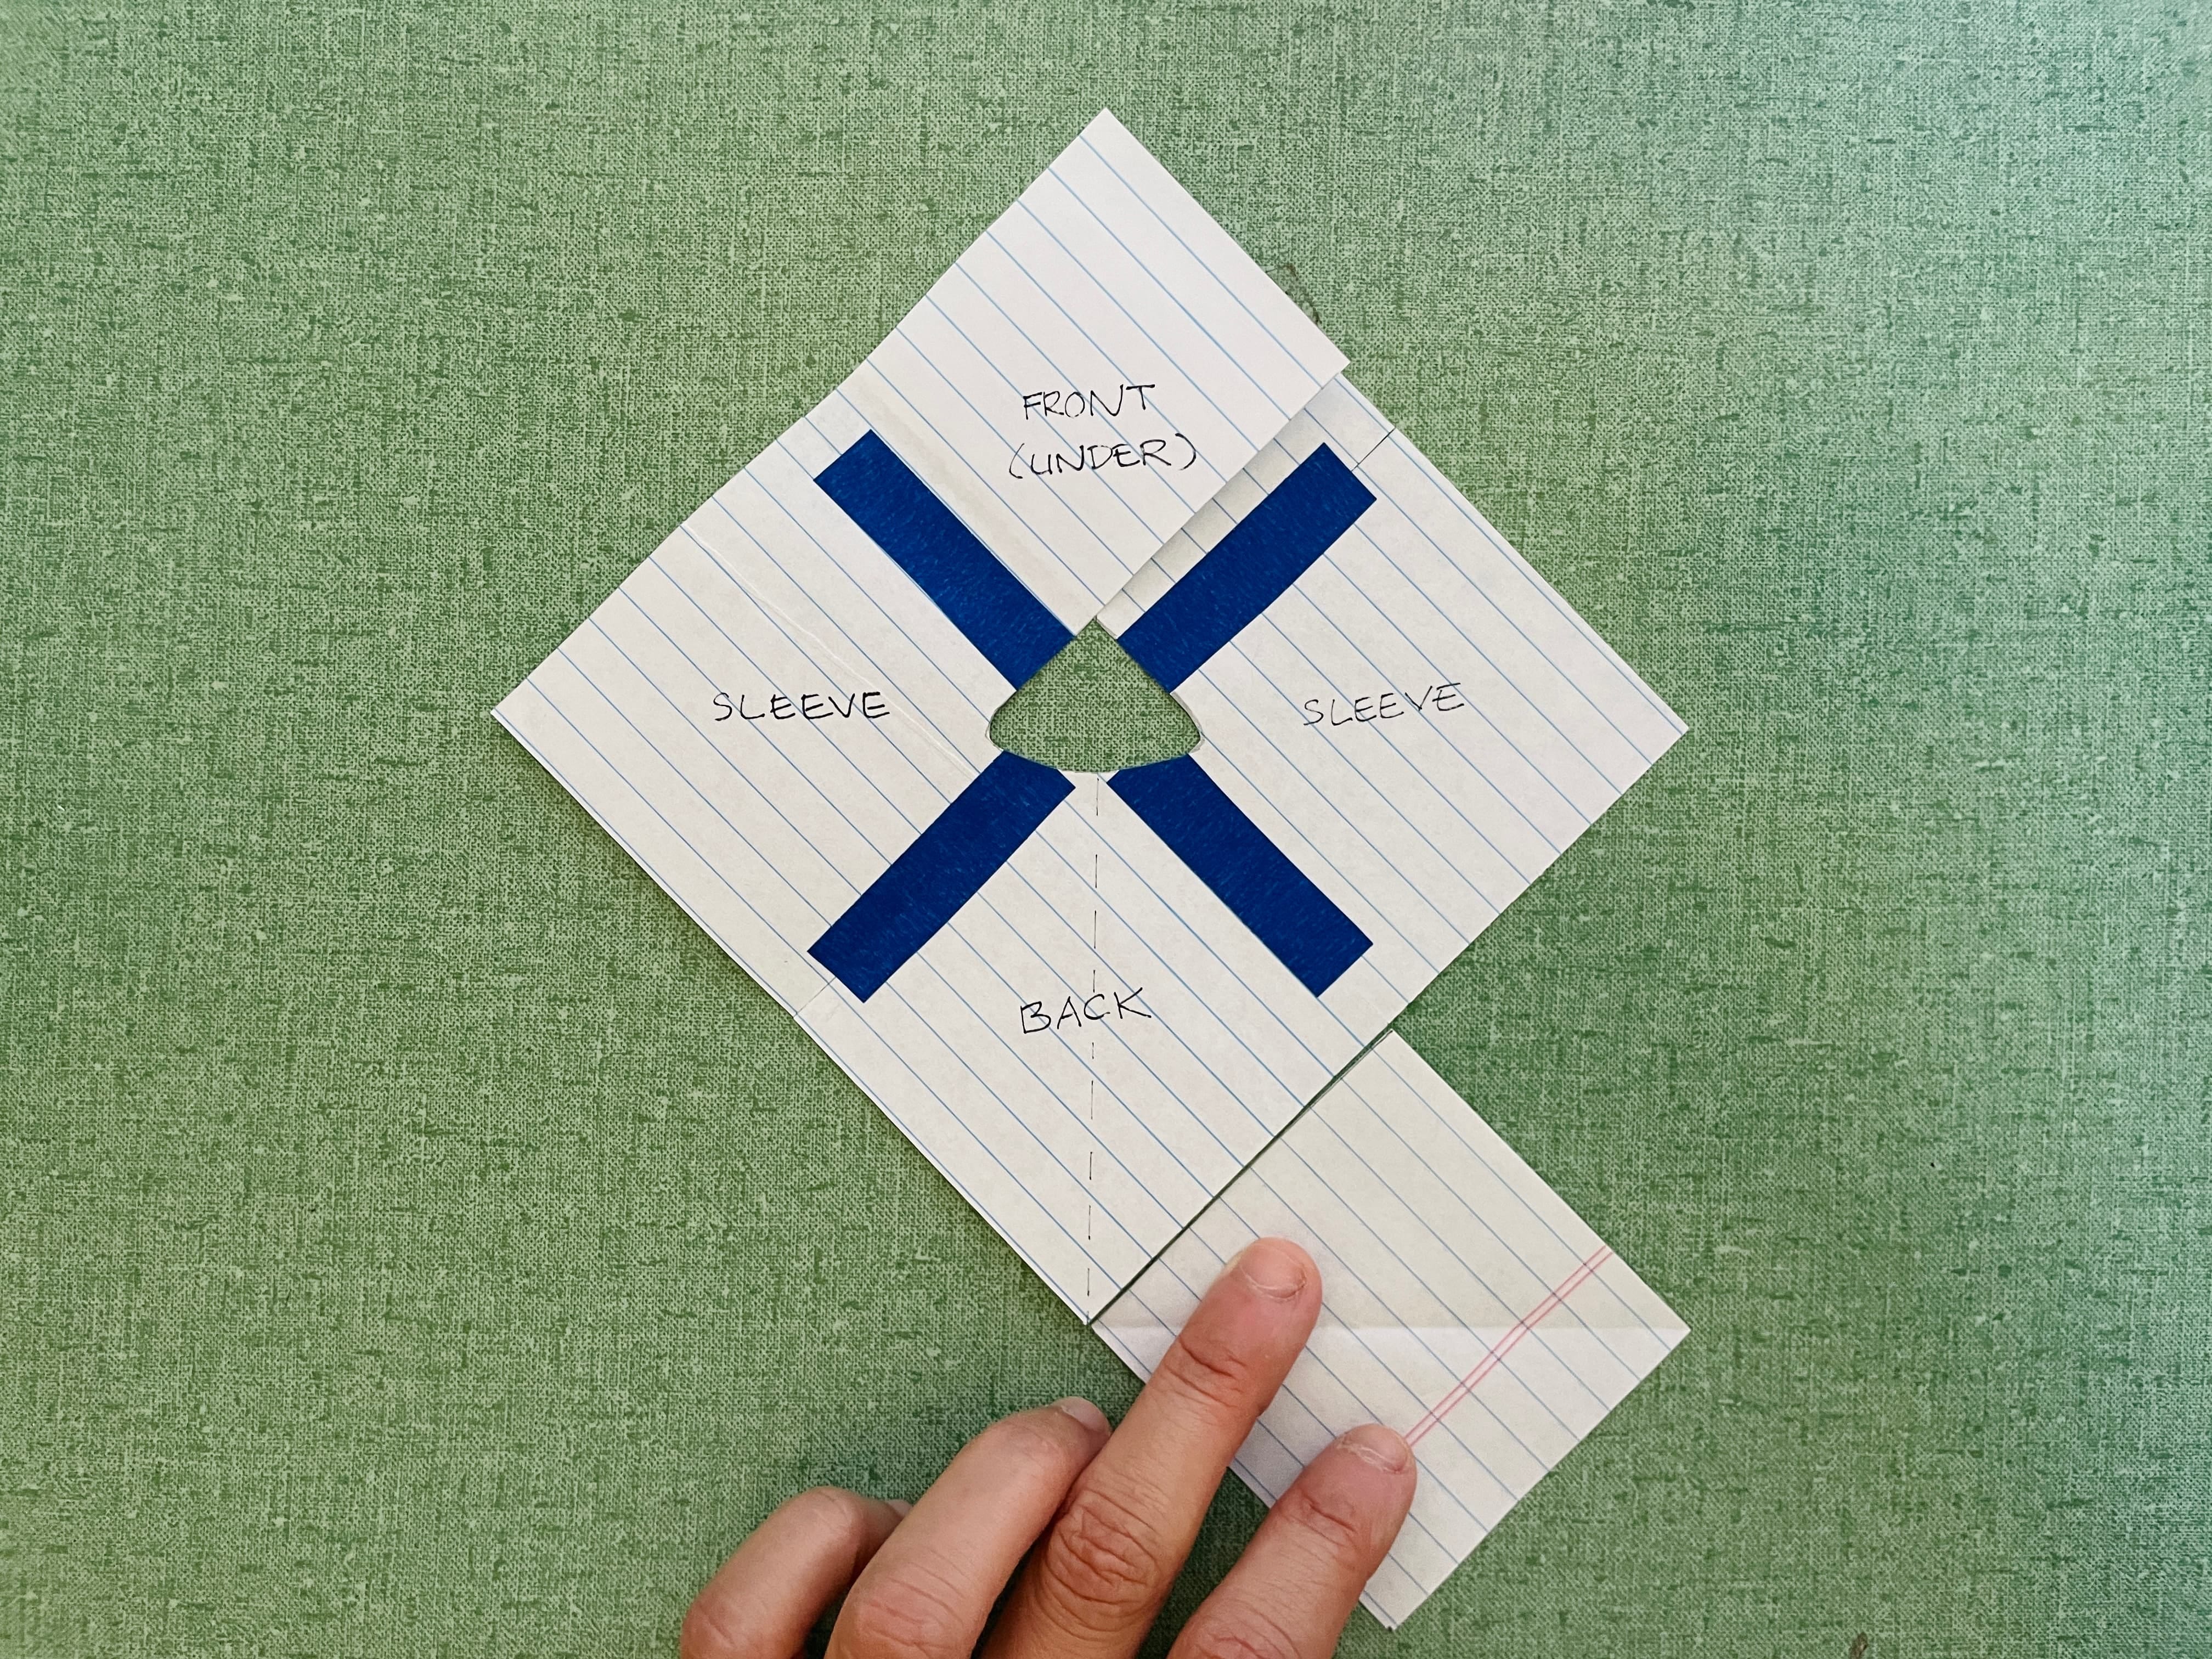
Put that square on top of the other front square, and then connect that with the other sleeve.
Putting the 5th square on top of the front square.
Taping the right sleeve with the 5th square.
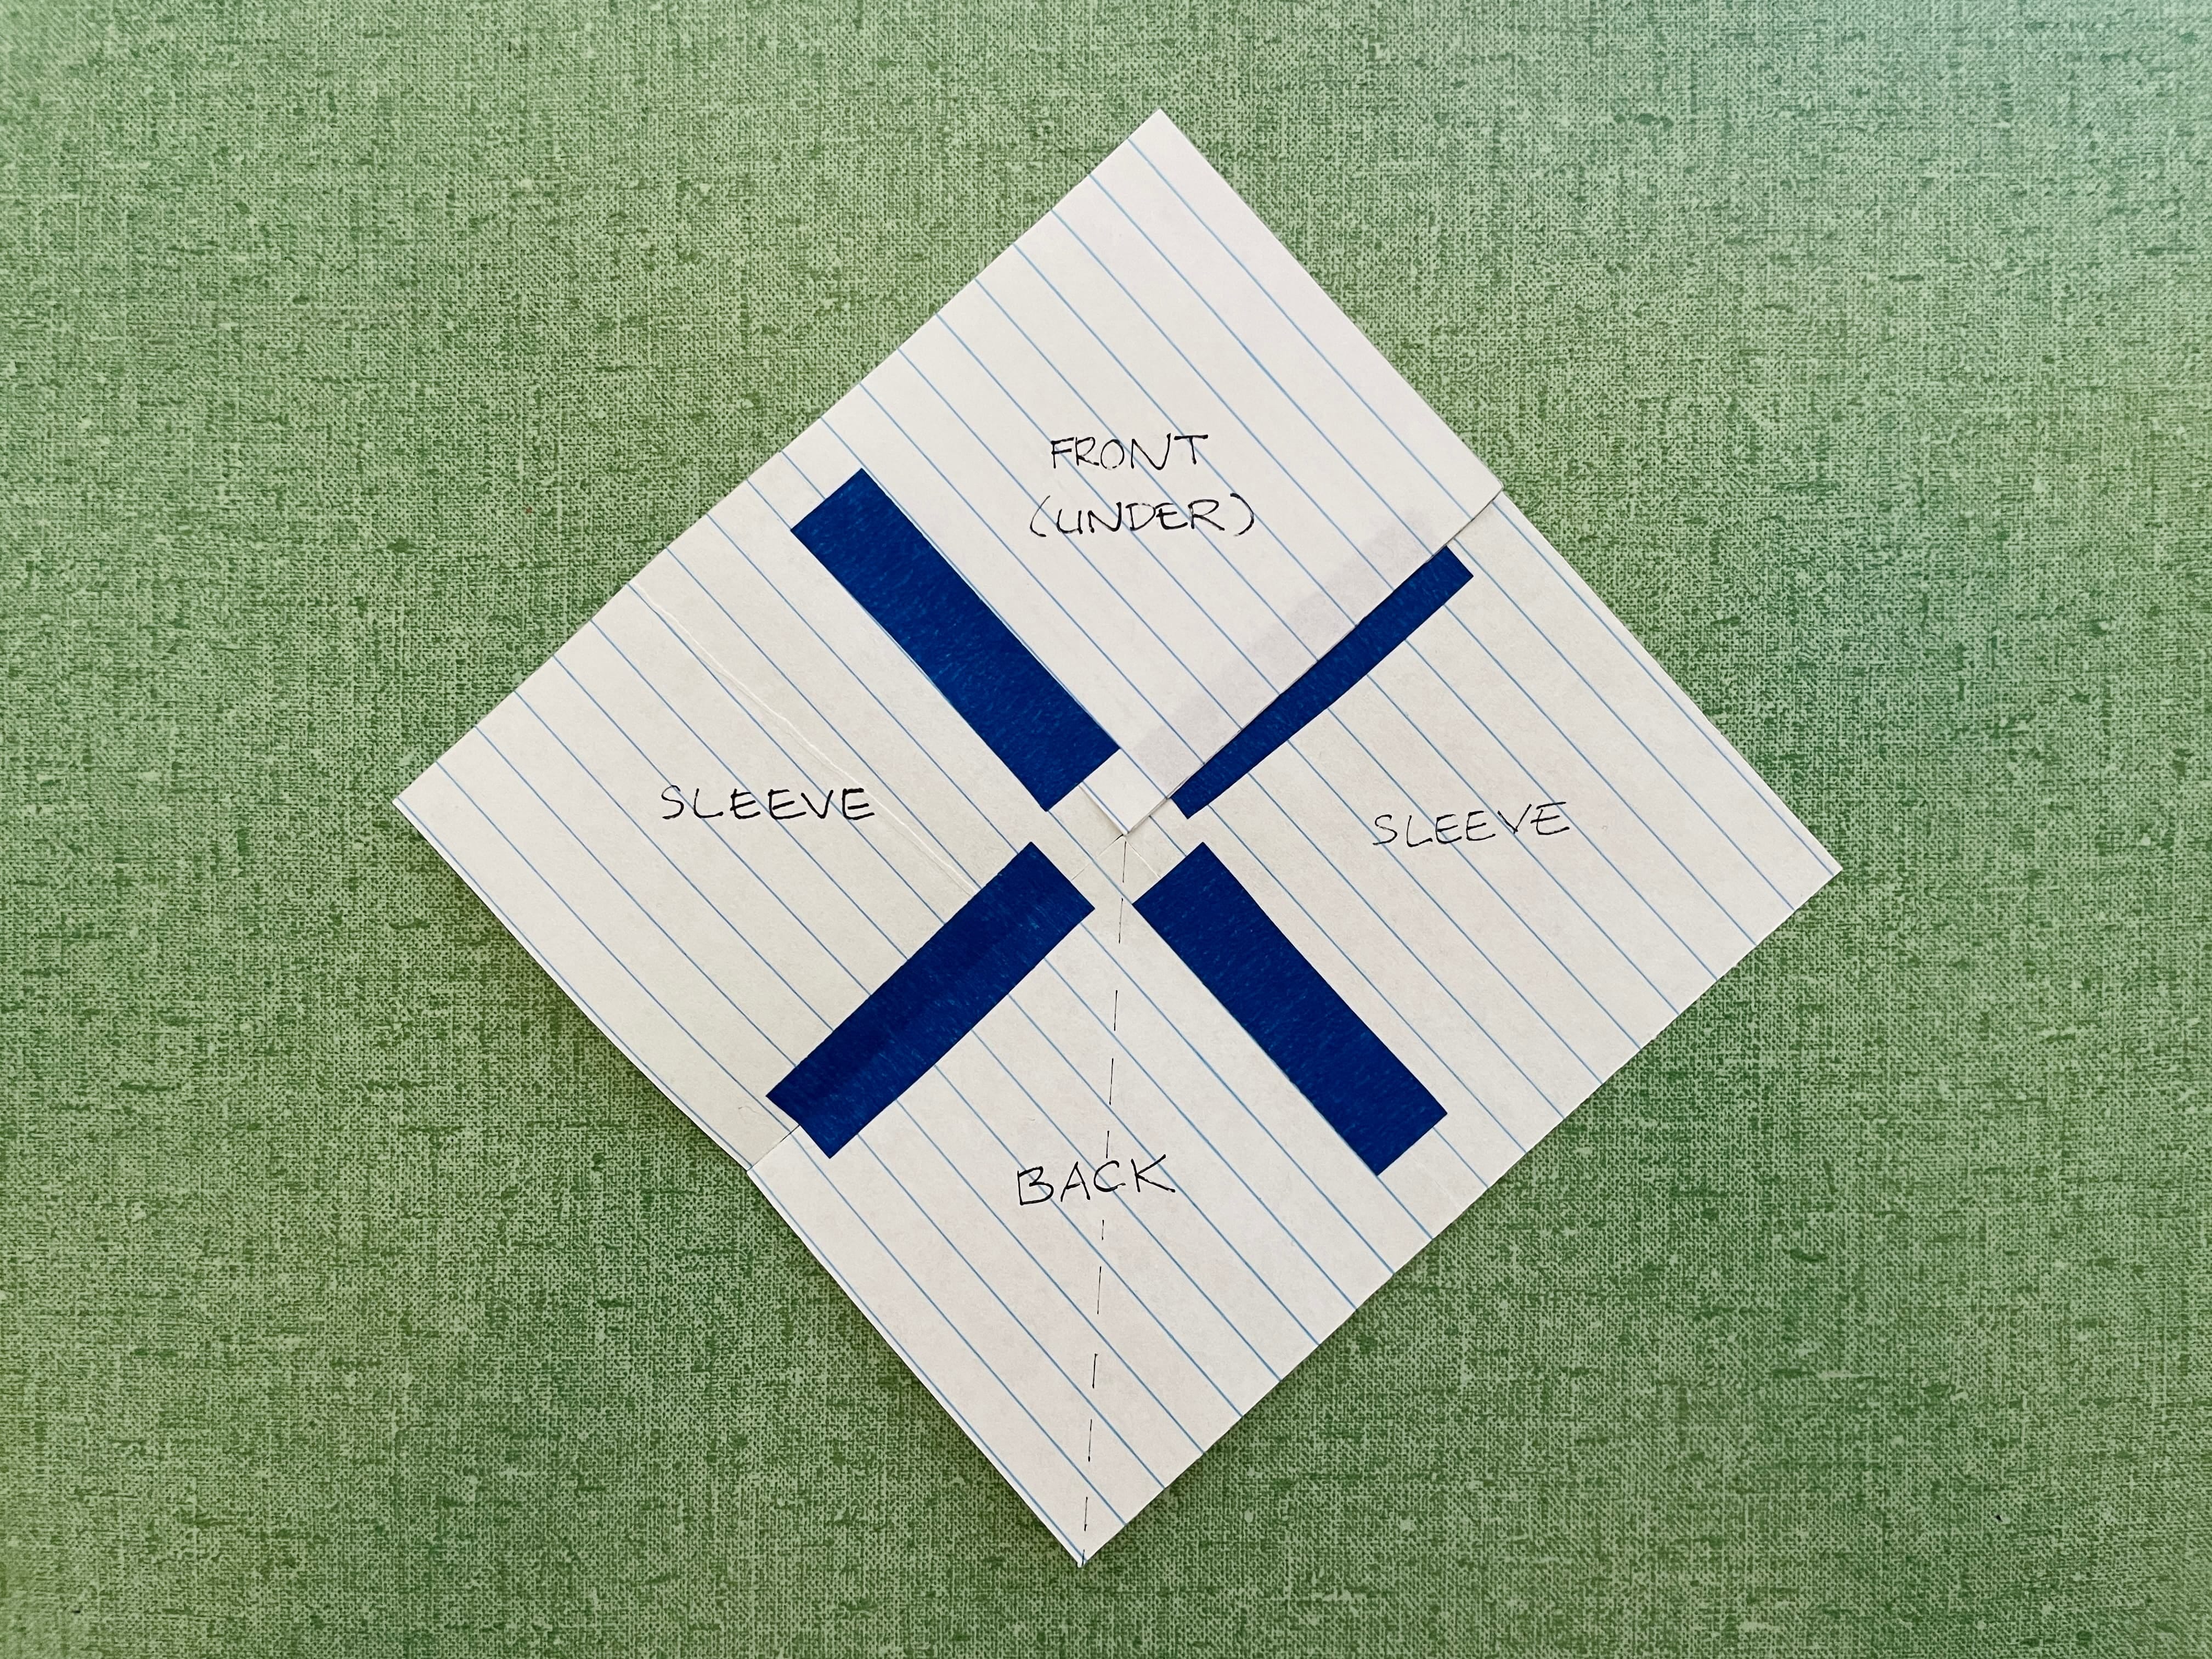
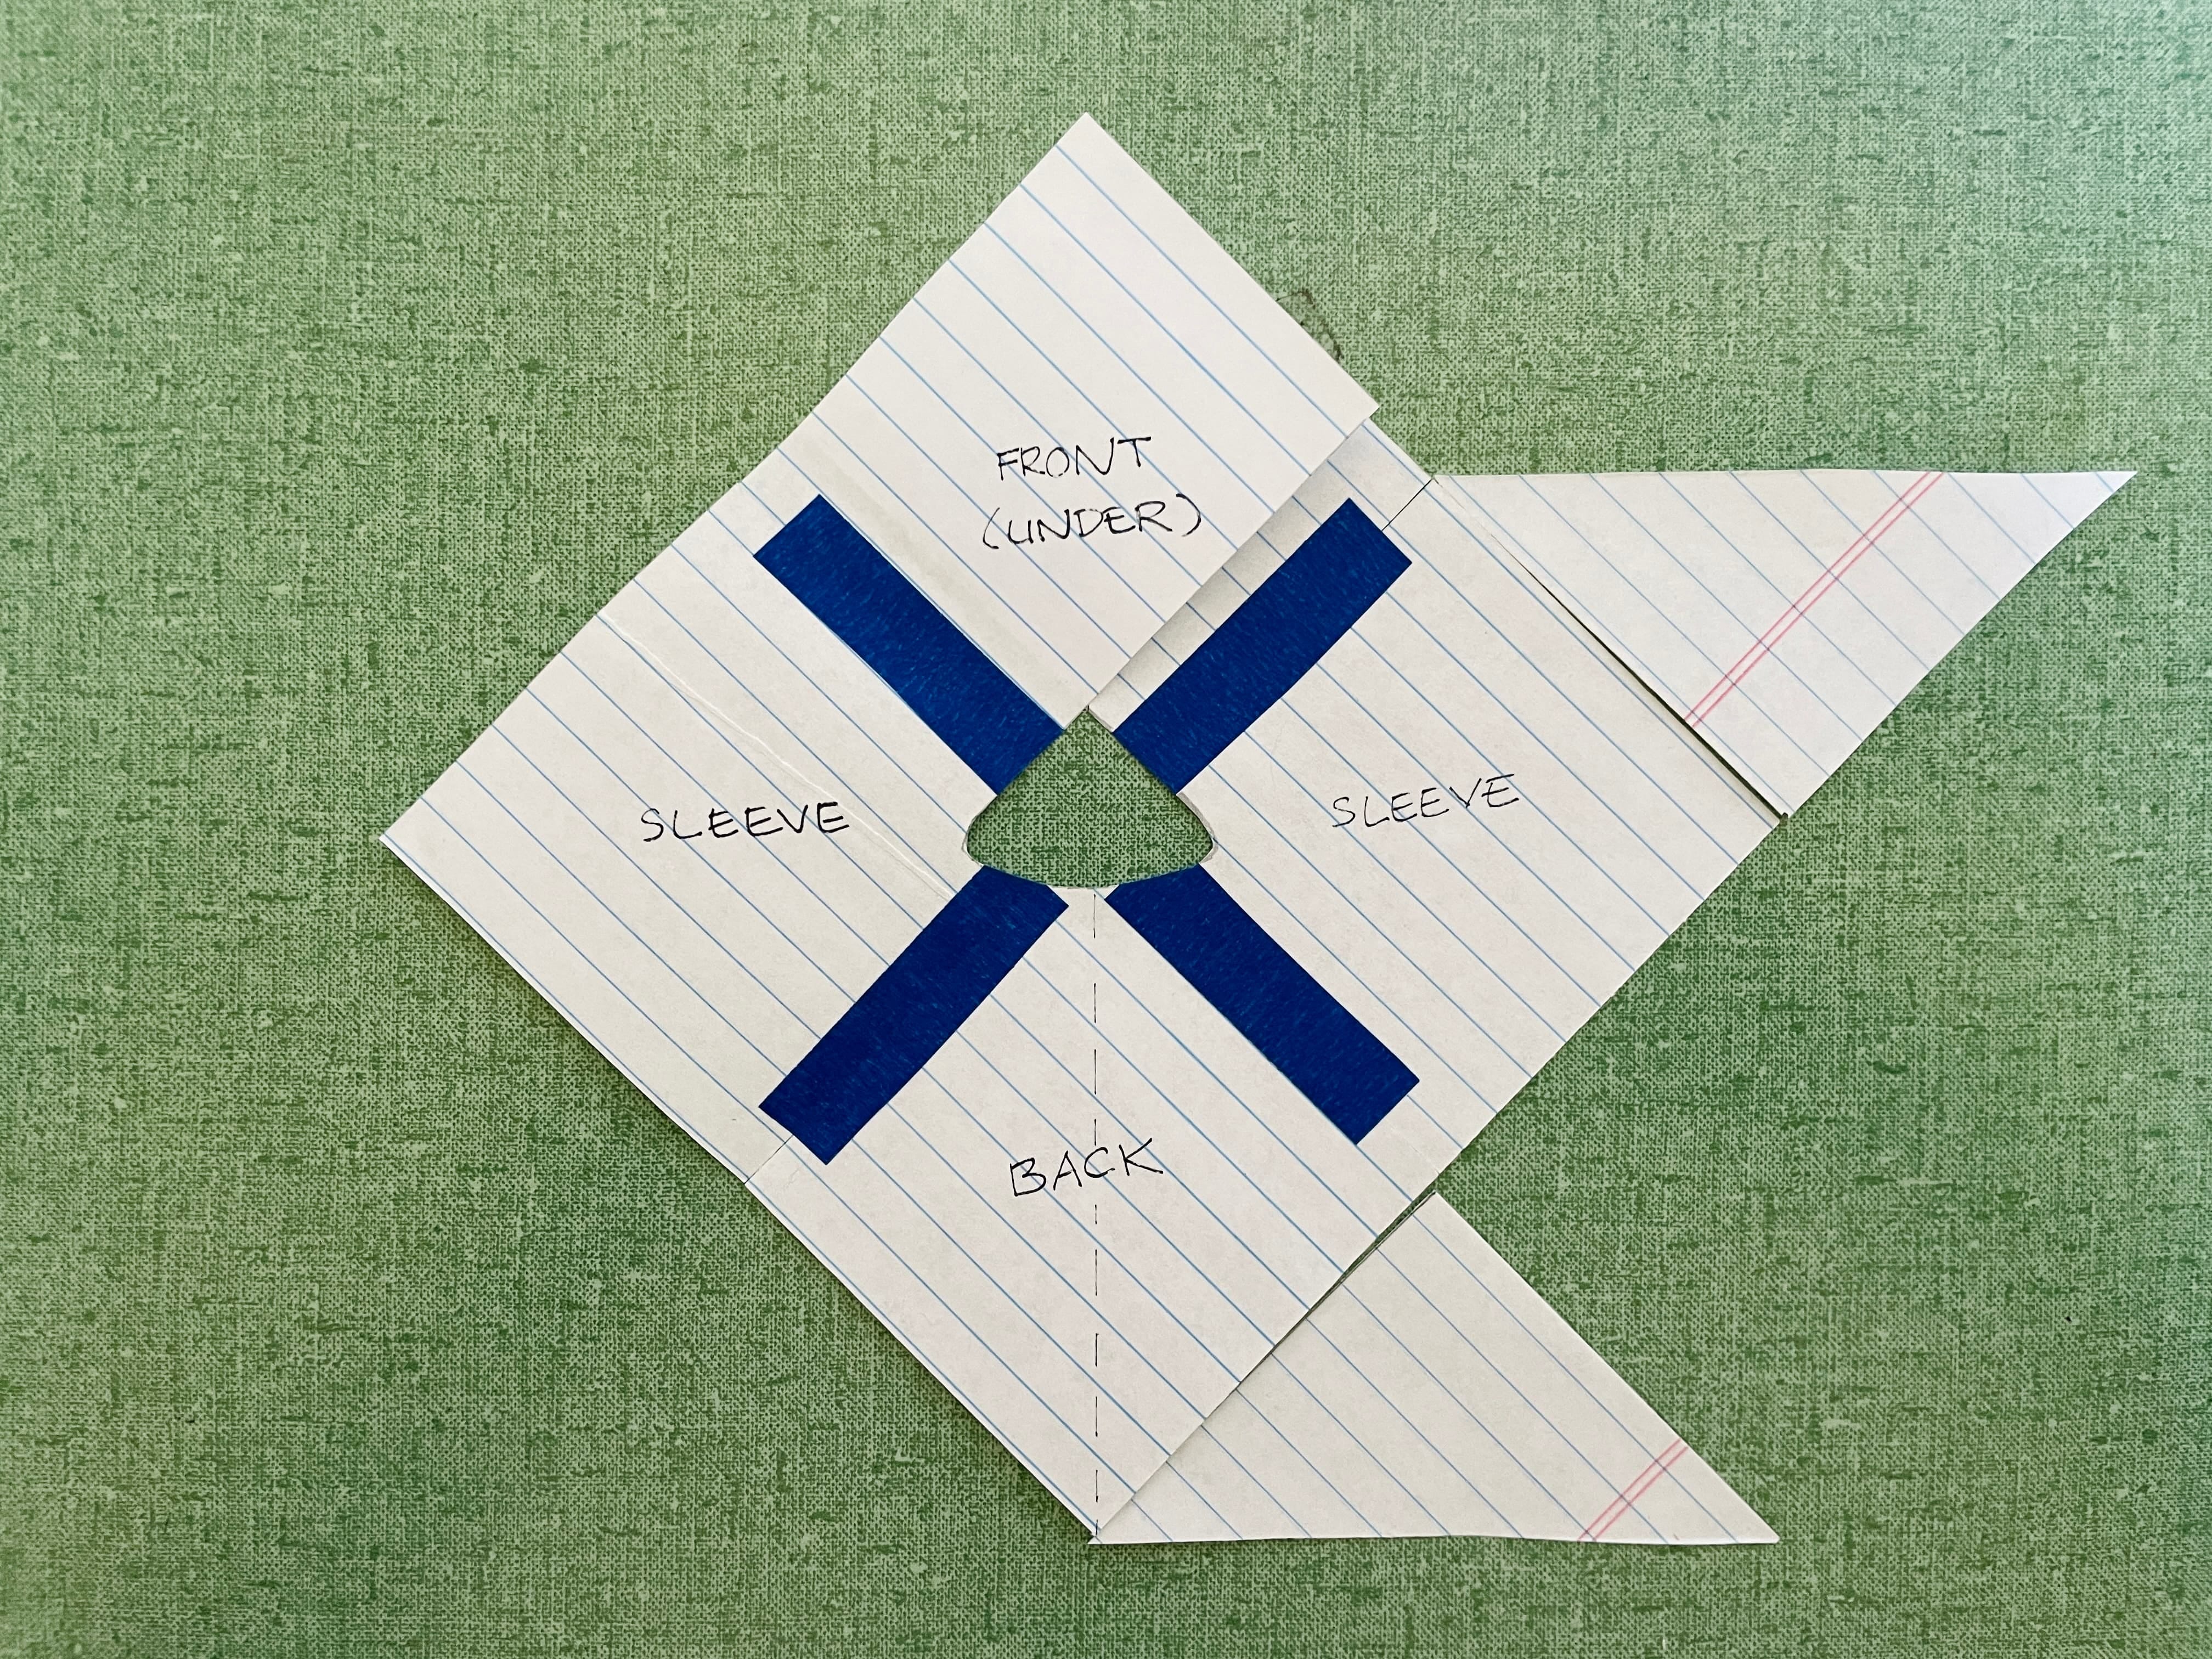
This is how the 5 squares are connected at this point.
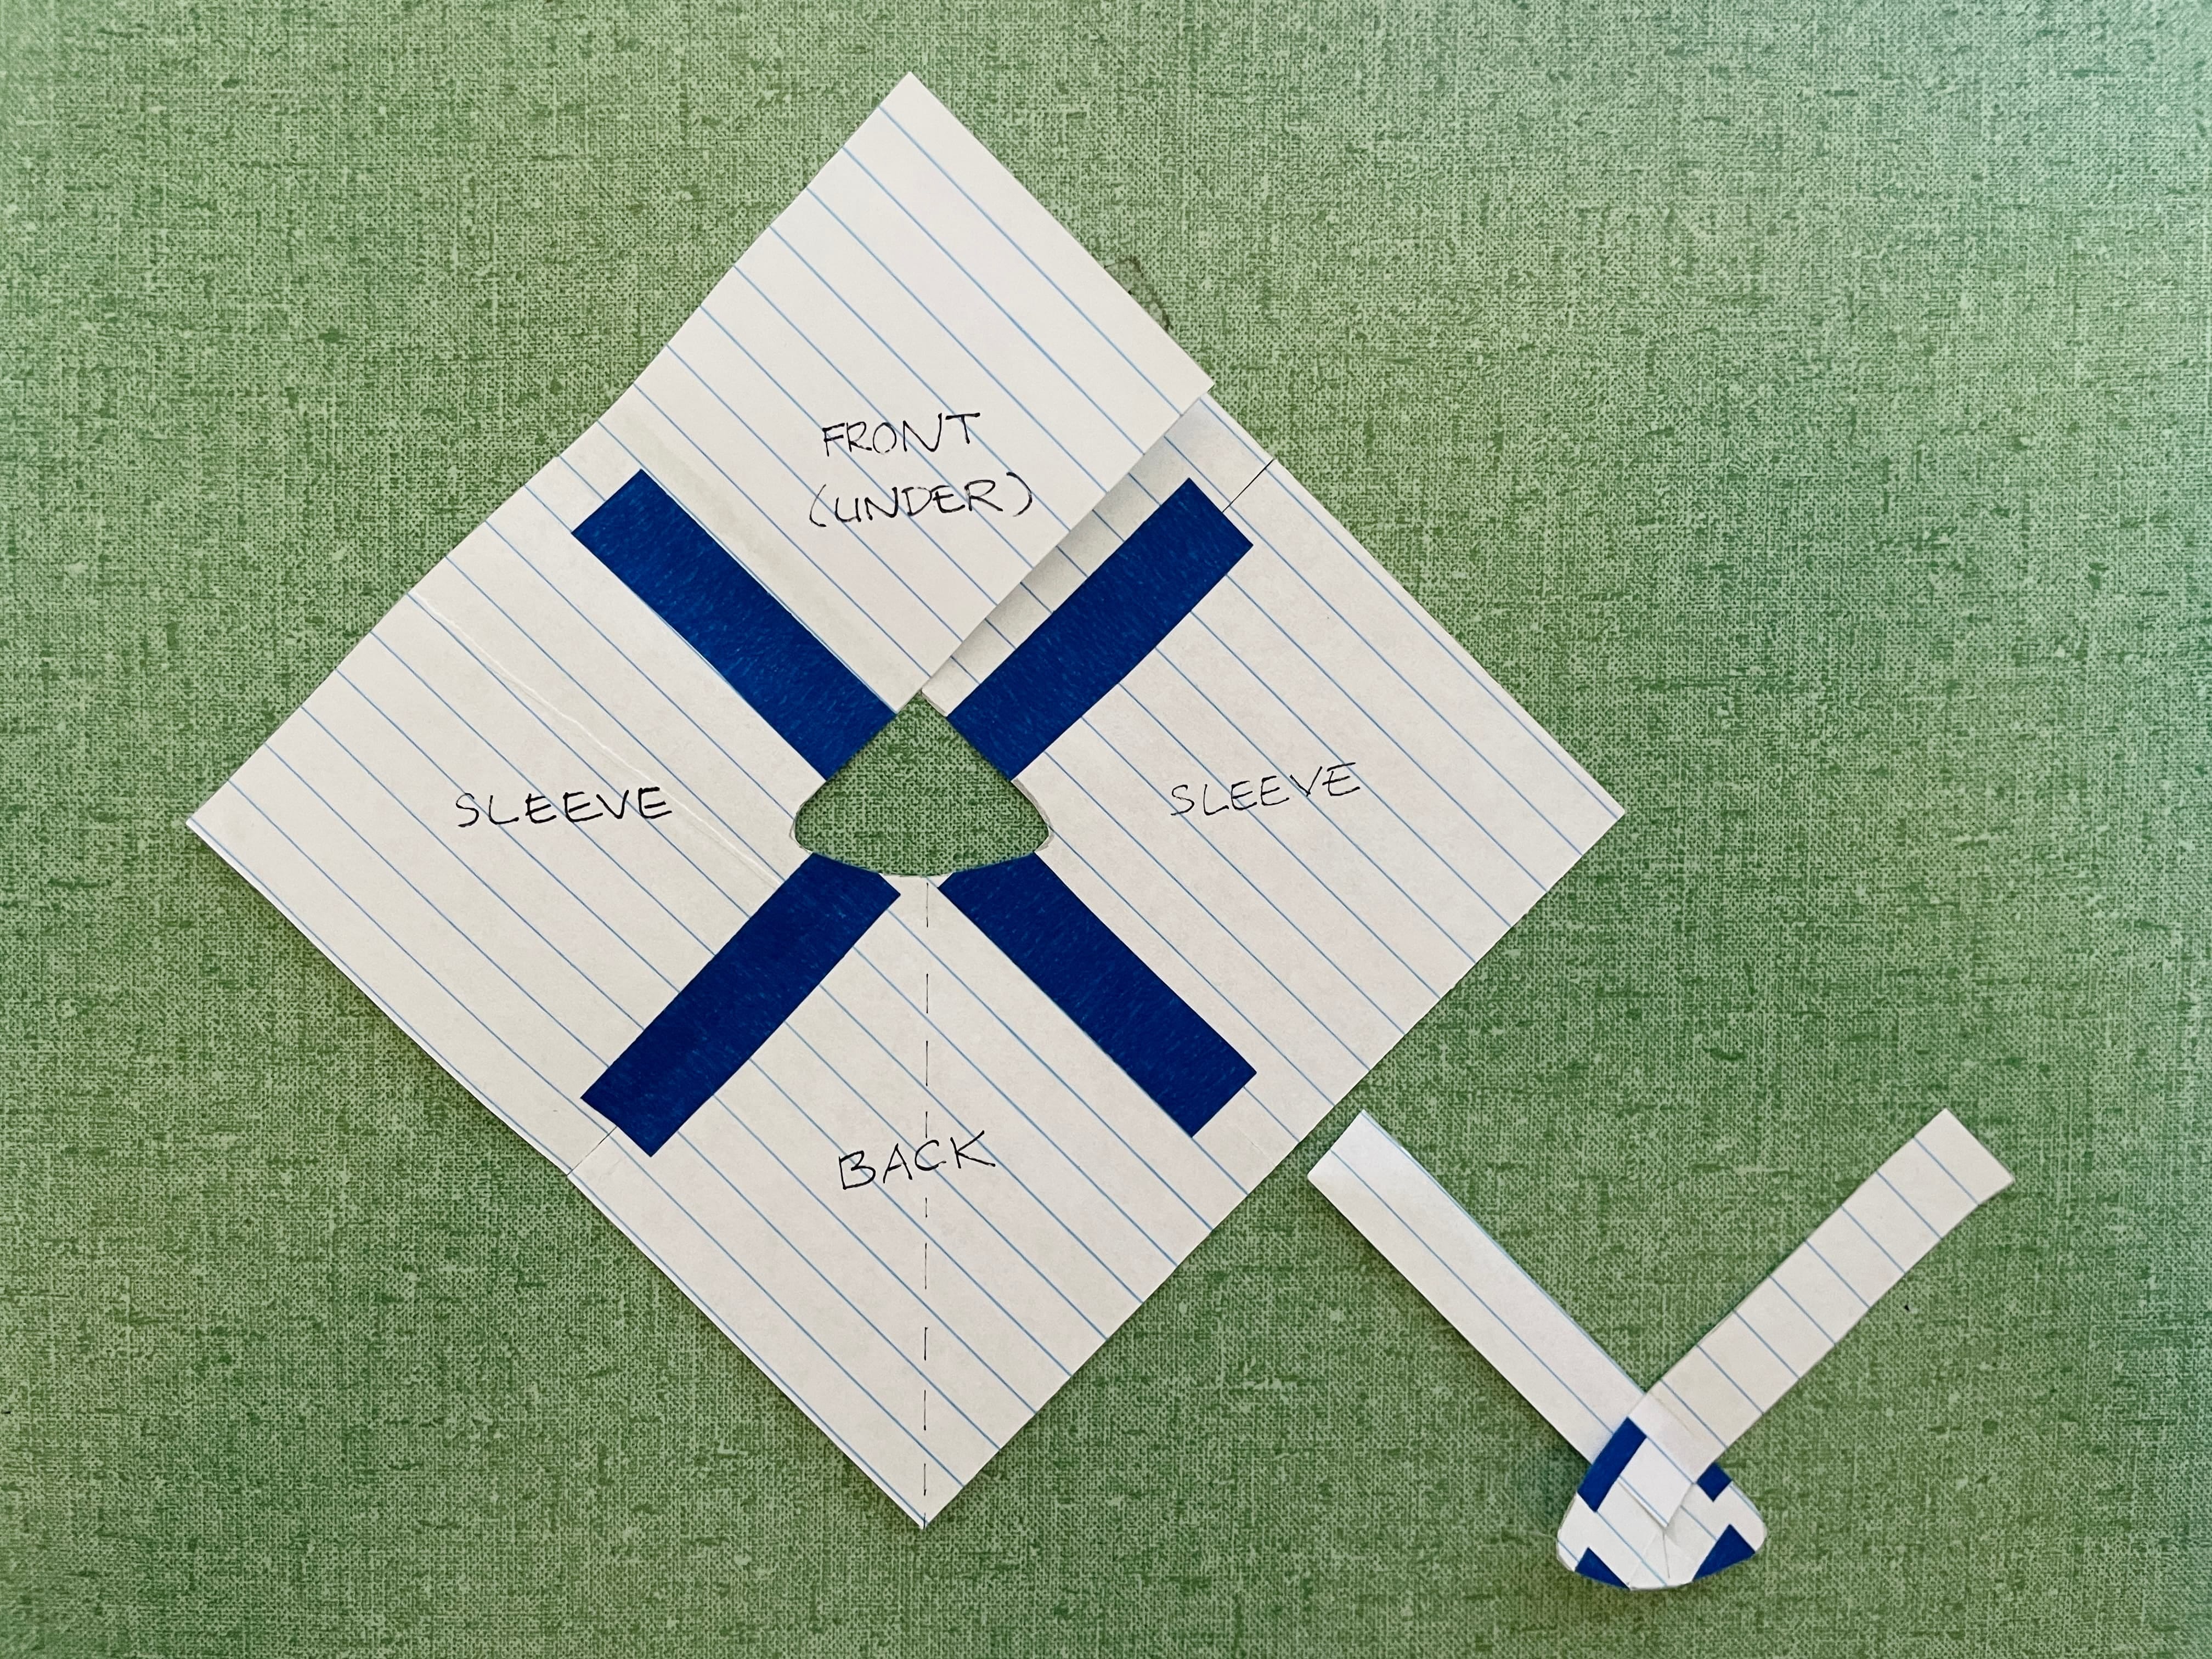
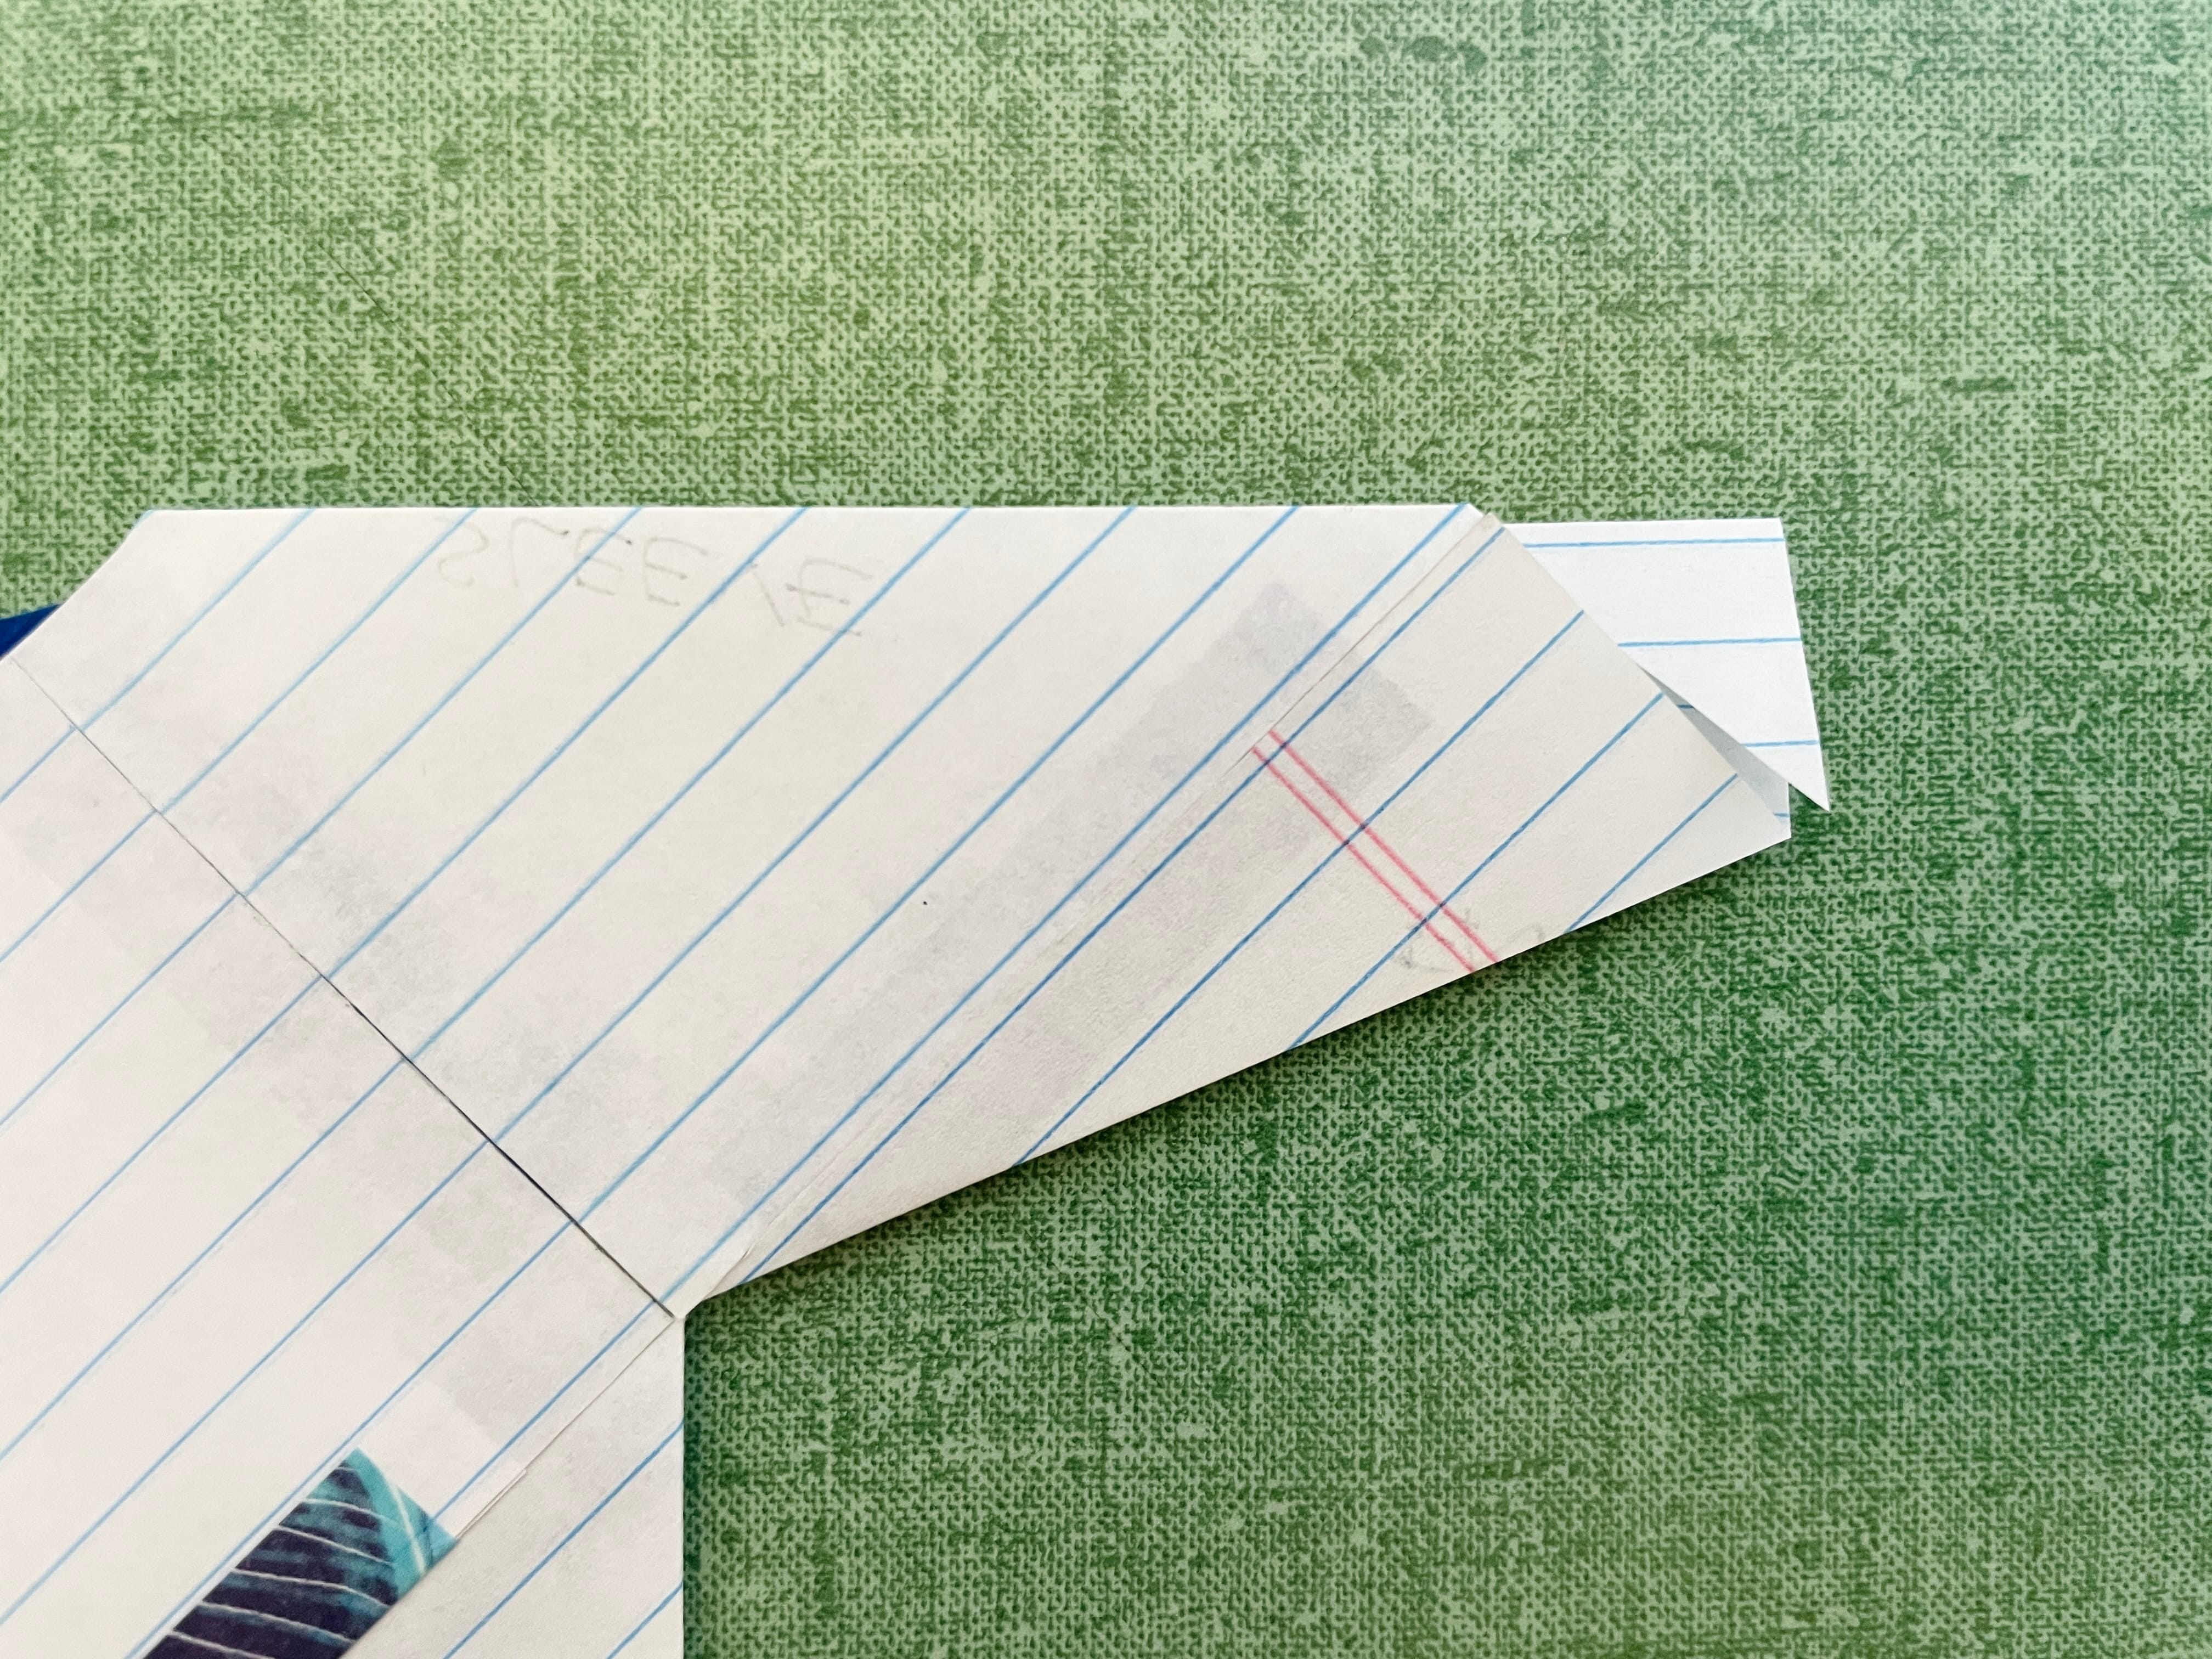
Now, make the neckline and extend the line to the rest of the front squares. Parts of the front squares will be cut, as are small parts of the sleeve and back squares.
This is how the neckline shows with the front (under) layer.
And this is how the neckline shows with the front overlay.
After cutting the neckline, this is what we have.
Everybody good so far? Great, let’s continue finishing the torso and sleeves. We are almost done with laying out all 7 squares.
Sides and Sleeves
Now, grab another square, place it next to the back square, and once again make sure the lines are facing the same direction as the others. Once it does, fold it into two on the diagonal.
Make sure you have your lines match up before making the fold.
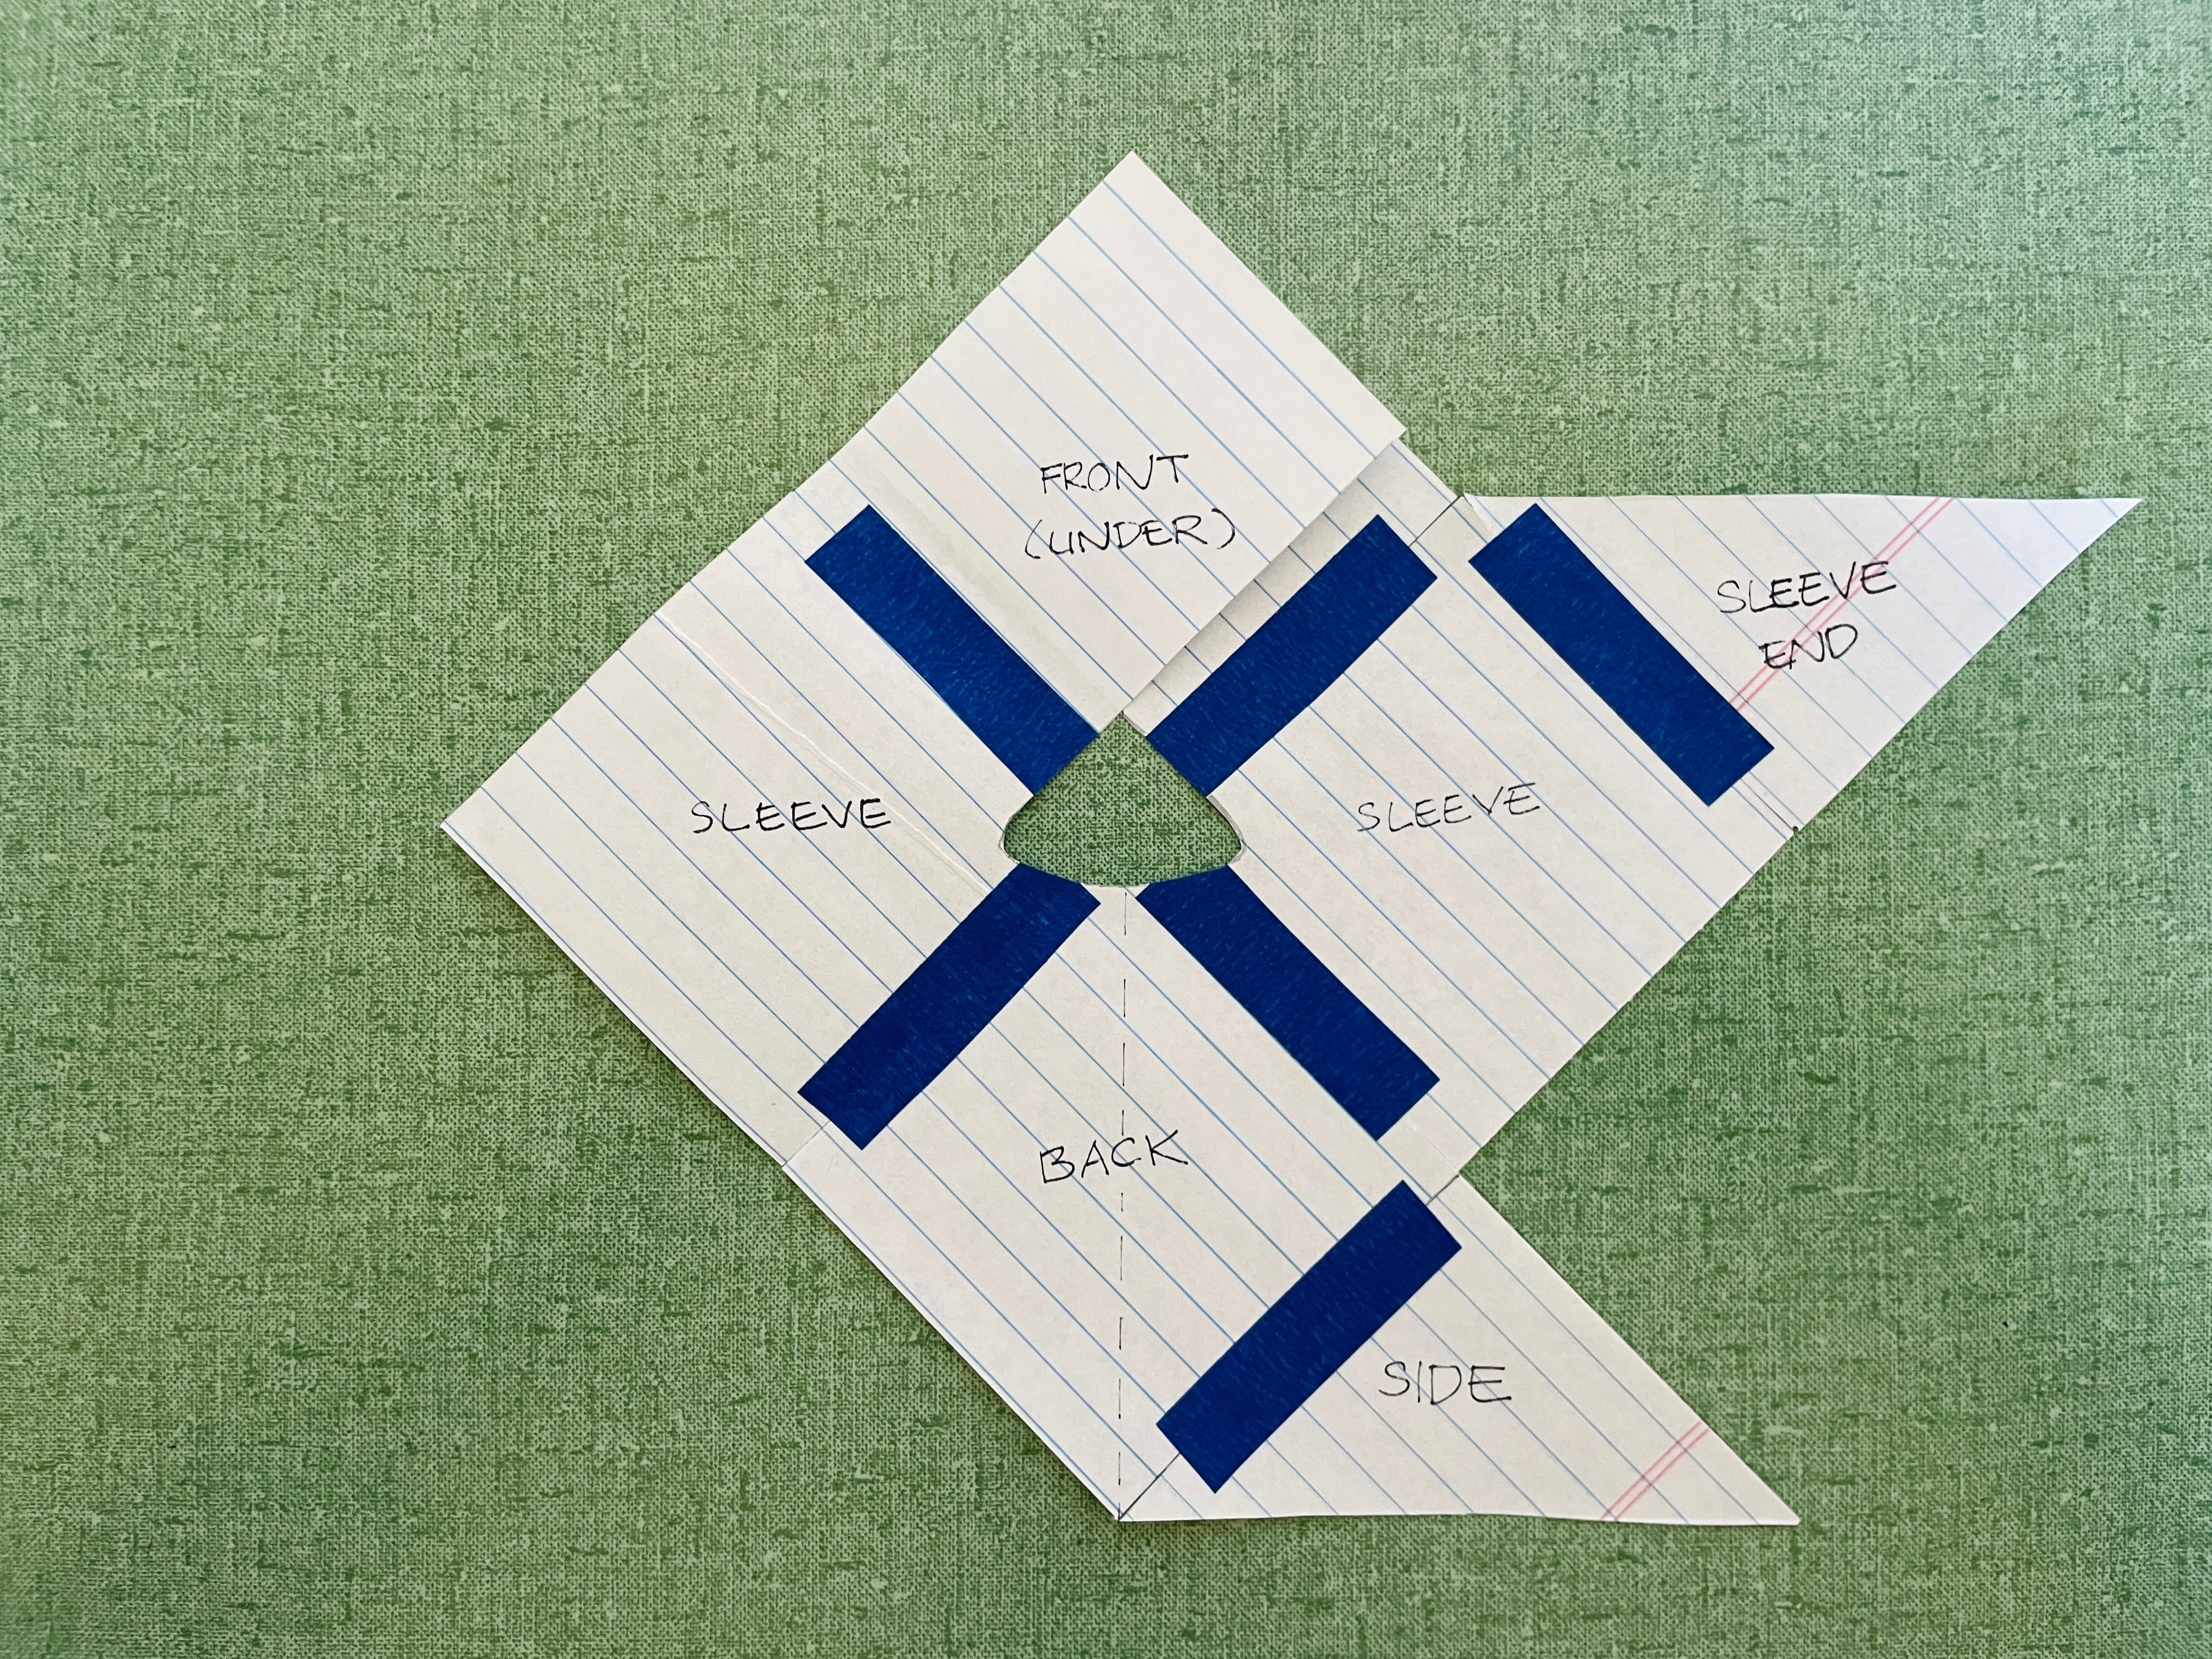
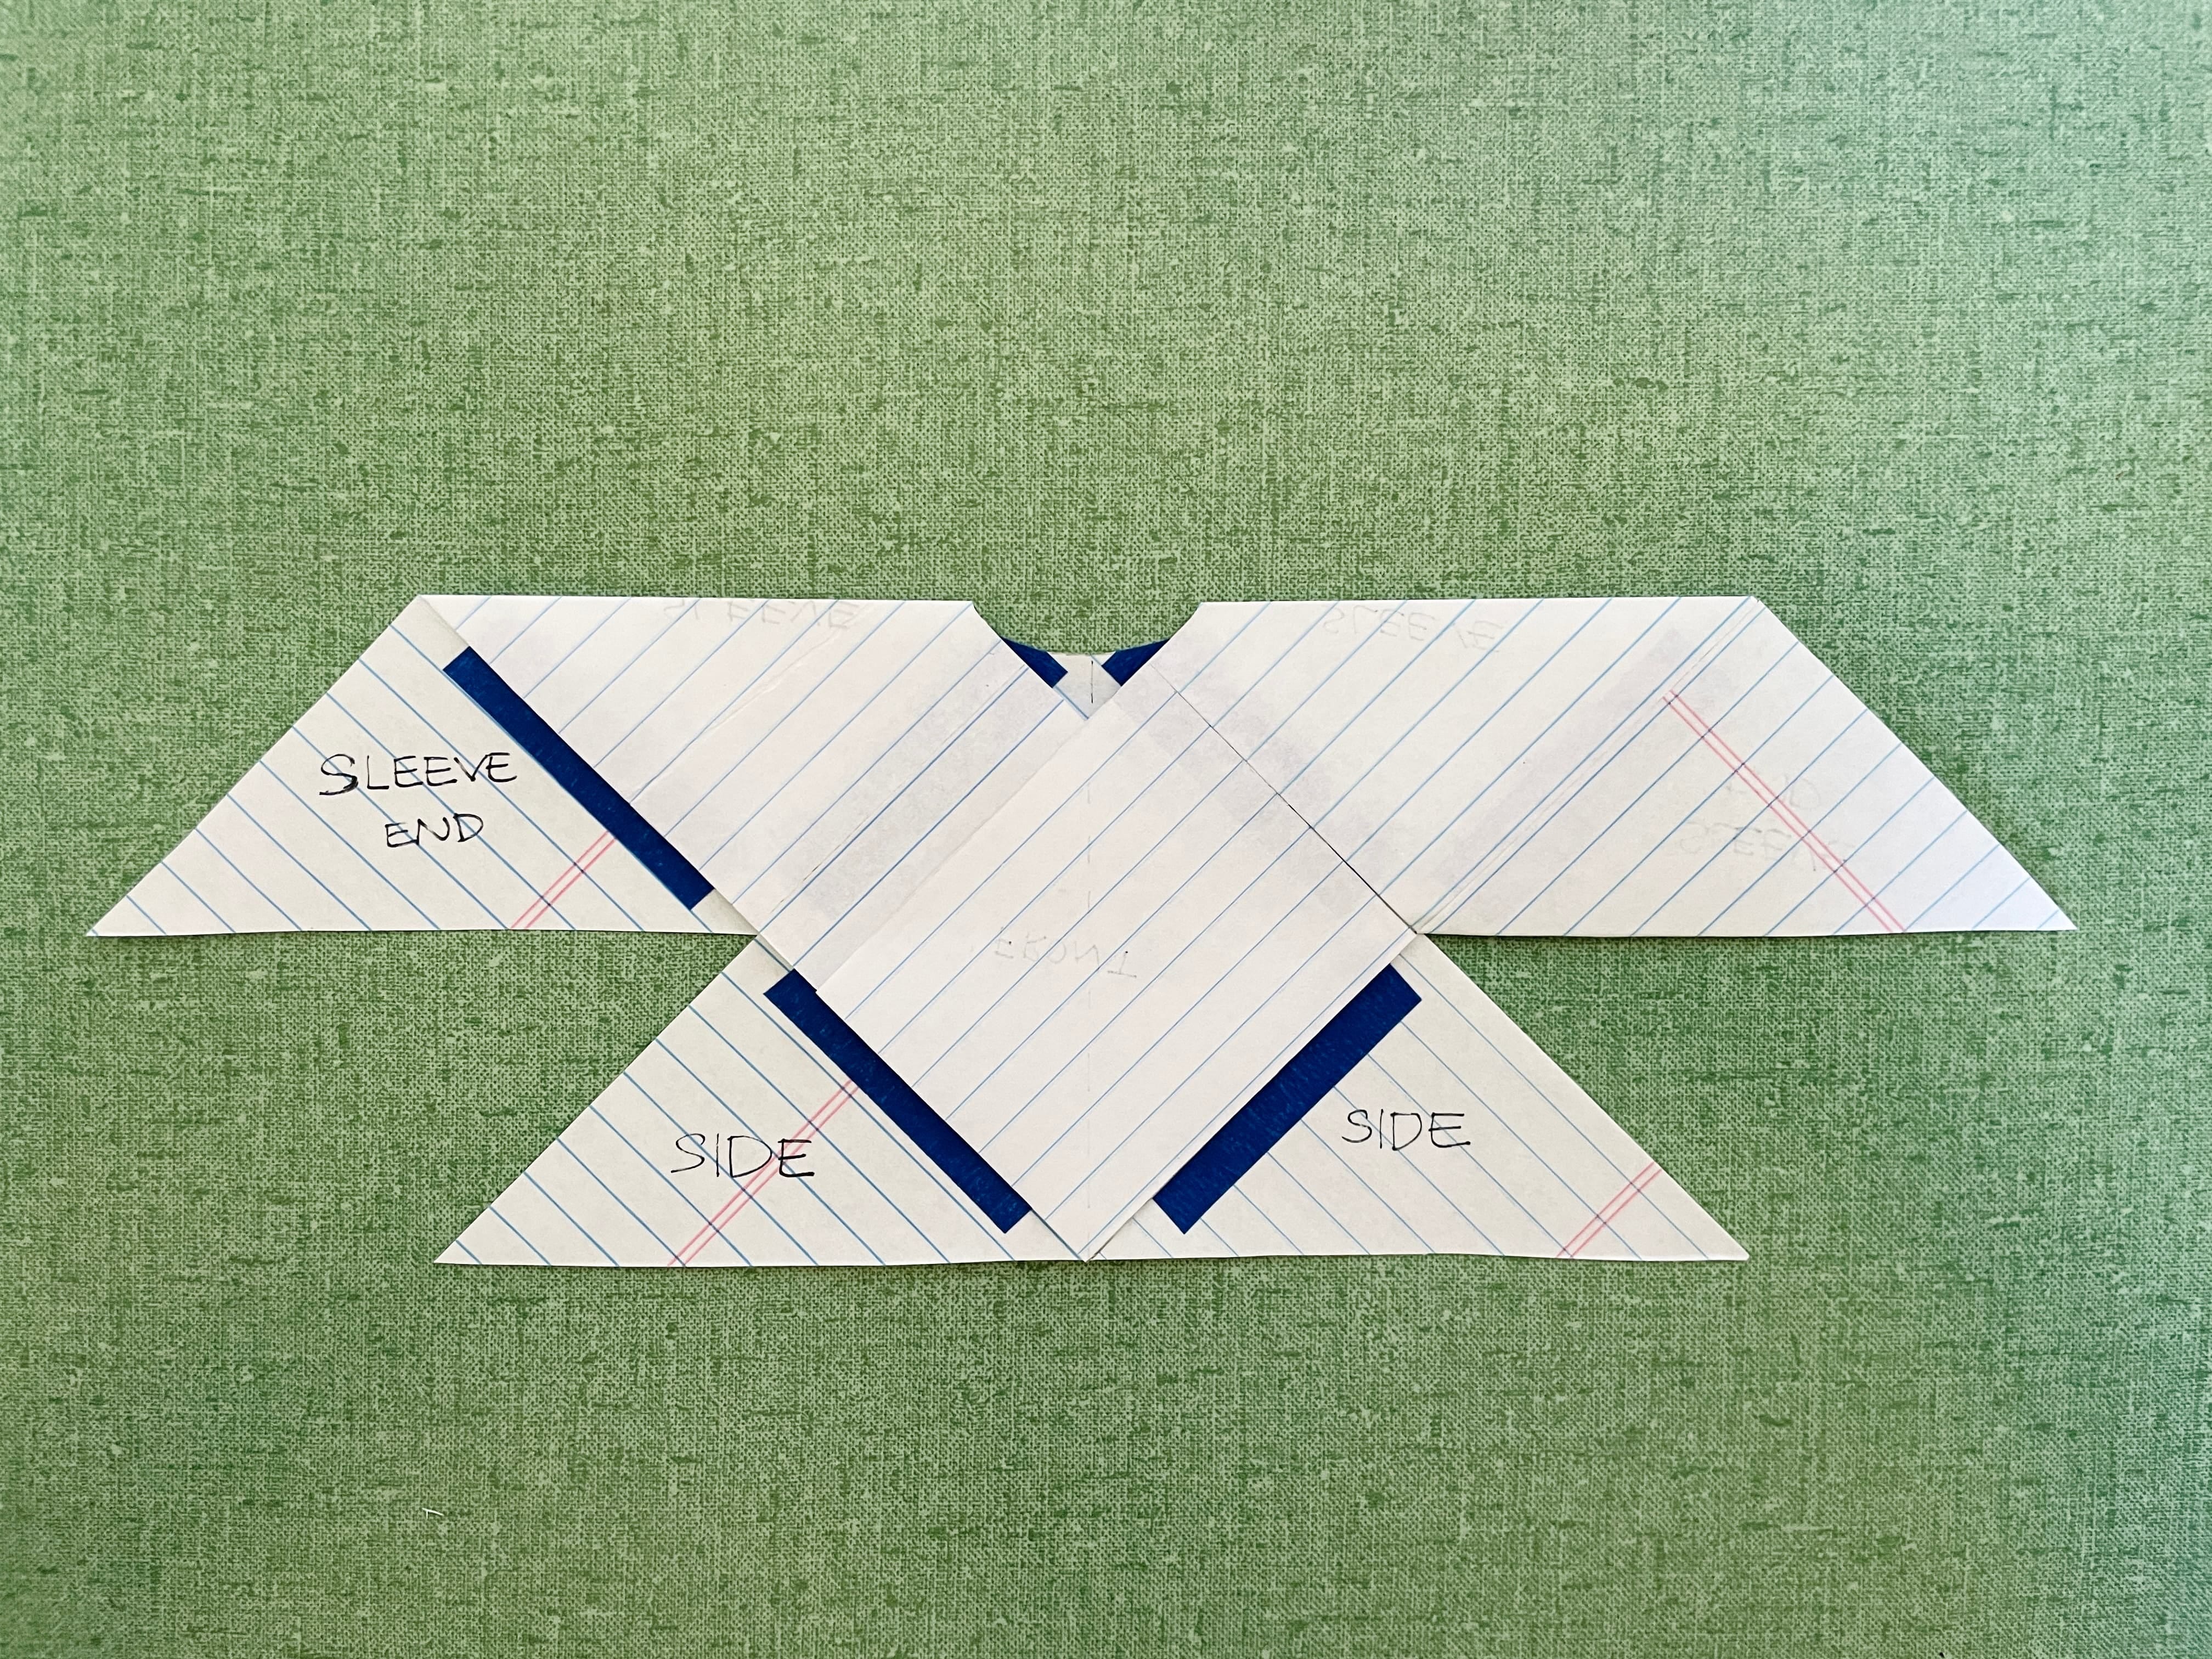
Cut that fold, leave one triangle where it is next to the back square, mark it “Side.” Take the other and place it next to one sleeve, mark it “Sleeve End.” Make sure the lines are facing the same direction as the others. If grainline alignment is important for the torso, it is more so for the sleeves for ease and comfort purposes.
One square becomes two triangles. Each is placed at their respective sections.
This is what the composition looks like after all marks and tapings are done.
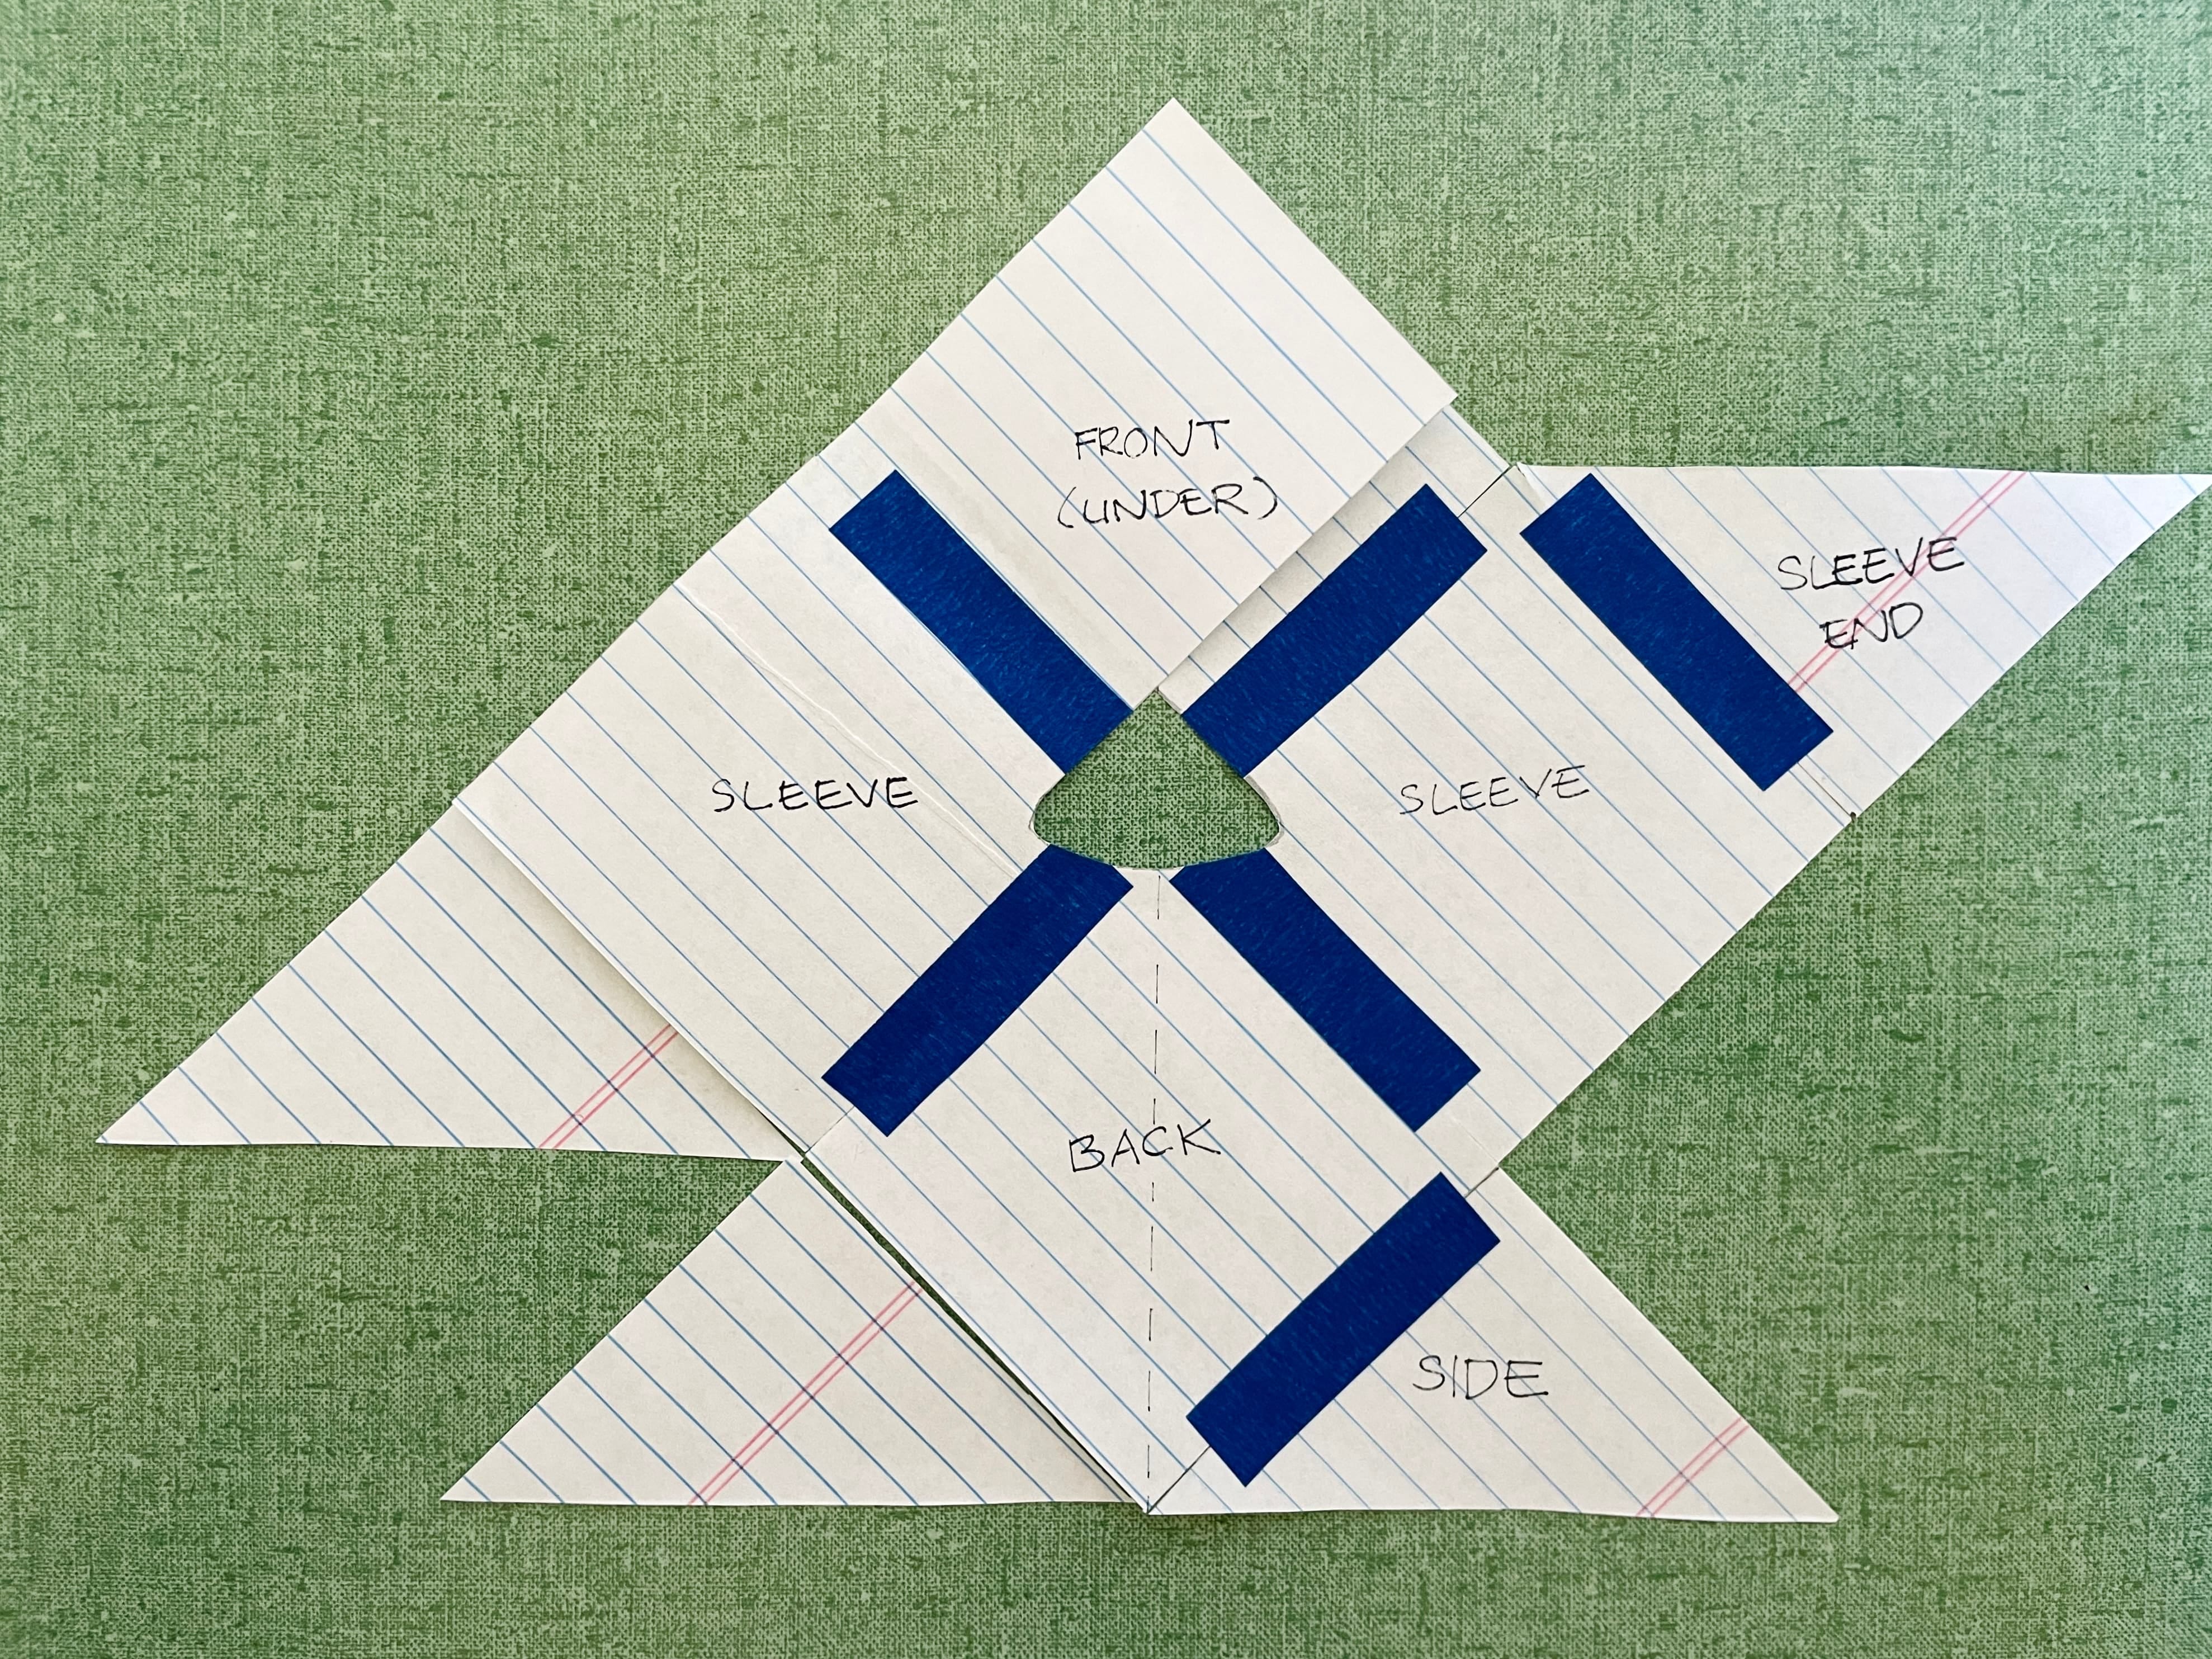
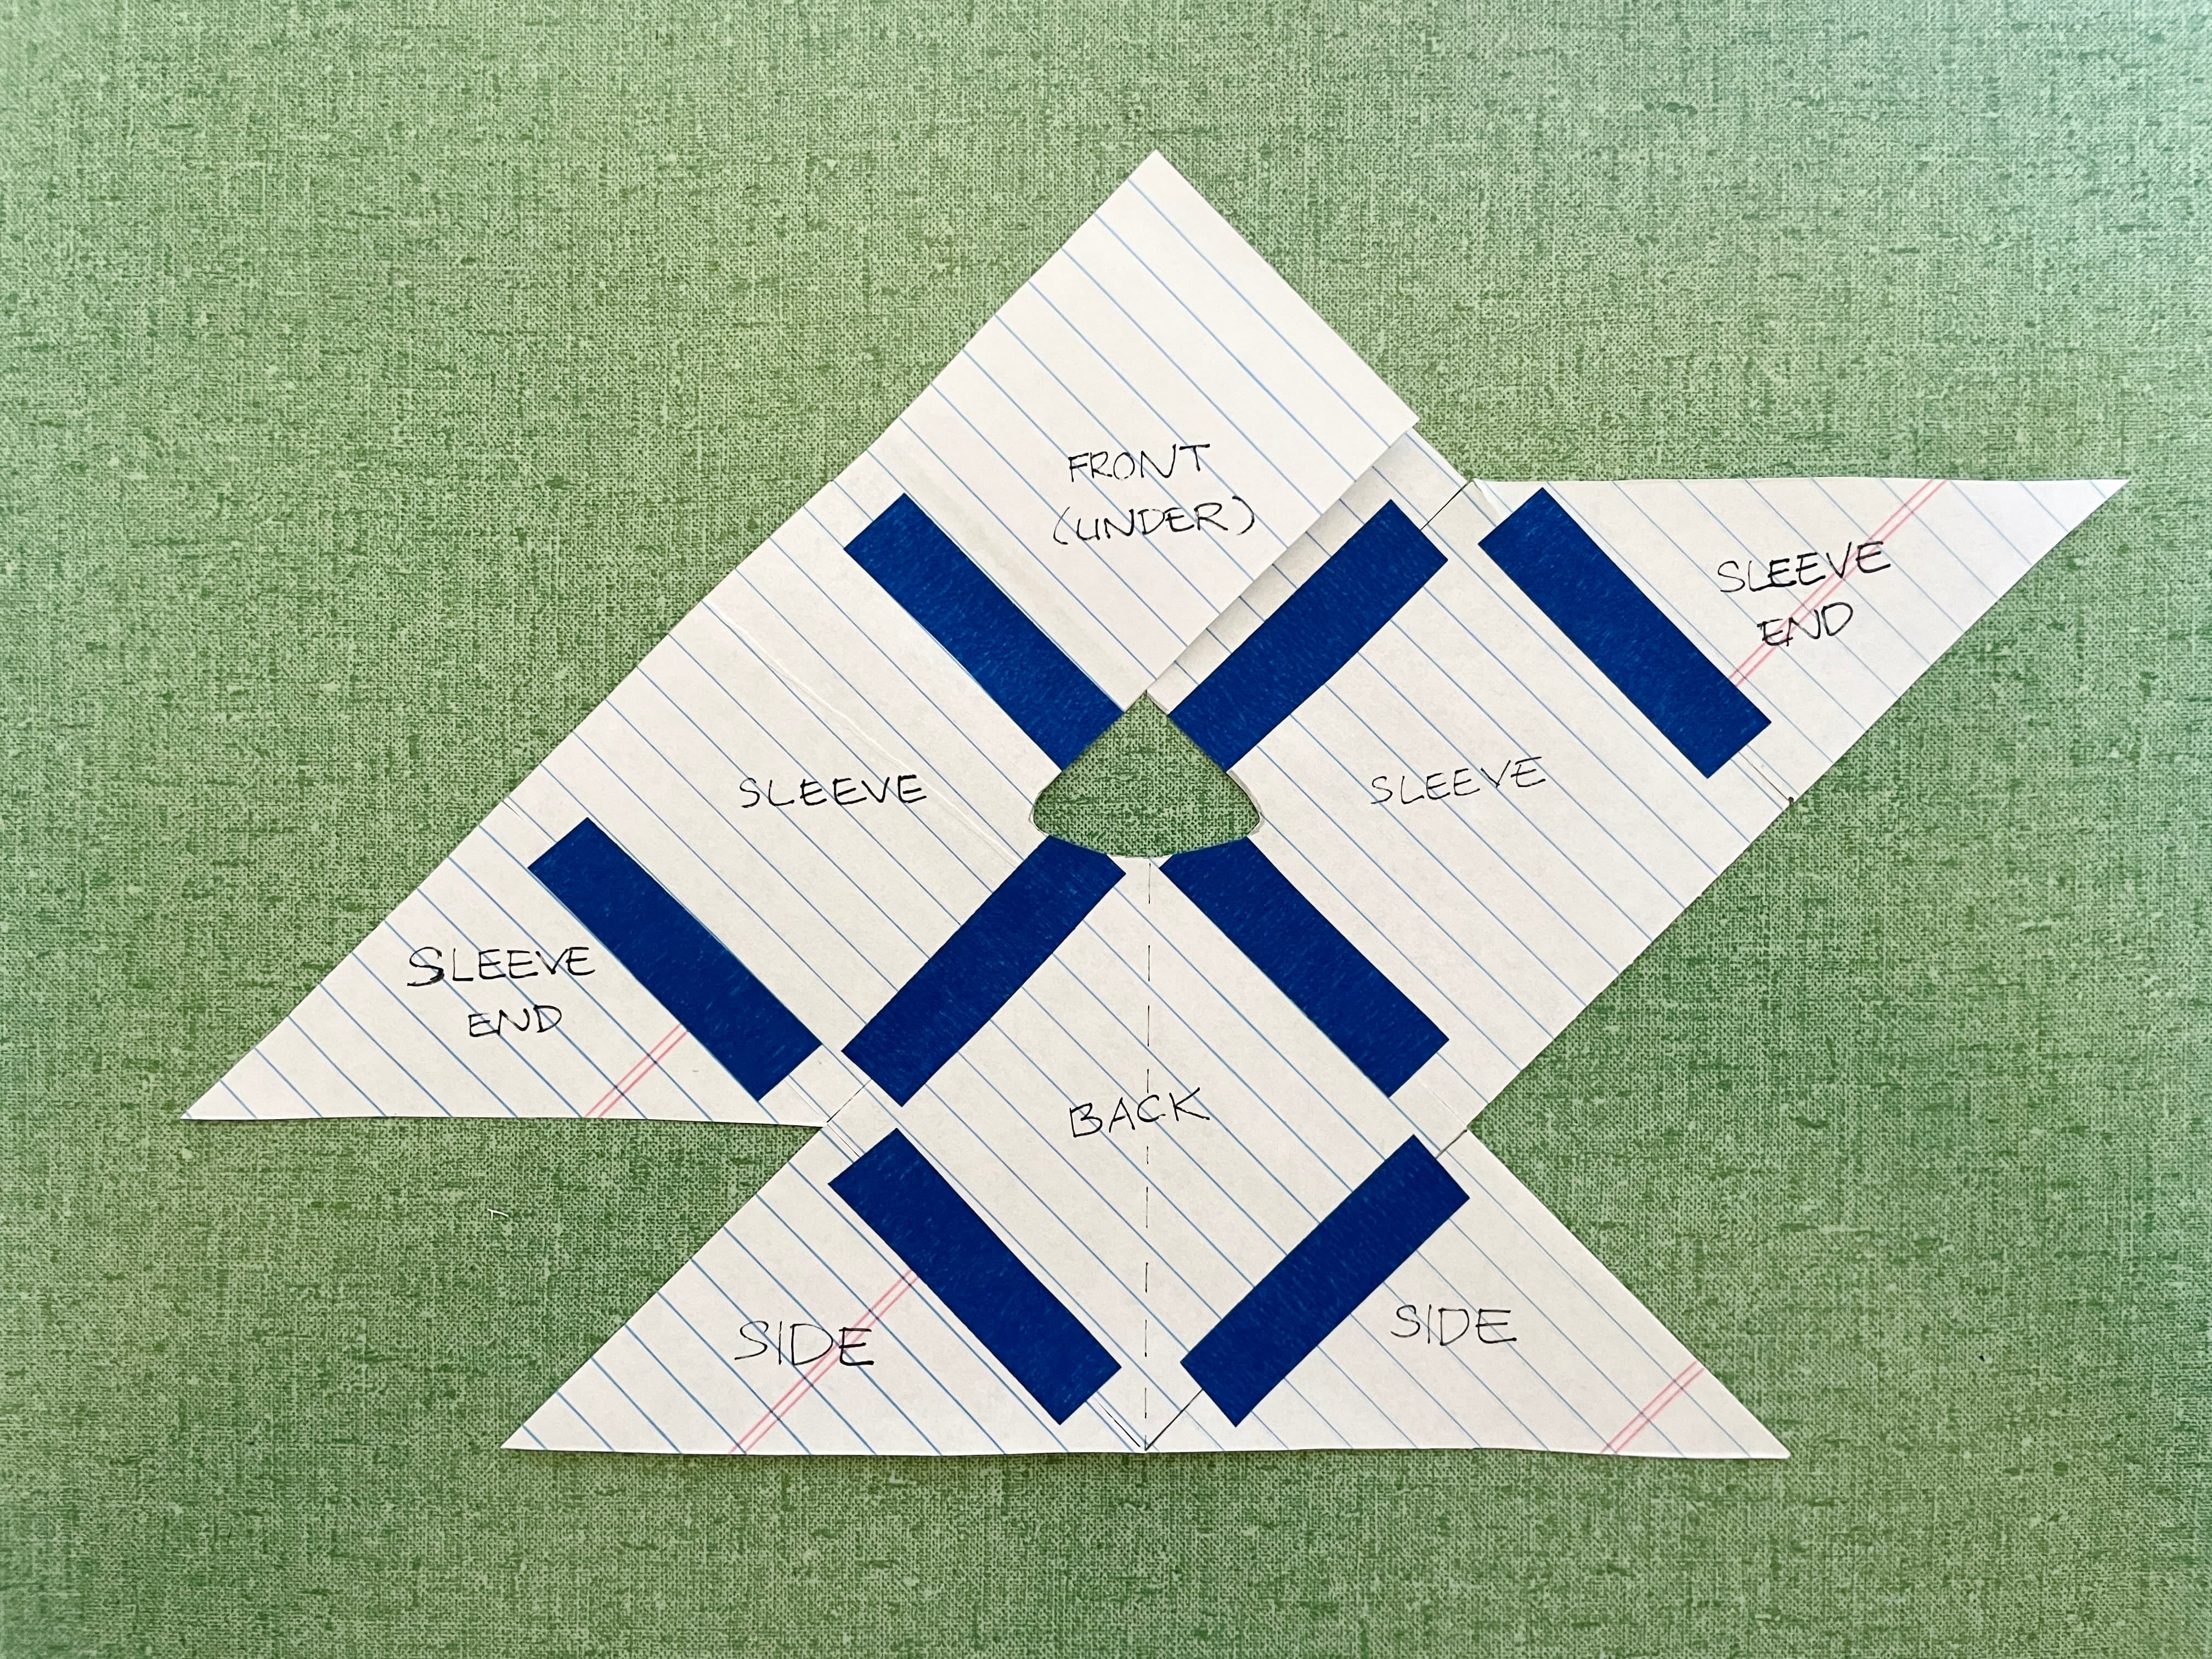
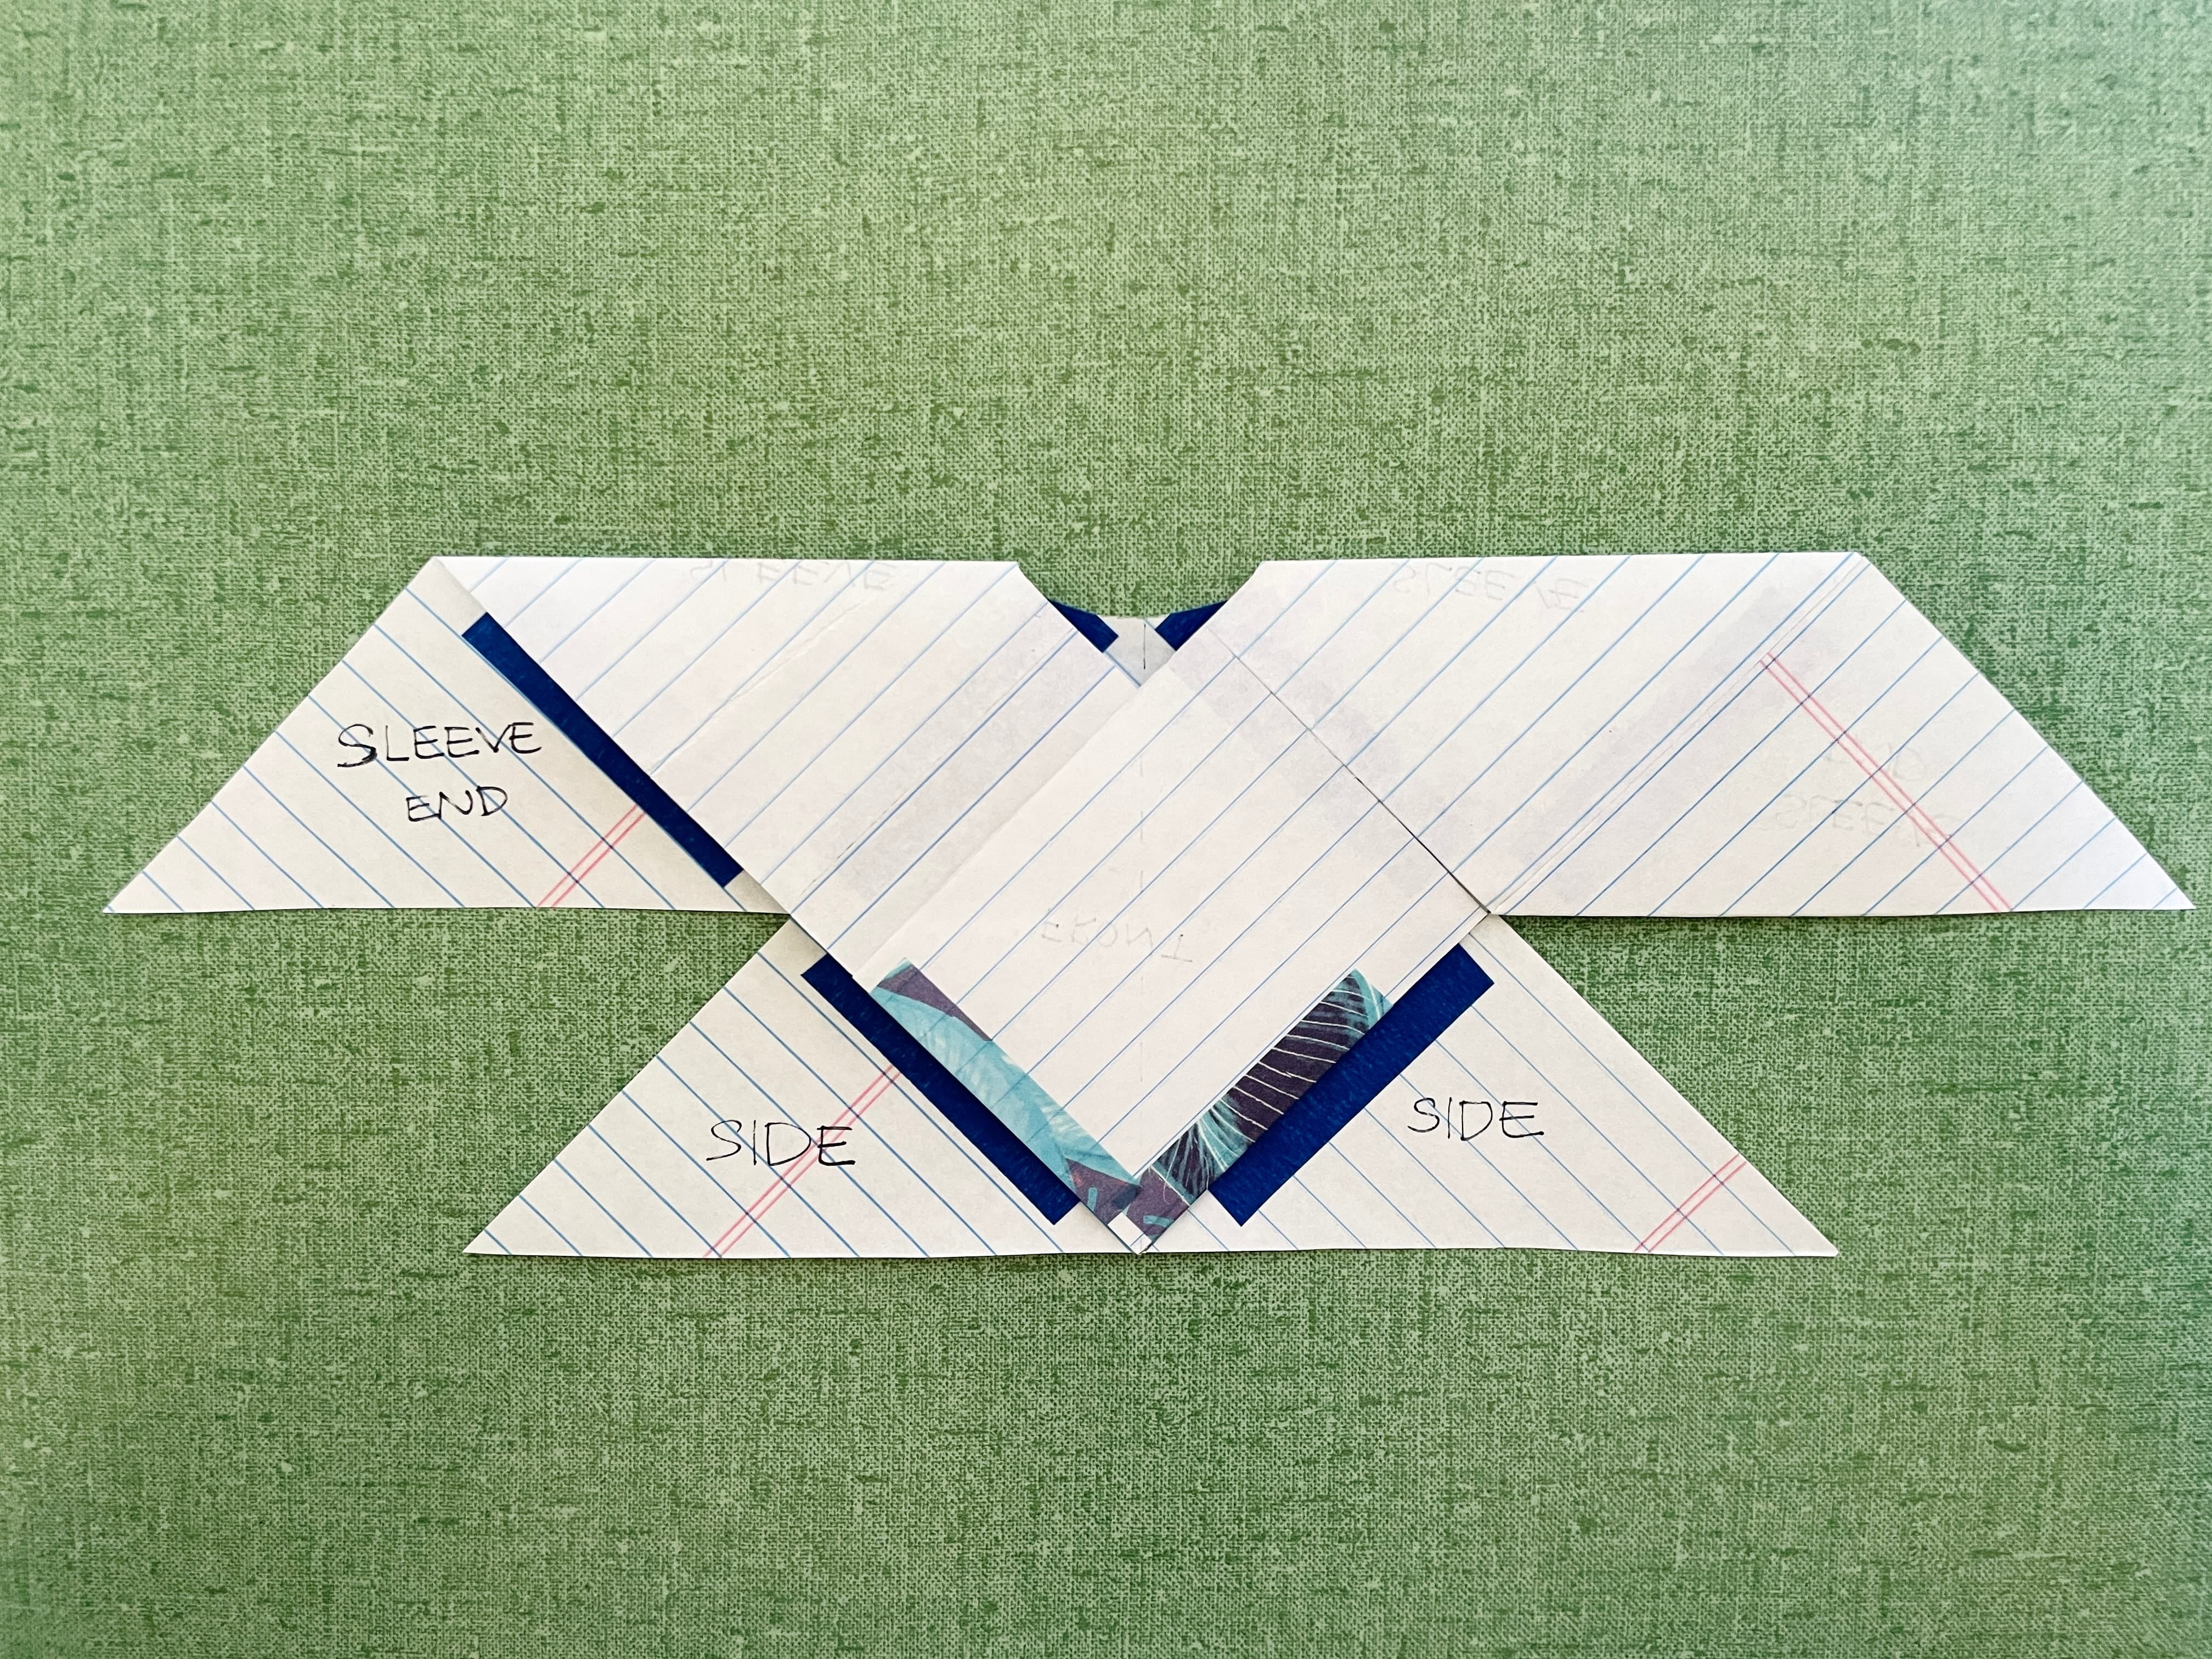
Do the same thing for the other side. Notice from the pictures below that the placement of the sleeve triangle is not identical.
The last square becomes two triangles to complete the other side and sleeve.
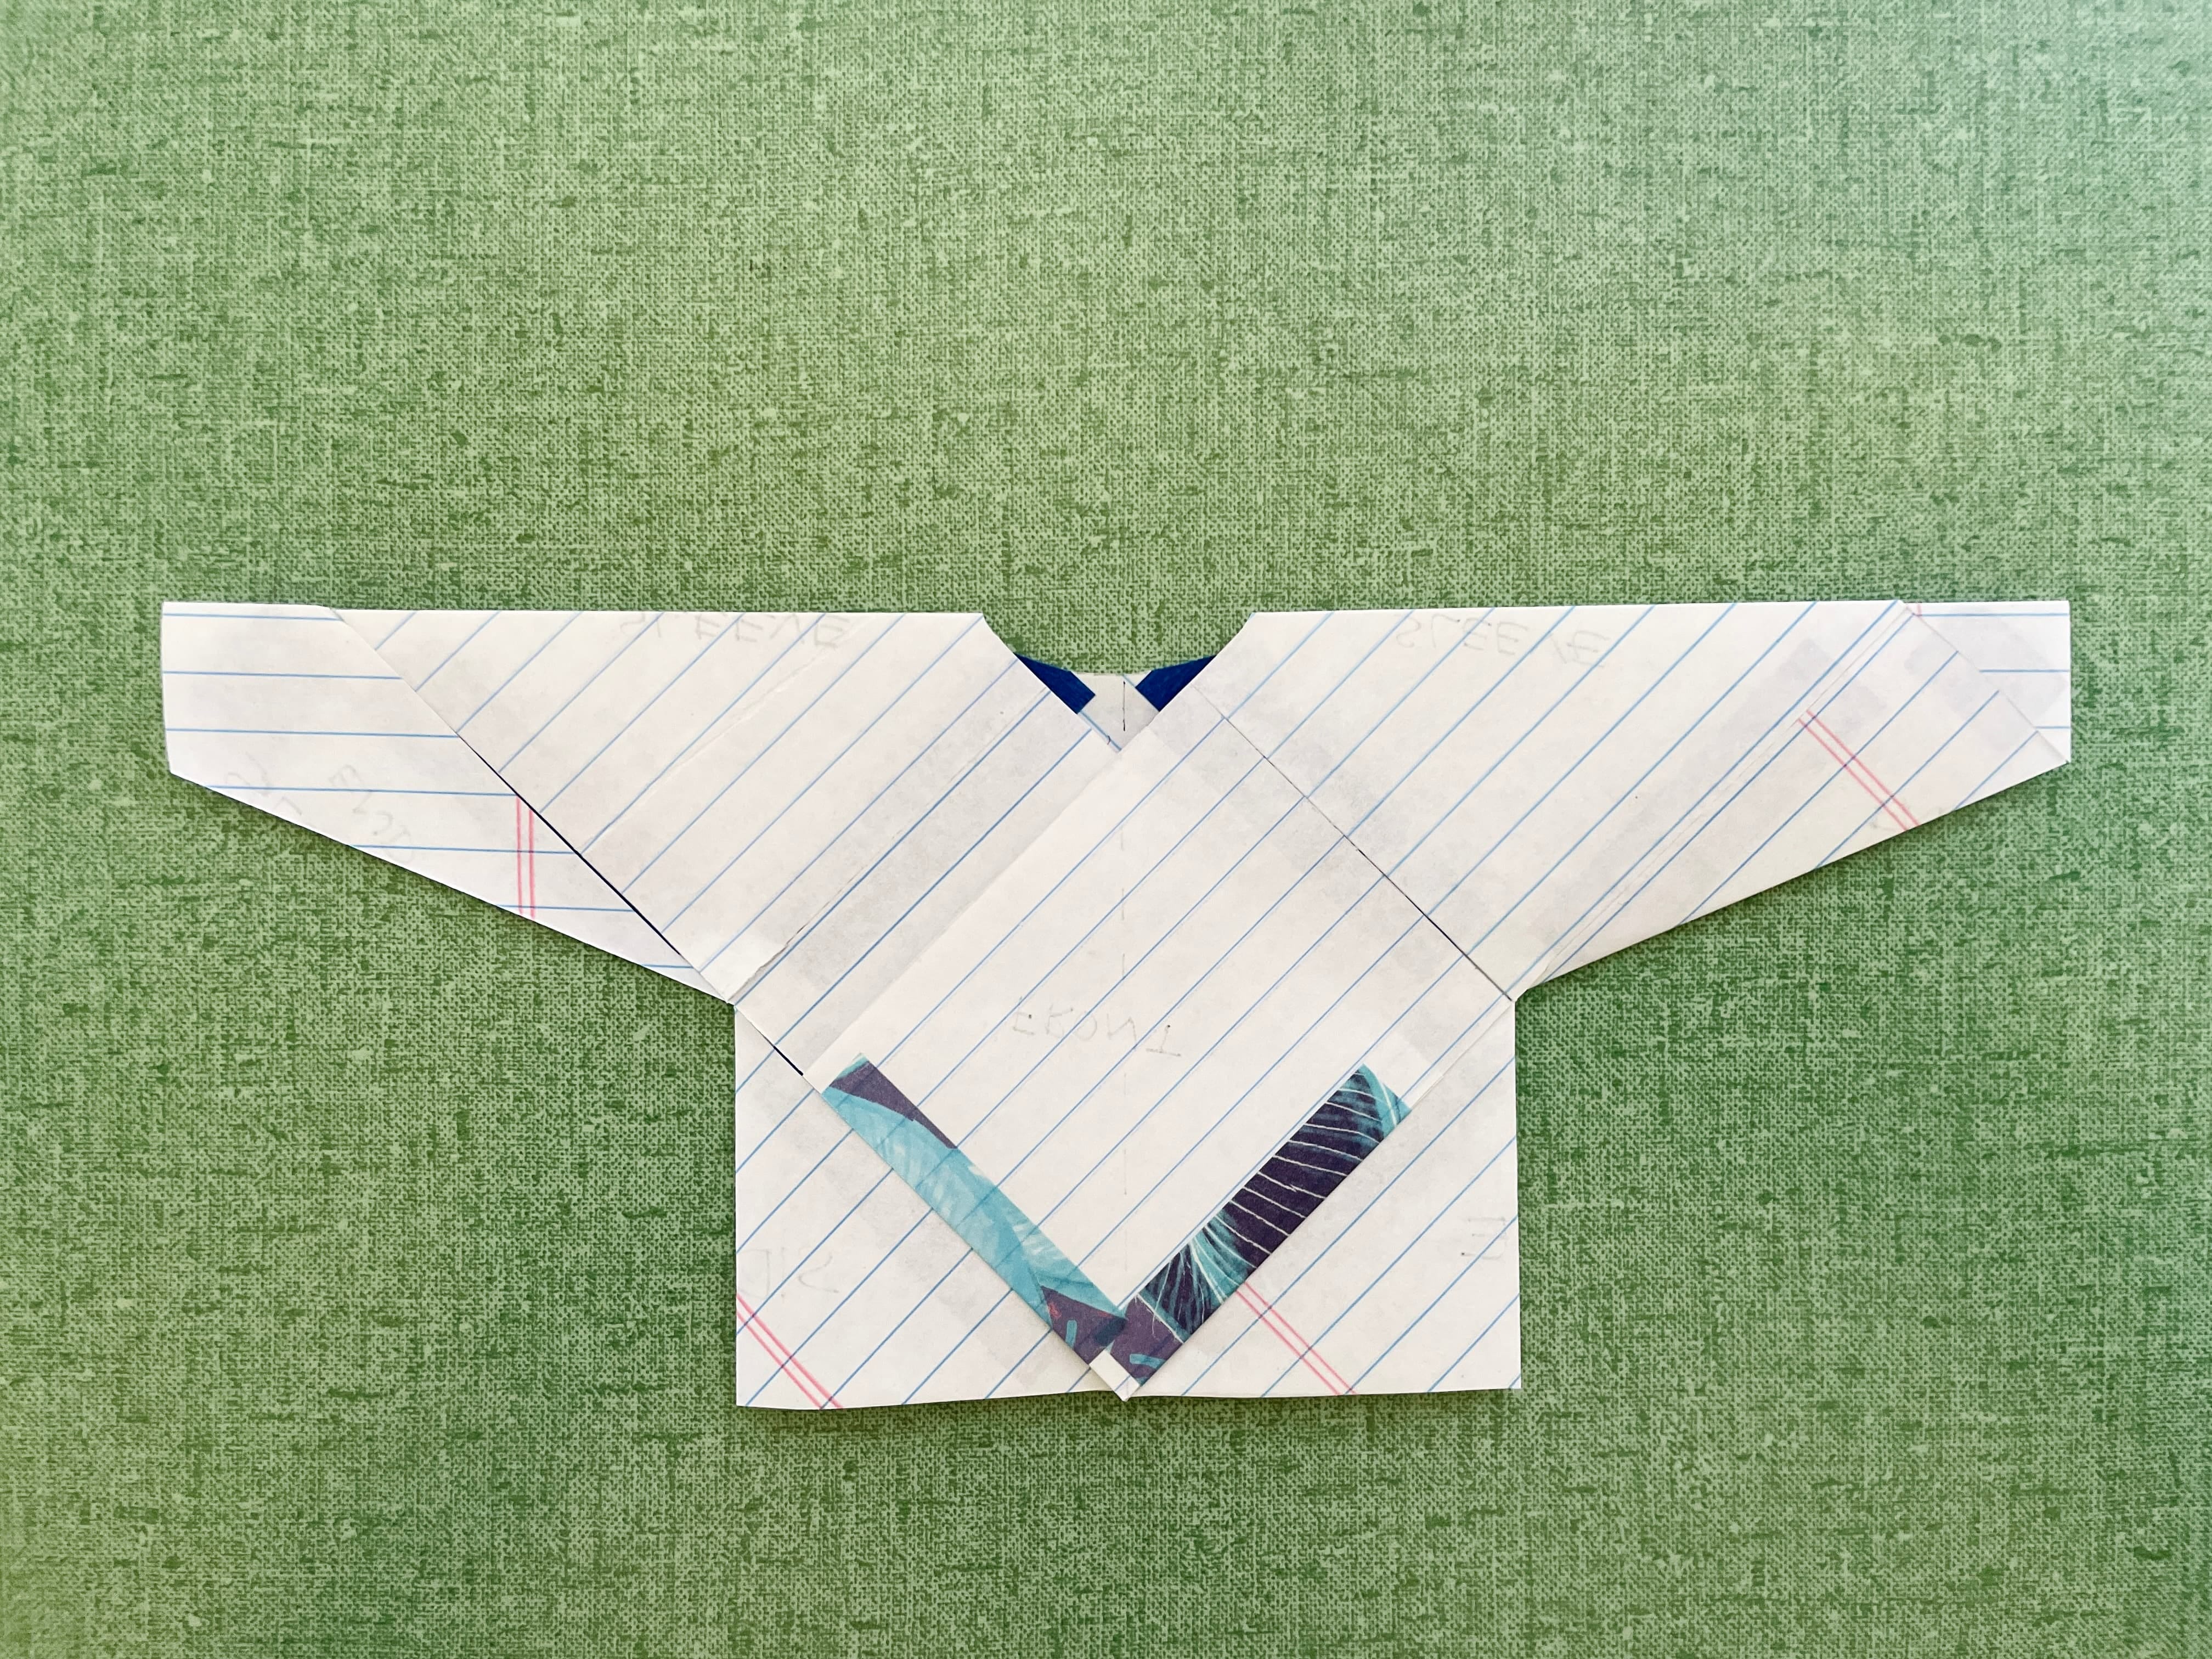
This is what the paper model looks like after all 7 squares are laid out and taped.
Yay! You made it this far. Let’s fold them.
Fold and Finish
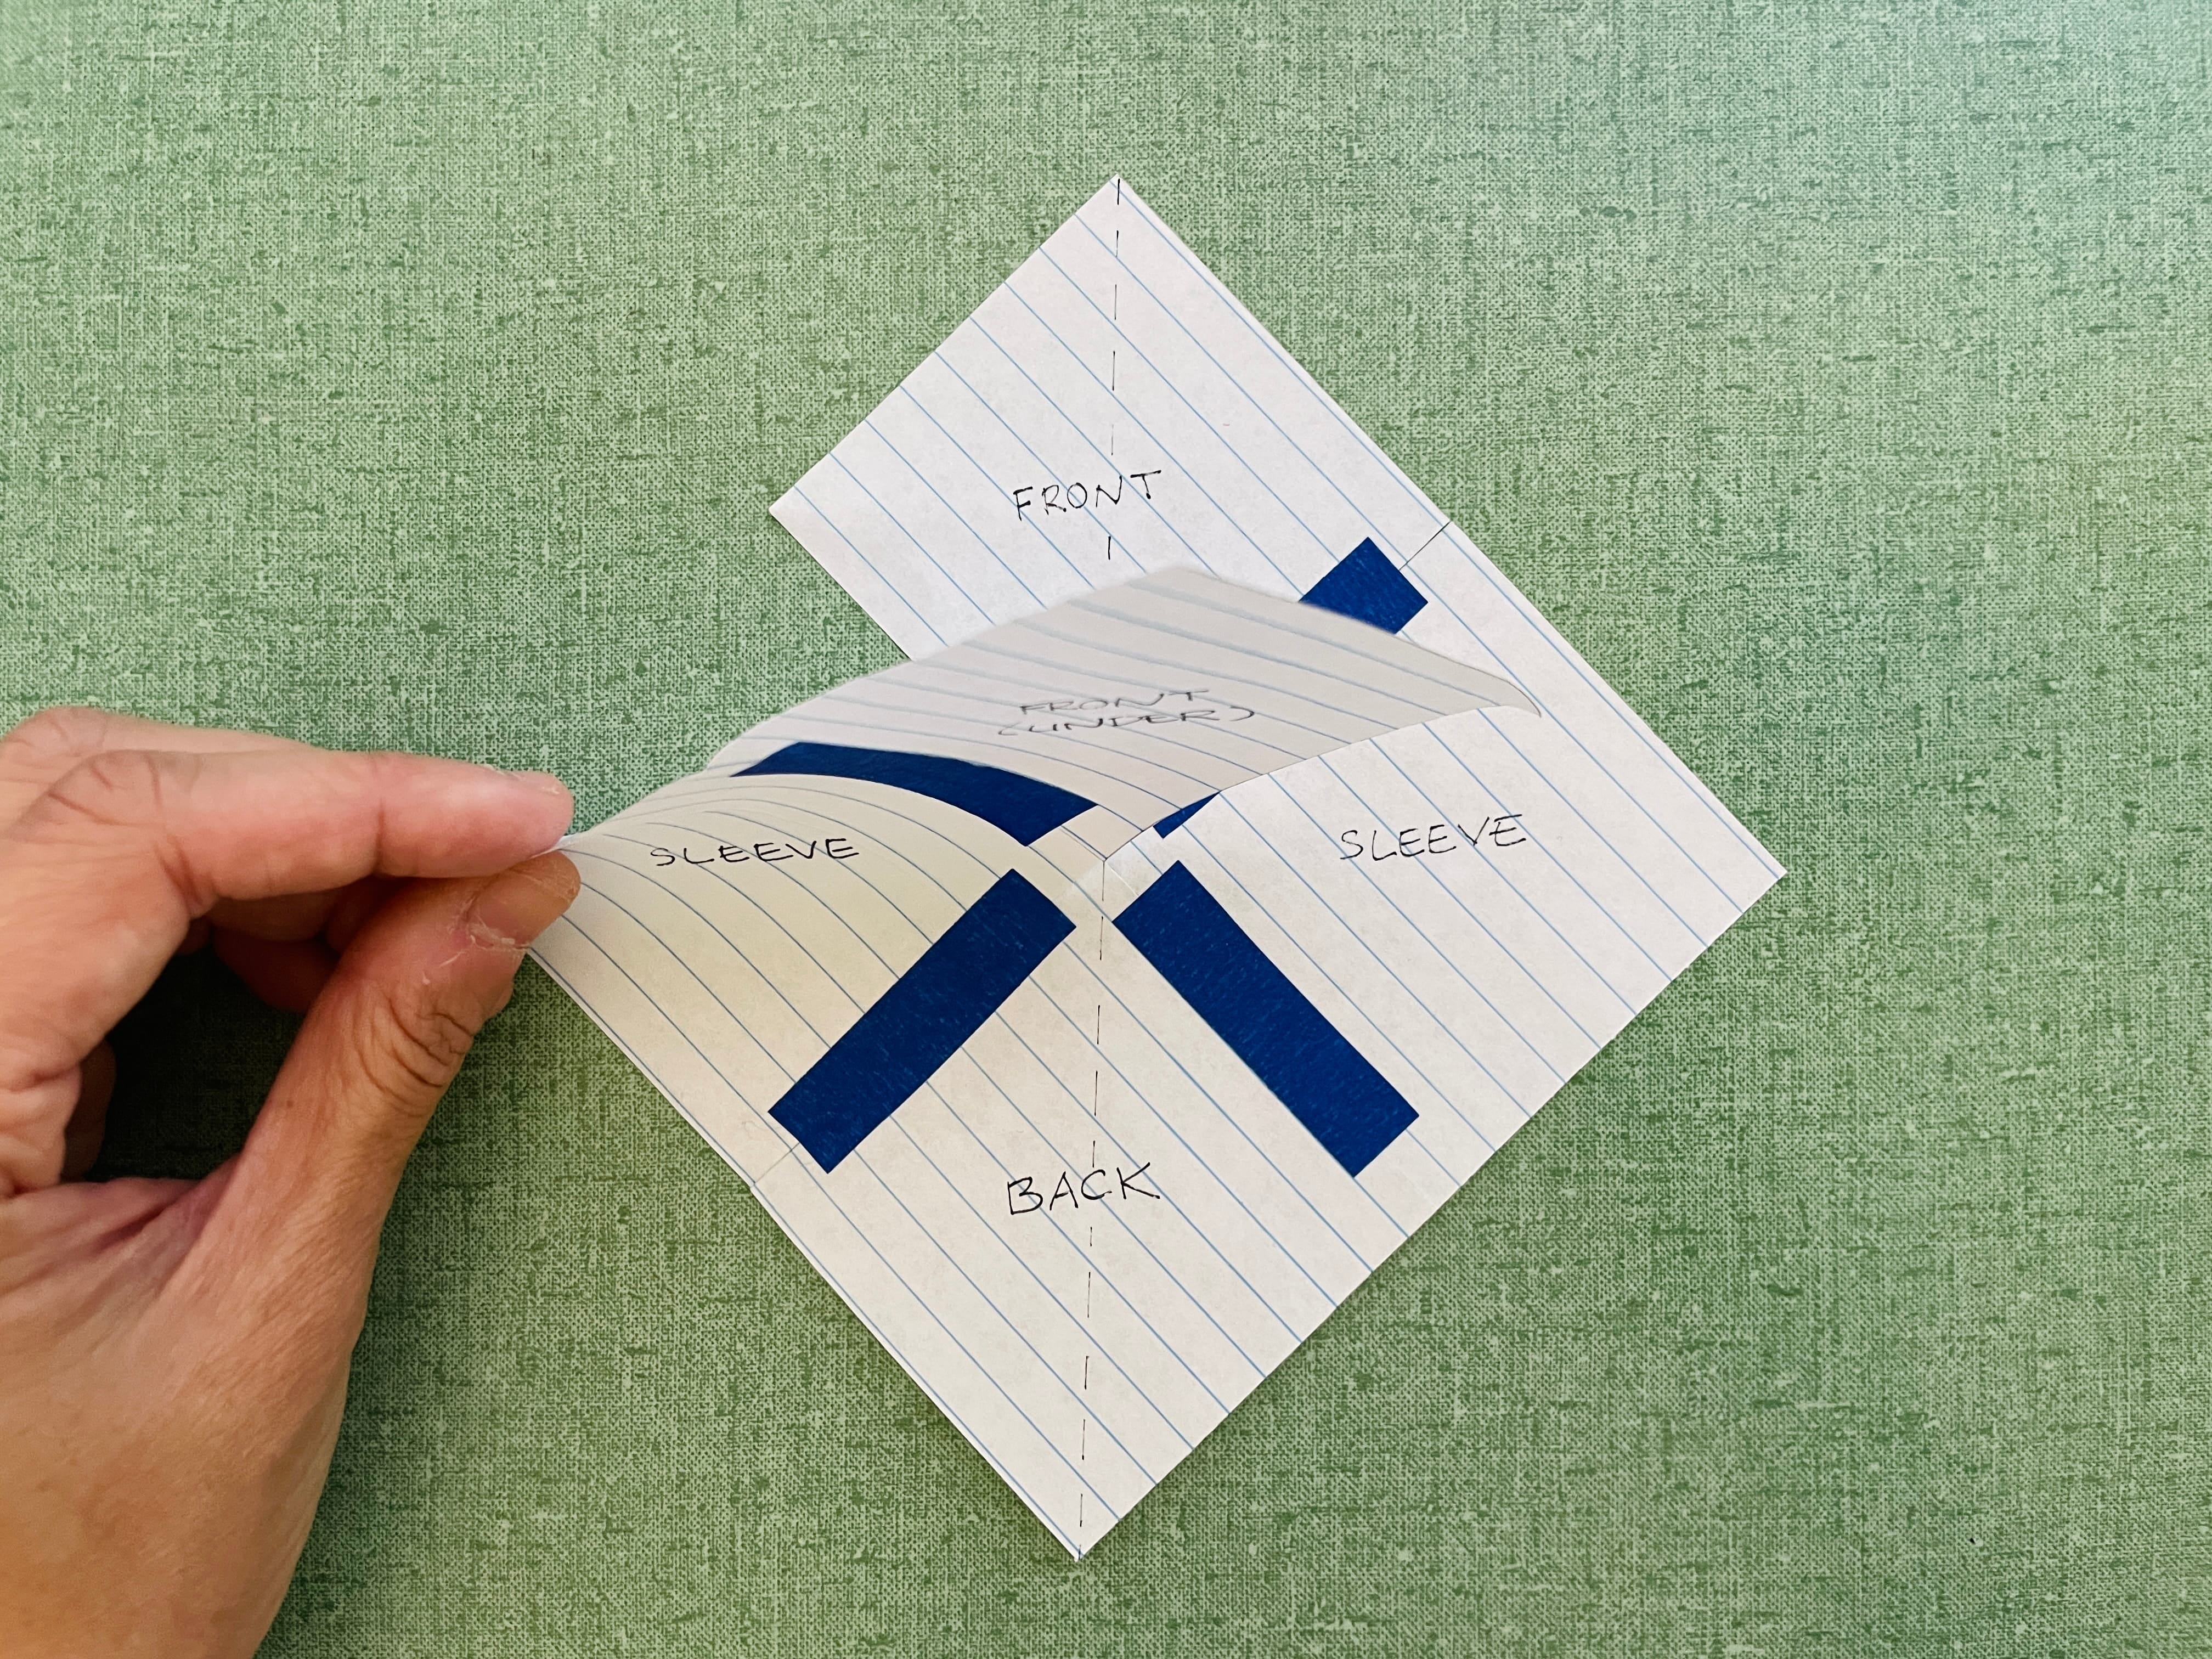
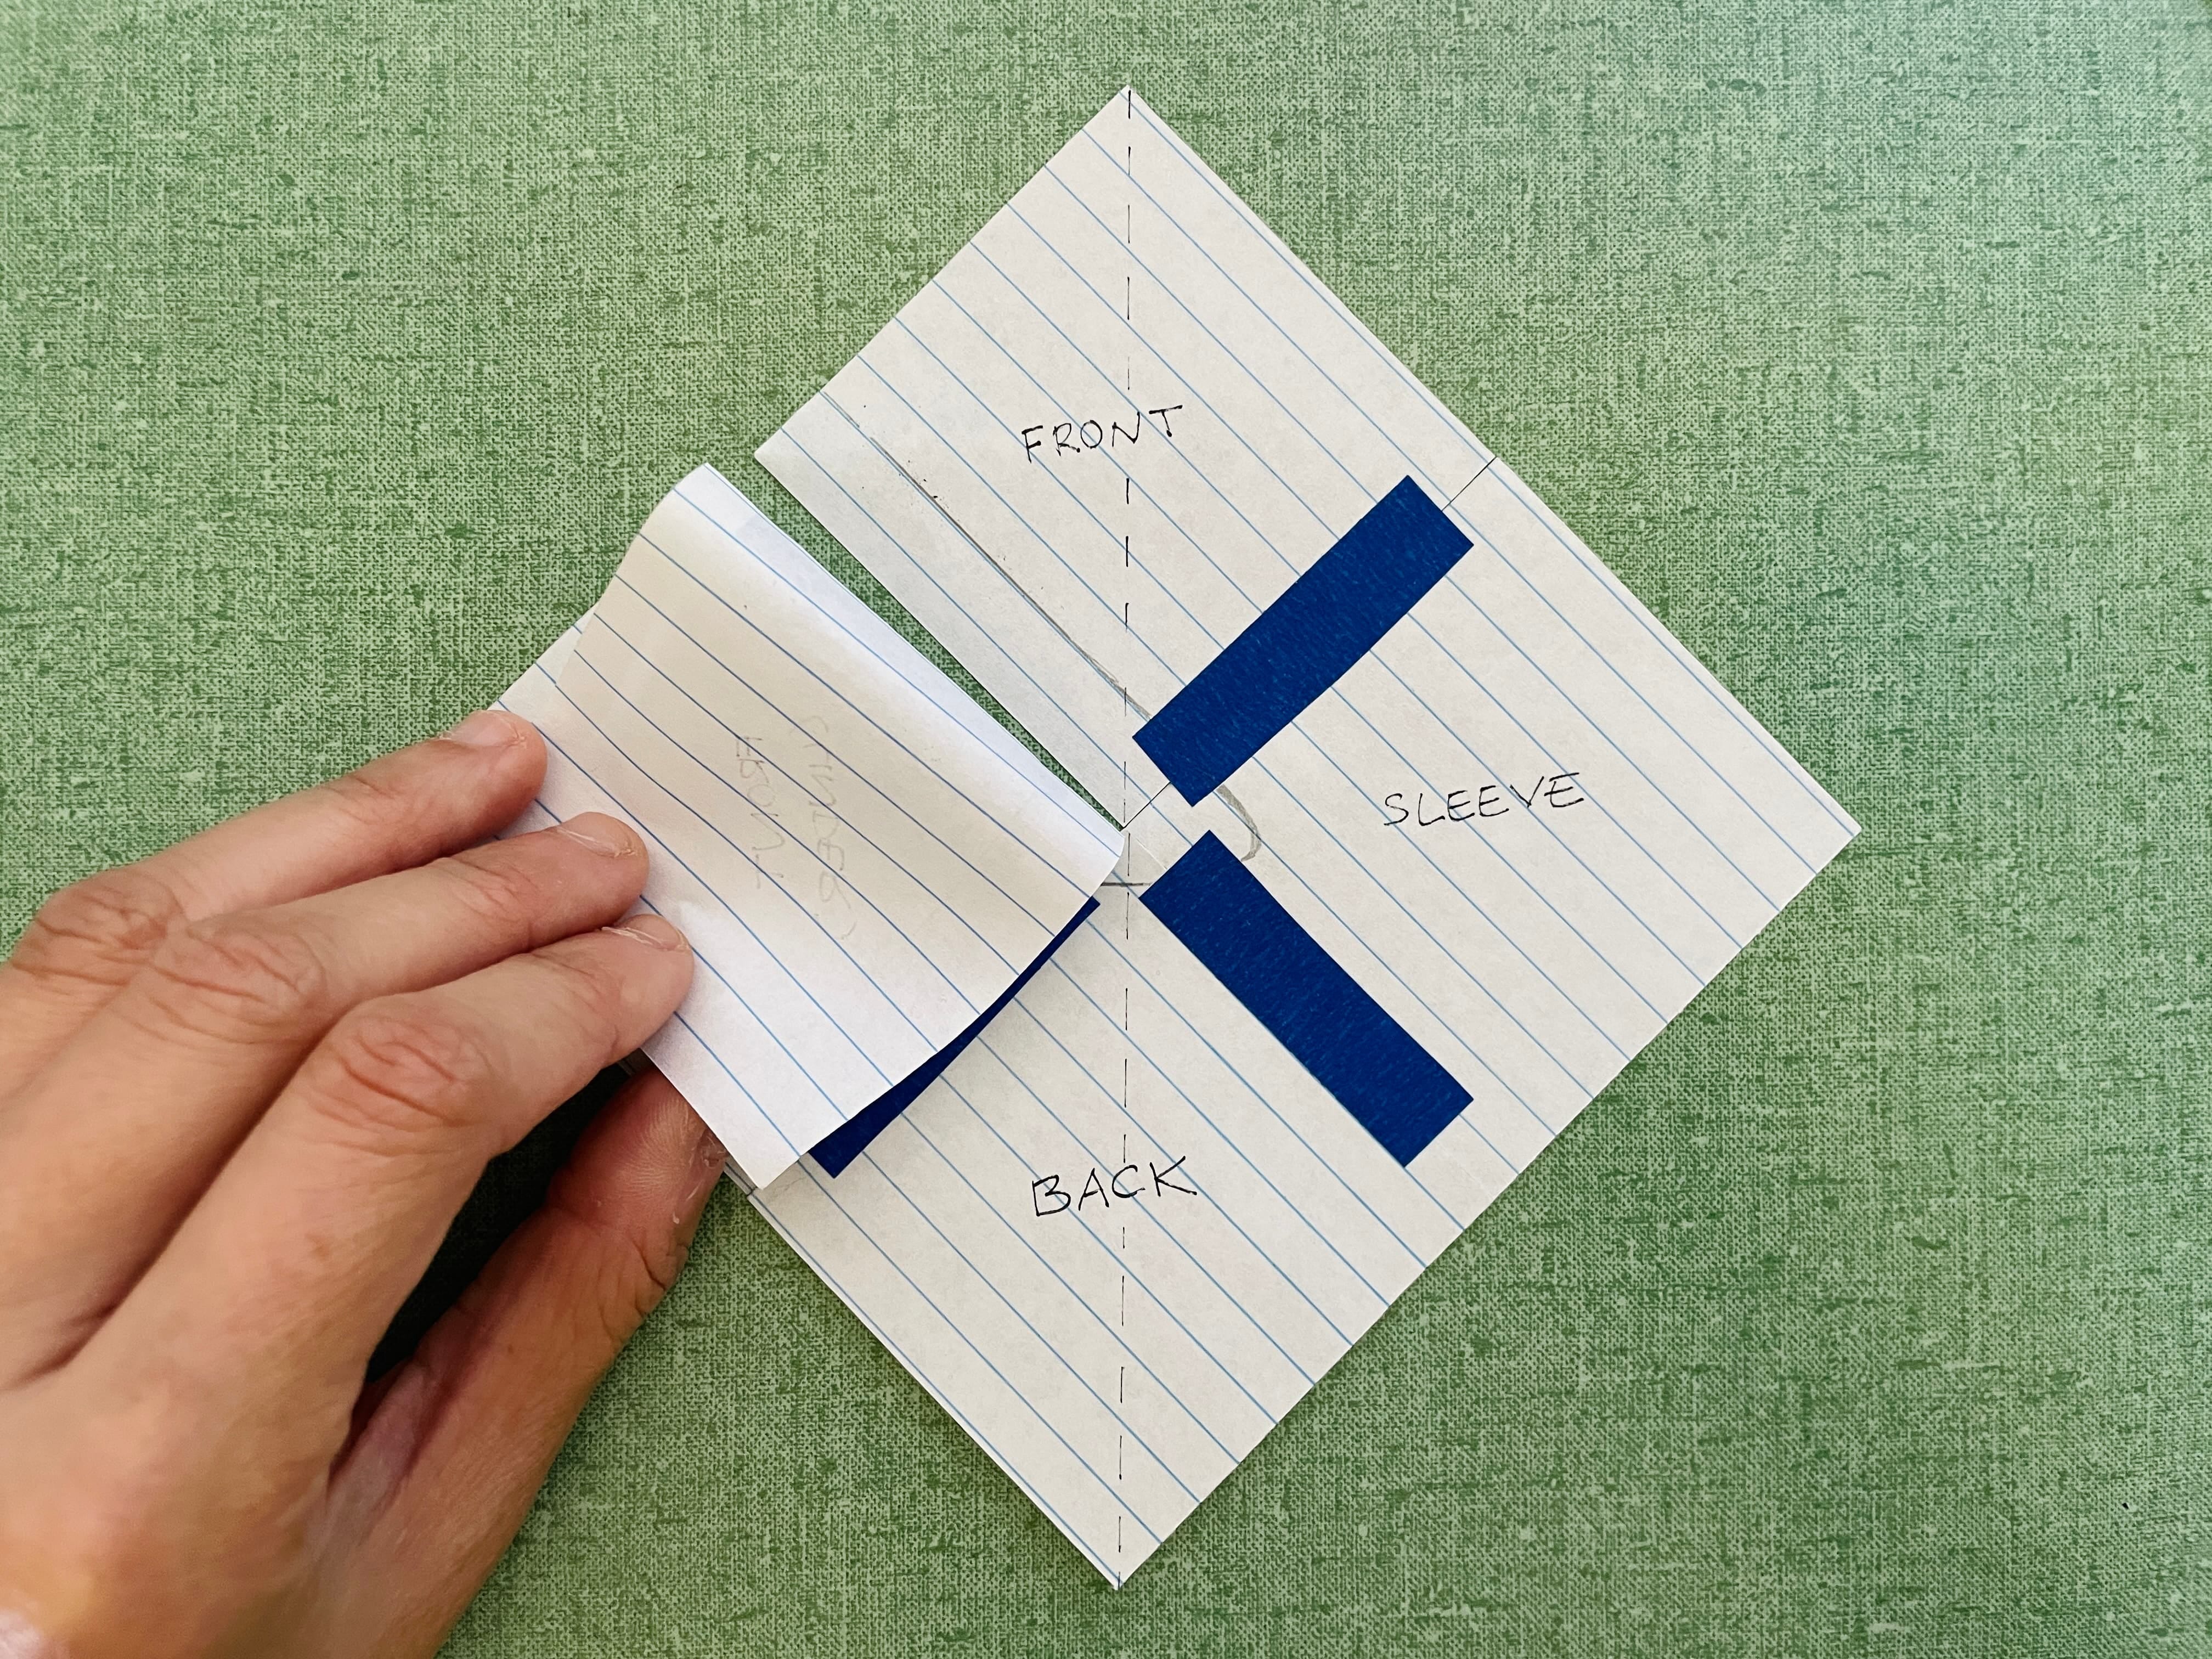
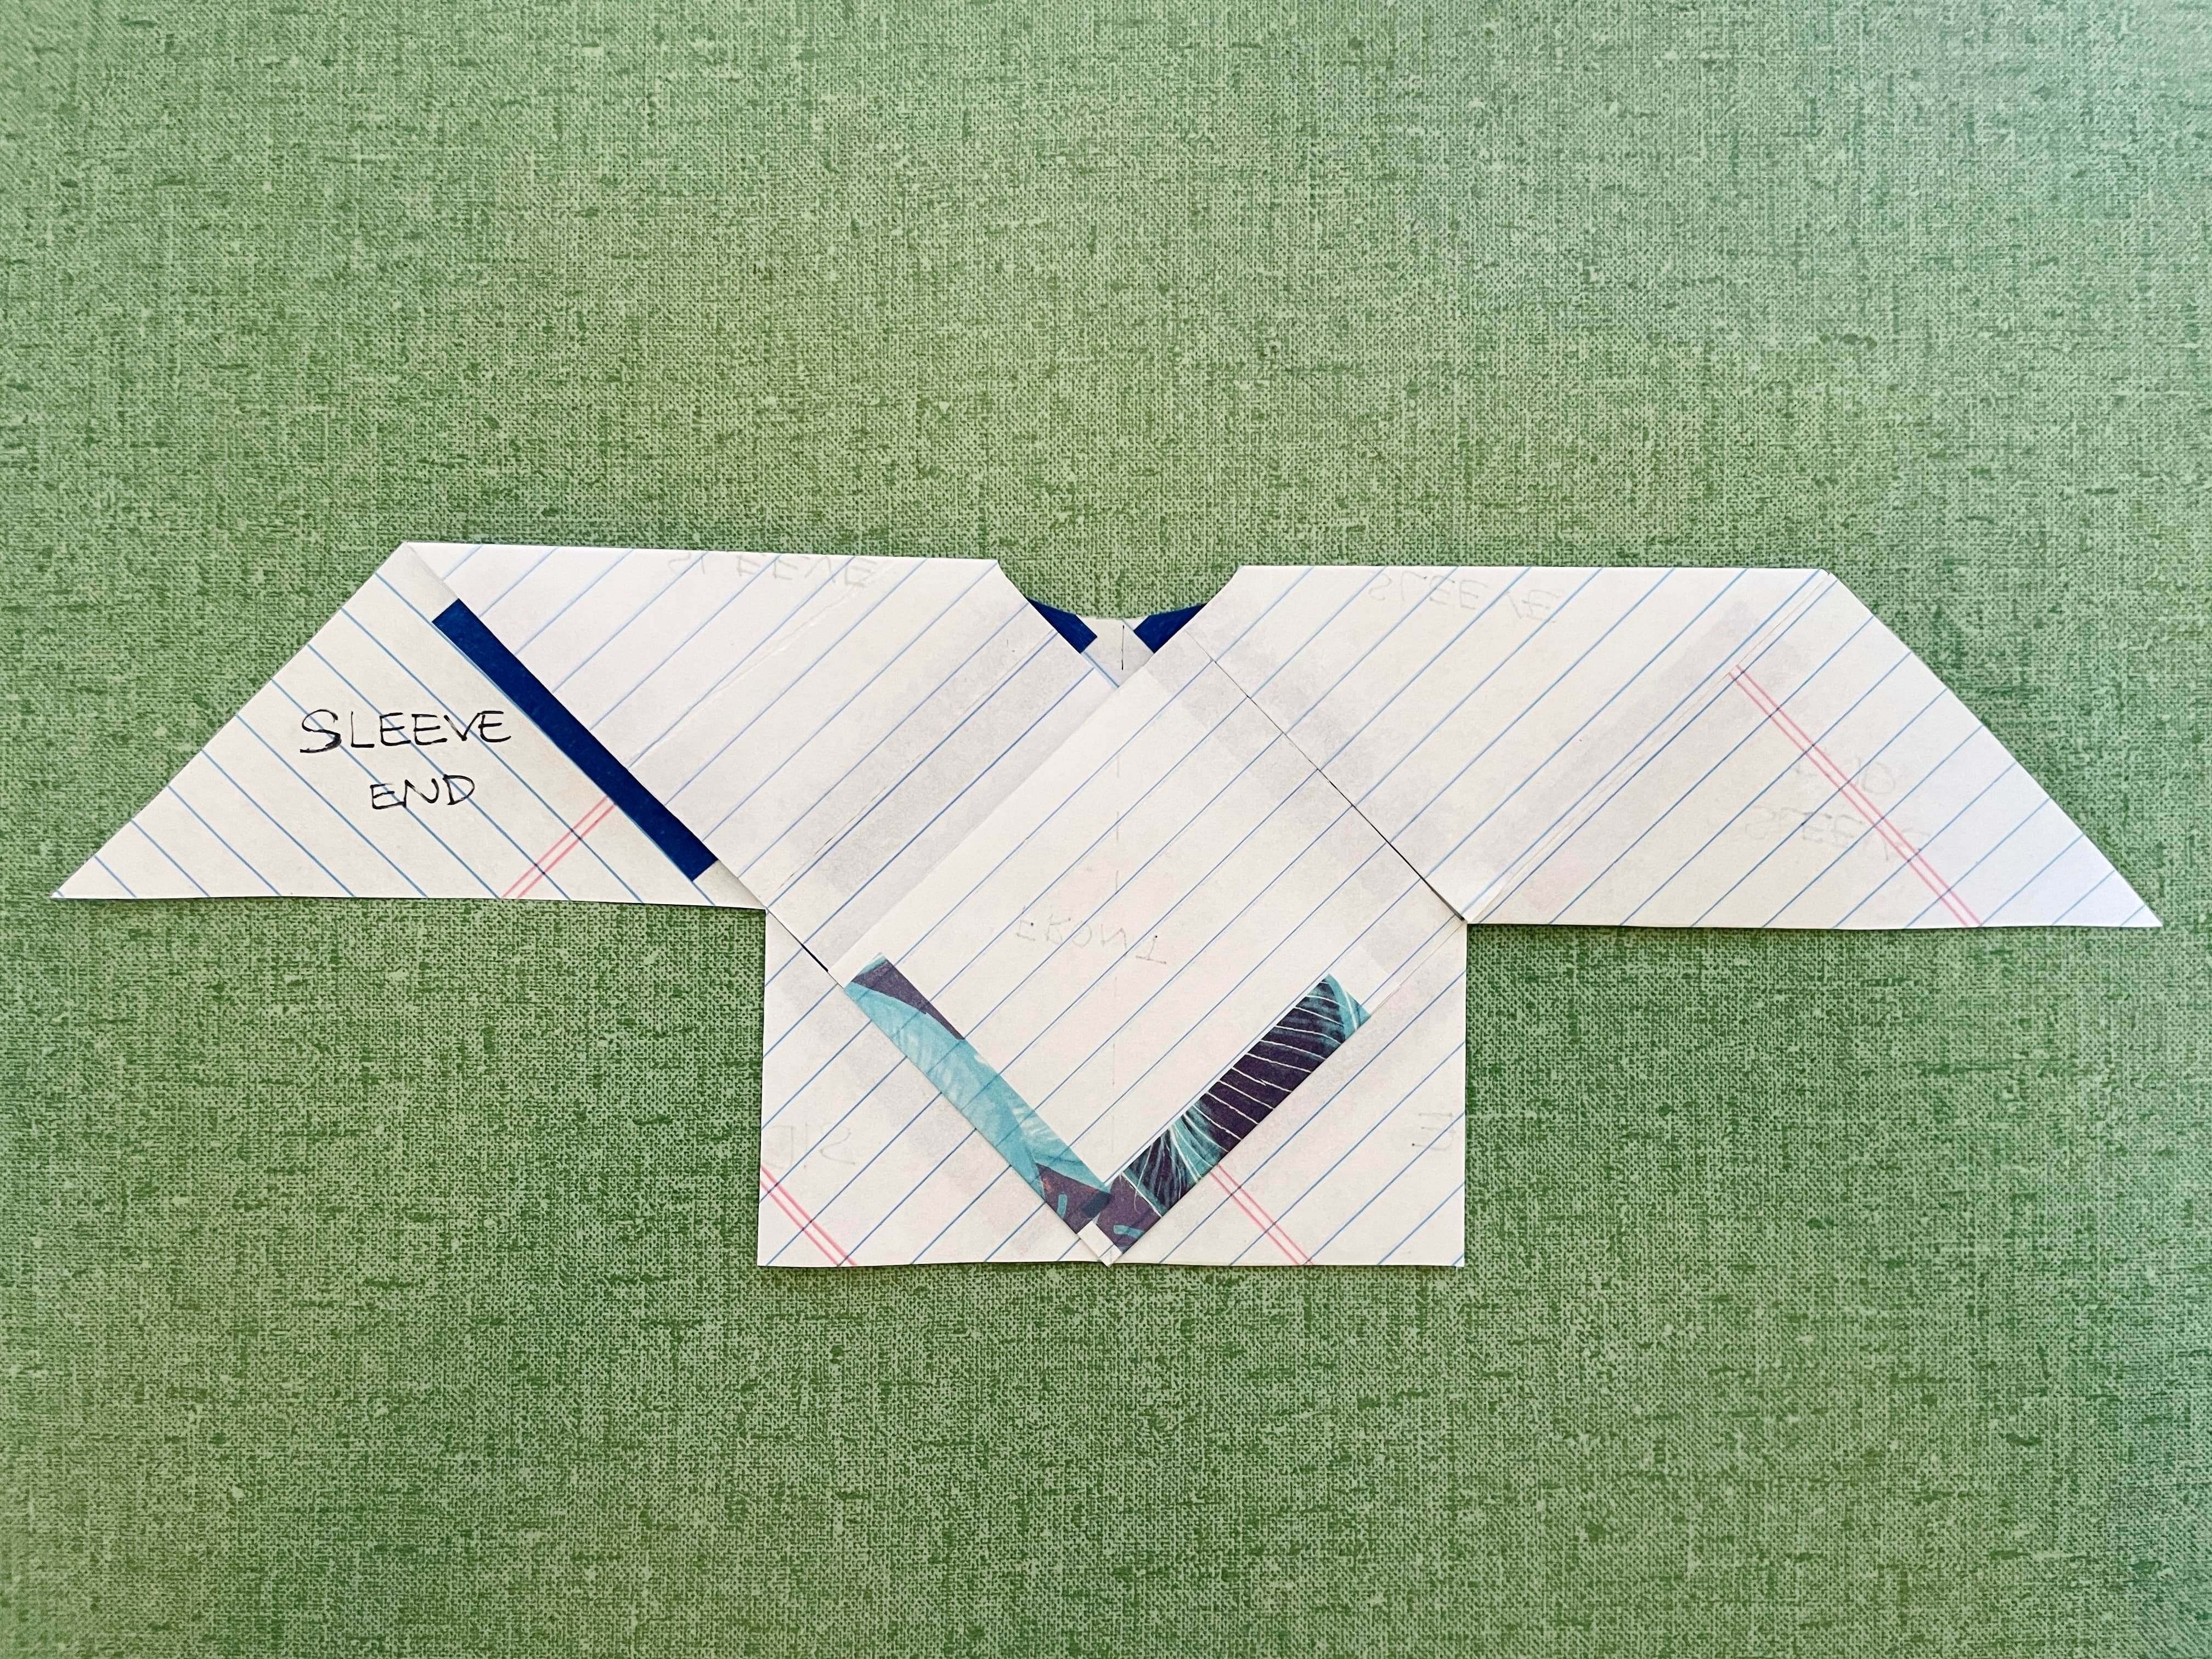
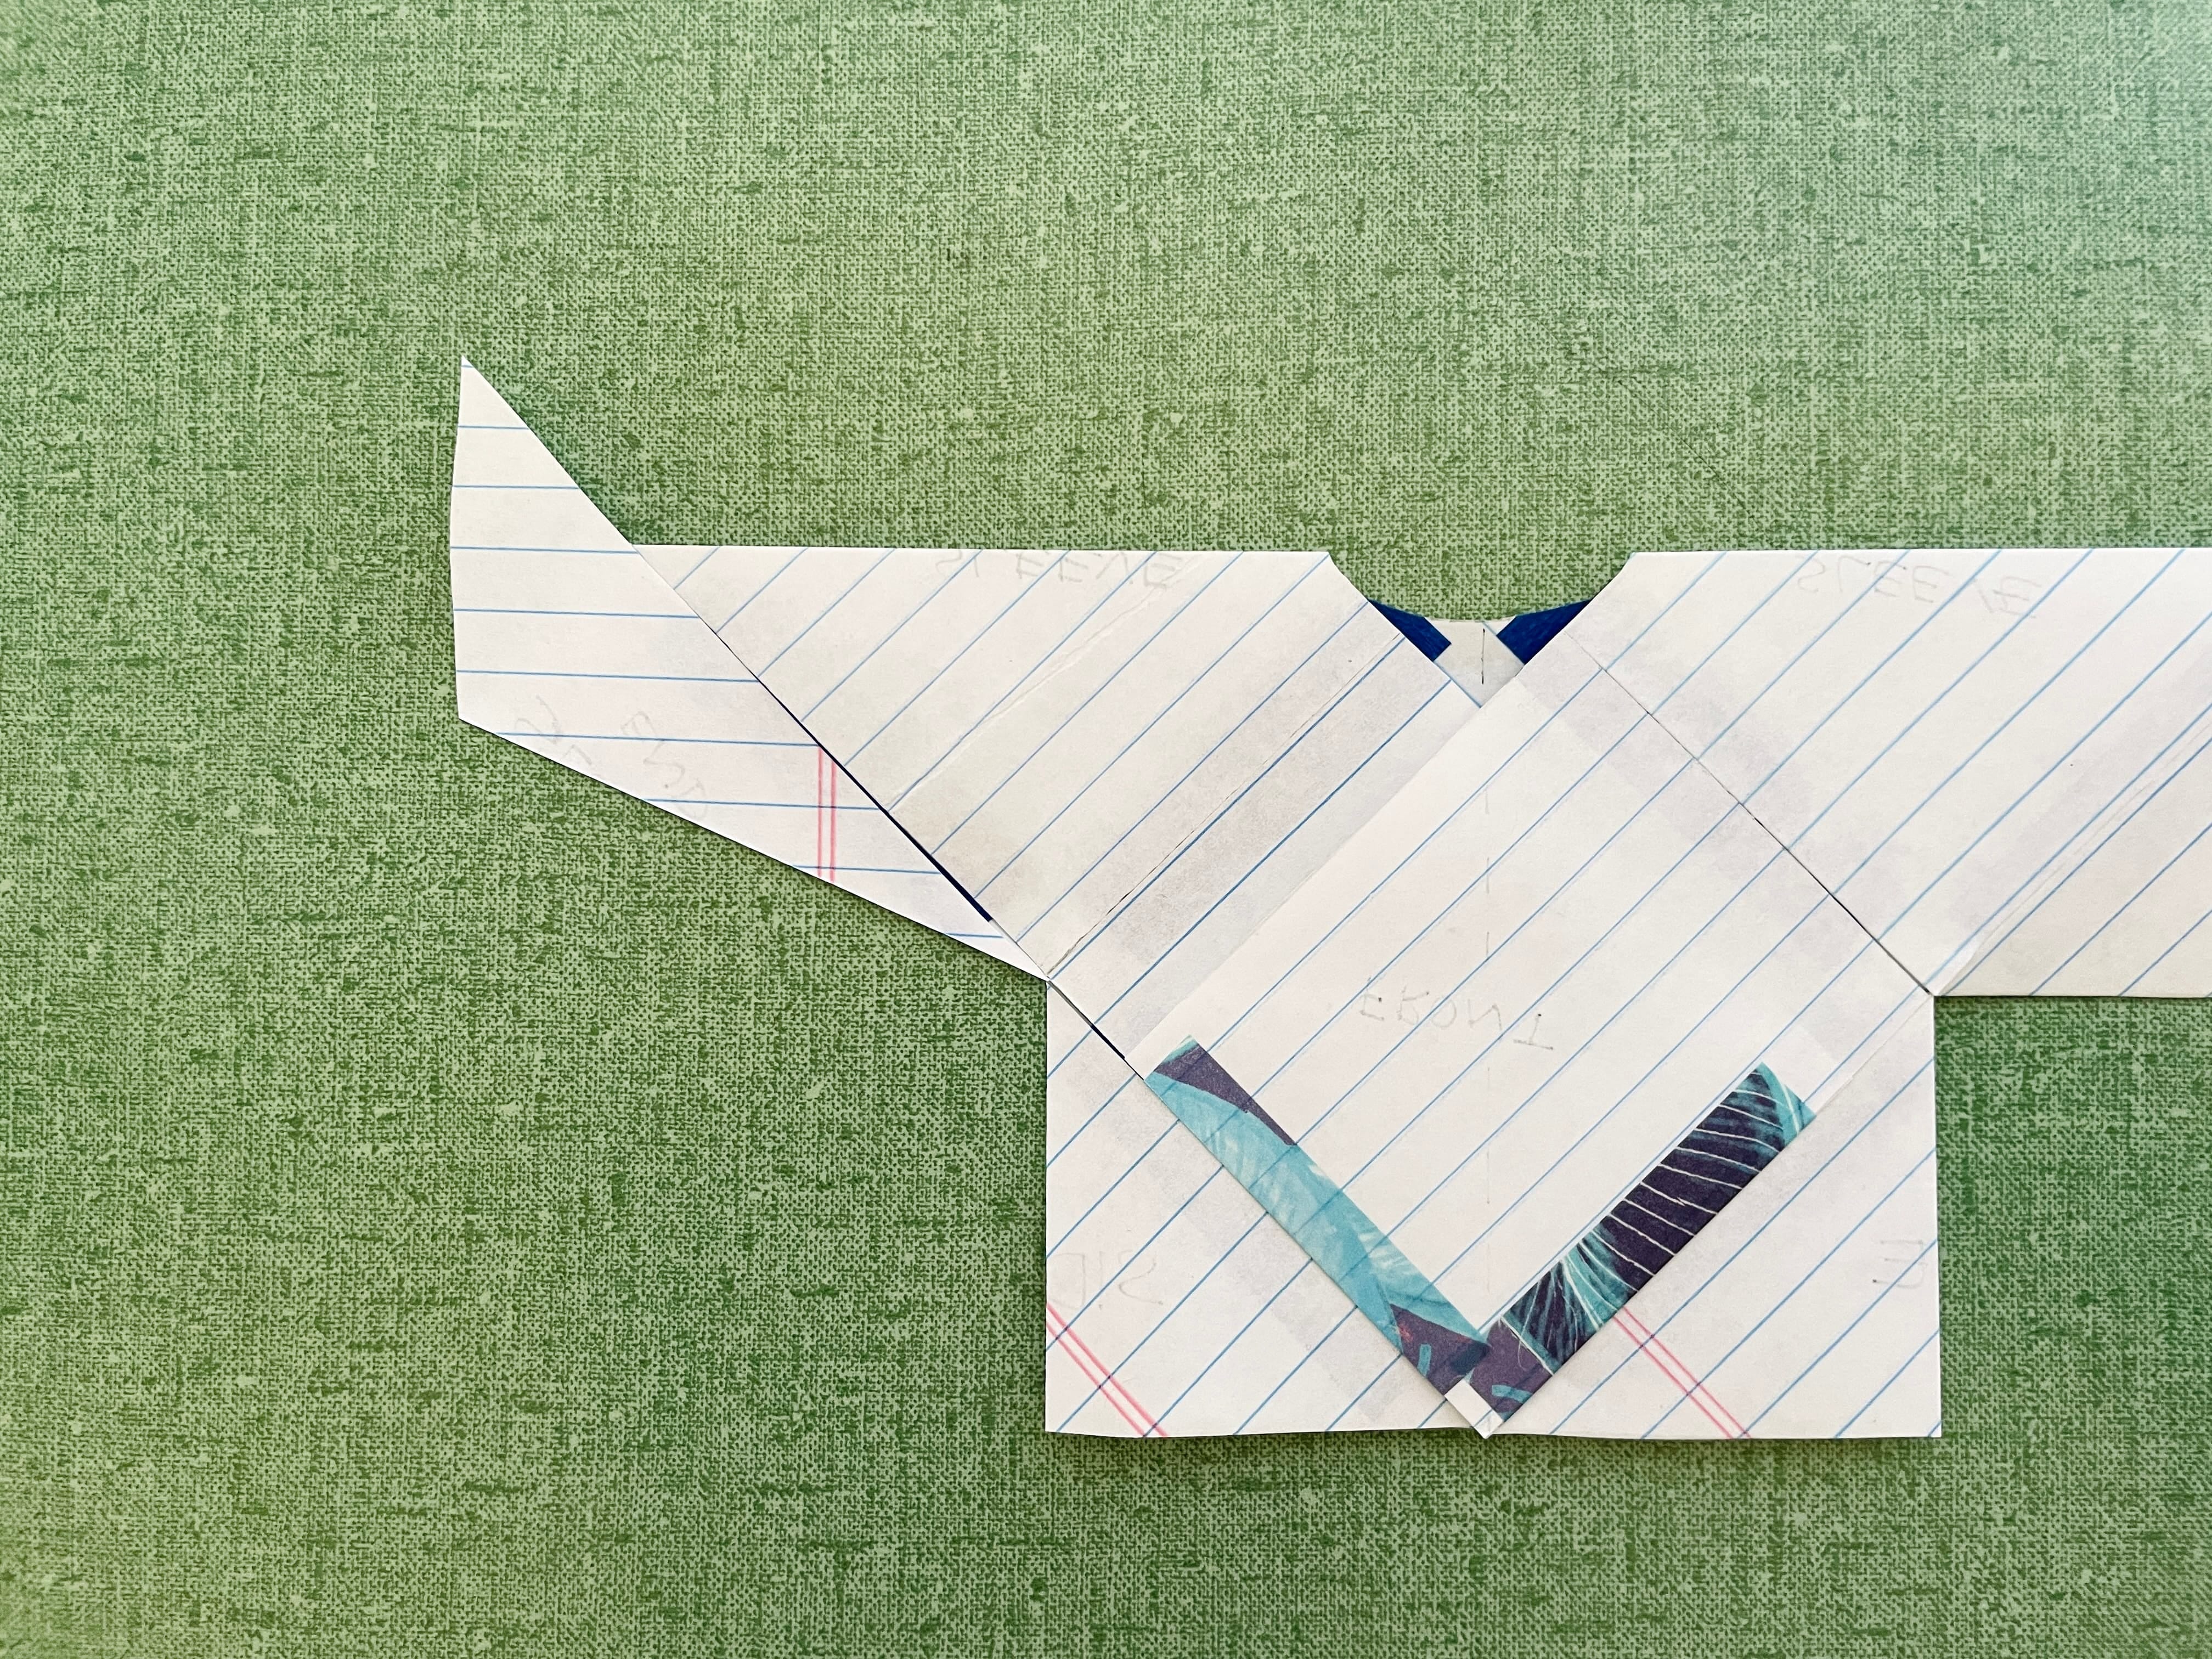
It’s time for the fun part. Fold the front panels towards you, creasing the shoulder line.
The front (under) panel is folded first.
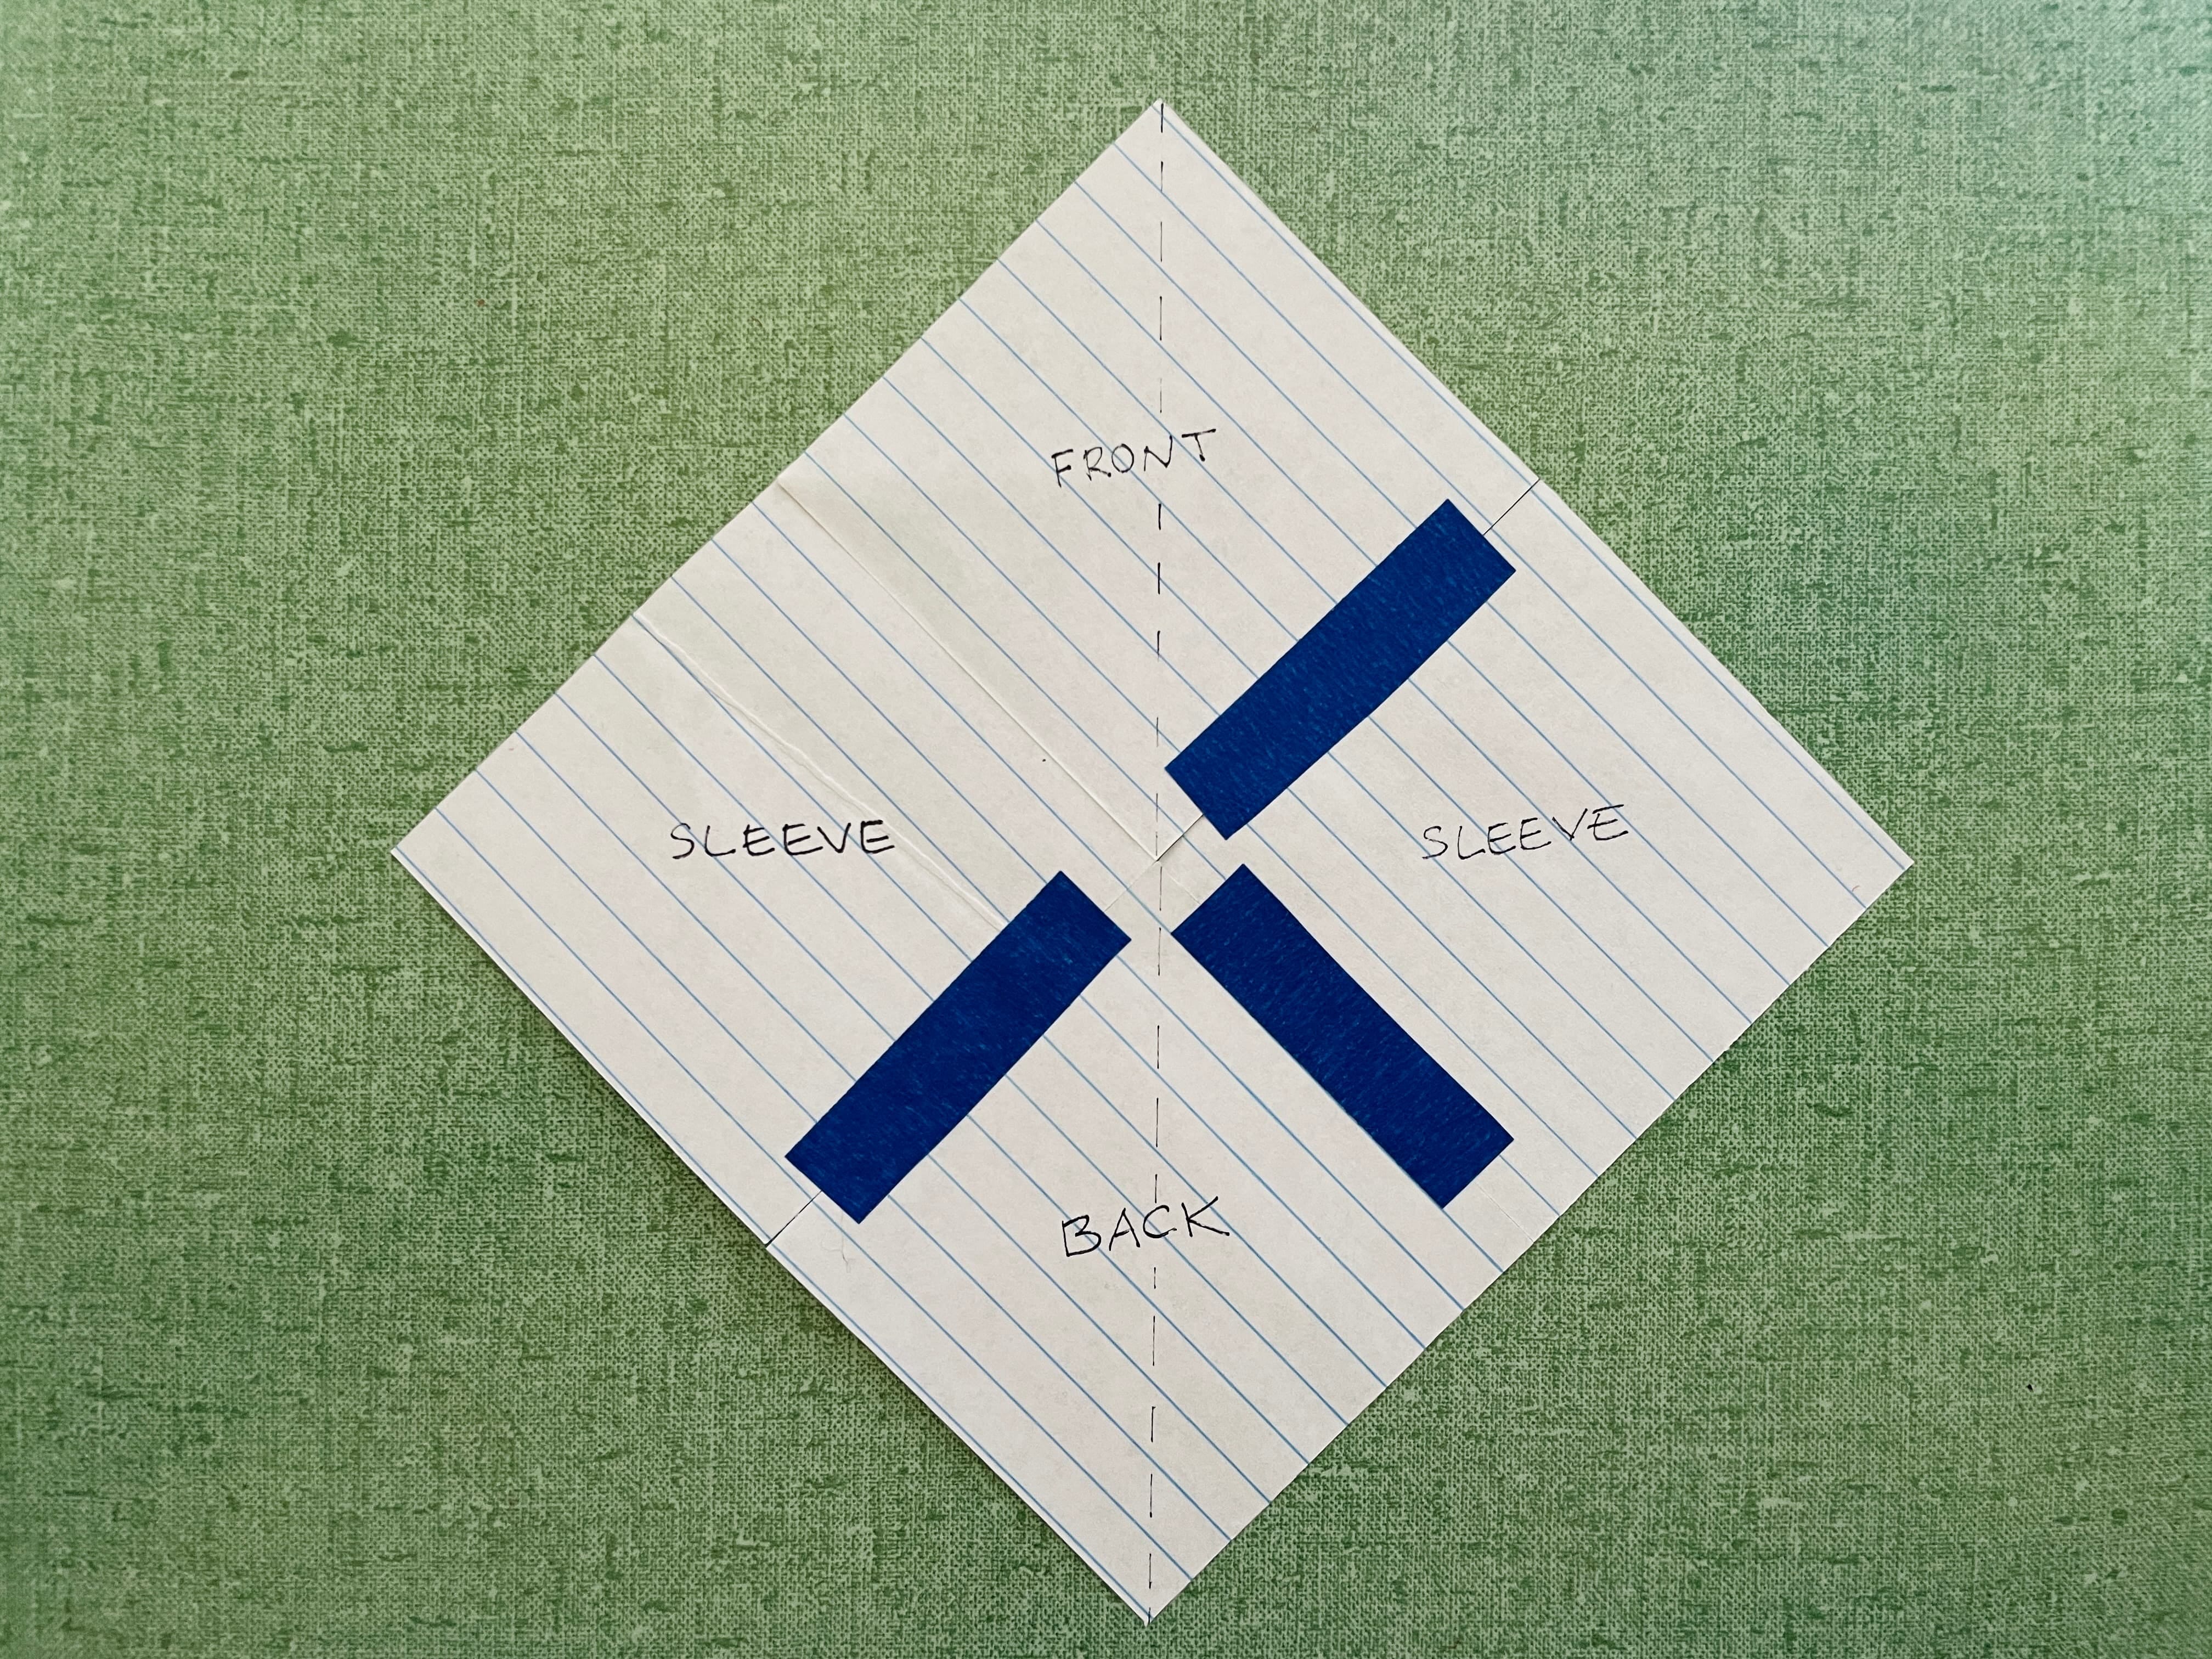
The true front panel is folded next.
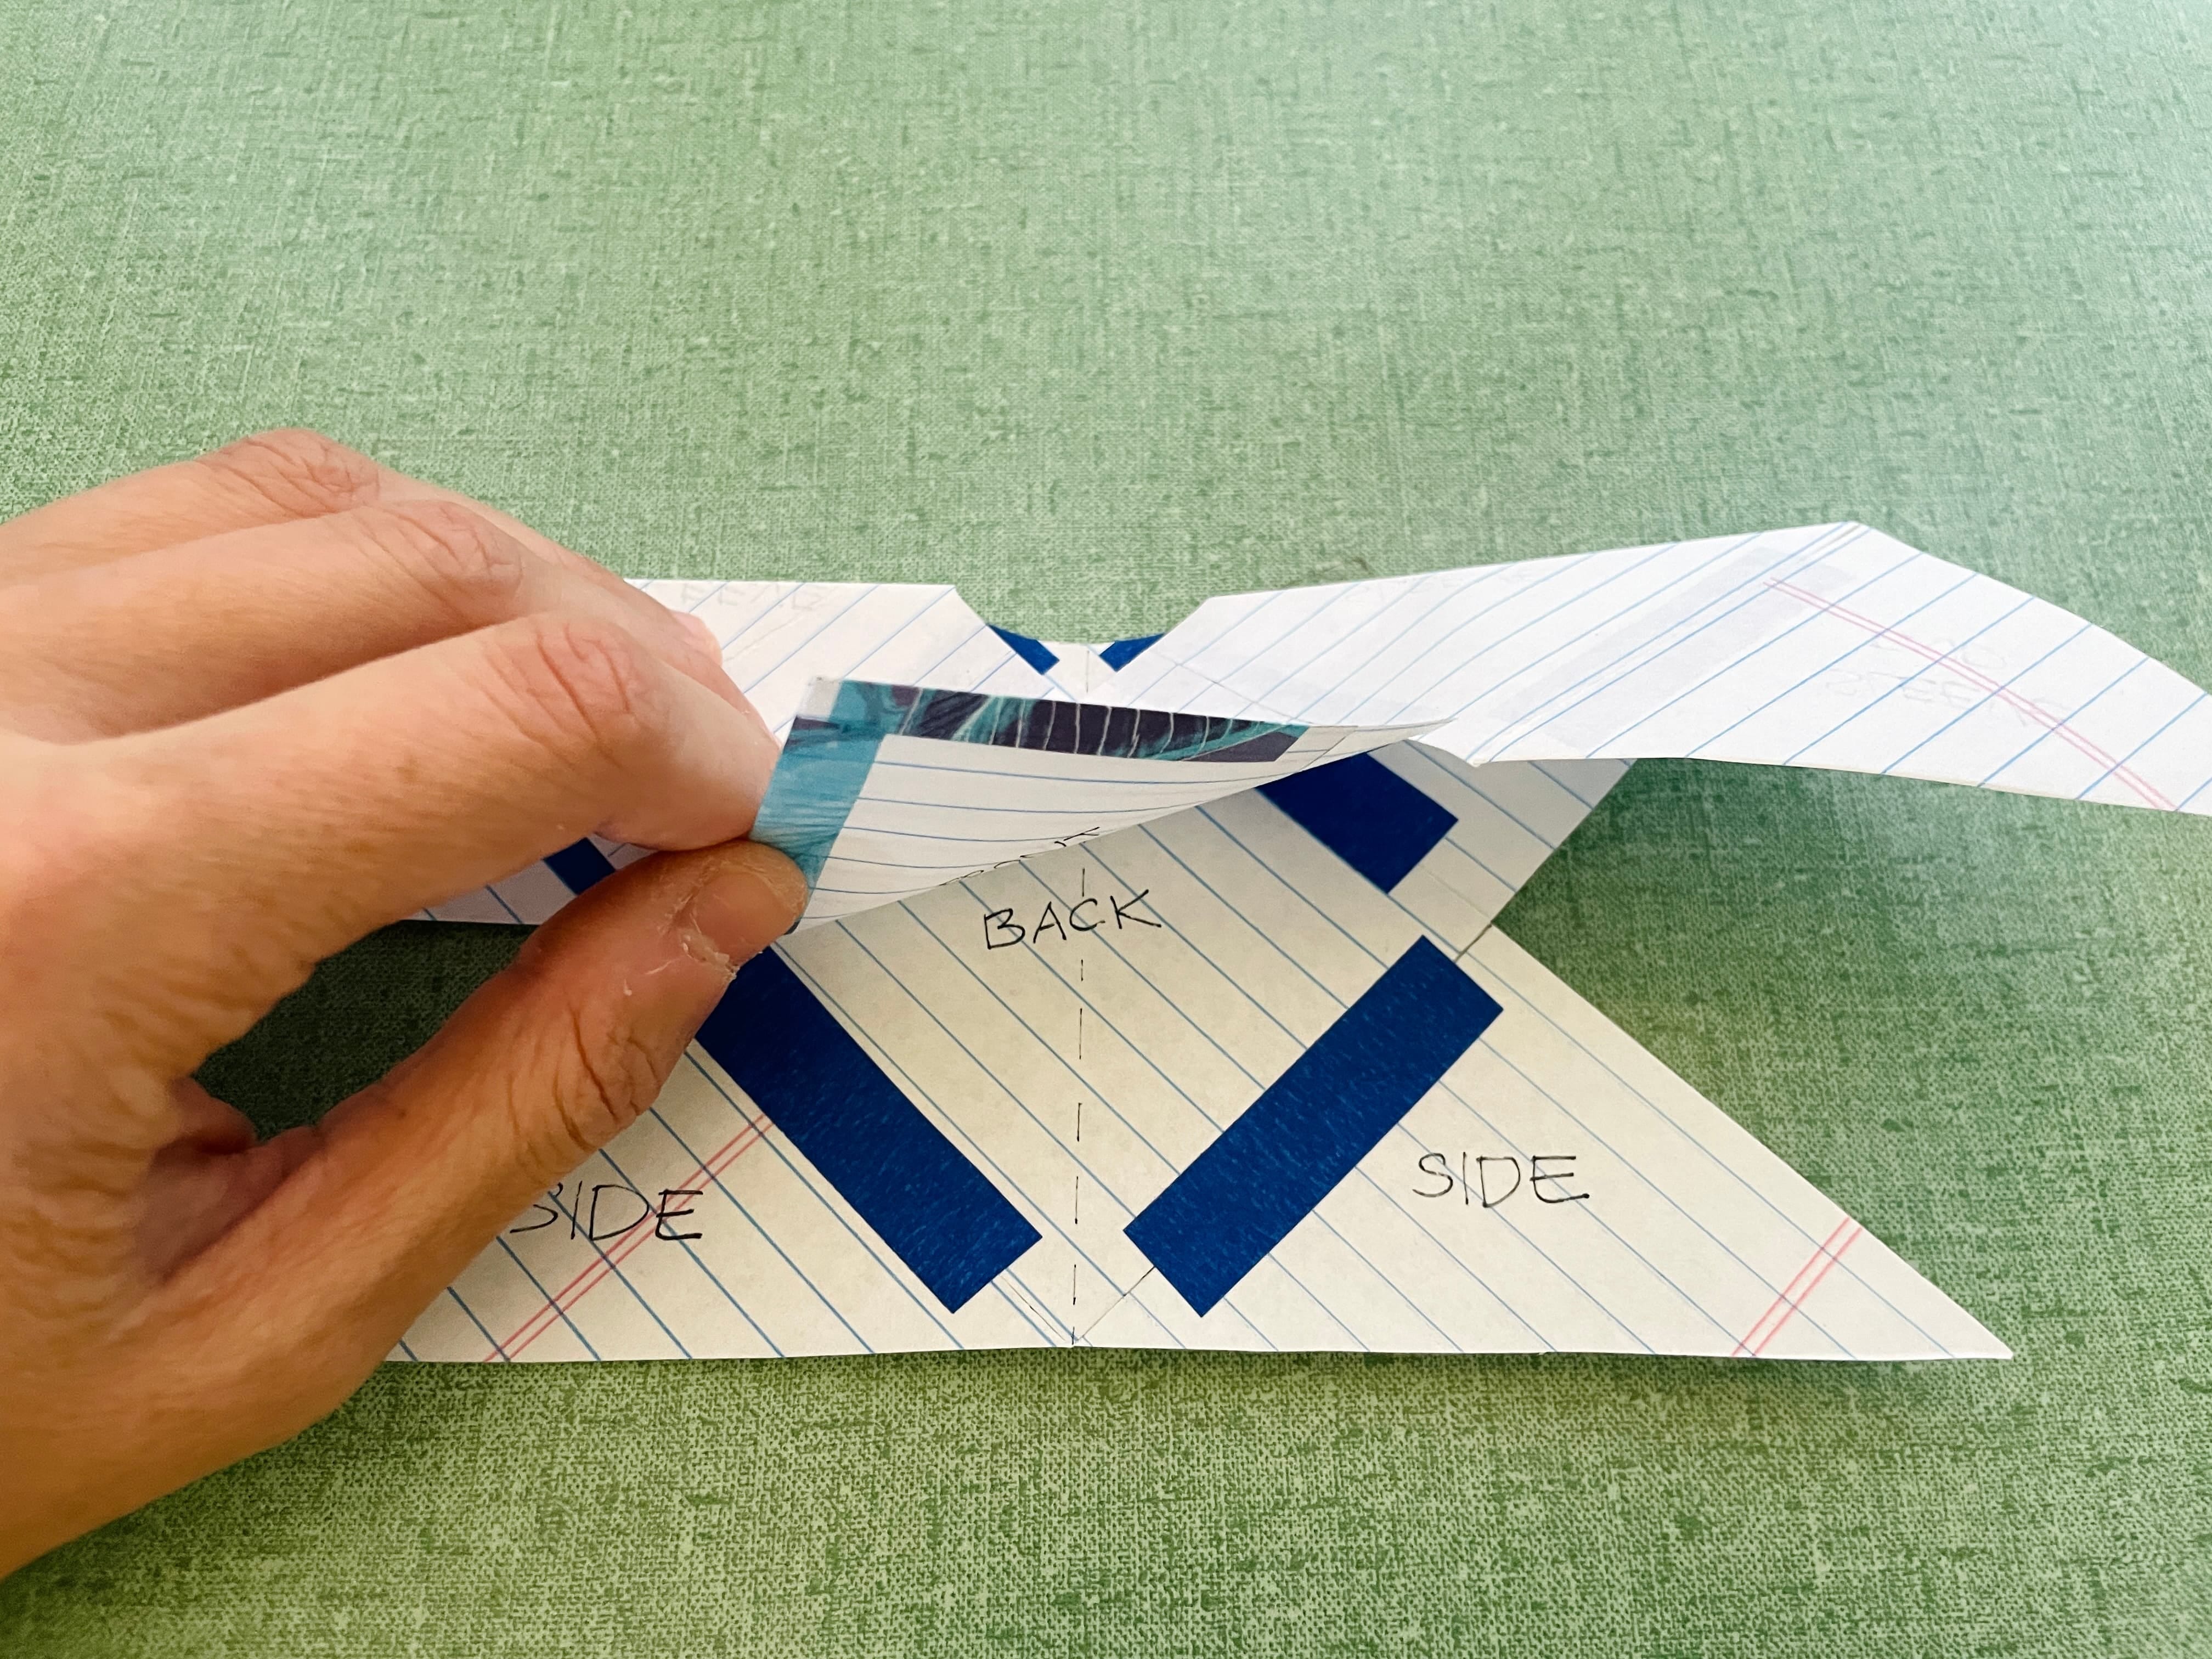
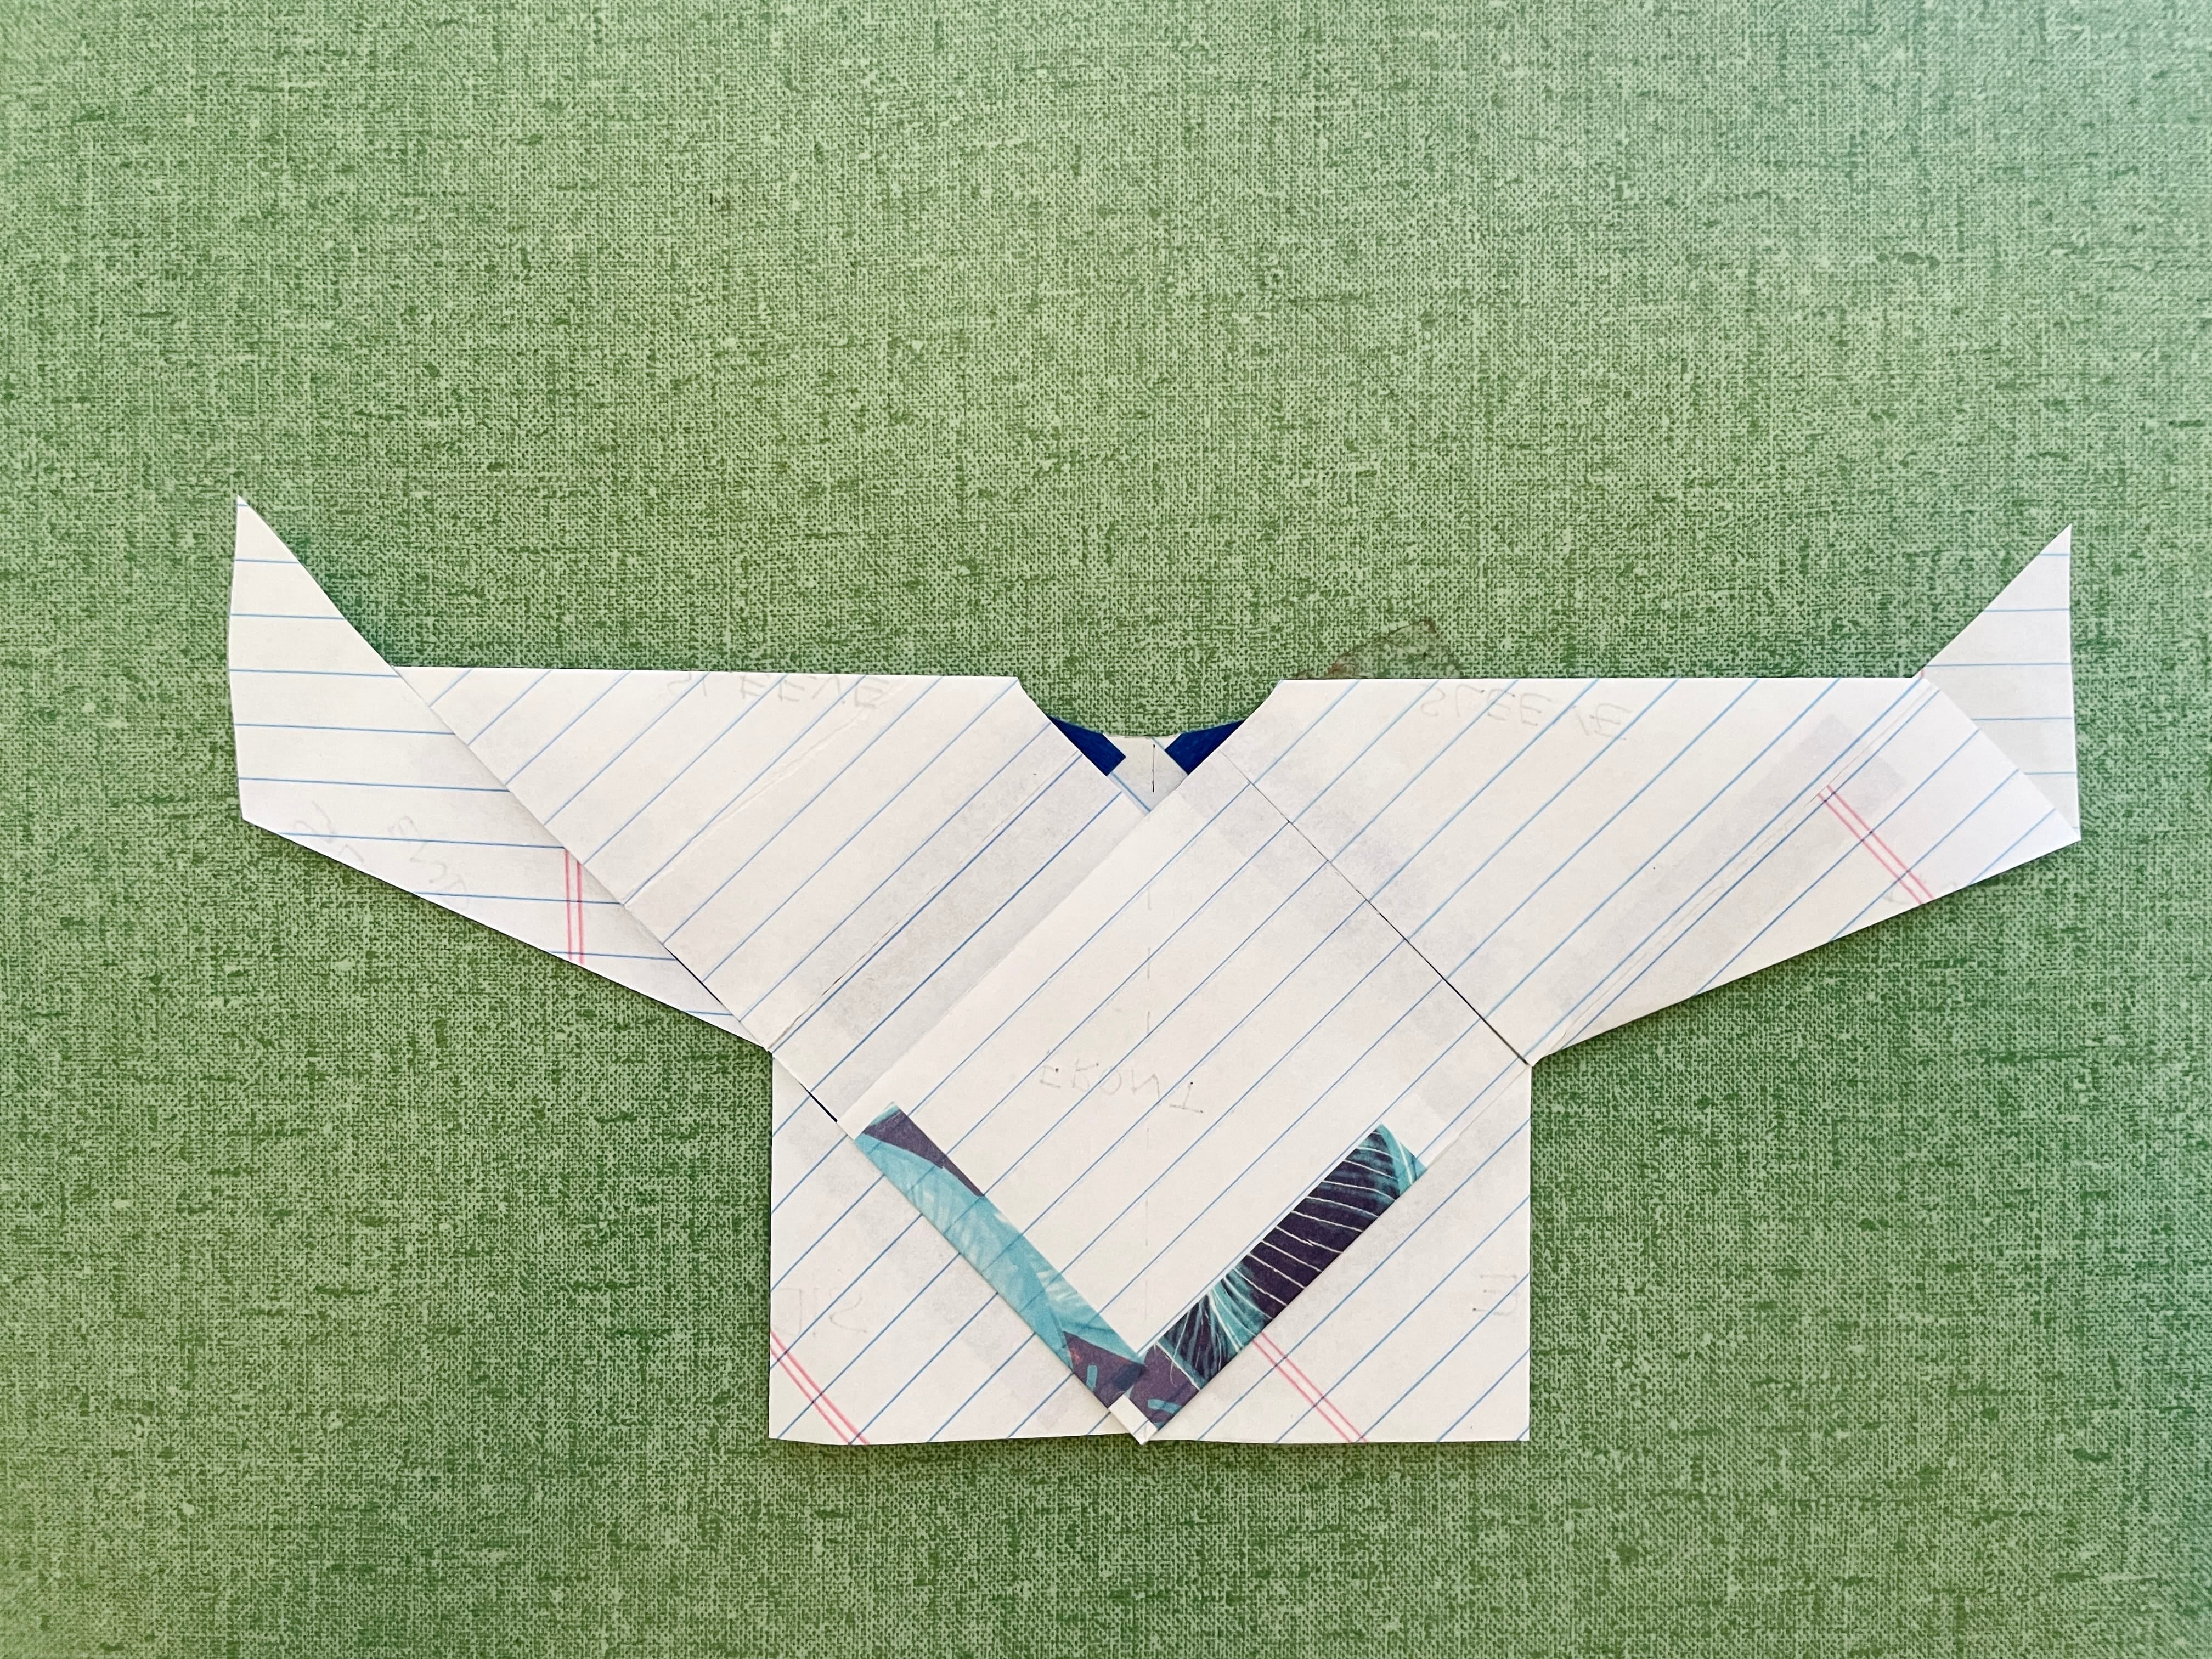
Now, tape the two front panels together to mark the sewing lines. I’m using a different tape to emphasize this step to make it clearer.
Connect the two front panels together, and you have your big hidden pocket.
At this point, the front panels are only connected to each other and nowhere else.
The hardest part is over, so let’s finish the sides.
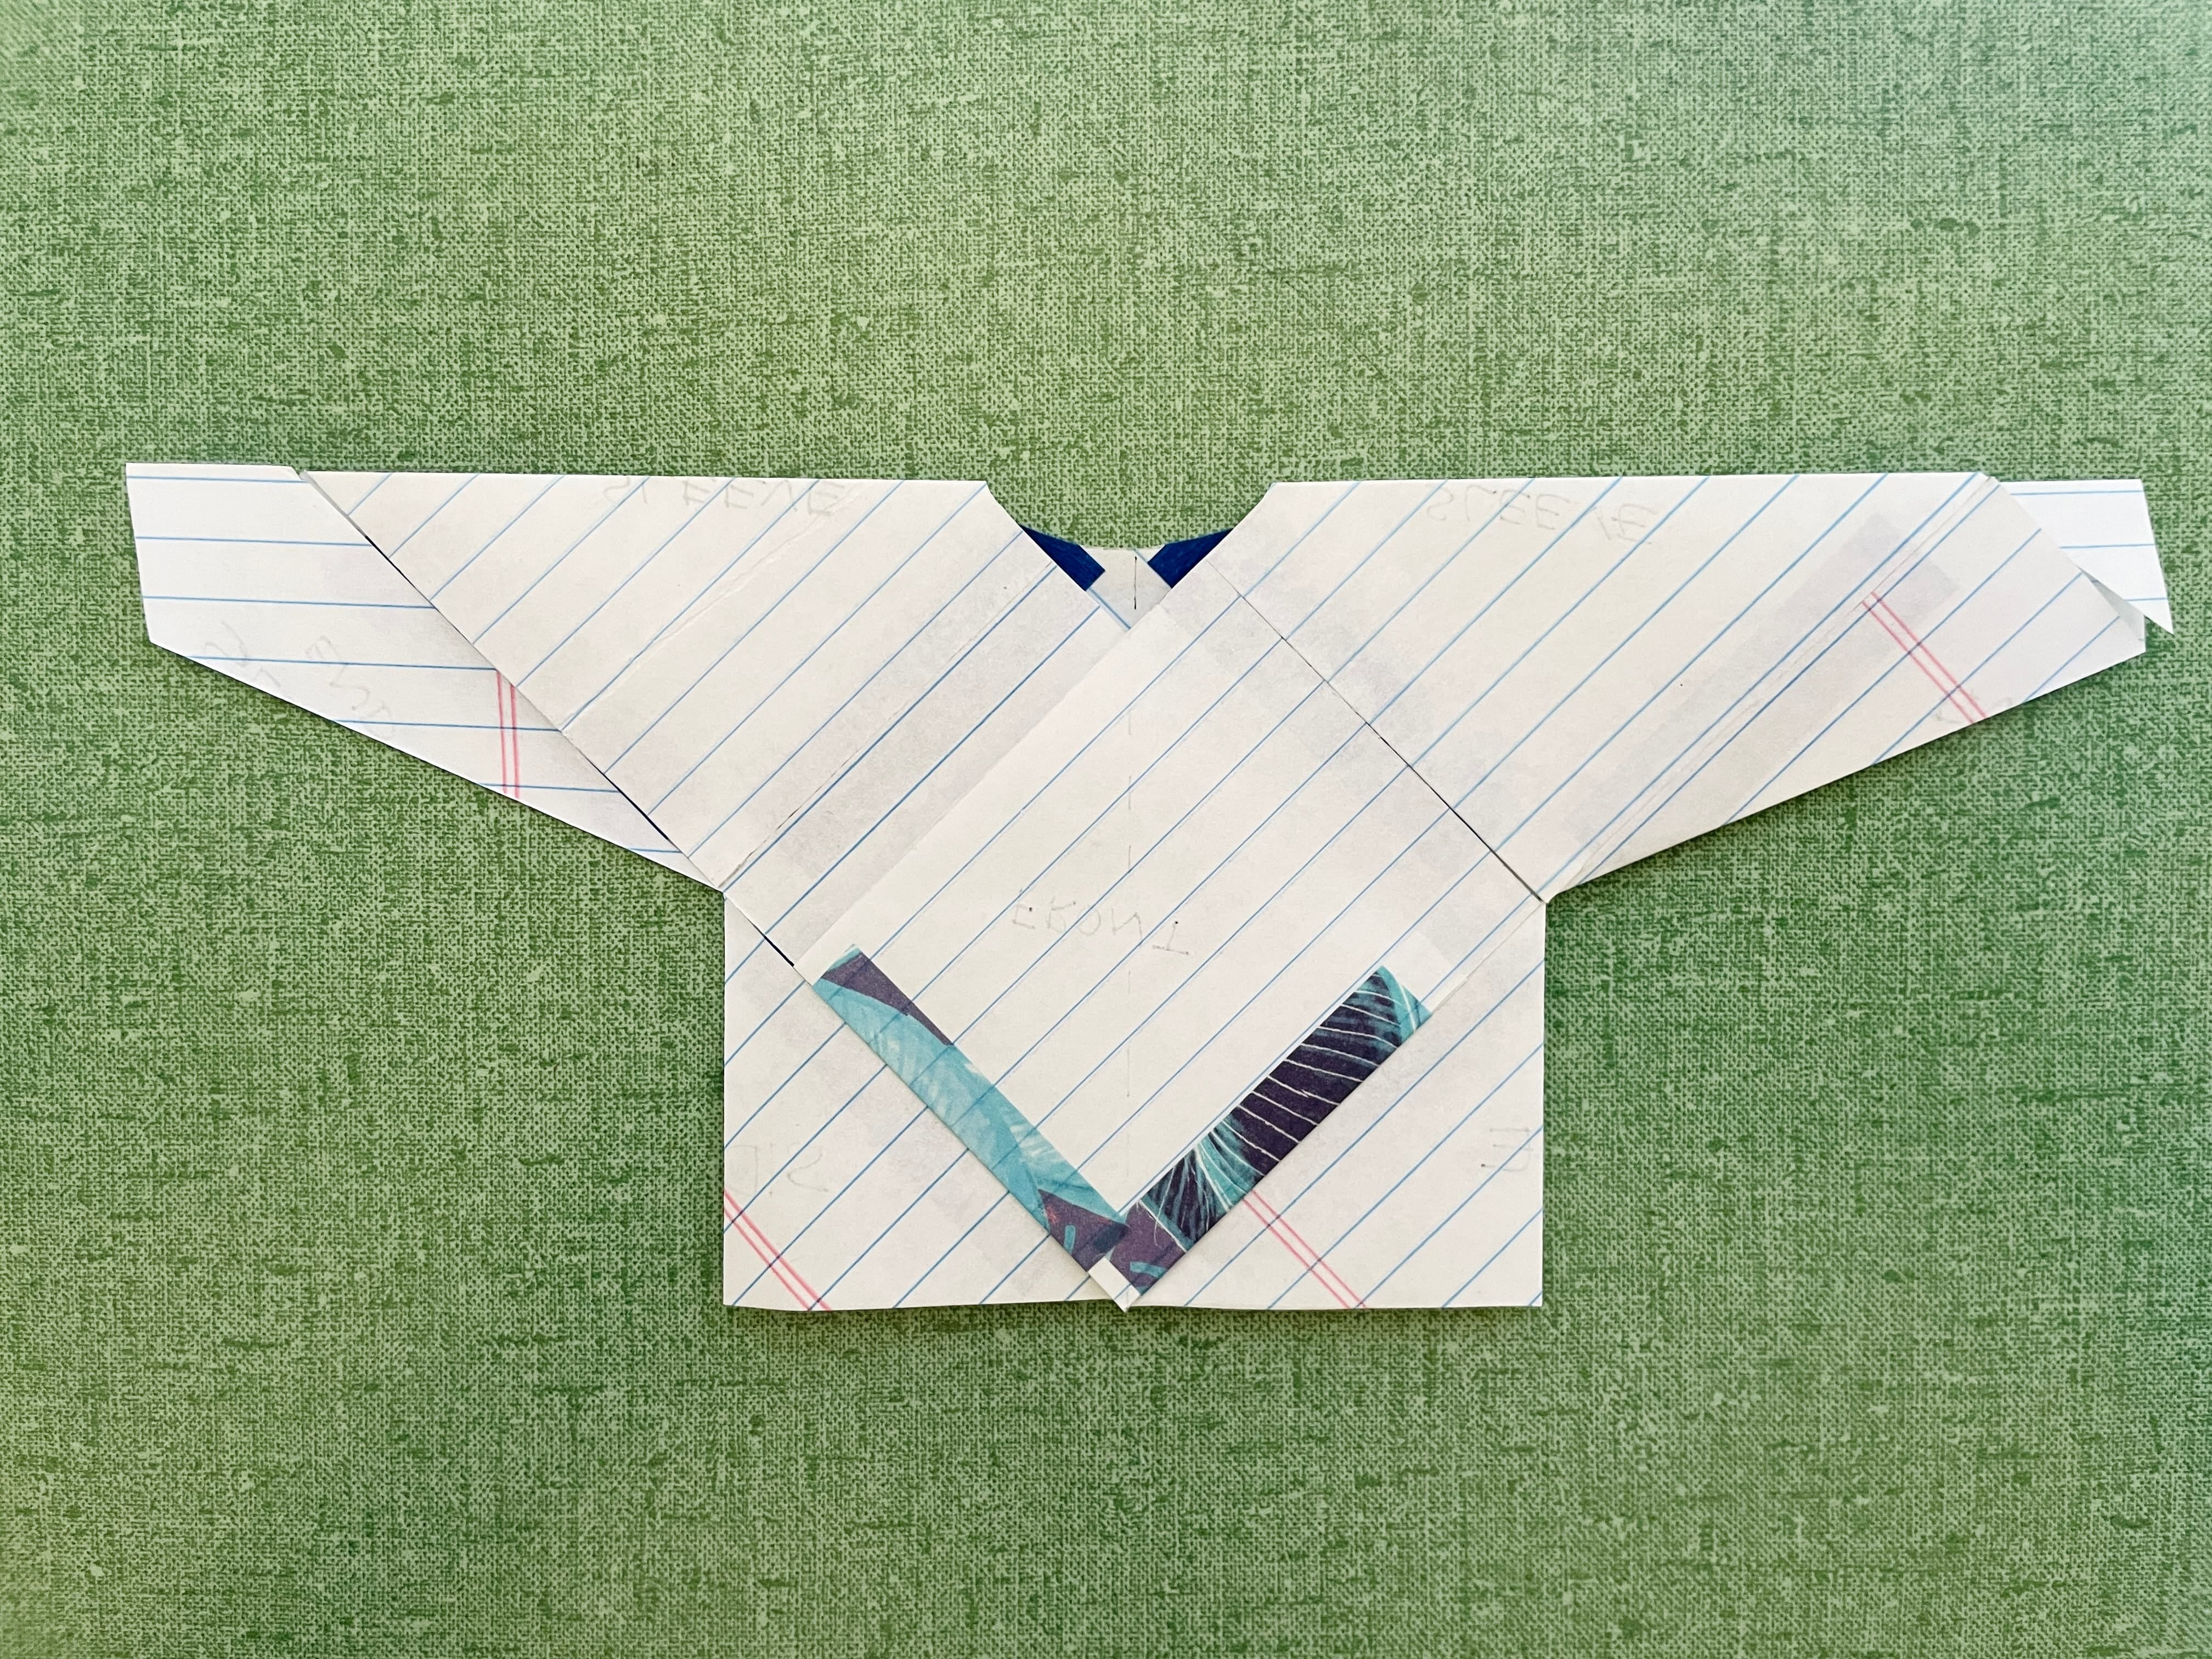
What the paper model looks like when the sides are folded.
Now the front panel layers are connected to the sides.
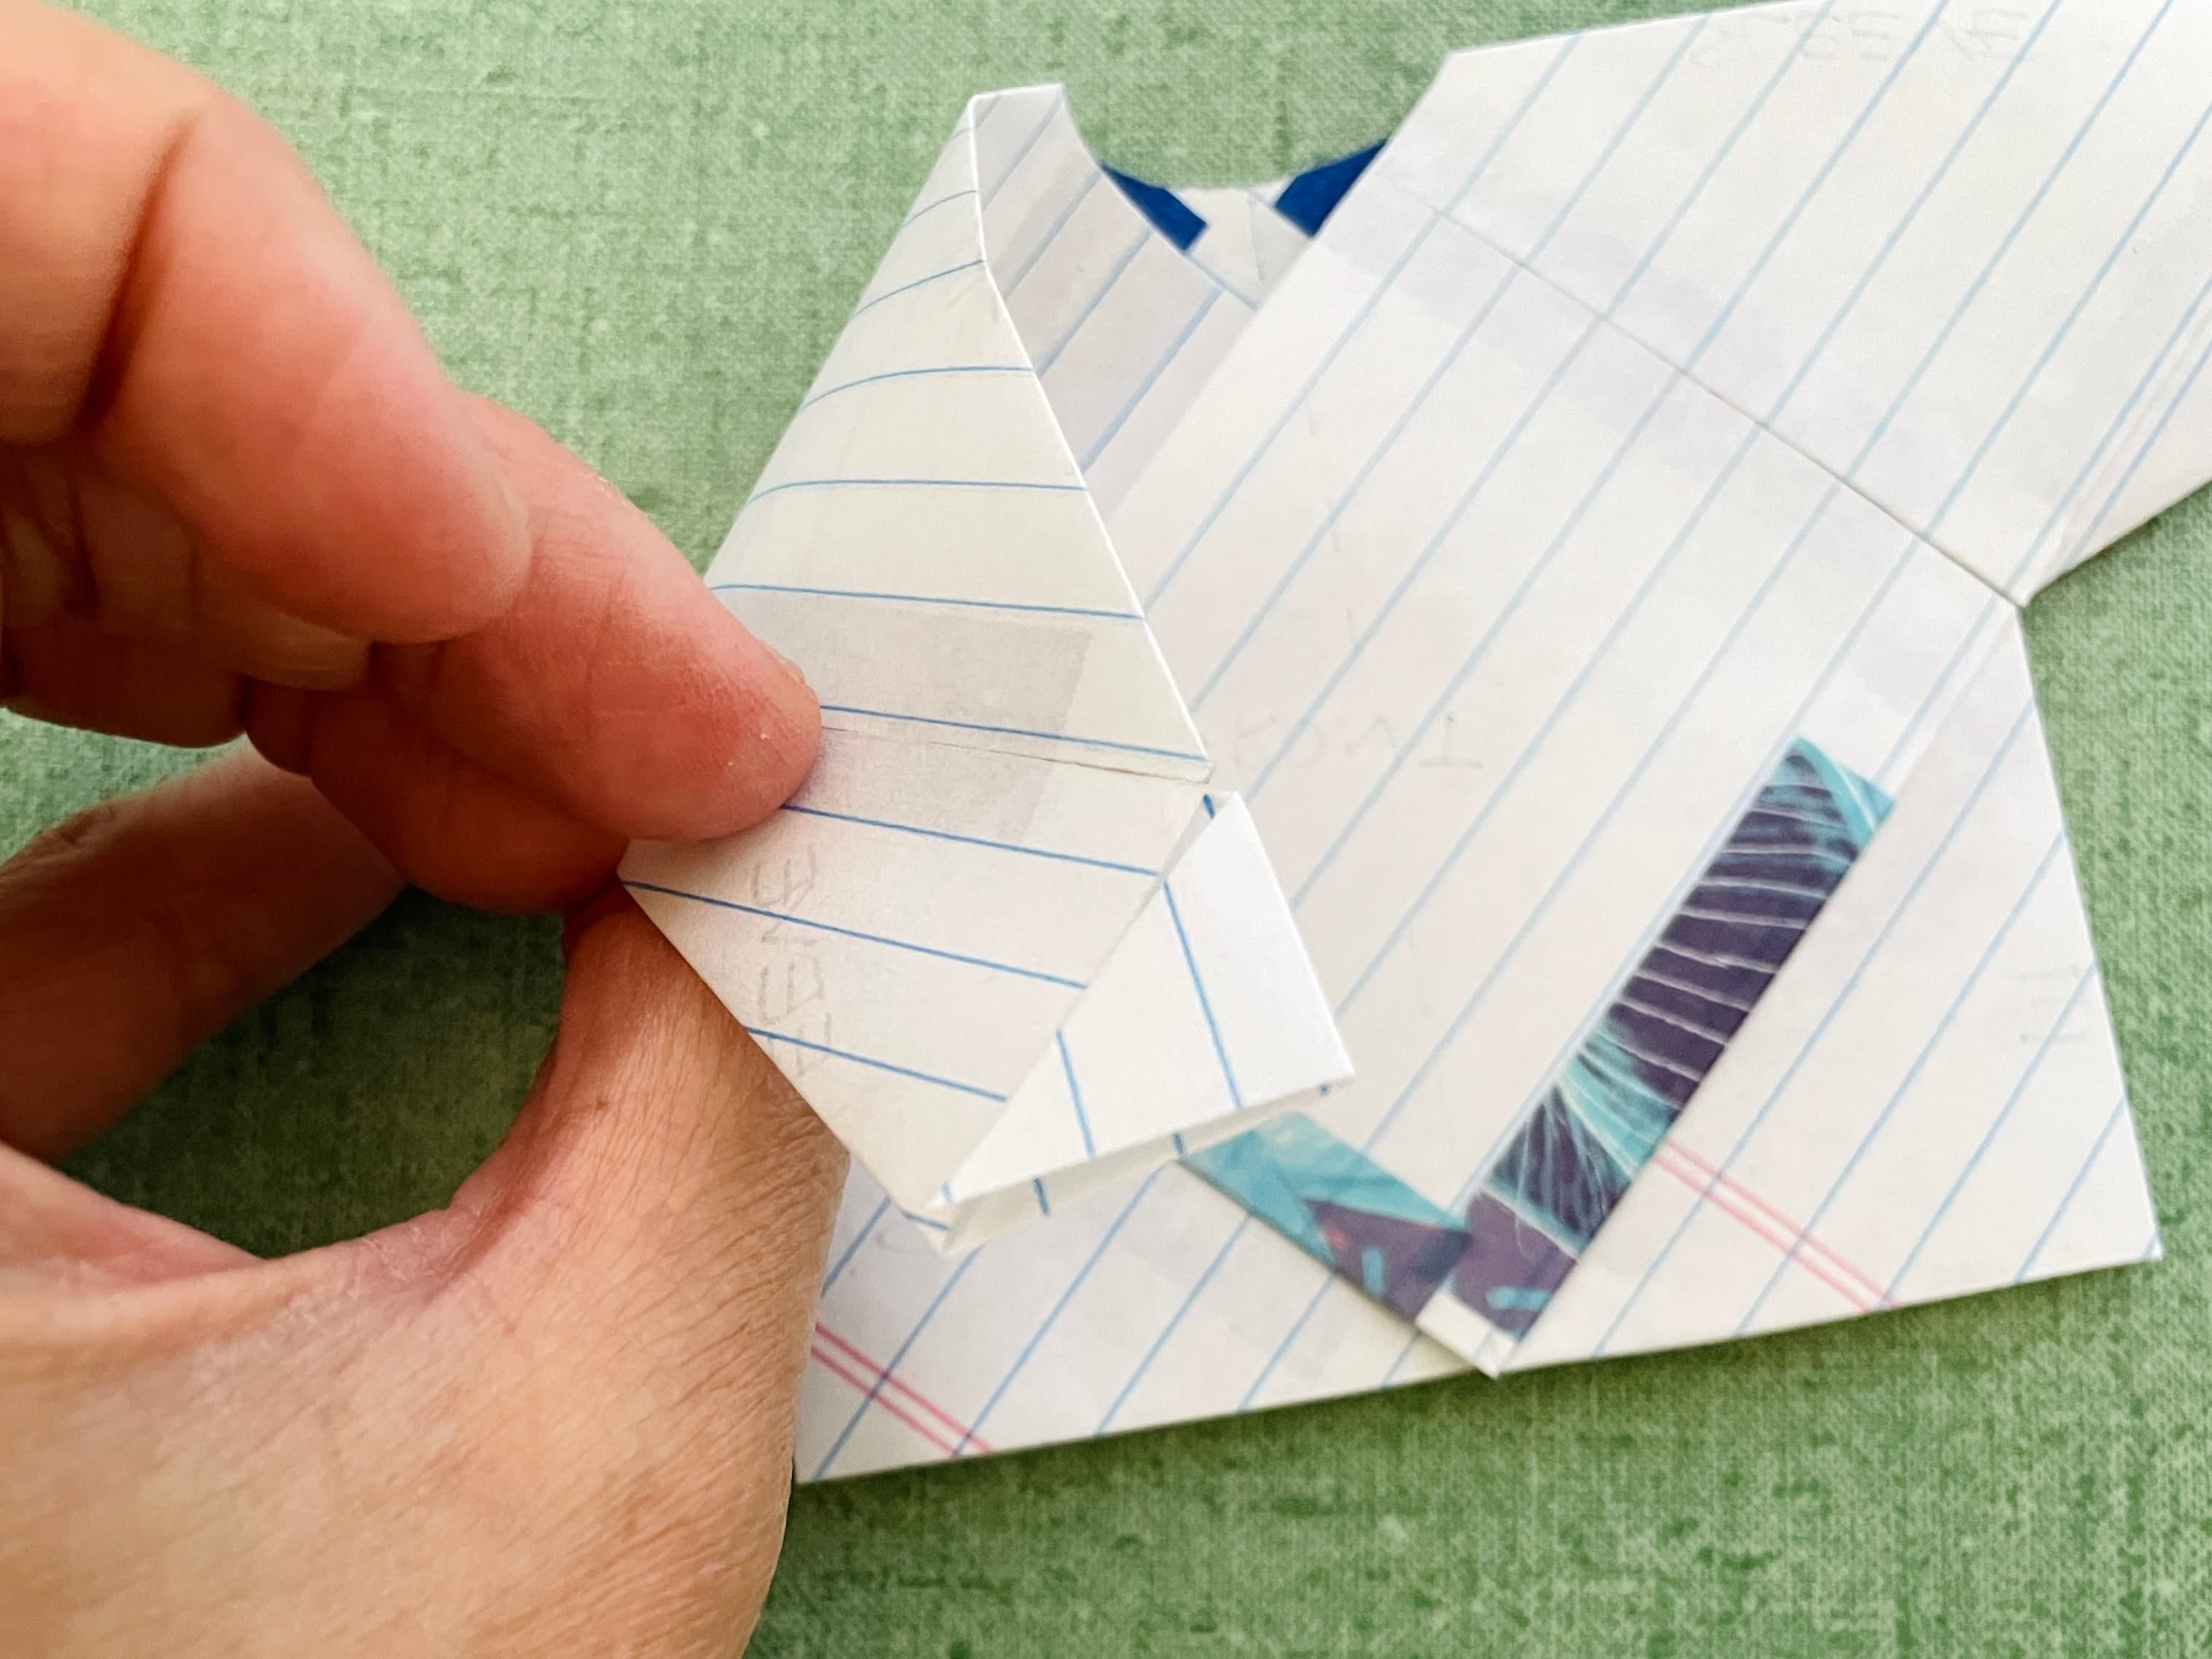
The only thing left to do is finishing the sleeves.
First fold of the right sleeve, folding towards you.
Do the same for the other sleeve, folding away from you.
Do the second fold to finish both sleeves - the right sleeve folds away from you, the left one folds towards you.
A closeup look of the right sleeve end fold.
A closeup look of the left sleeve end fold.
Tape the connections shut from the wrong side, and you’re done. Congratulations – you have a 7-square wrap top paper model!
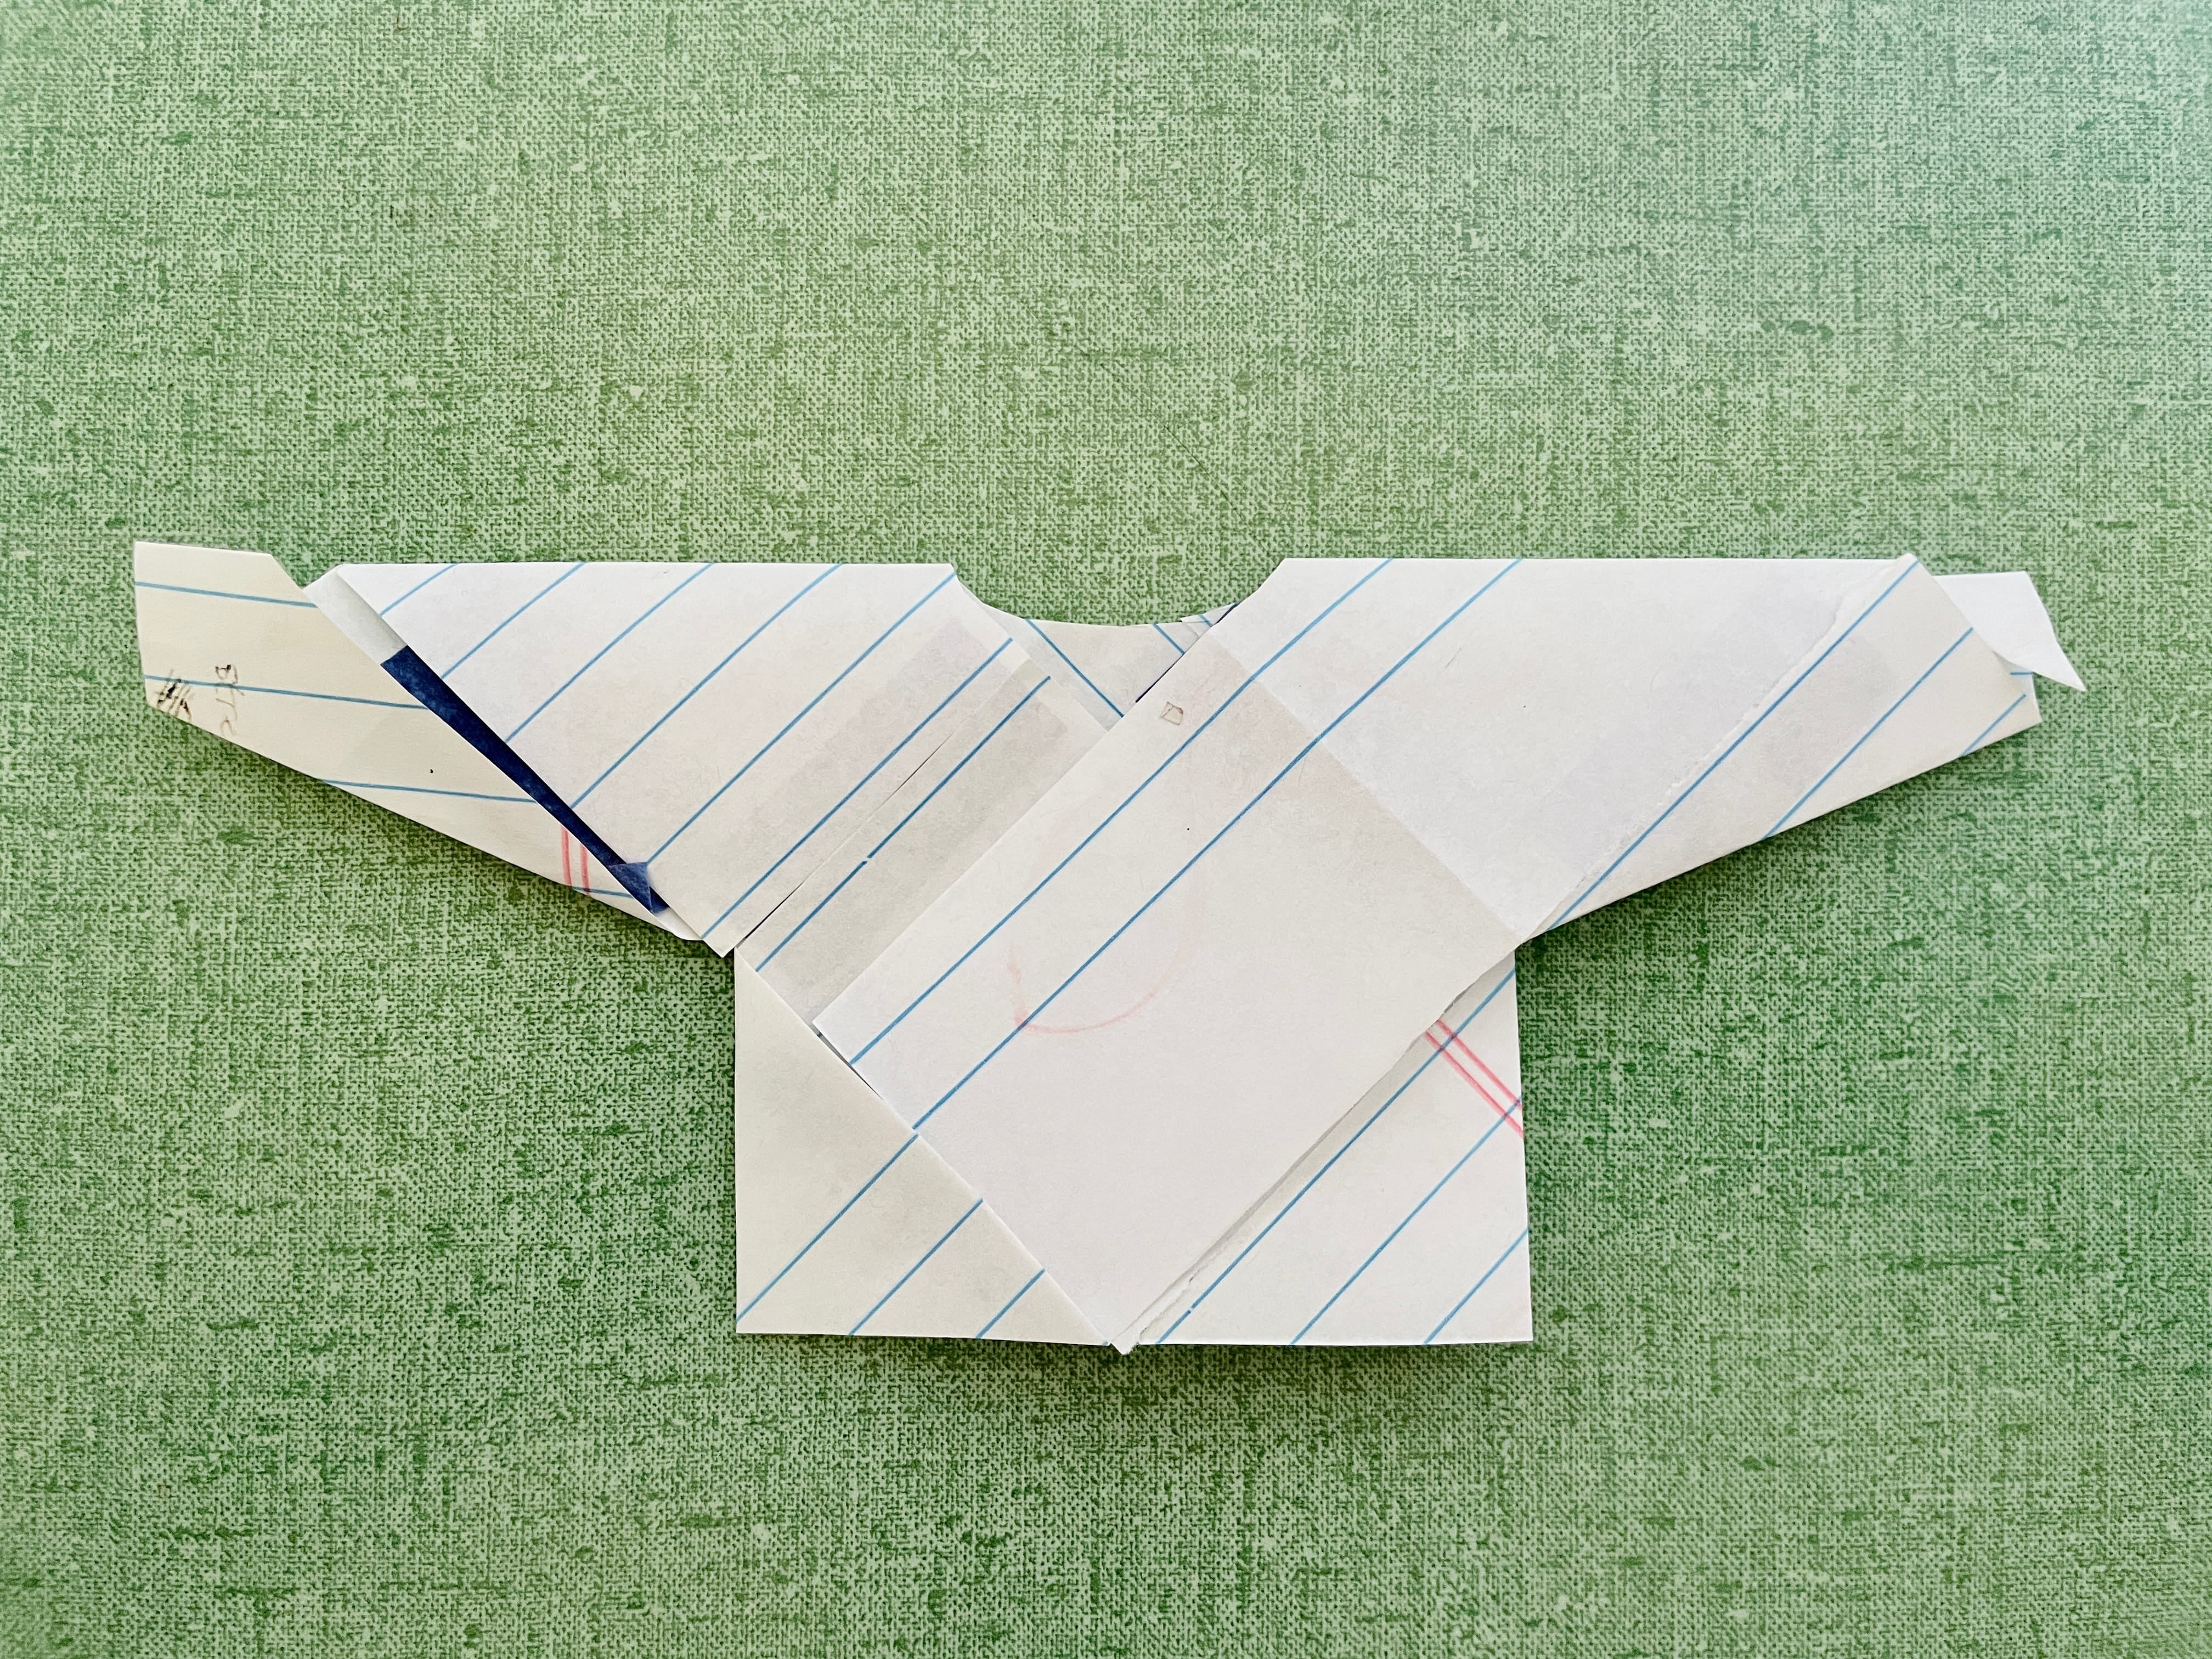
This is what the 7-square wrap top paper model looks like after all the tapings are done.
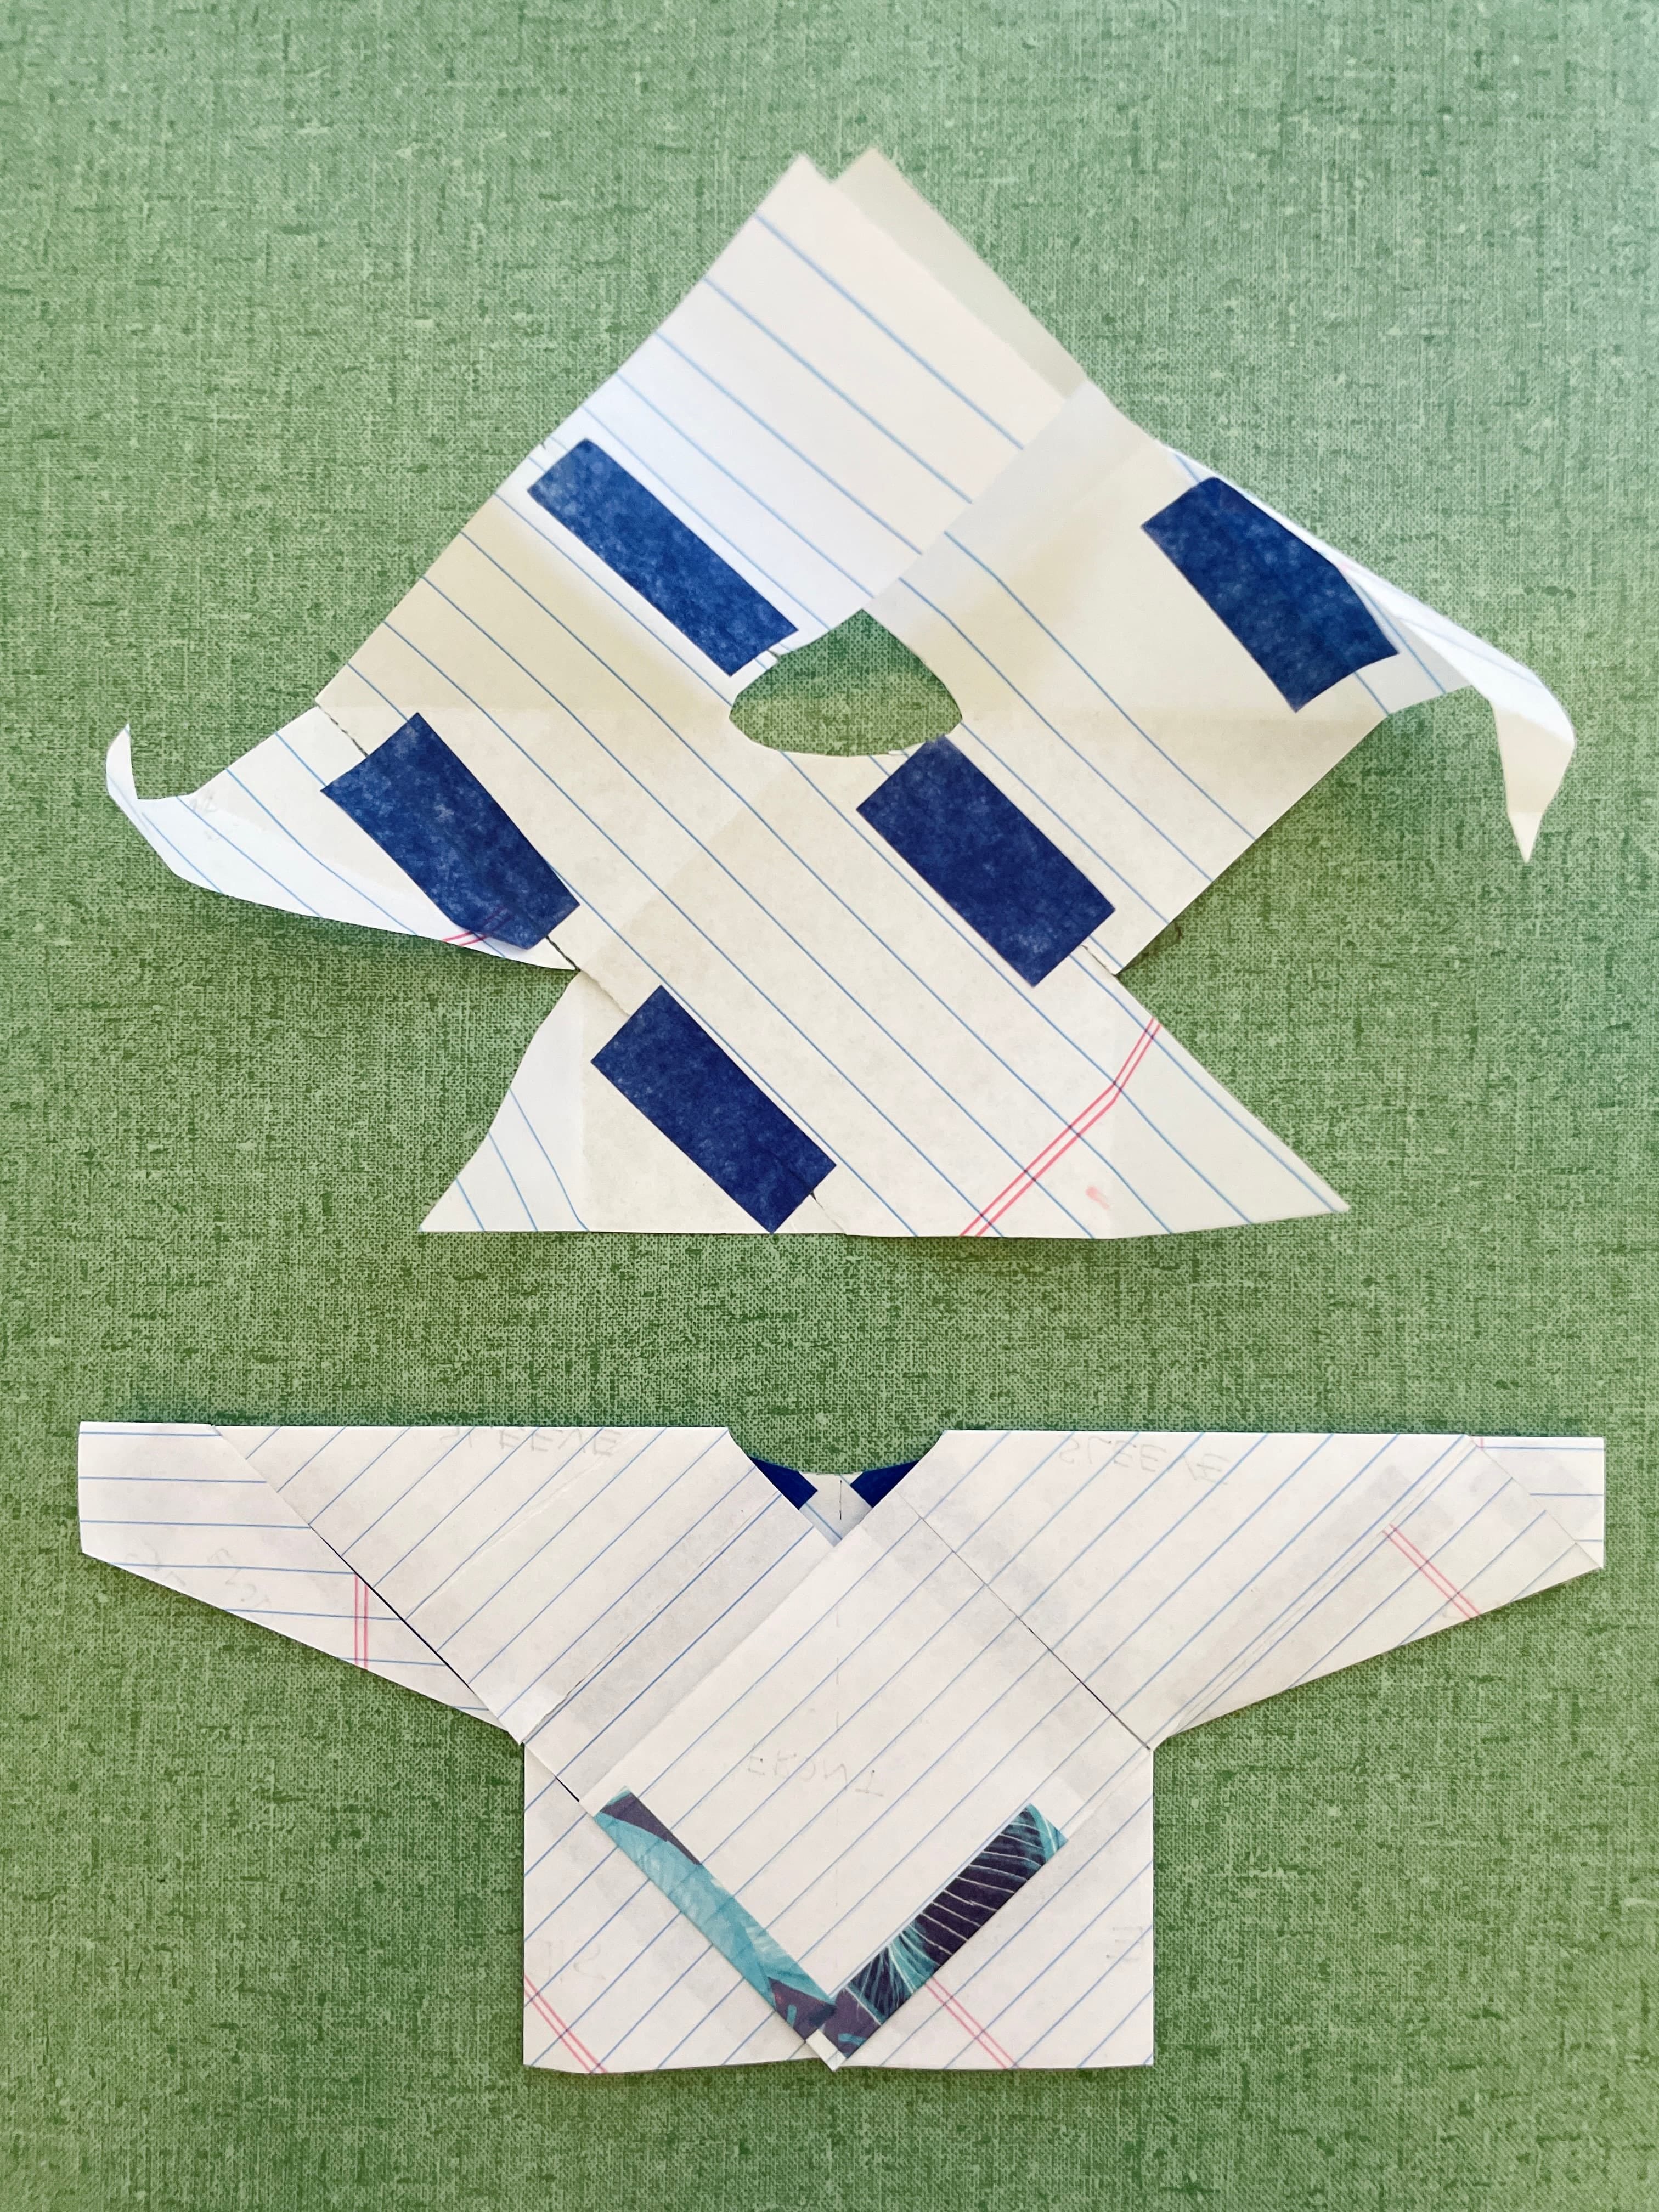
Comparison of the pre-fold model and the finished composition.
Here’s a short video I made to showcase the pocket, torso opening, and sleeves.
Are you ready to call it a day, or do you want to do another paper model challenge? Do what you need to do. If you want another challenge (as if this issue is not long enough already), let’s tackle the 10-square pants paper model.
Thank you for reading this free article - if you enjoy it, please consider leaving a tip.
Let me preface by saying that while making this paper model is a fun exercise for all levels of sewists, actually making the pants requires intermediate sewing skills. This is because you need to decide how to finish the waist area.
Do you want to add a waistband?
Do you want to add pleats, elastics, or a combination of both?
Do you want to add belt loops to the waistband?
Do you want to add pockets?
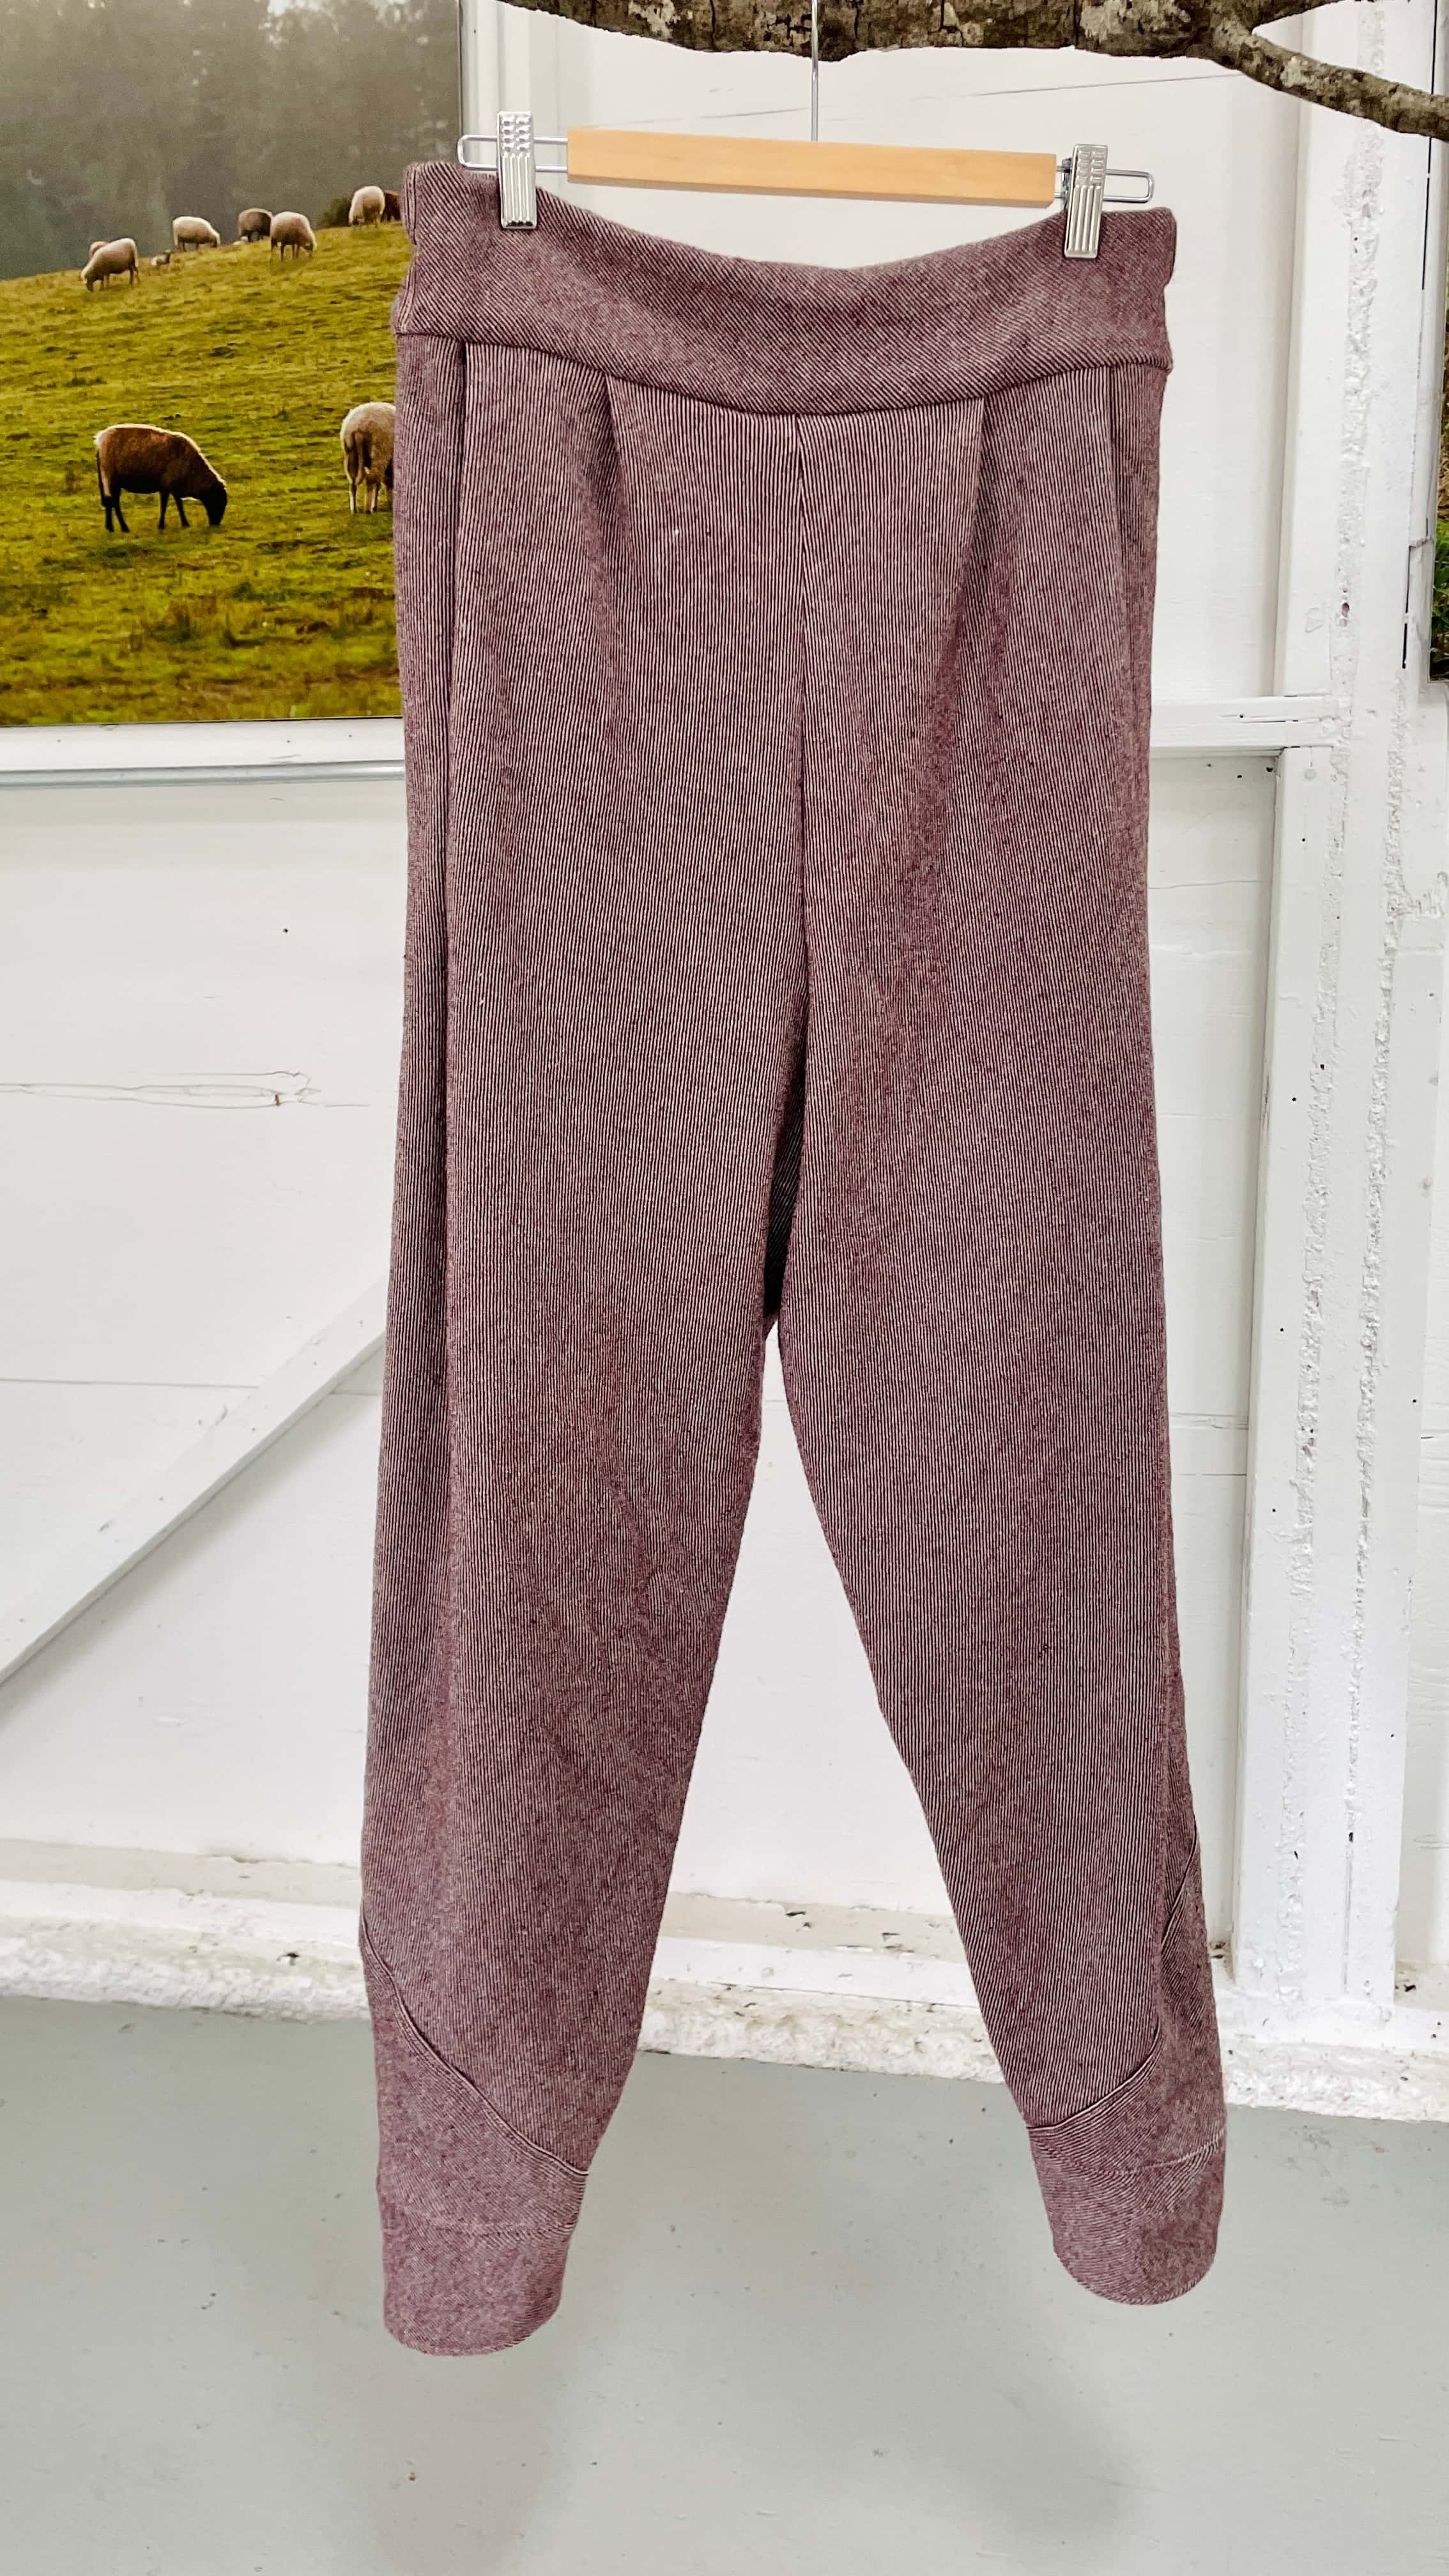
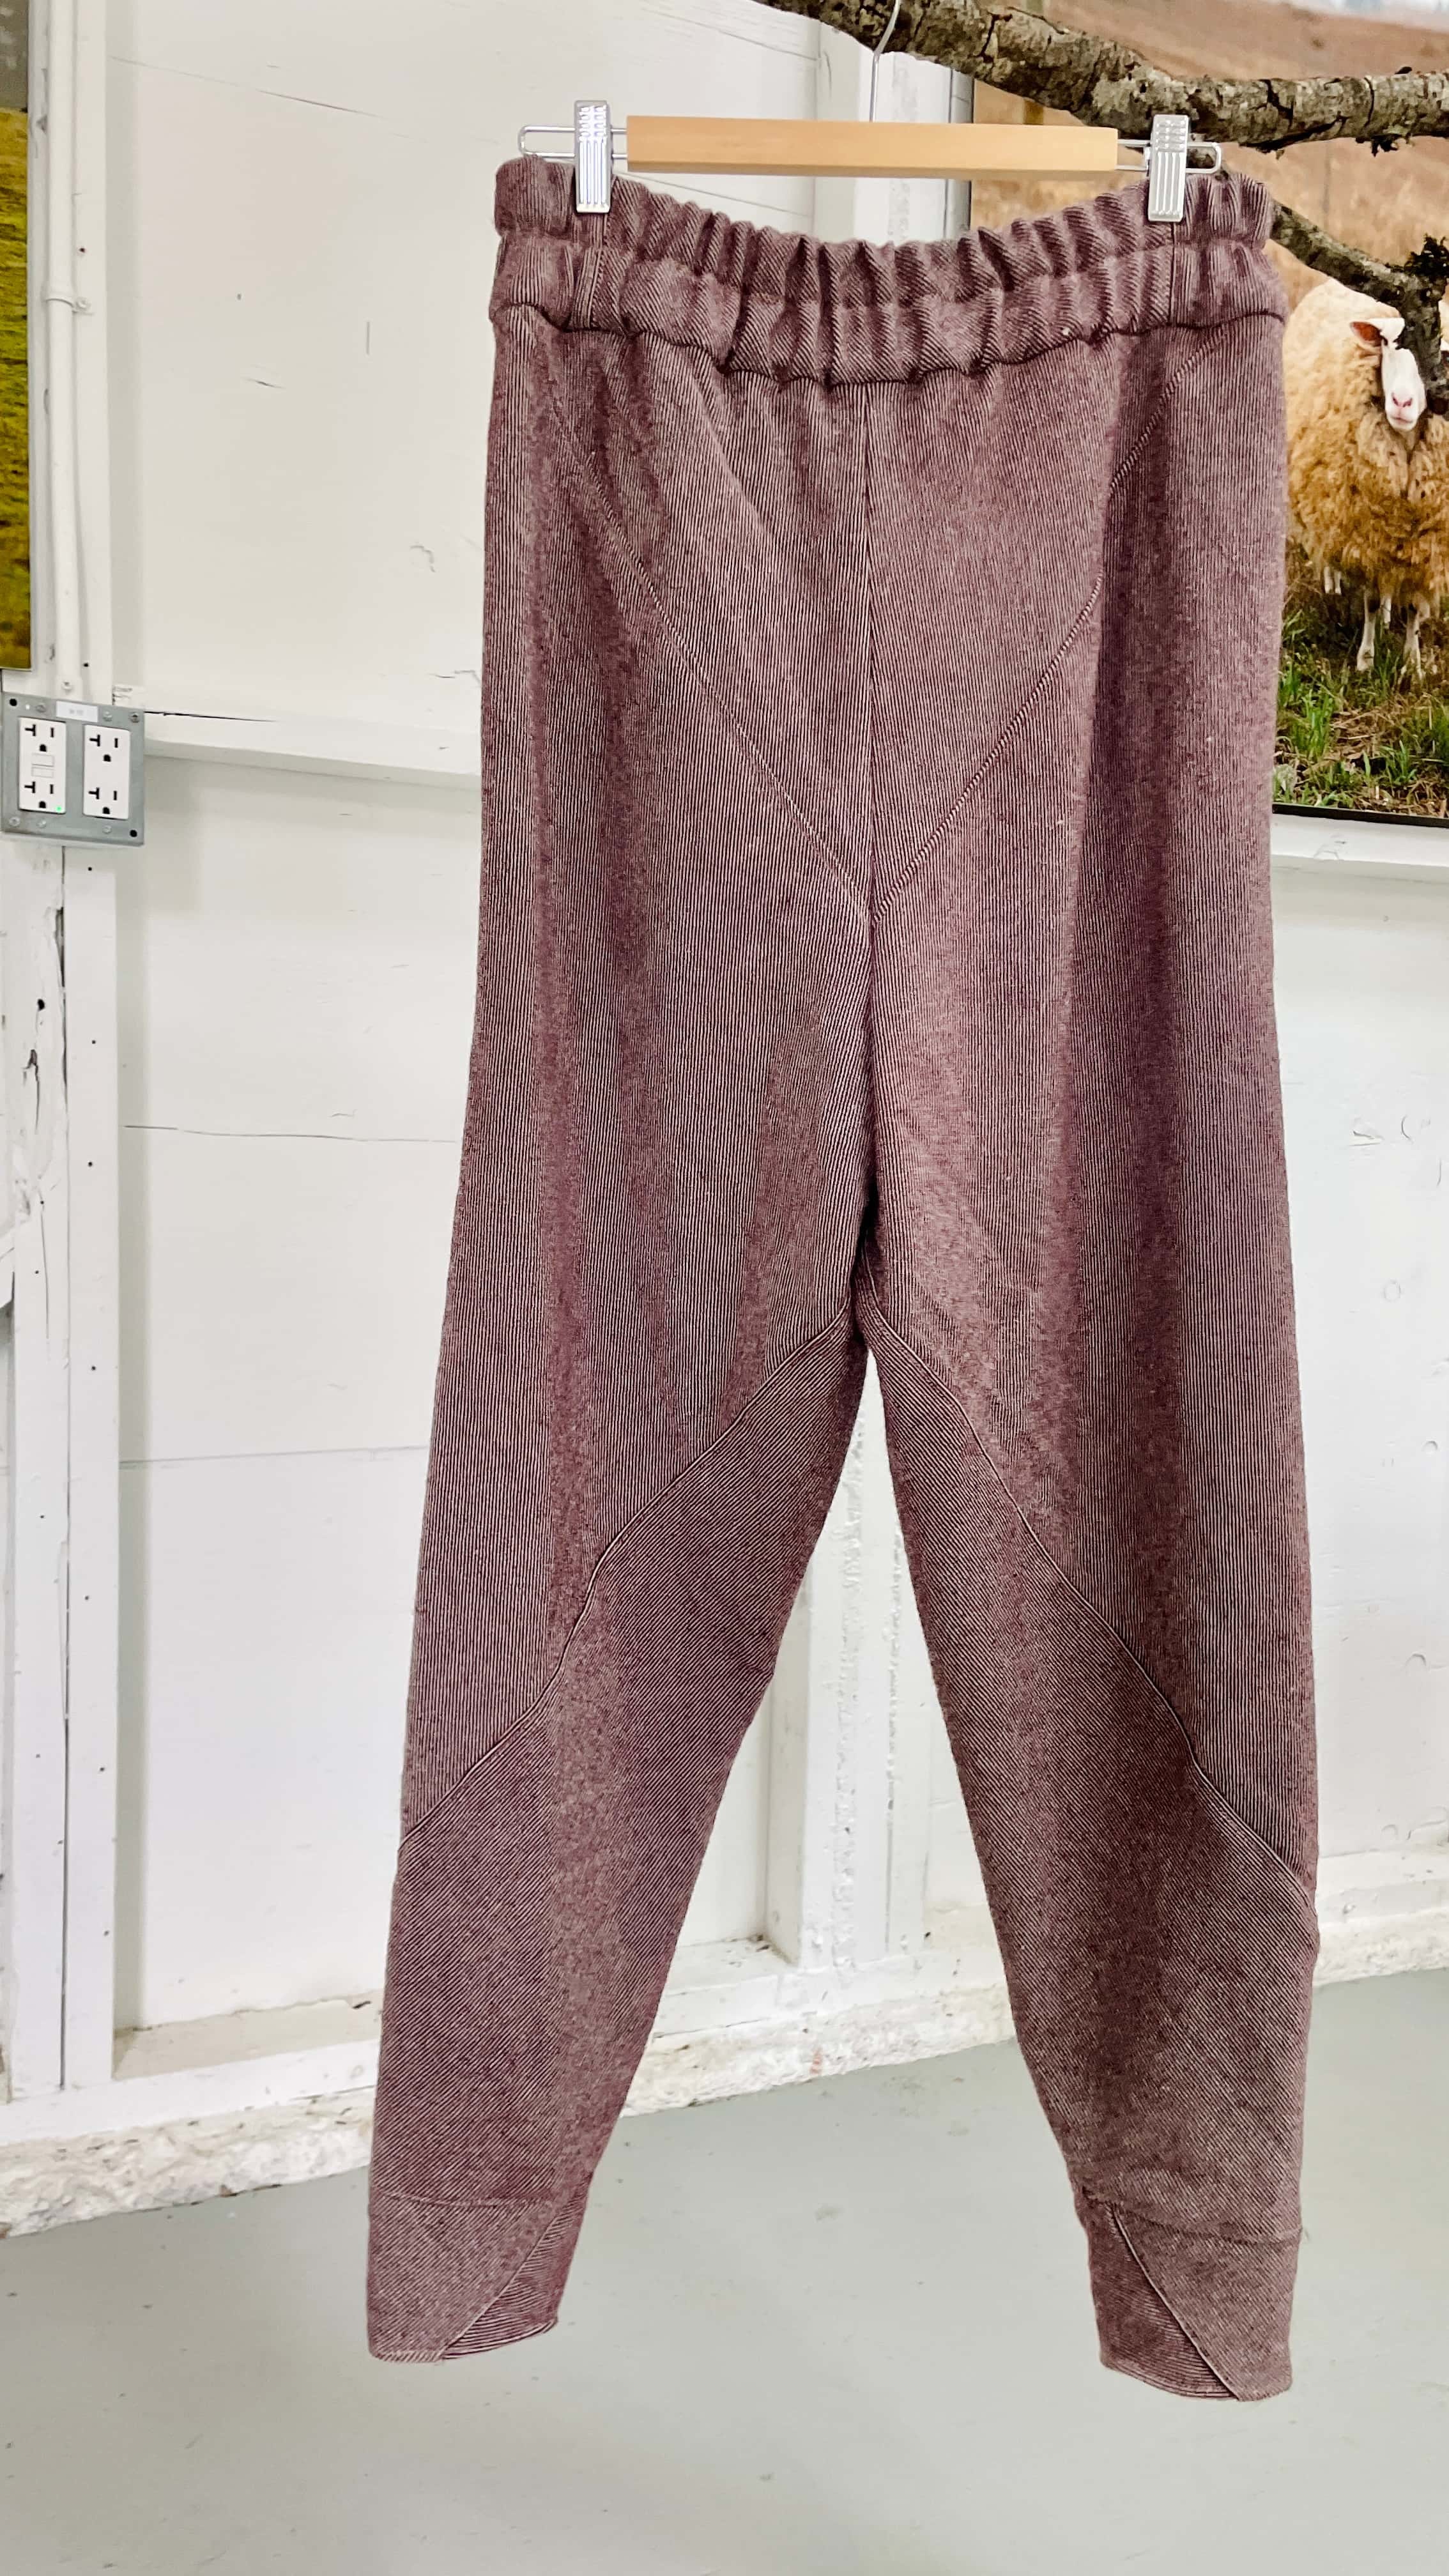
What my finished 10-square pants look like from the front. Photo by Paige Green.
What my finished 10-square pants look like from the back. Photo by Paige Green.
And for those who love patterns, do you want to use patterned fabric and do pattern matching?
These are all considerations that you as the maker need to decide. This paper model exercise will allow you to see how I continue experimenting with square-based shapes to create two pant legs. For simplicity sake, I will use solid colored papers. What you do beyond that is up to you!
Now that we have that out of the way, grab one origami paper (mine is 15cm x 15cm), plus one square with side measurement of ⅓ the origami paper (i.e. 5cm x 5cm). Fold the origami paper to have 9 equivalent squares for visual aid.
It doesn’t matter if it’s origami paper or not, just make sure the big square is the size of 9 individual squares.
As usual, we have a wrong side and a right side. This yellow color is the wrong side.
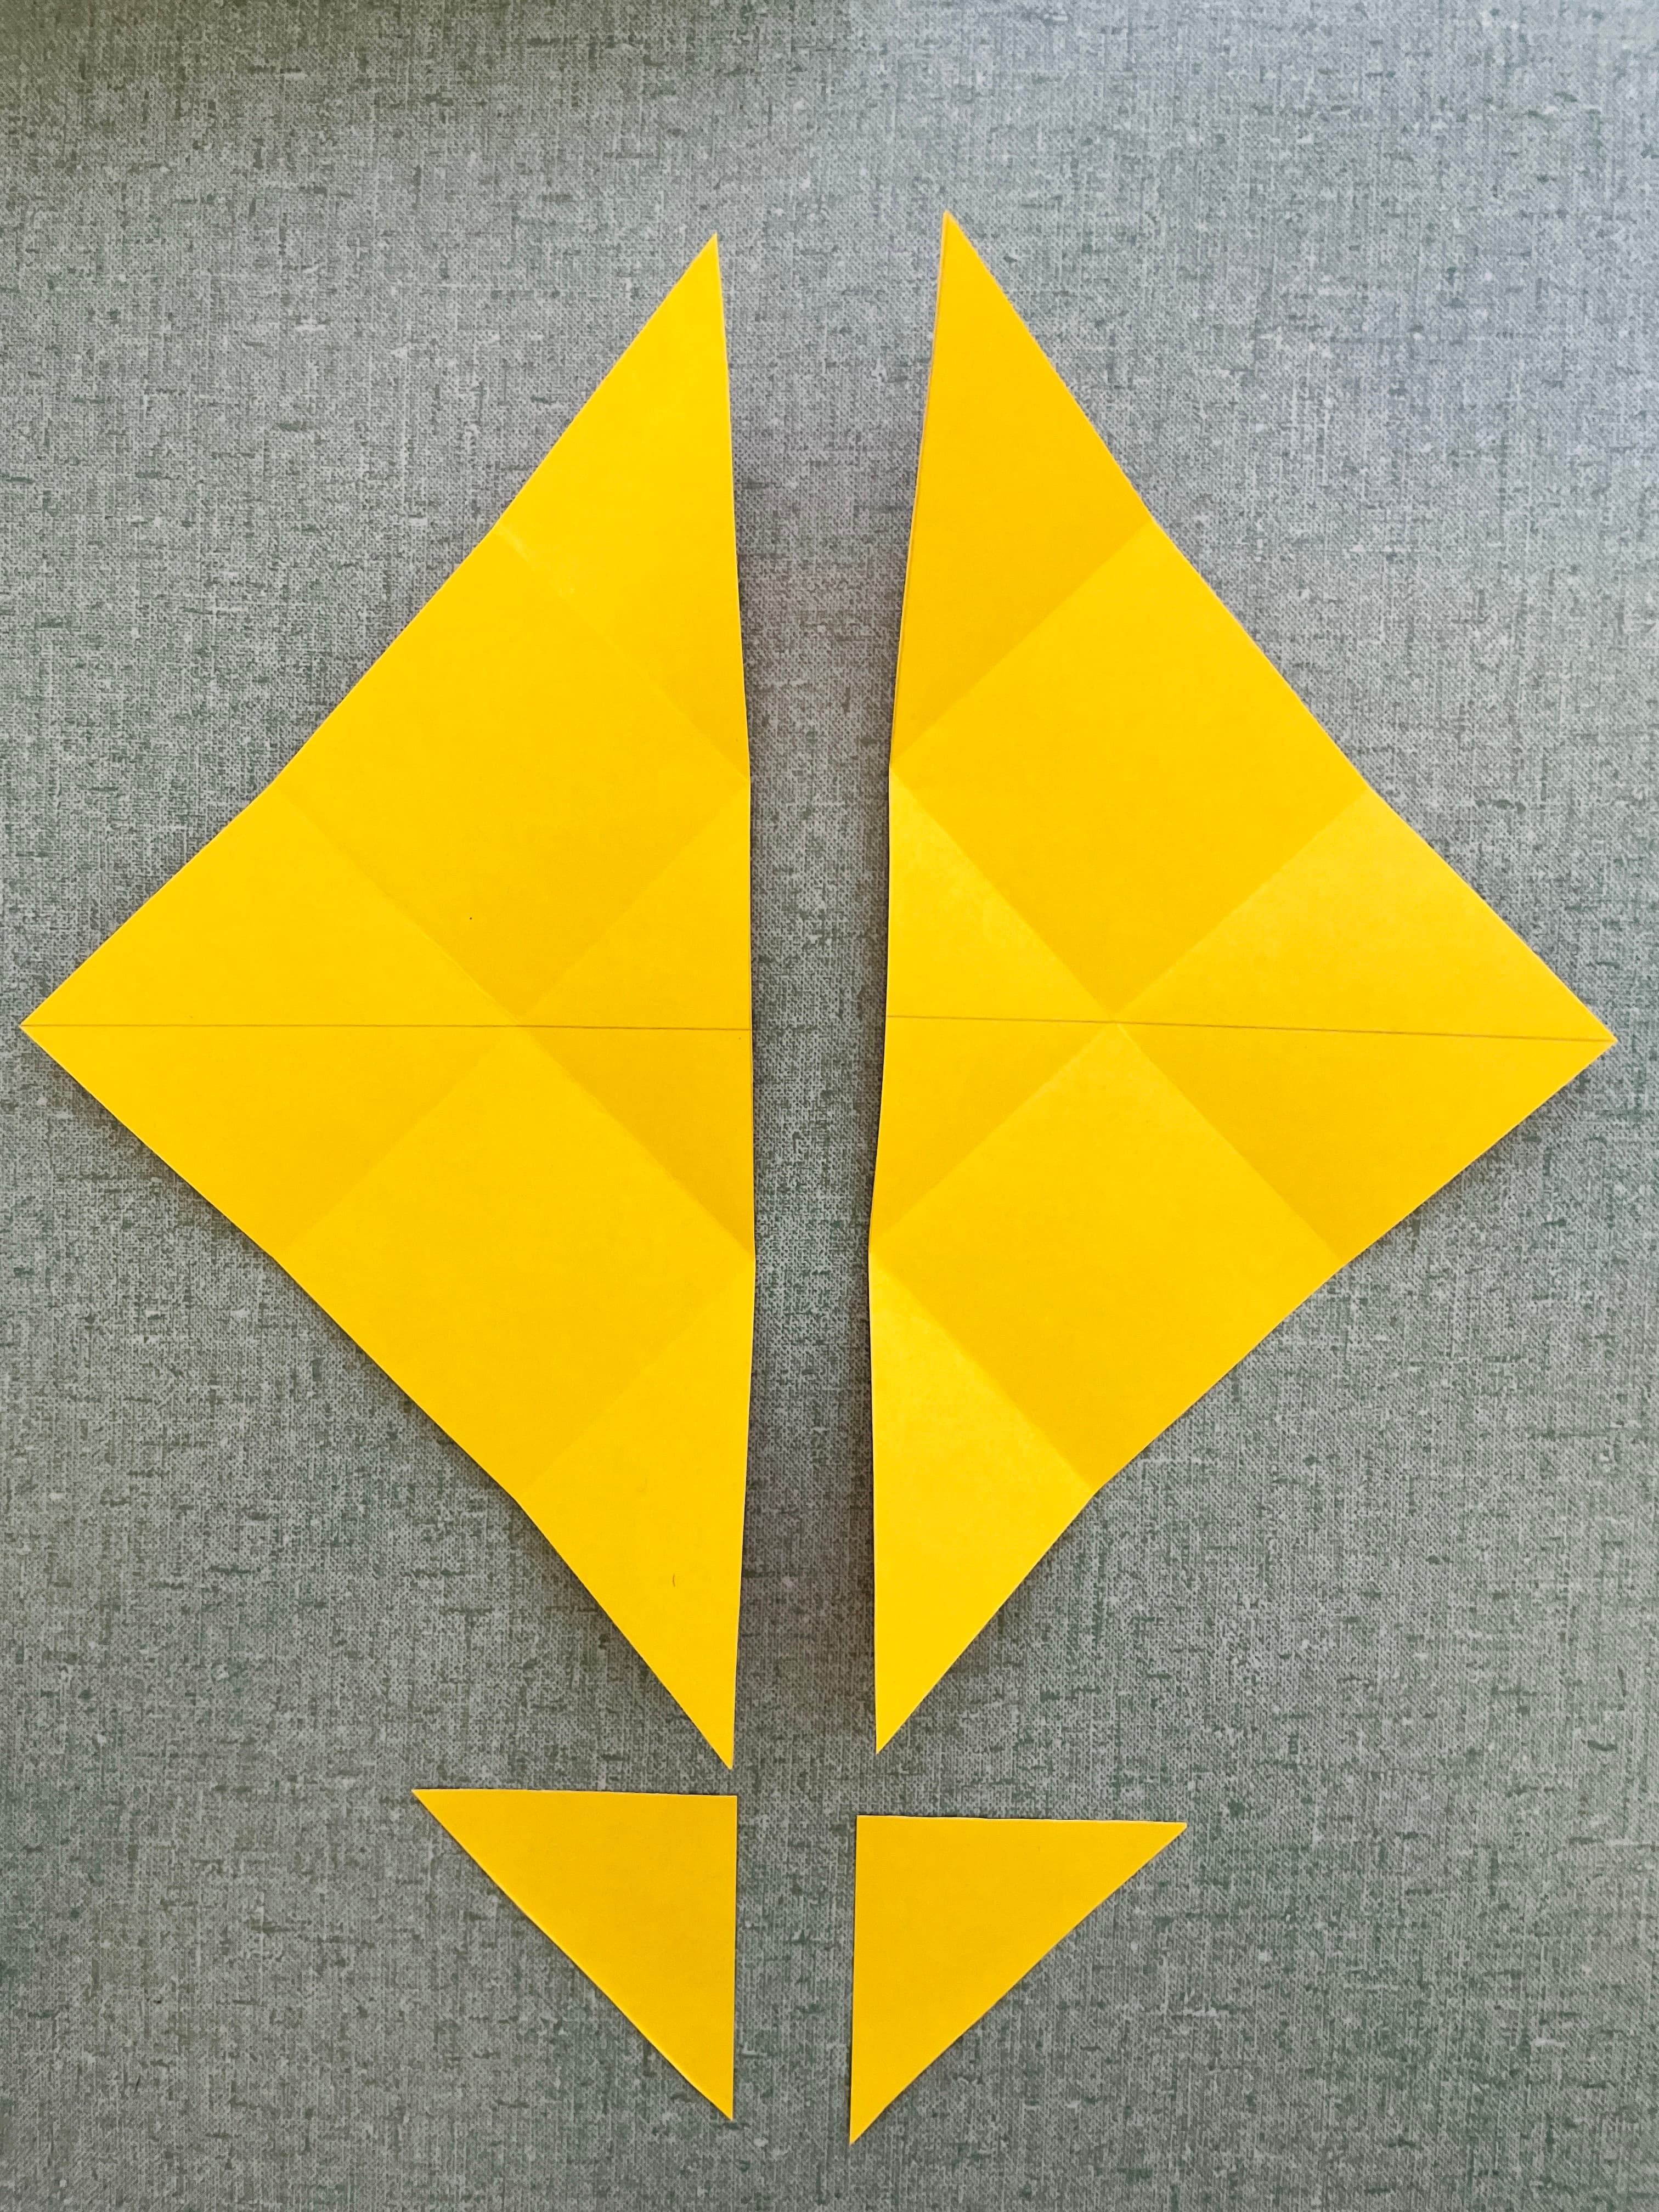
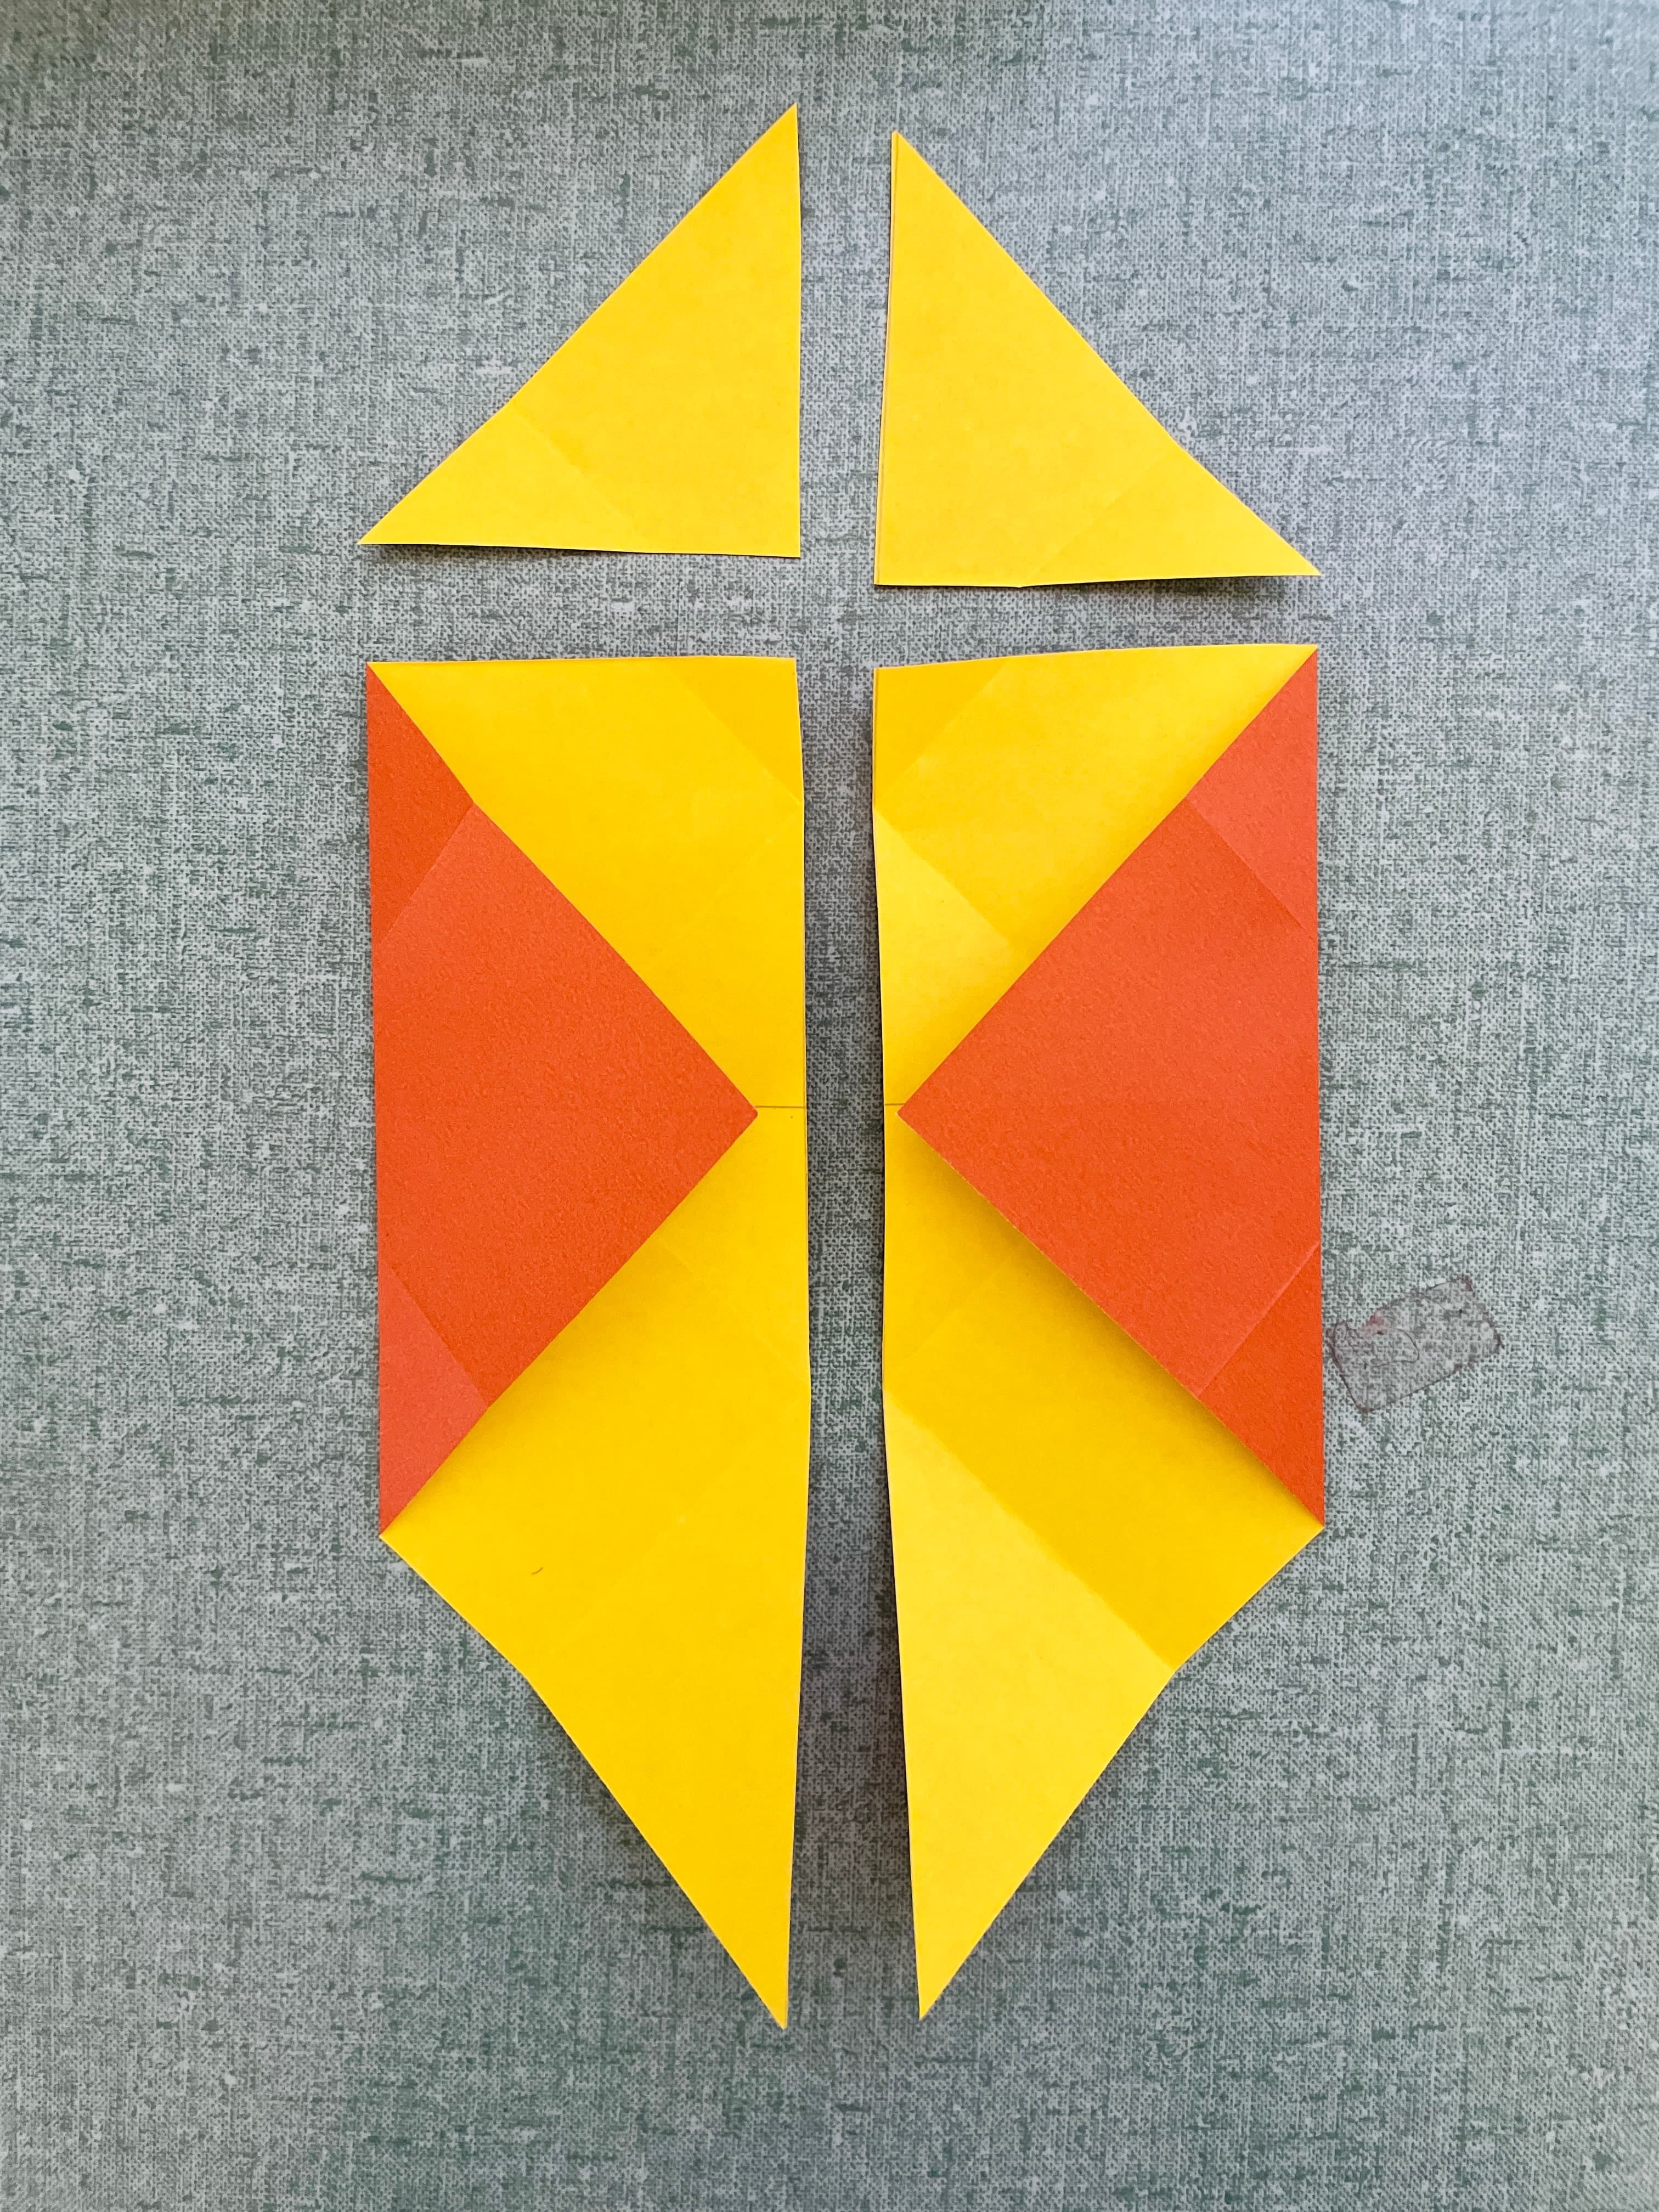
Make a straight line on the two diagonals, and cut one.
Now we have two big triangles and two small ones.
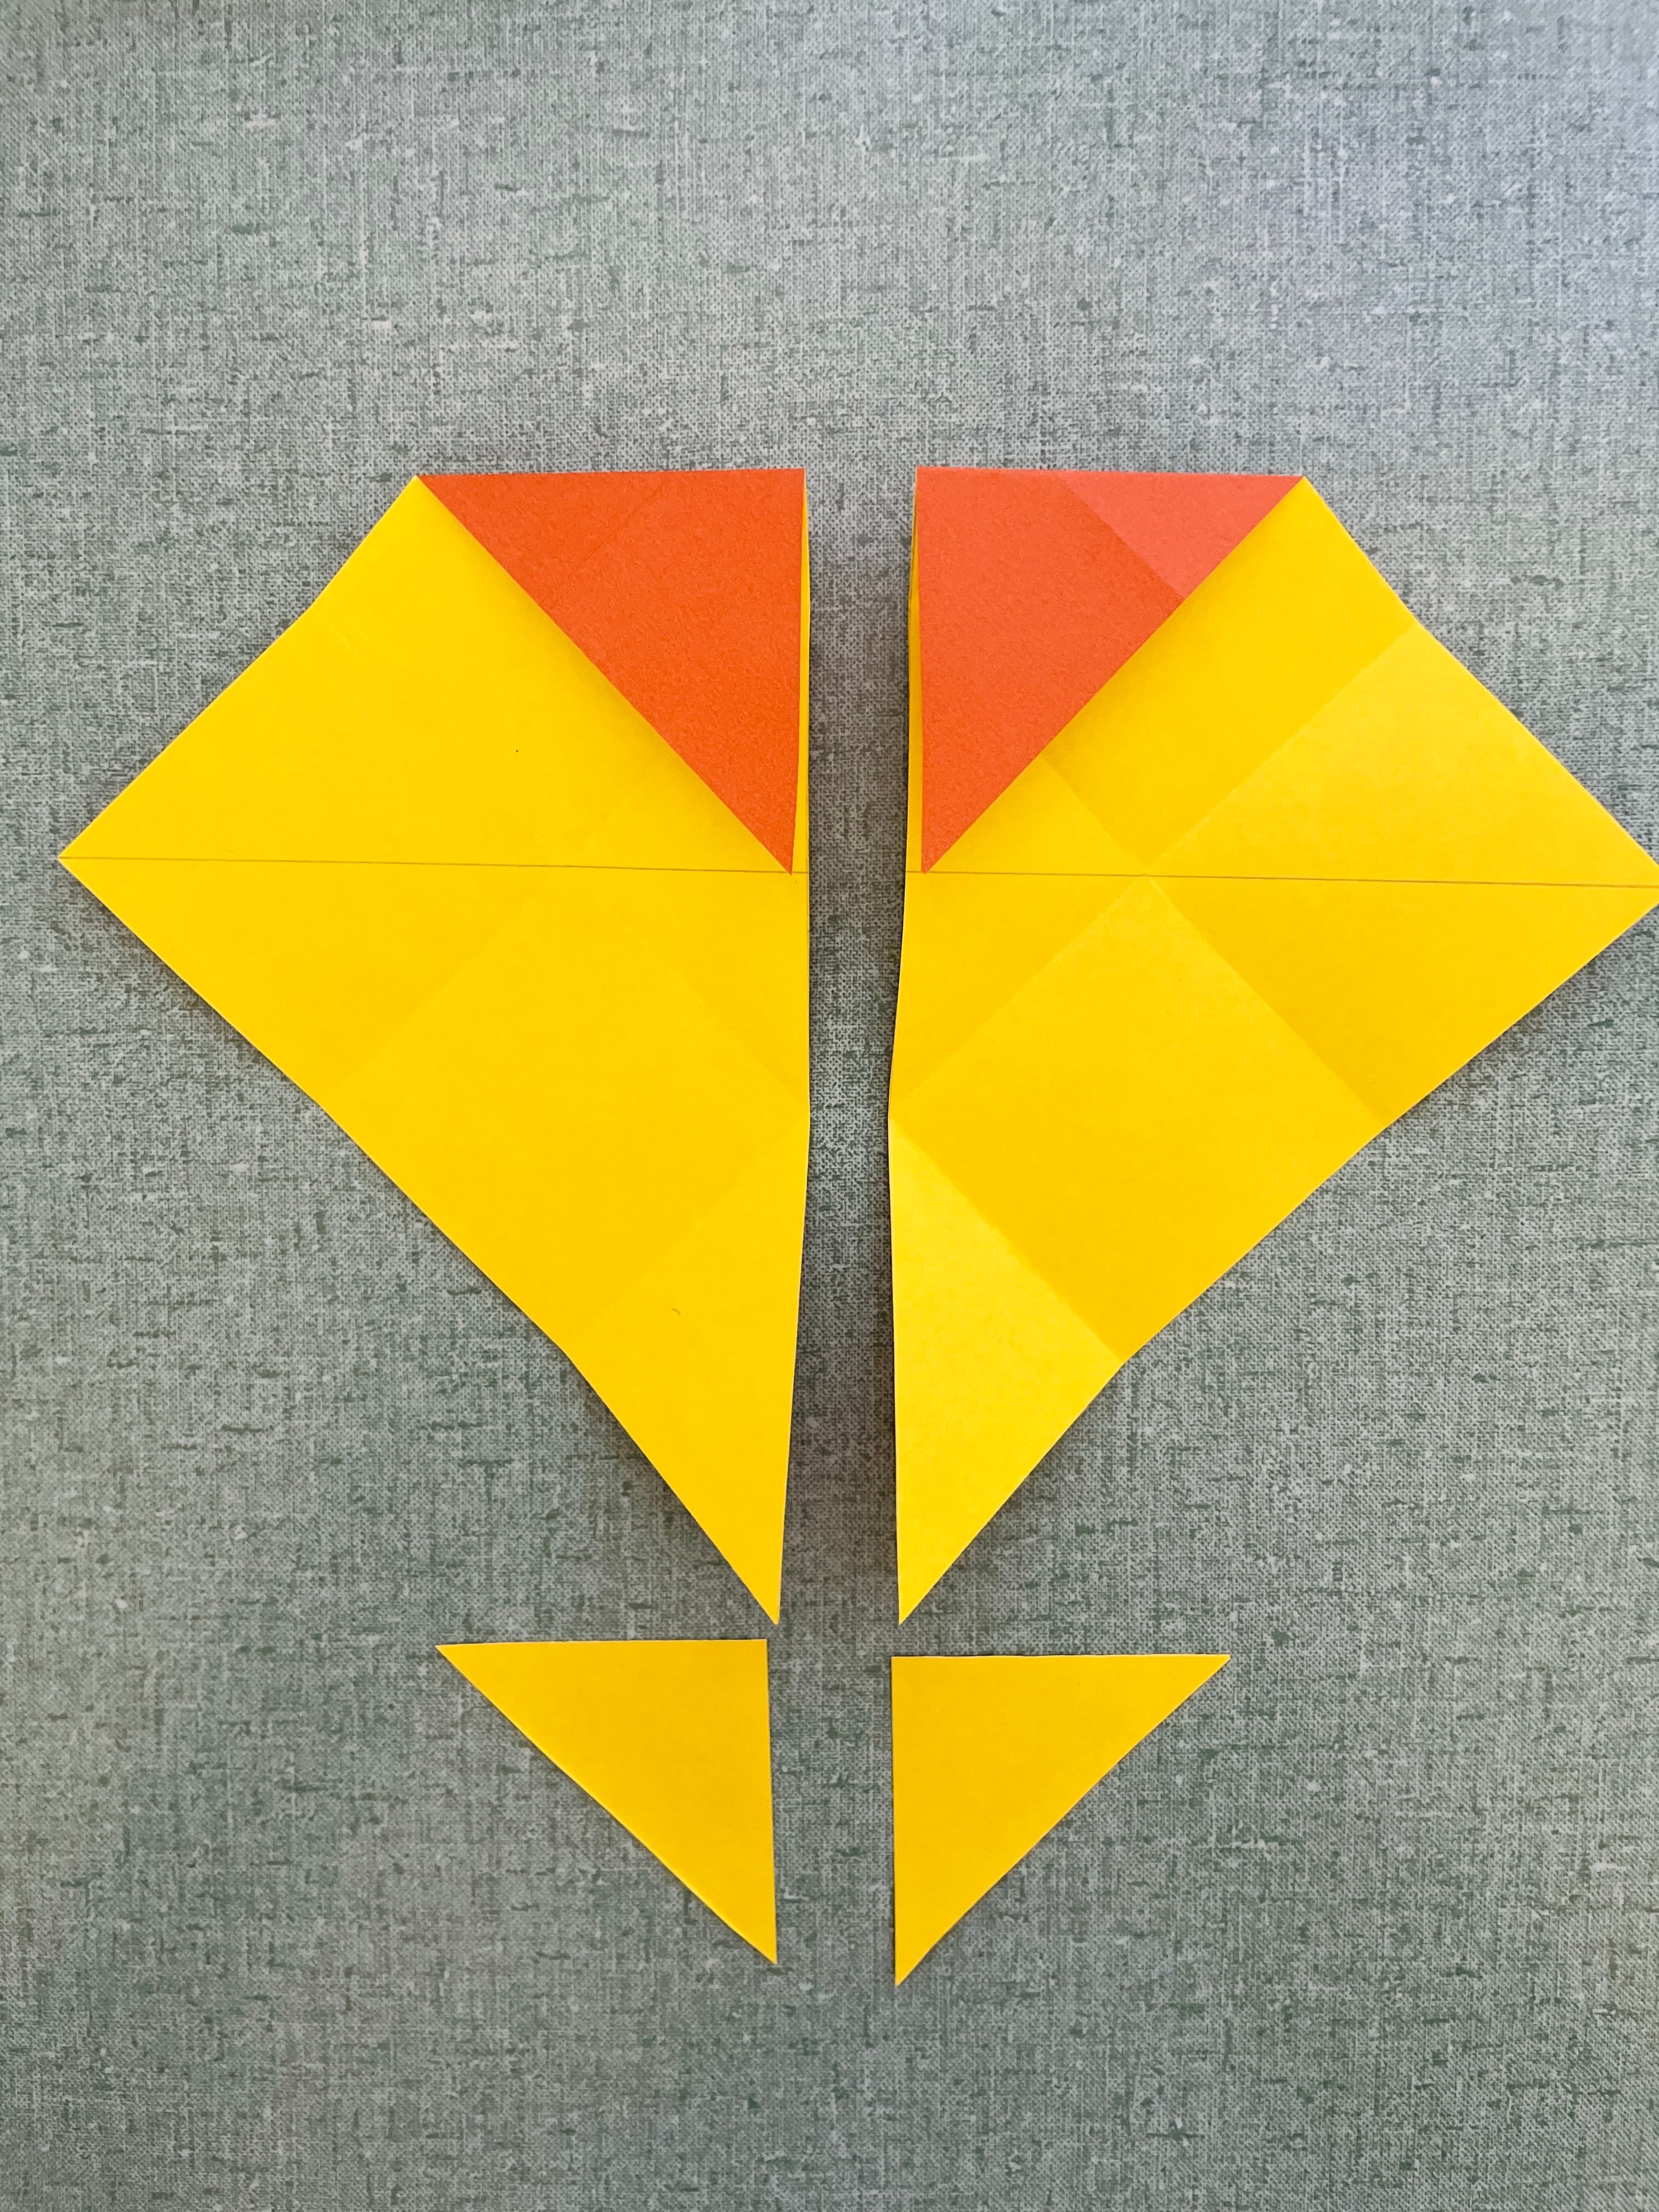
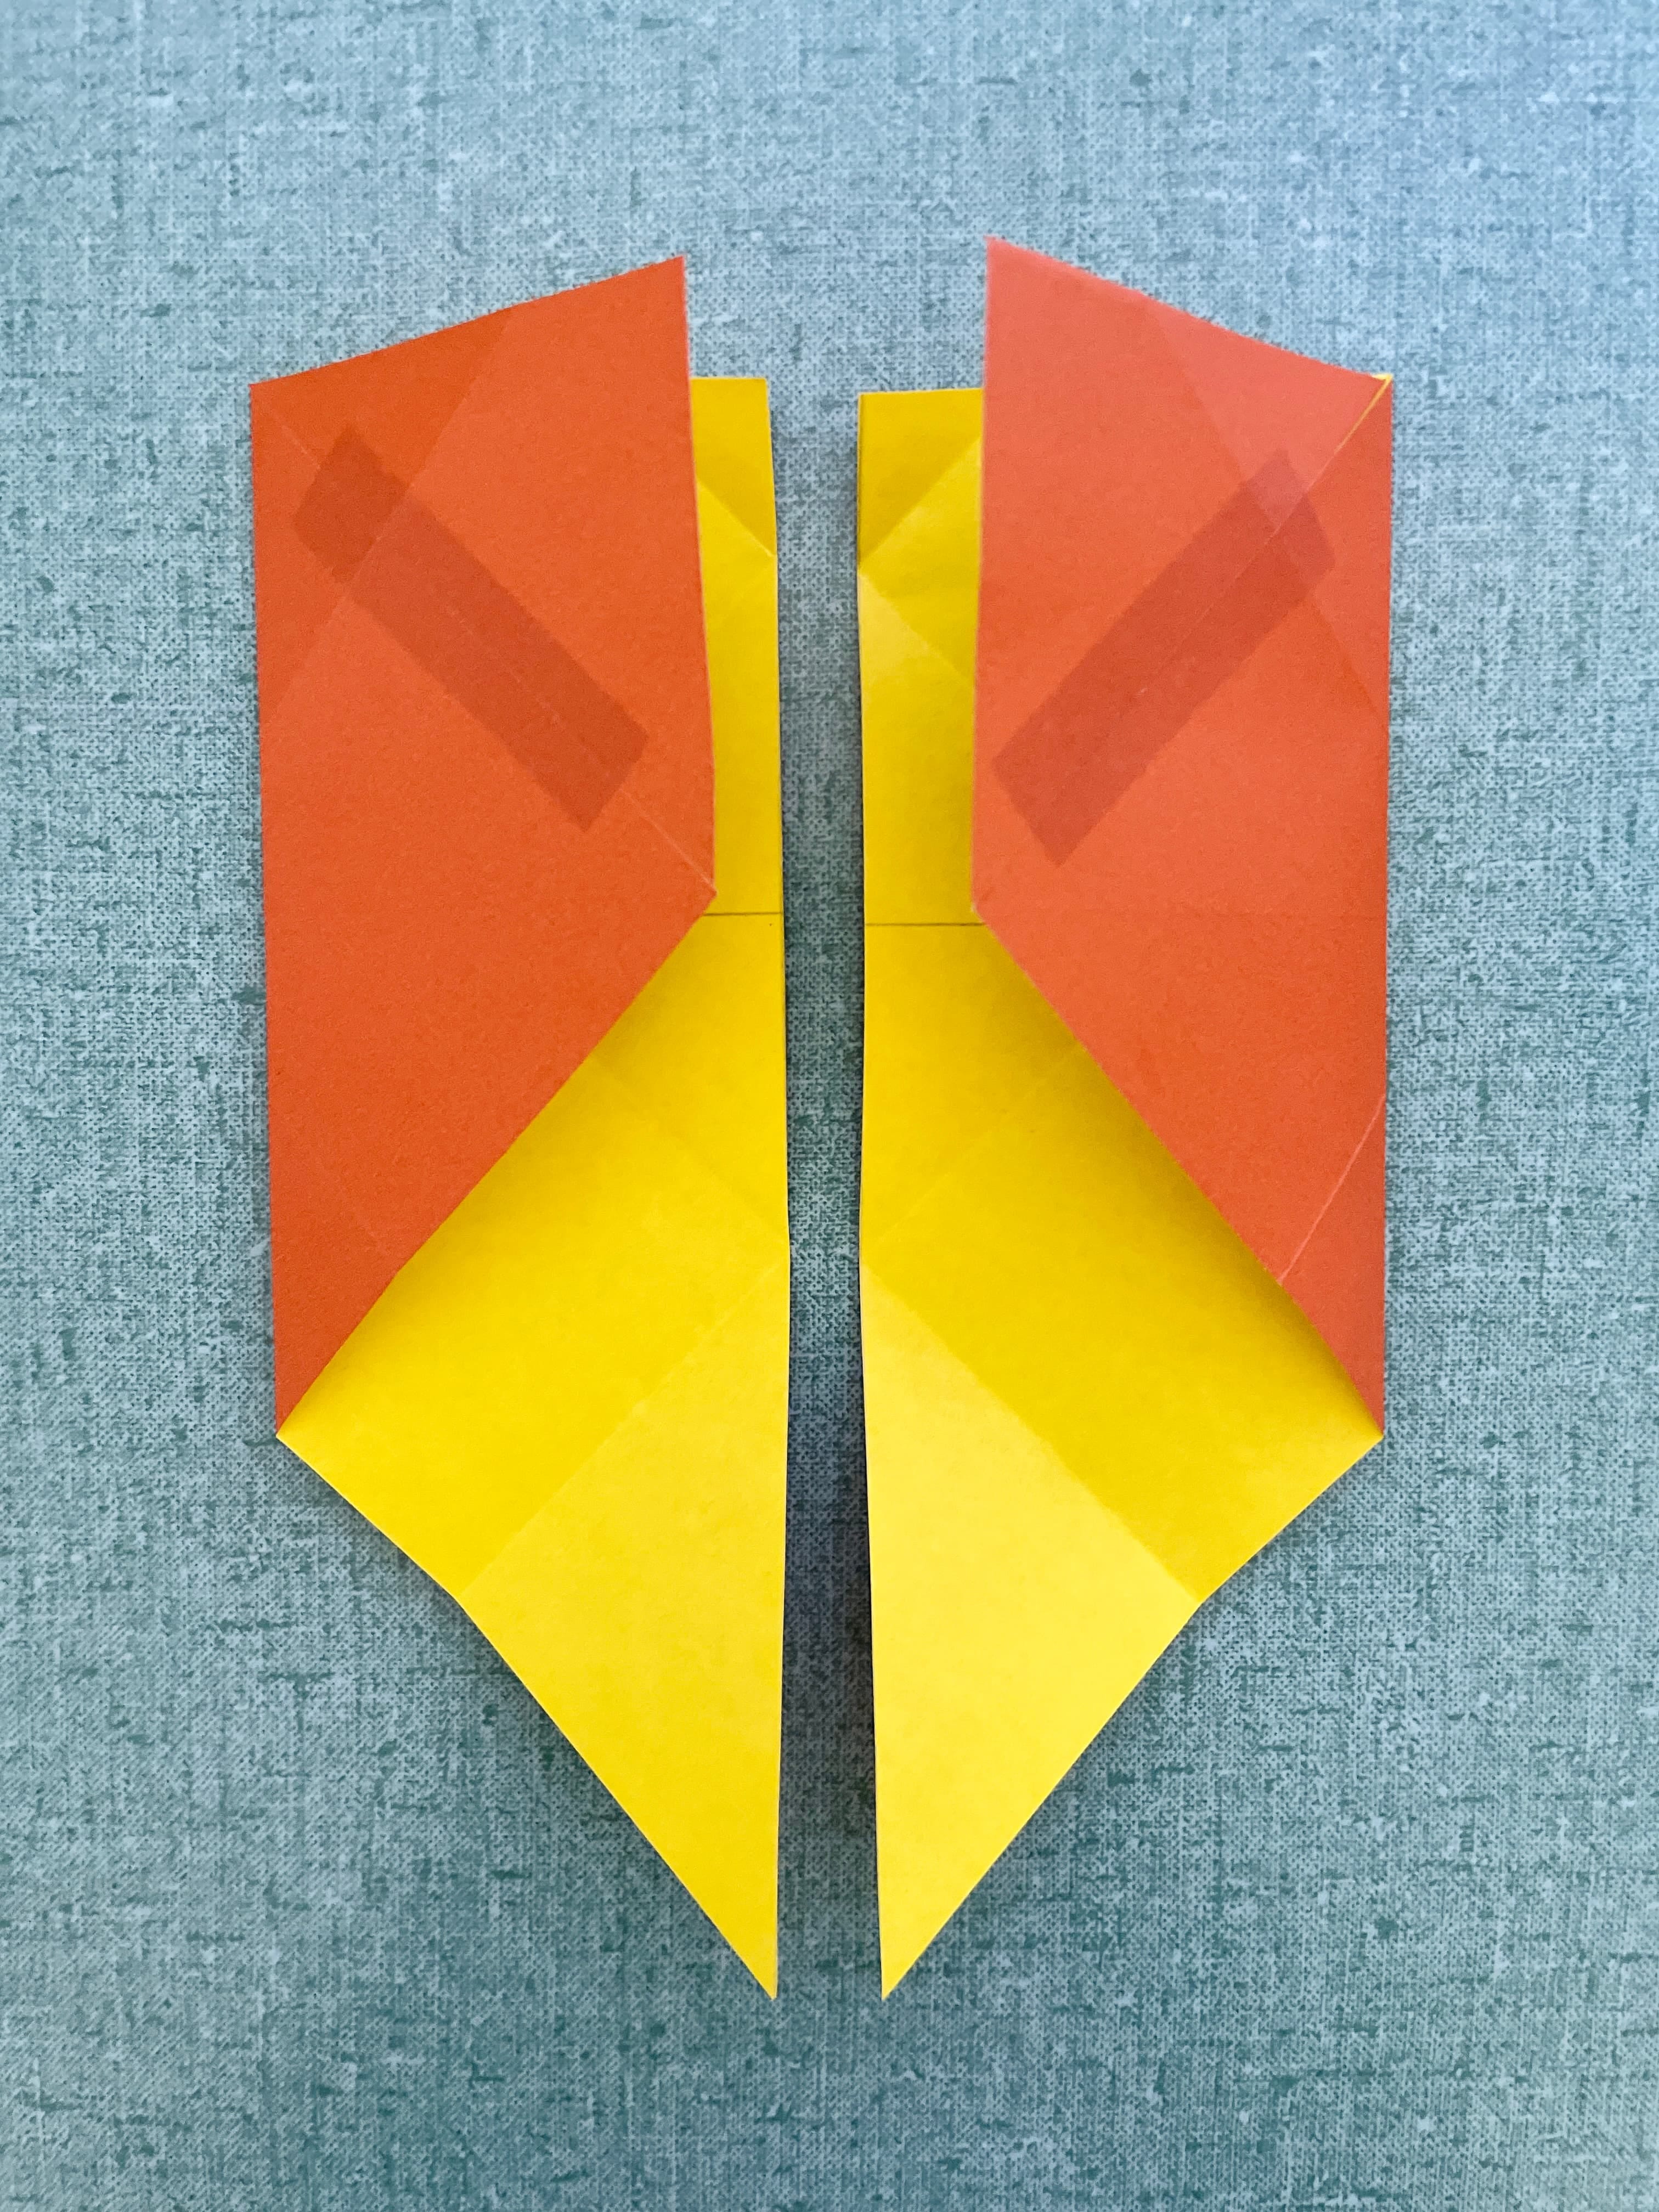
Intrigued yet? Fold the top of the big triangles towards the center line.
Now we start seeing the “right side” of the paper, shown with the brown-orange color.
Cut the fold line you just made on the two triangles, and place it back where they were, for now.
Putting back the resulting two triangles on the top.
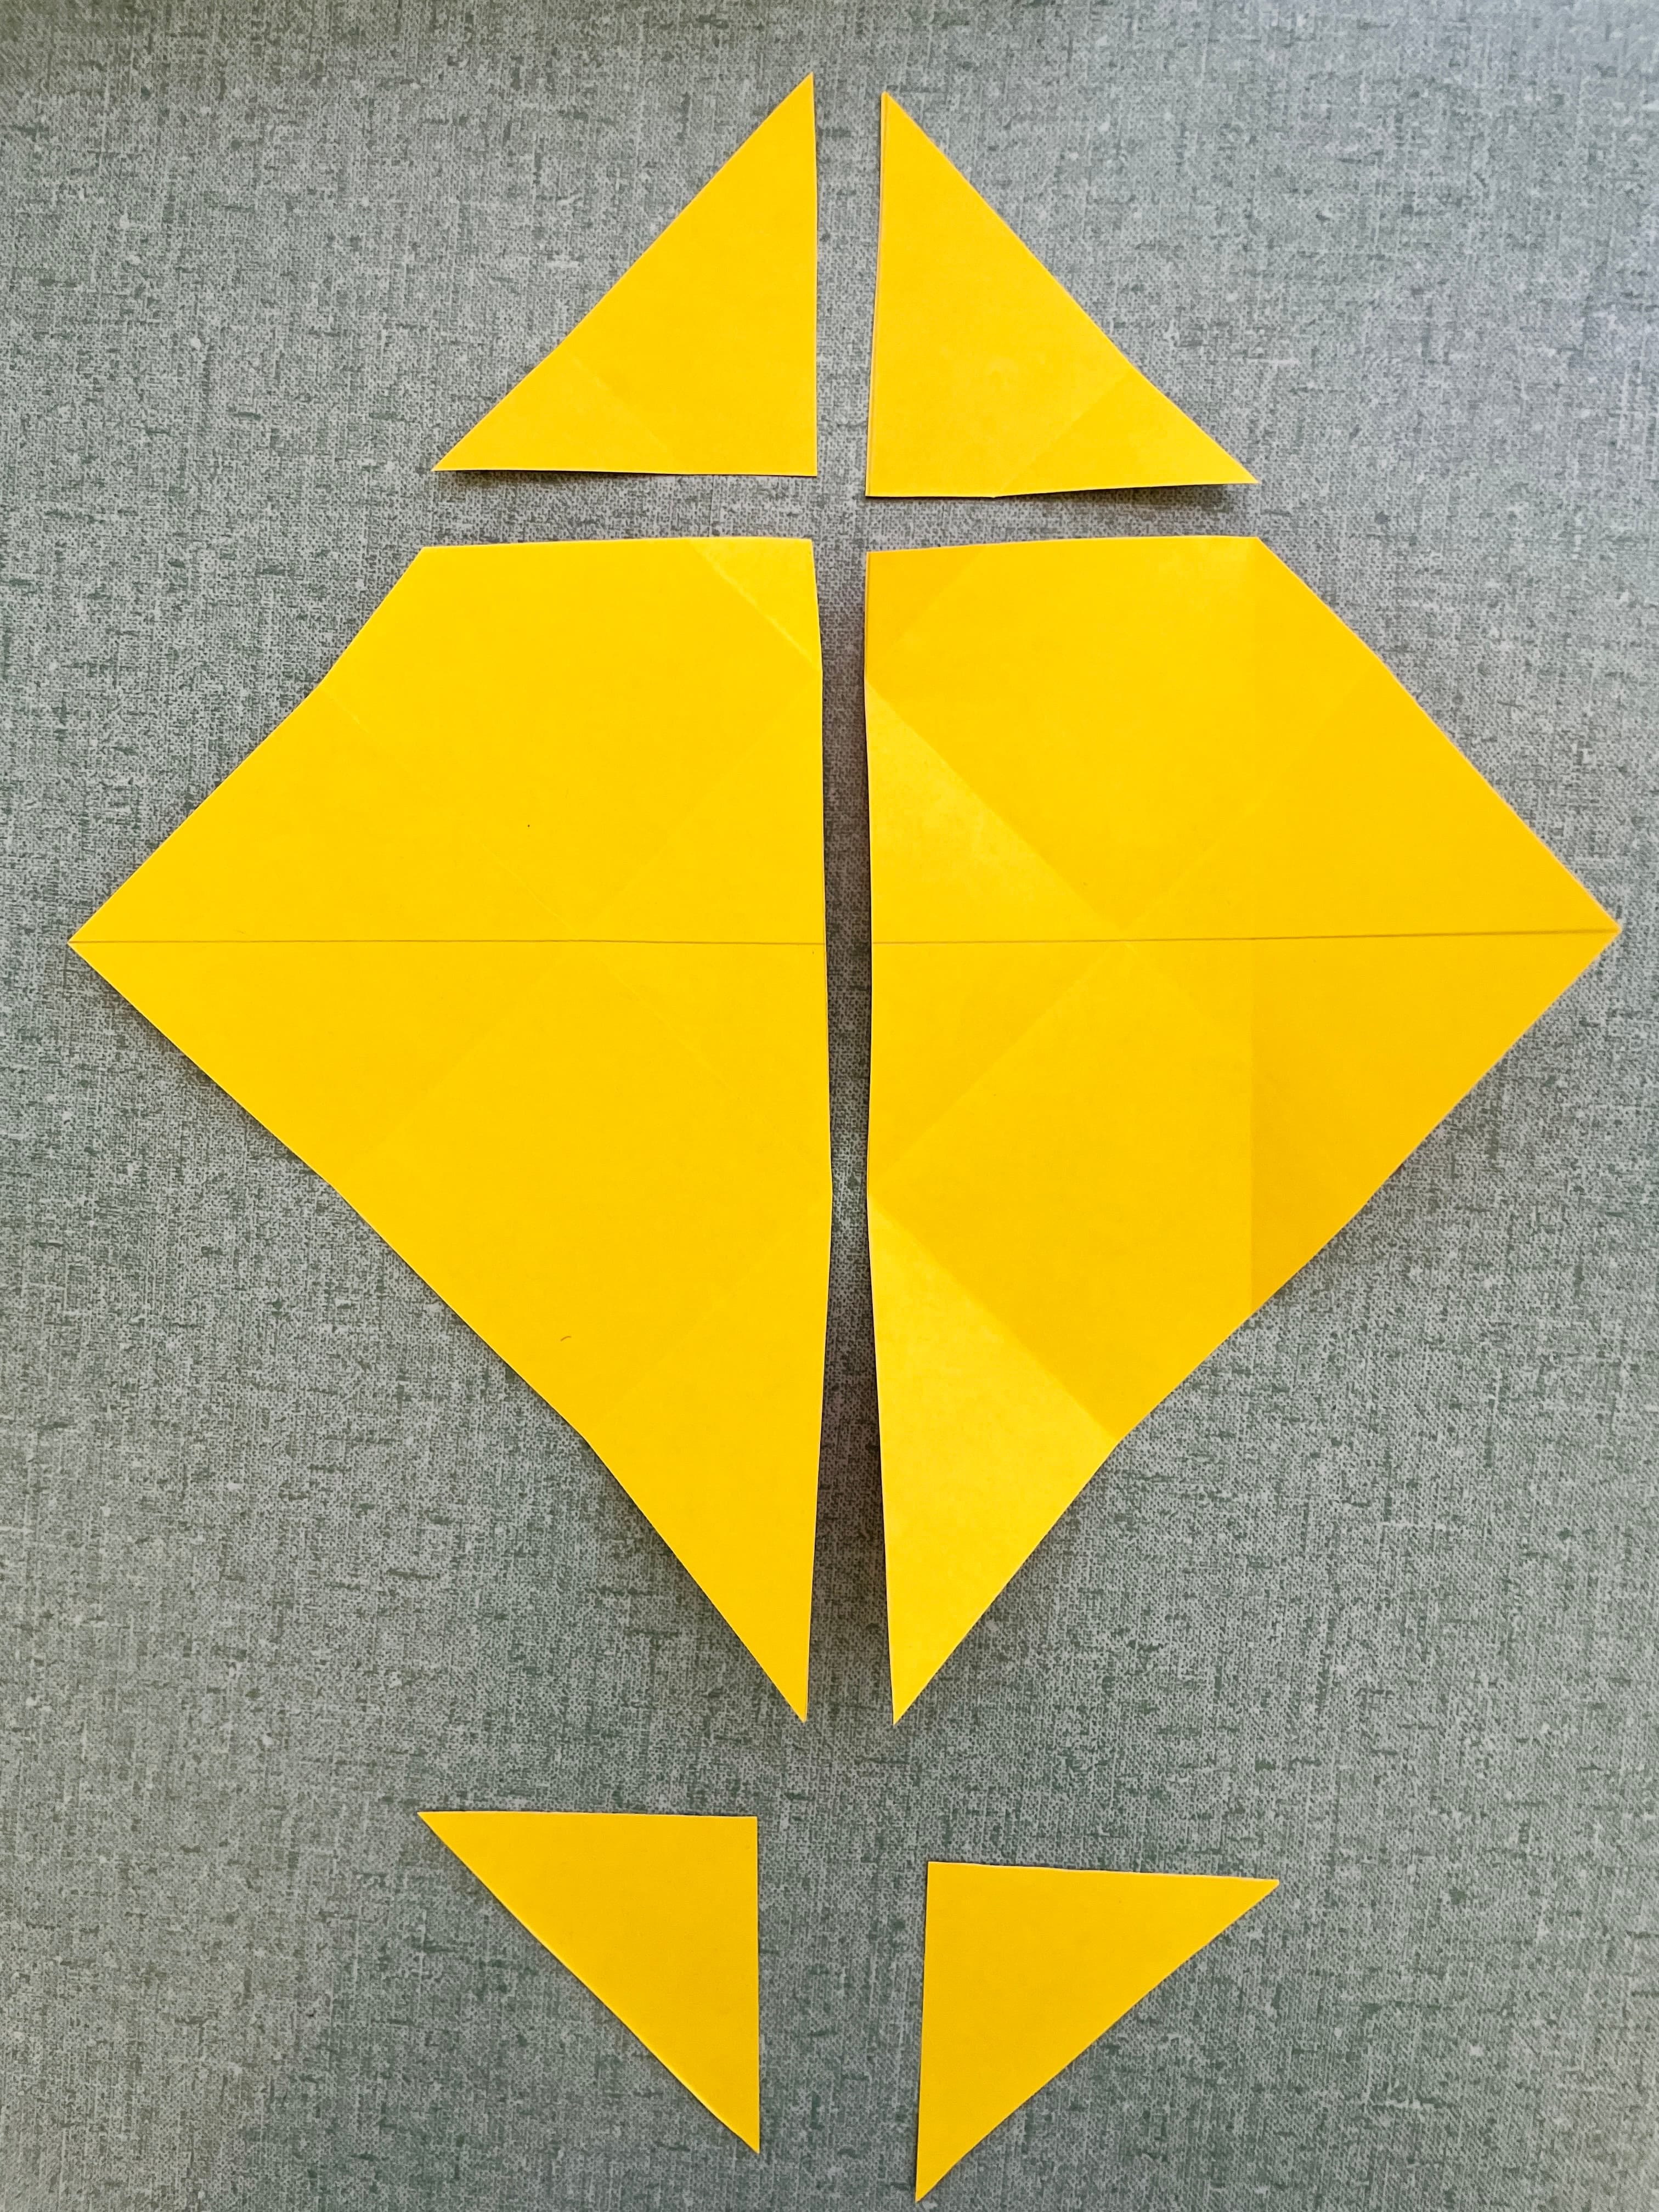
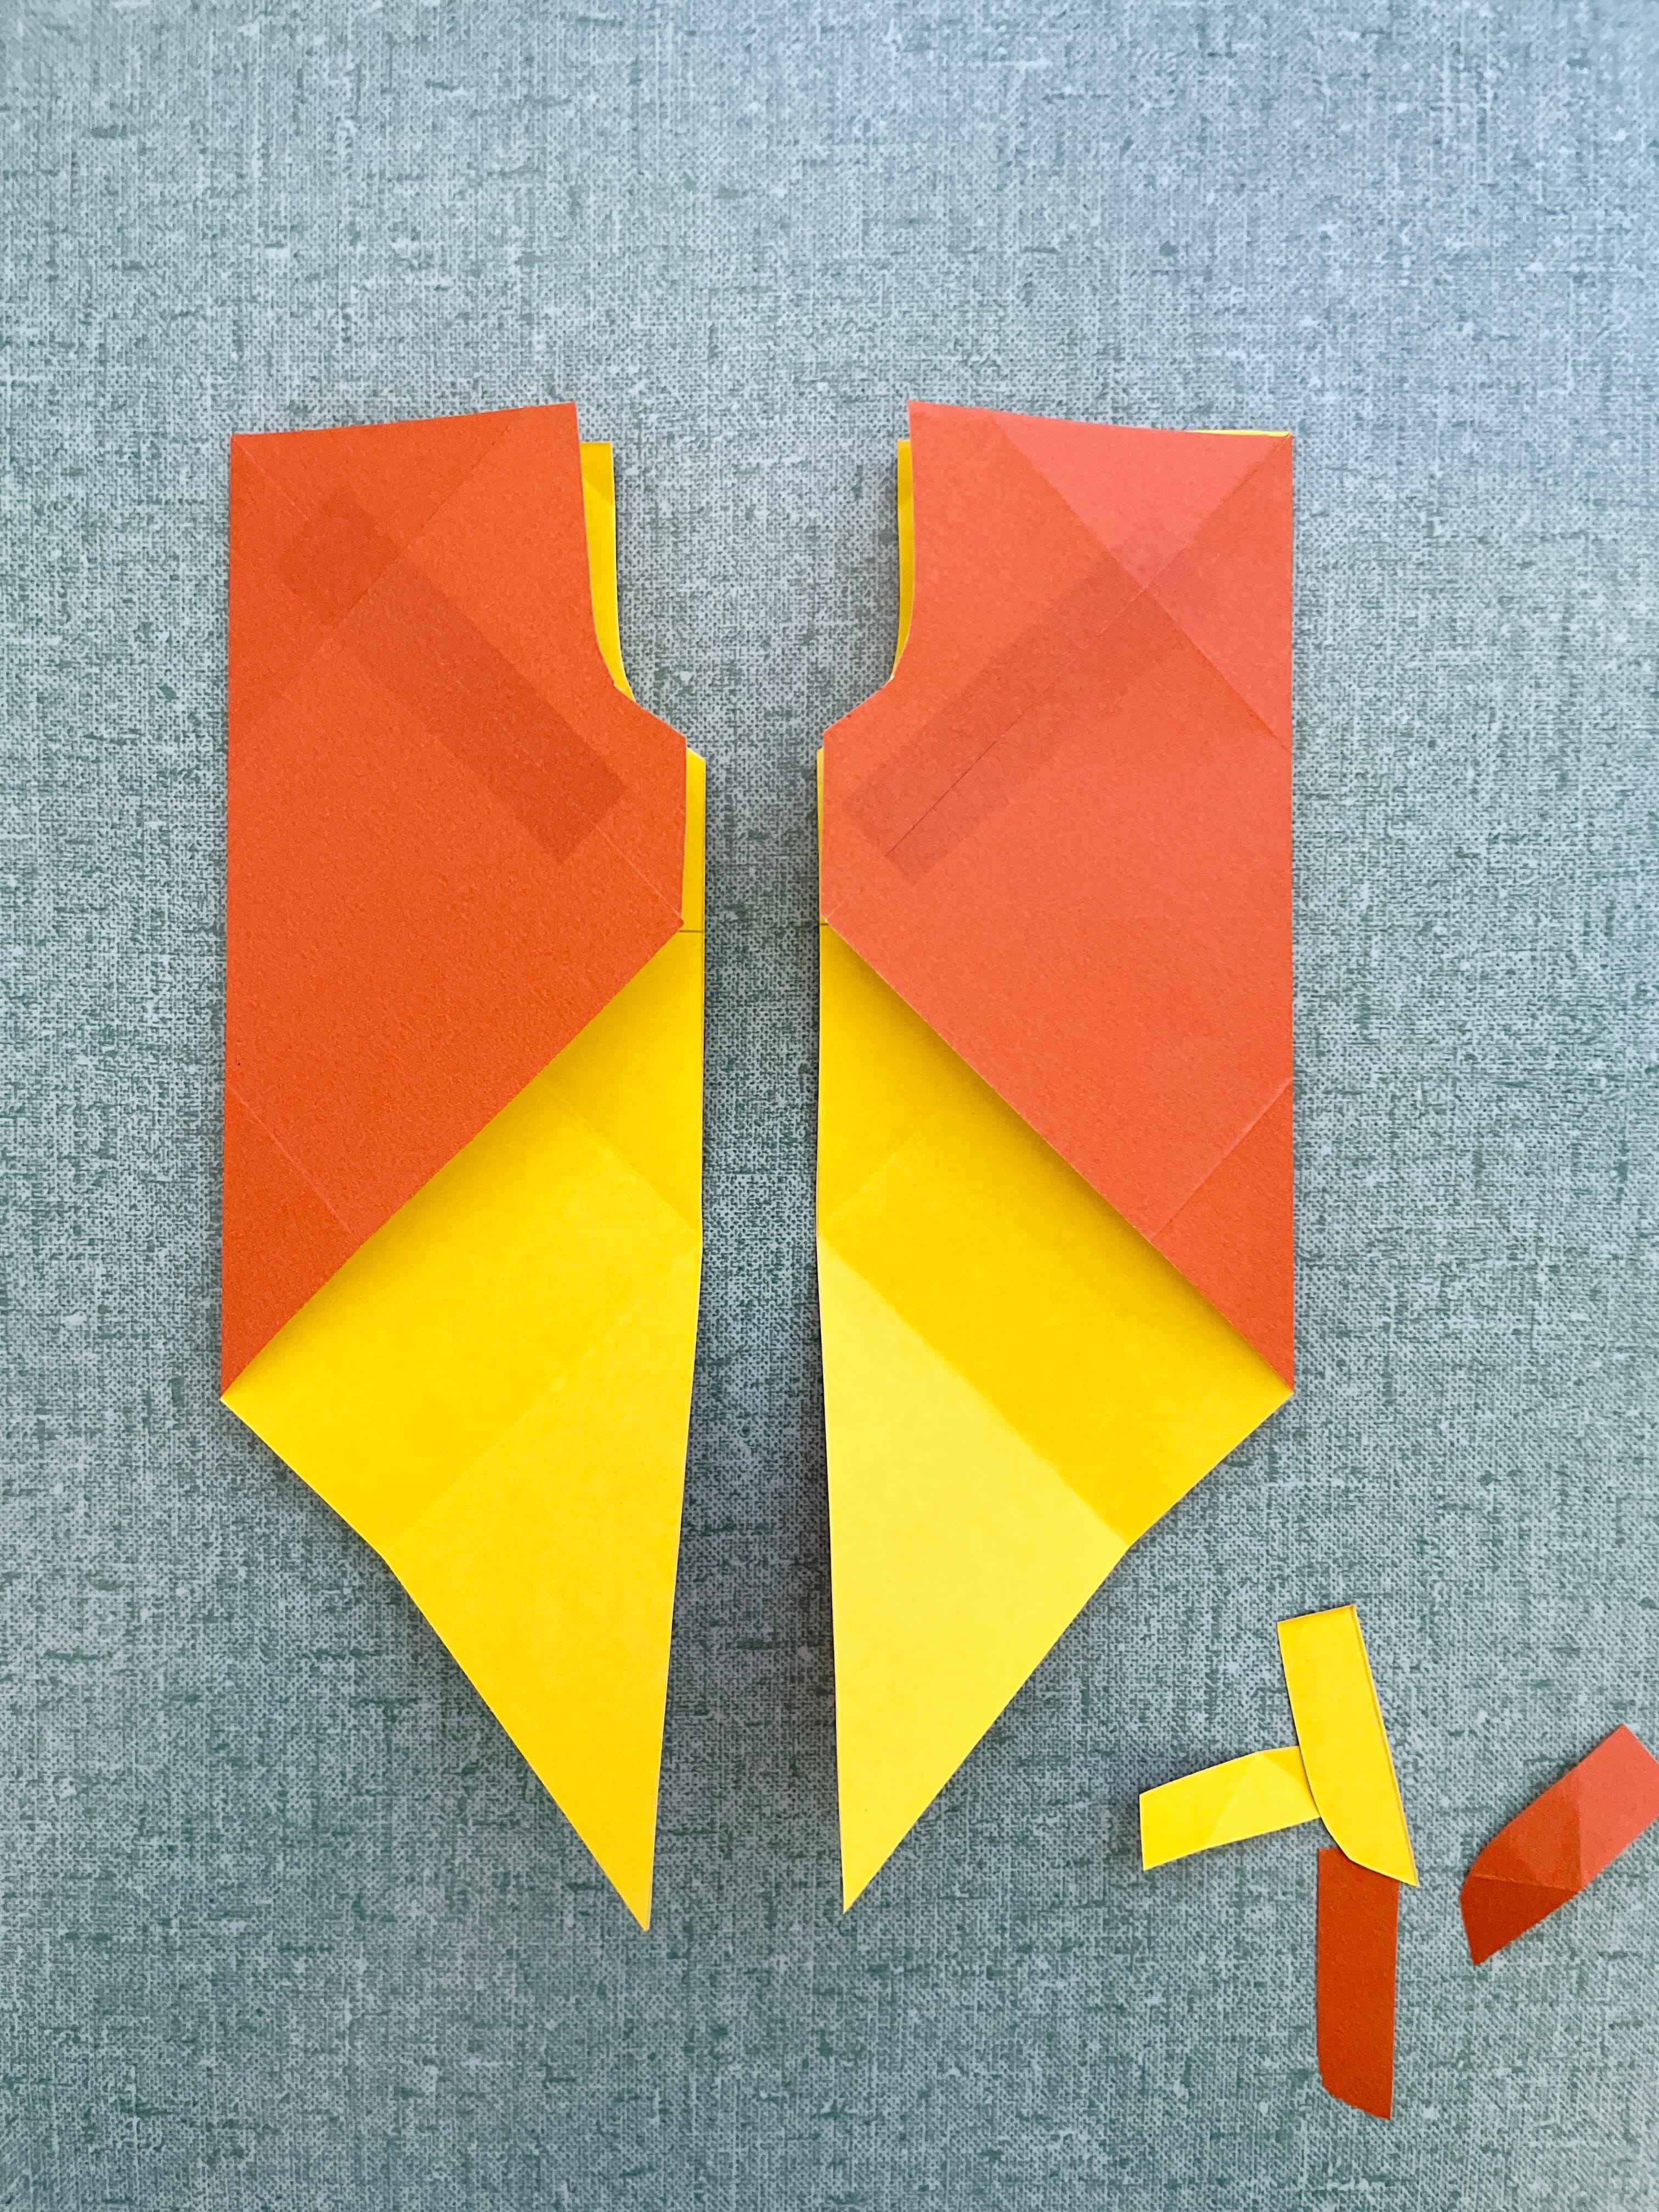
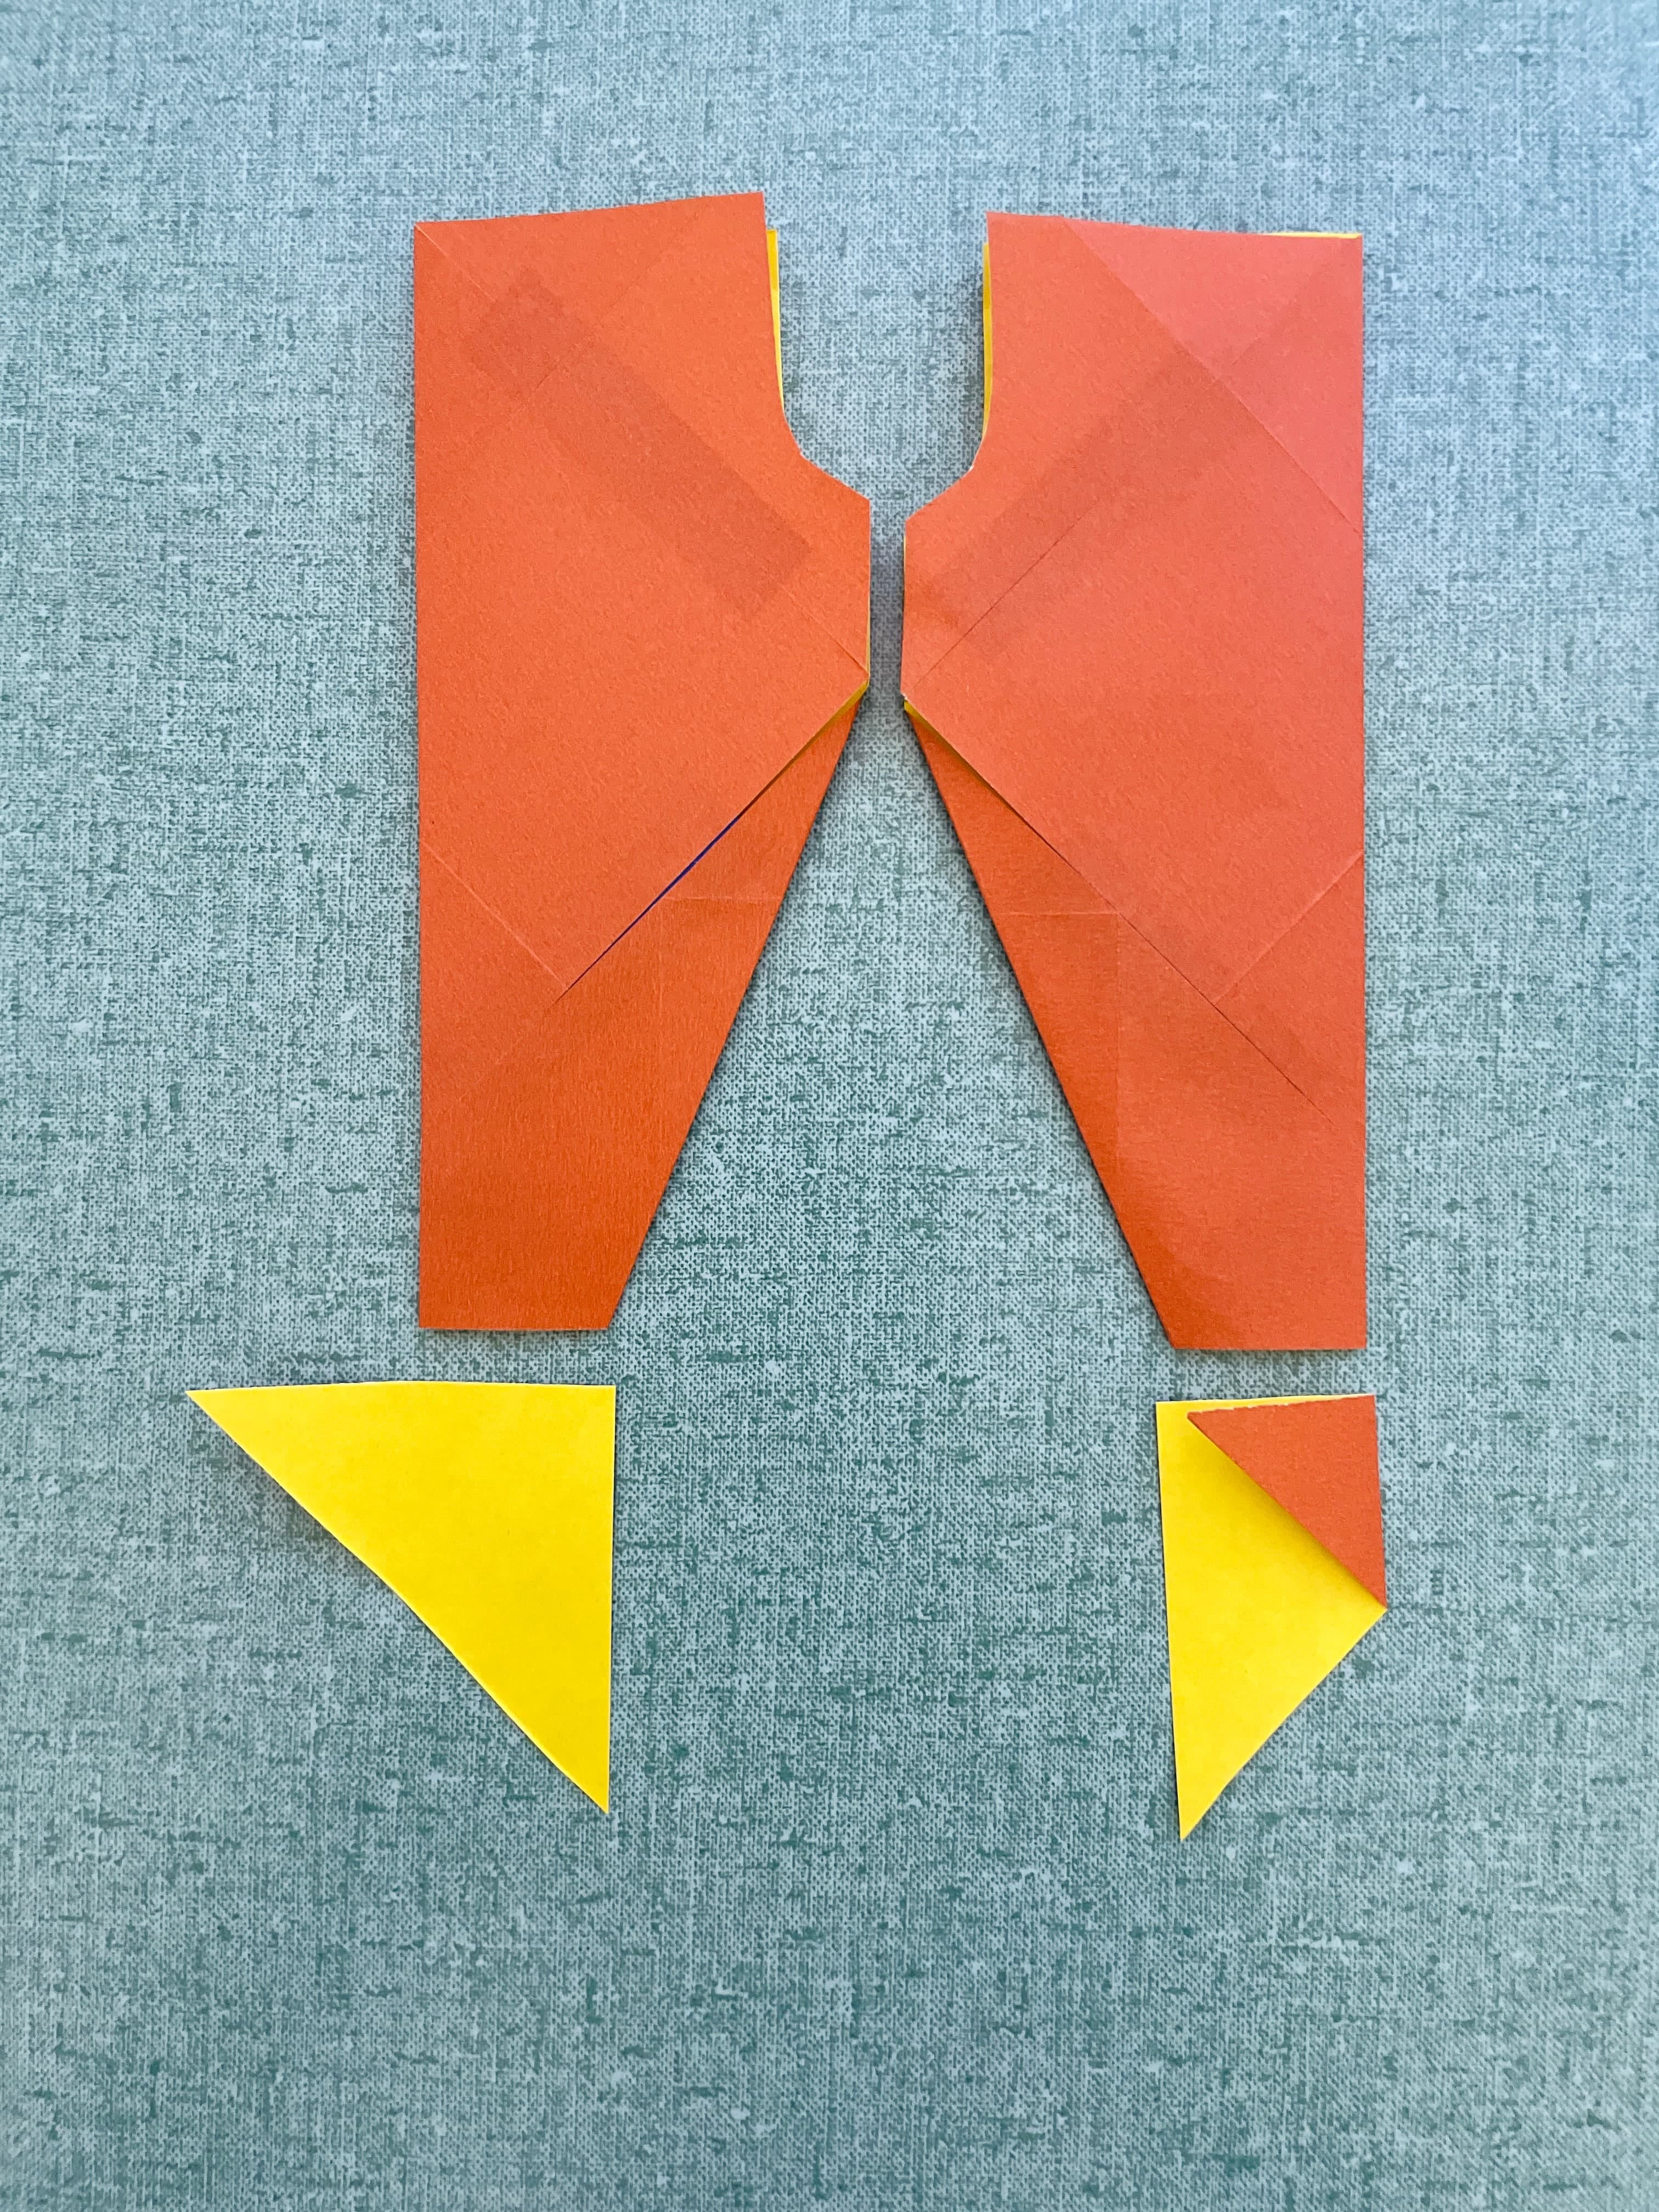
Now, let’s set aside the two small triangles on the bottom and focus on the remaining four paper pieces. Fold the big paper pieces towards the center.
We start constructing the pant legs!
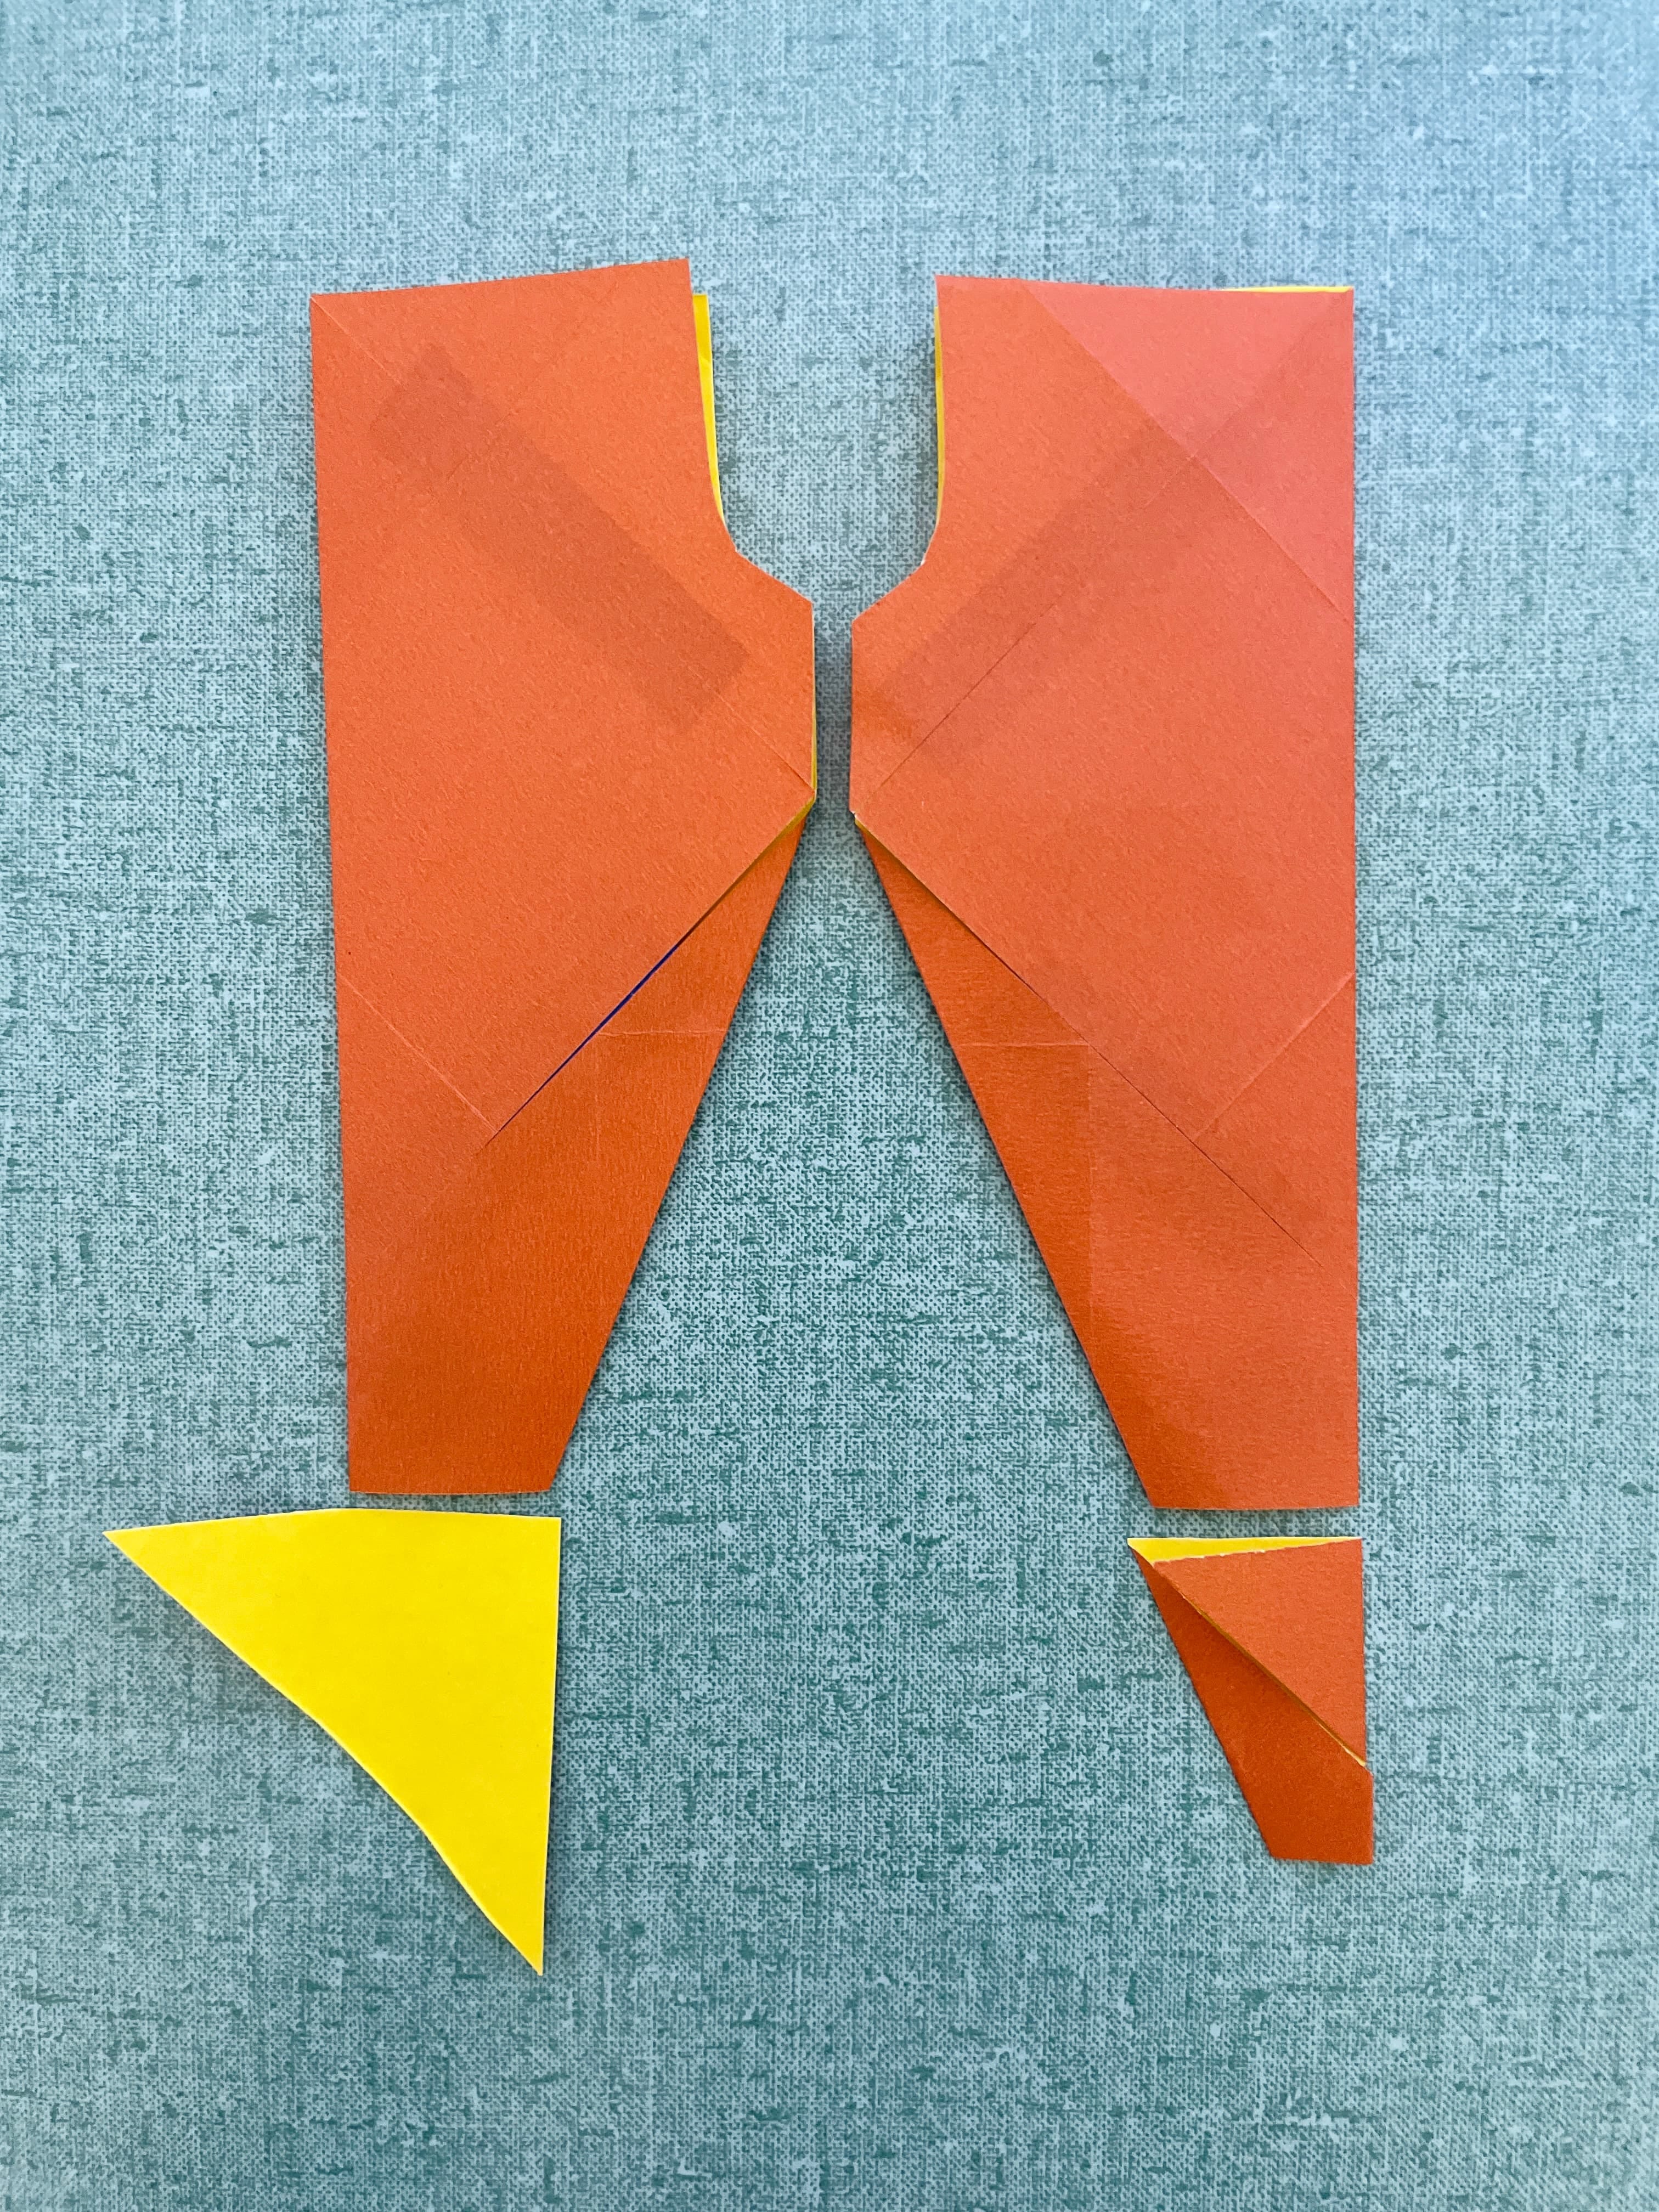
Now, take the triangles you just cut and attach one each to the top of the folded piece.
Do you start seeing the pant legs?
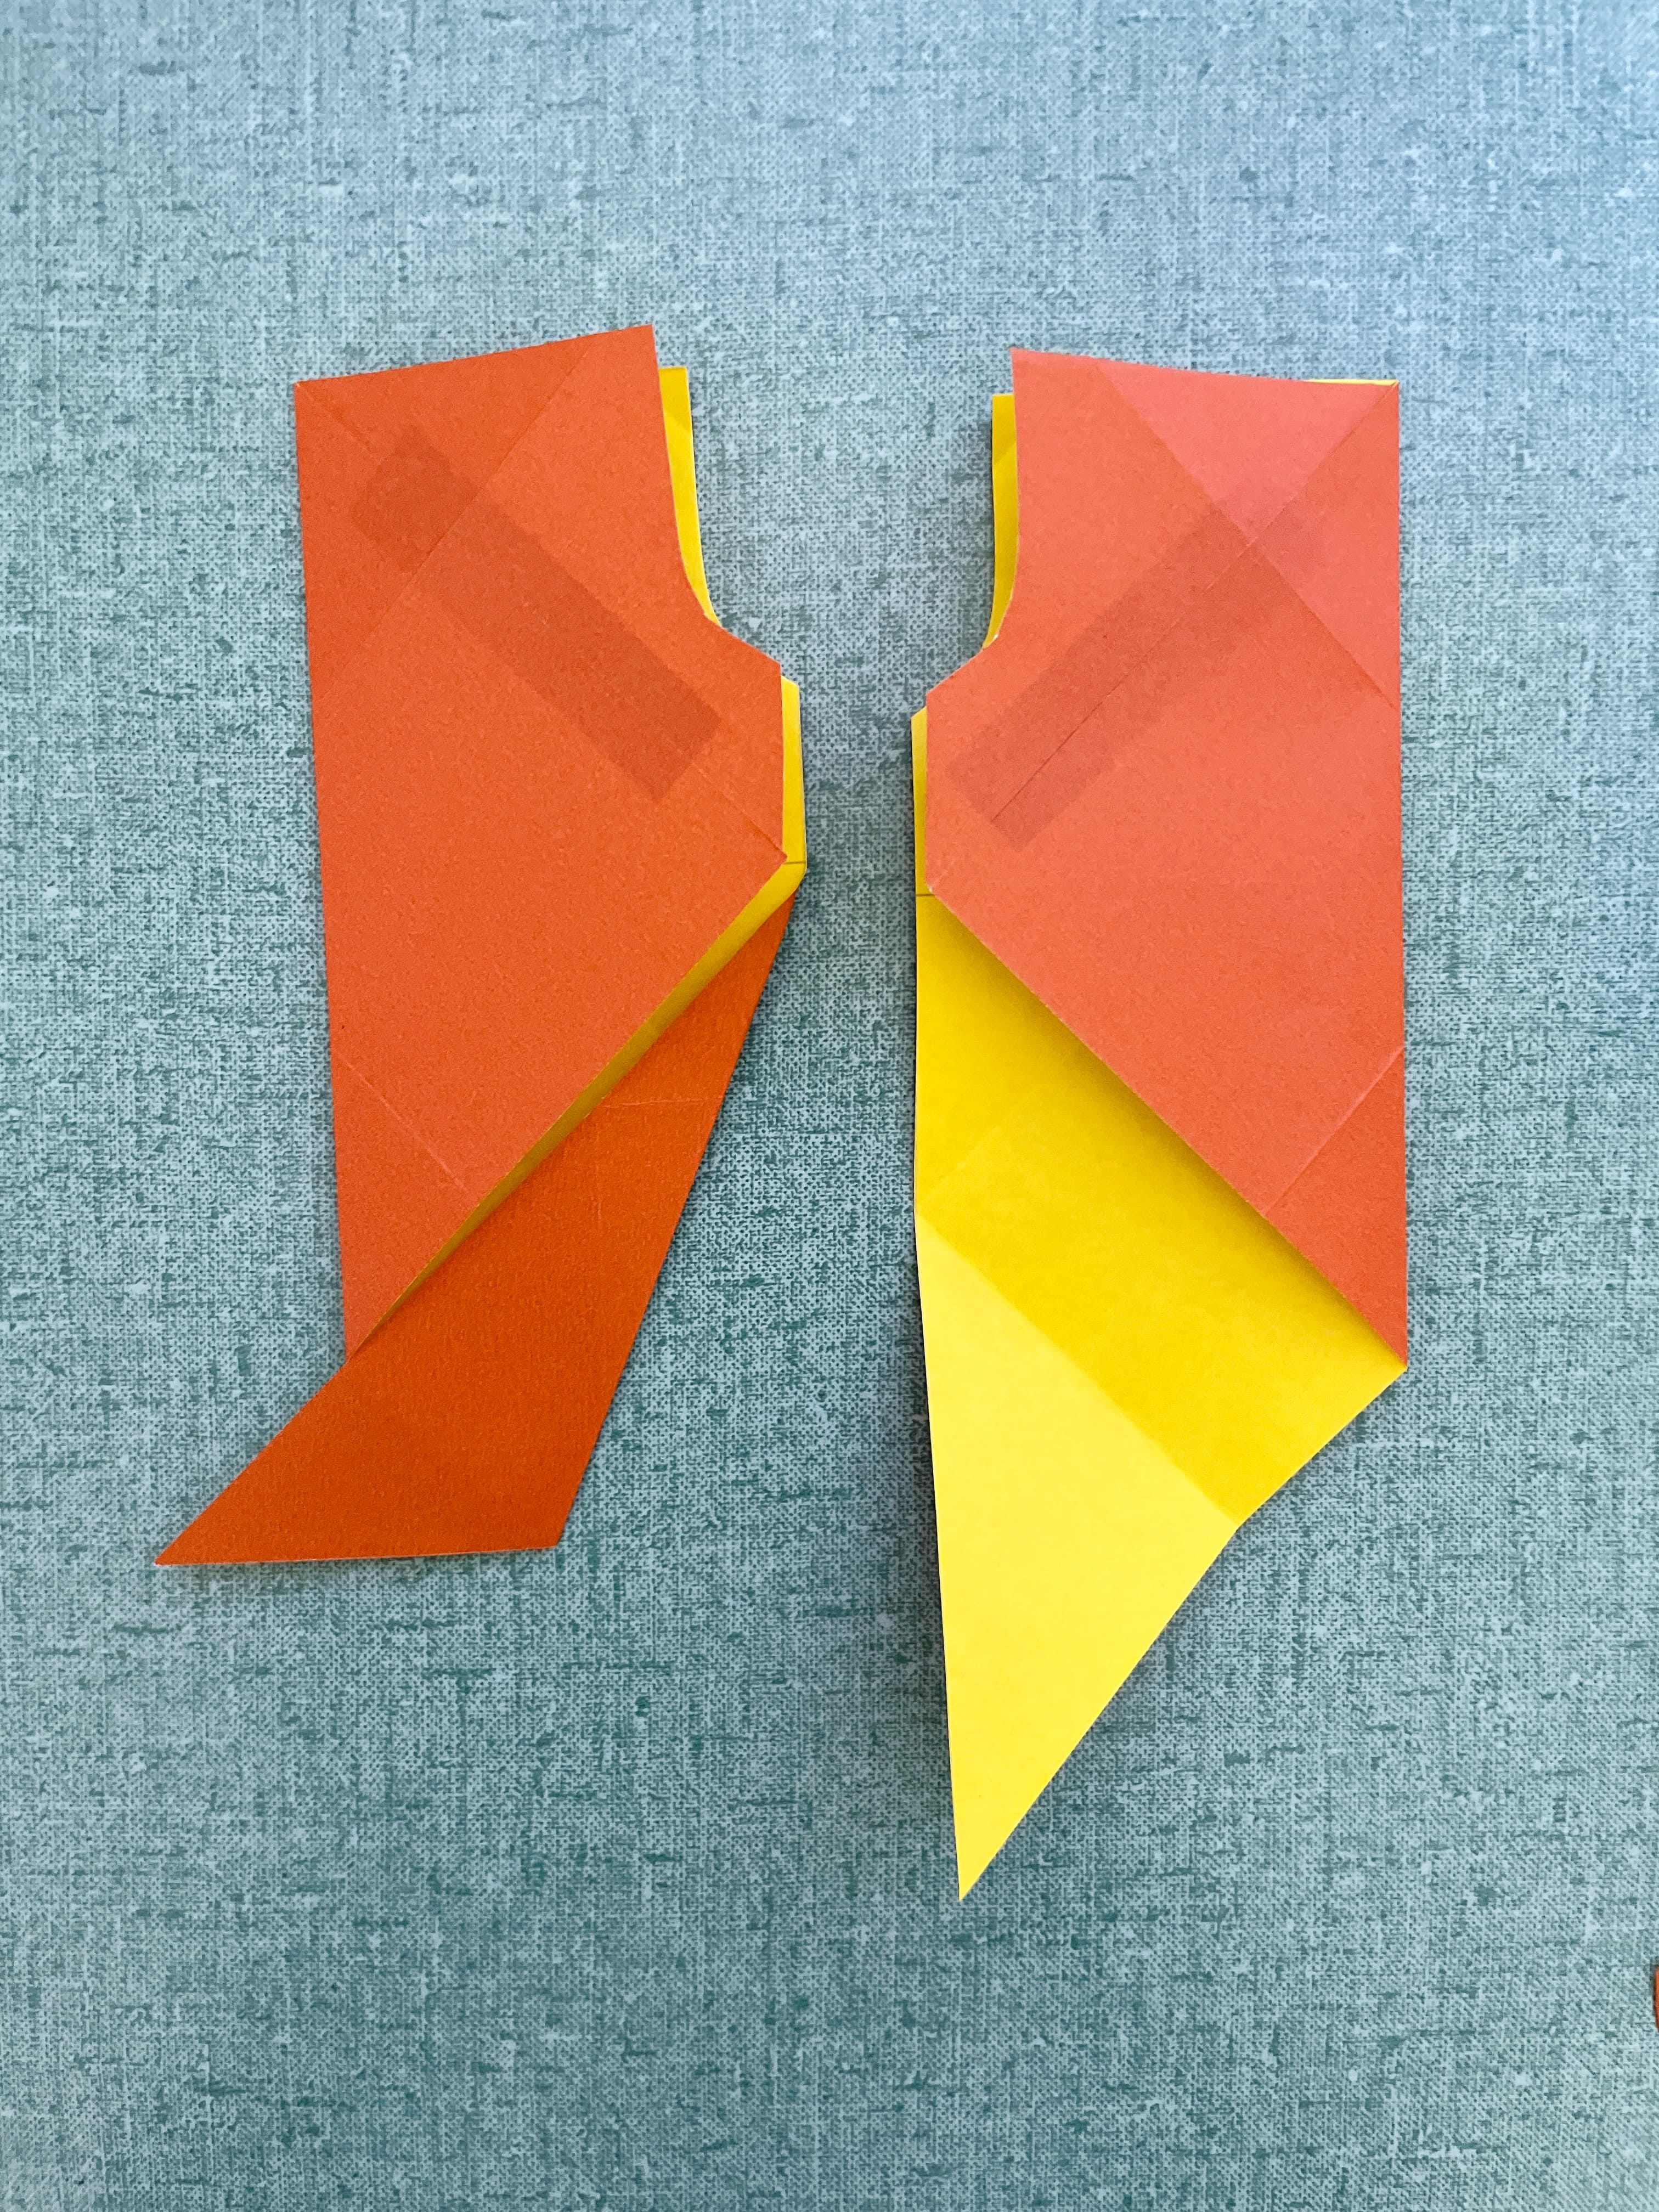
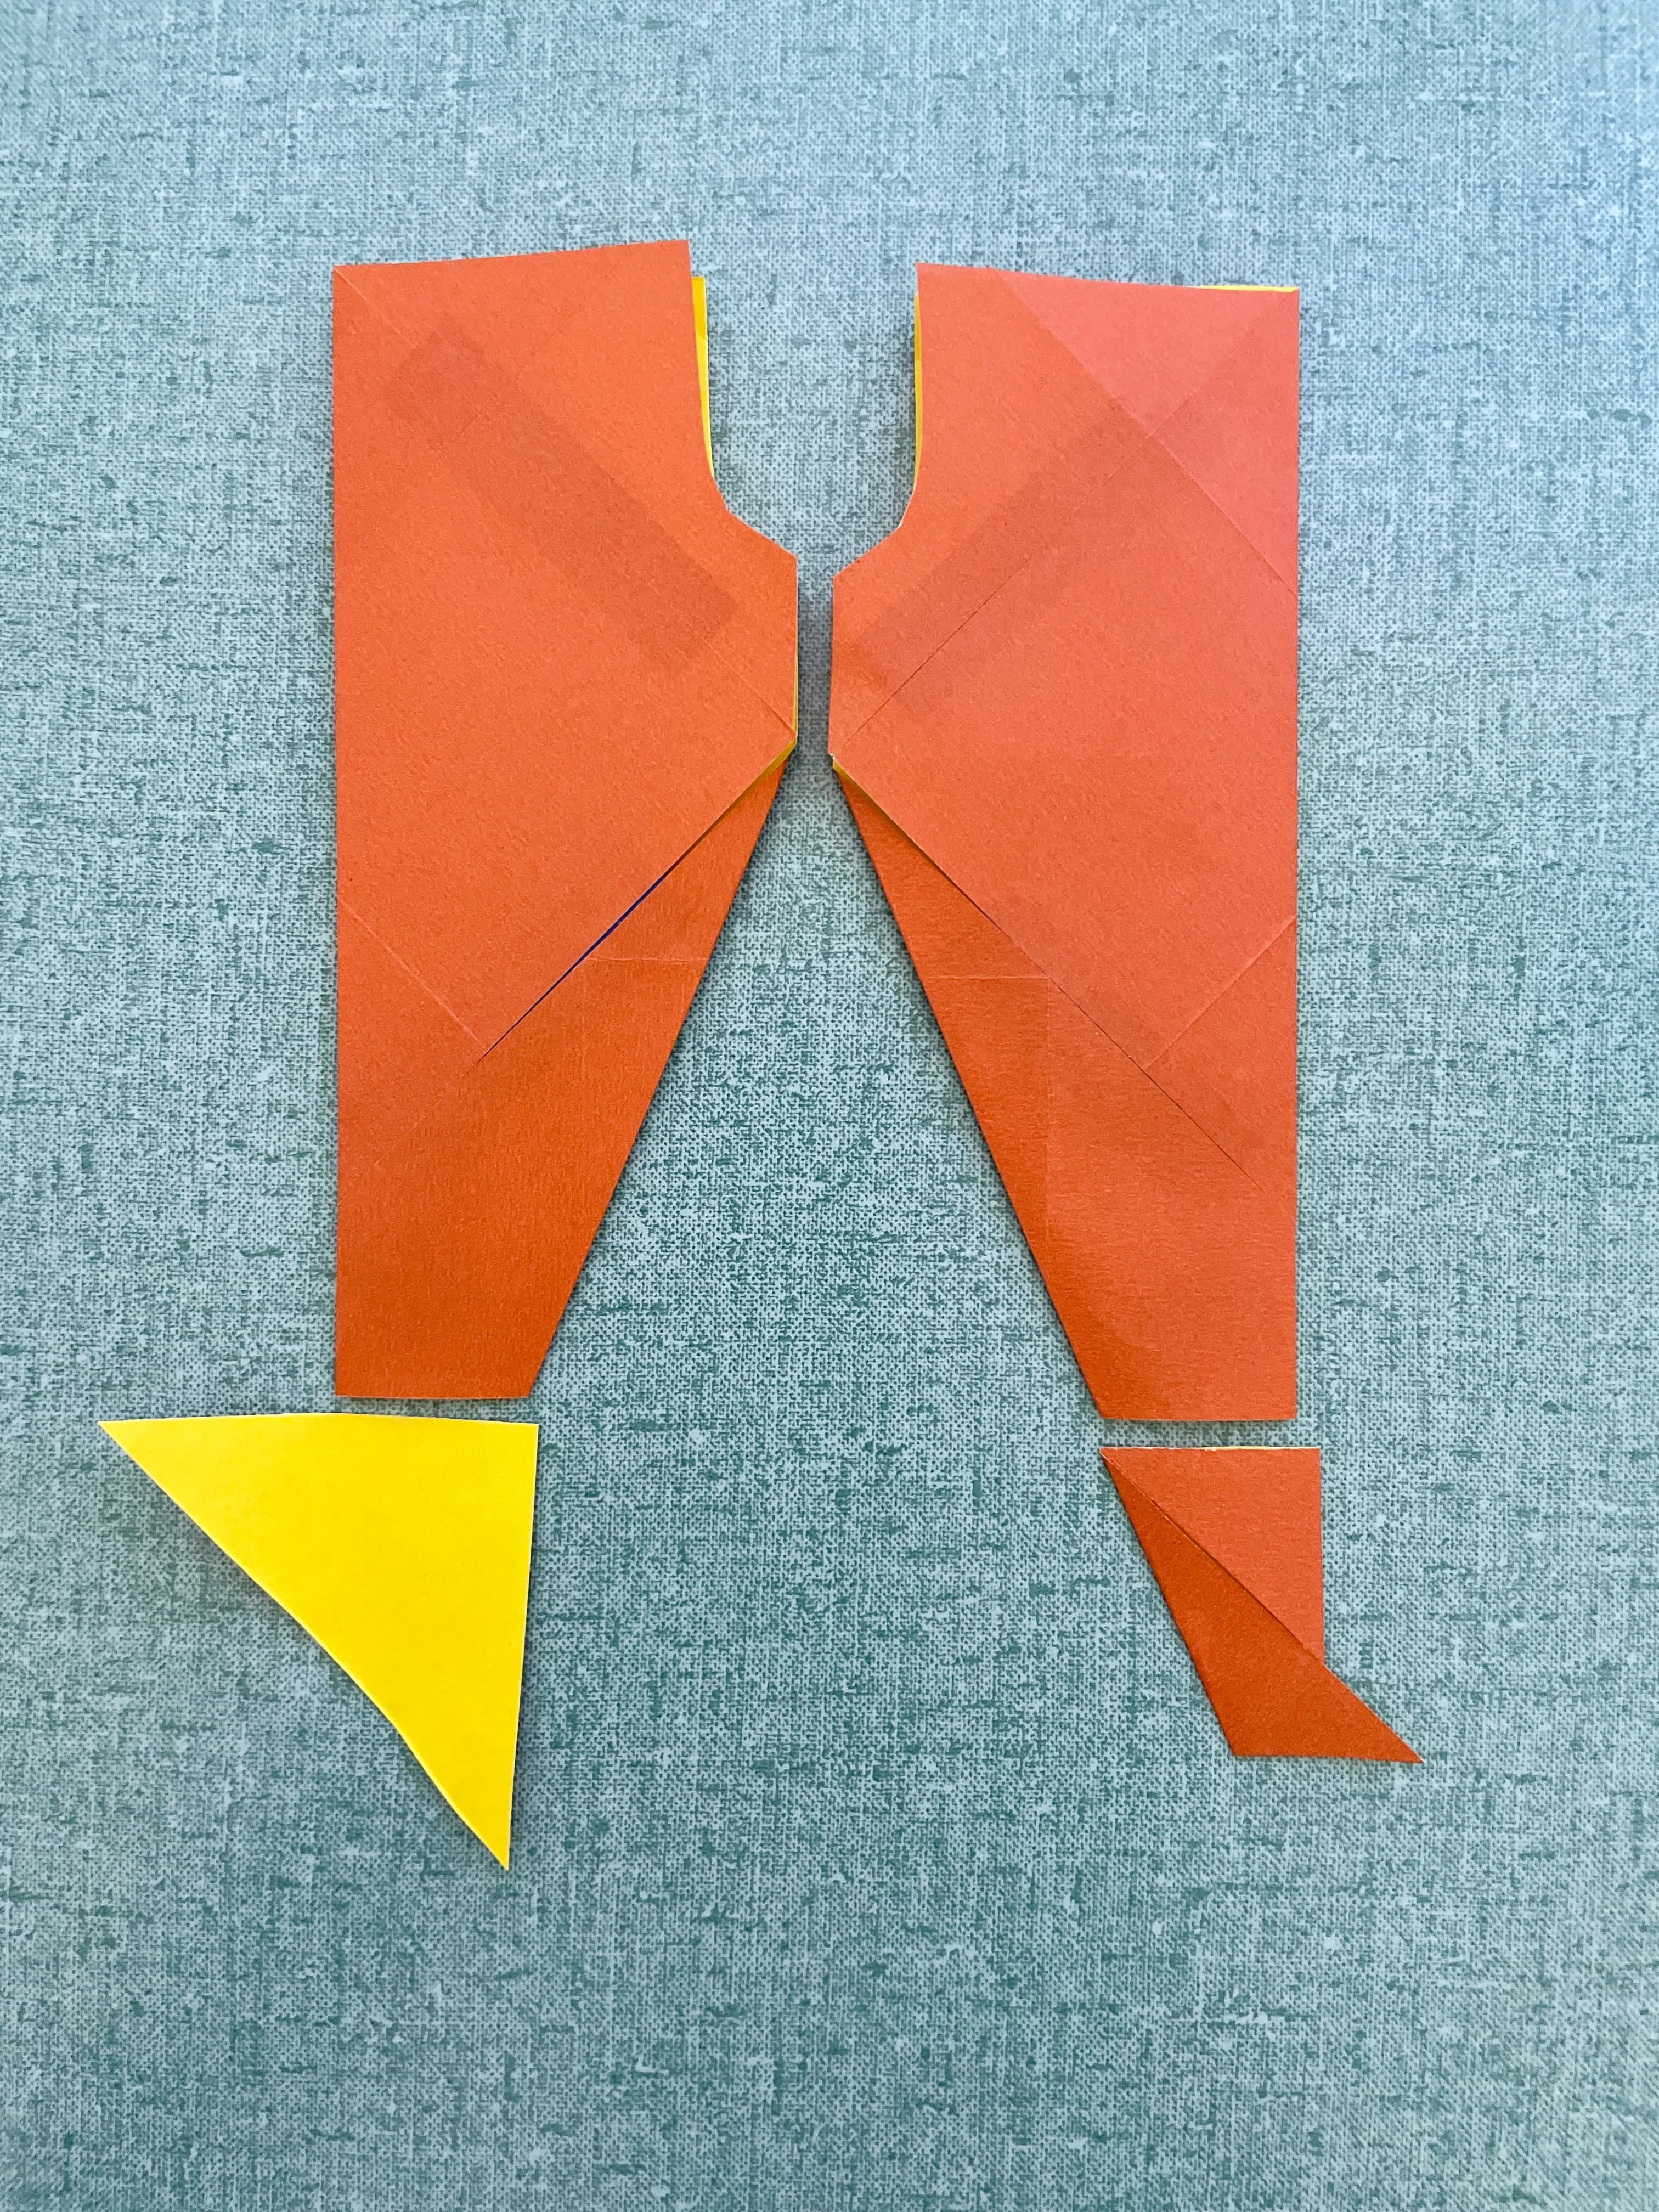
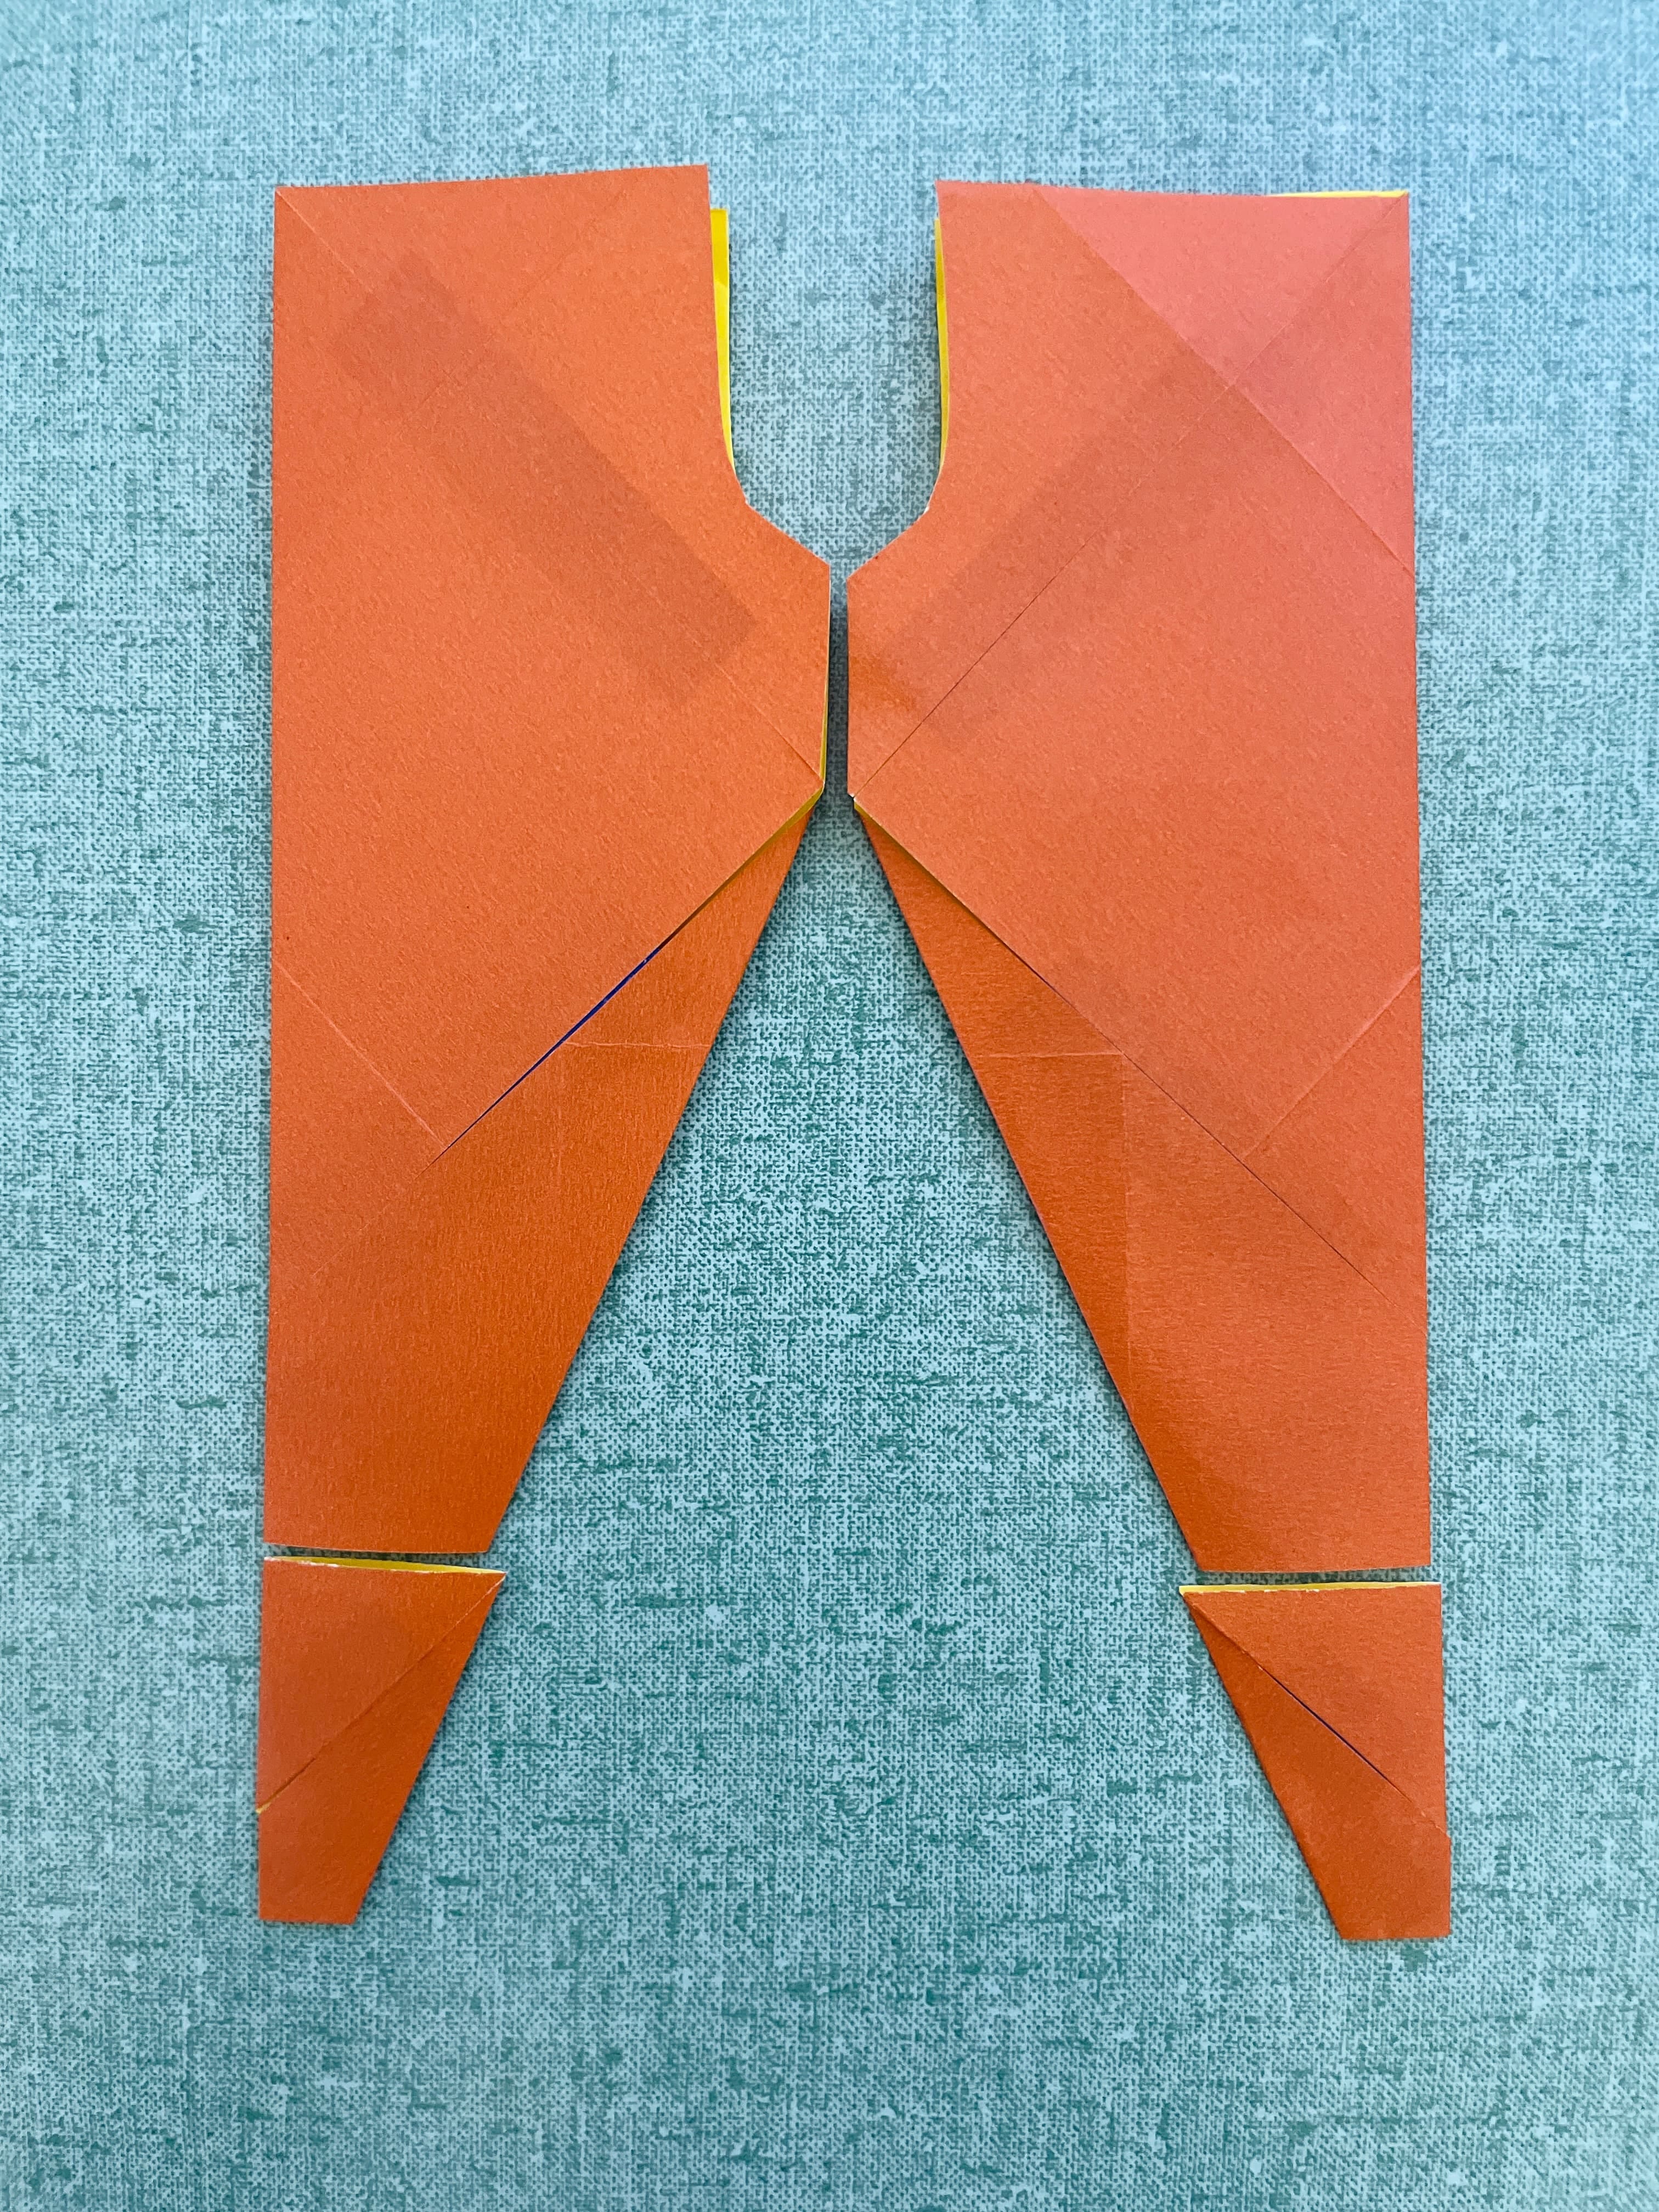
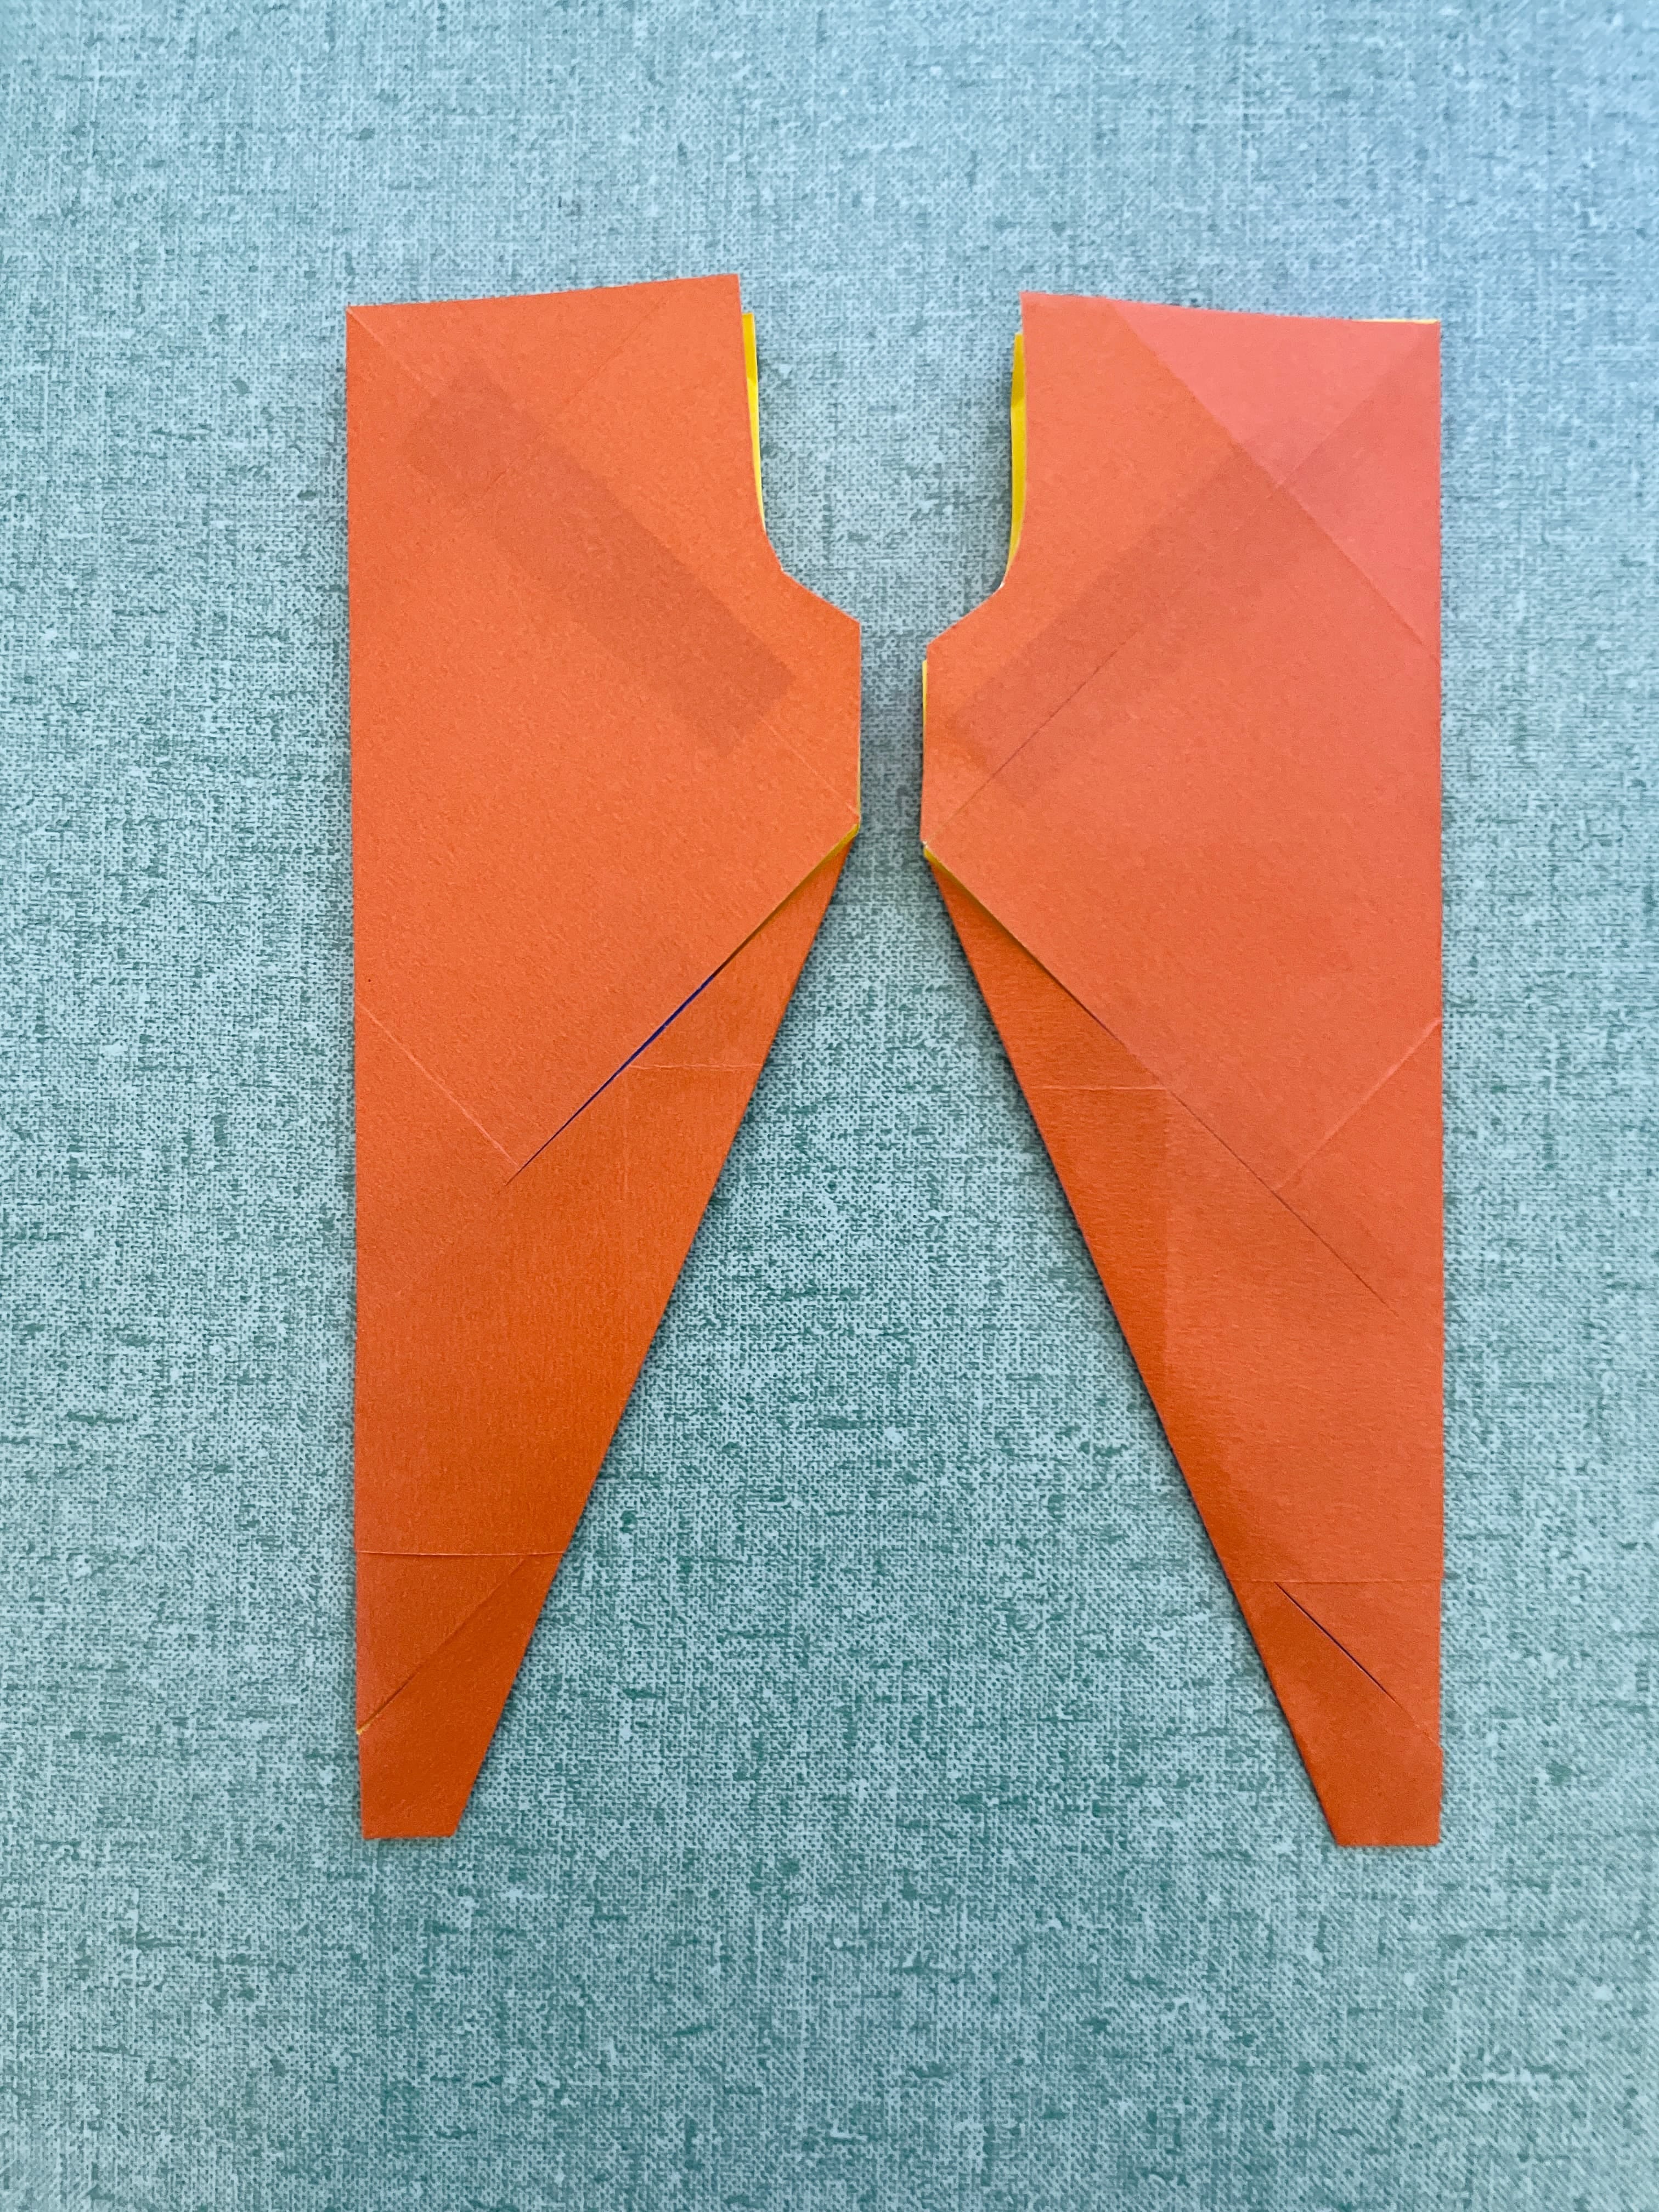
Mark and cut out the J-curve for the pant legs.
Surely, they look more like pant legs now, yes?
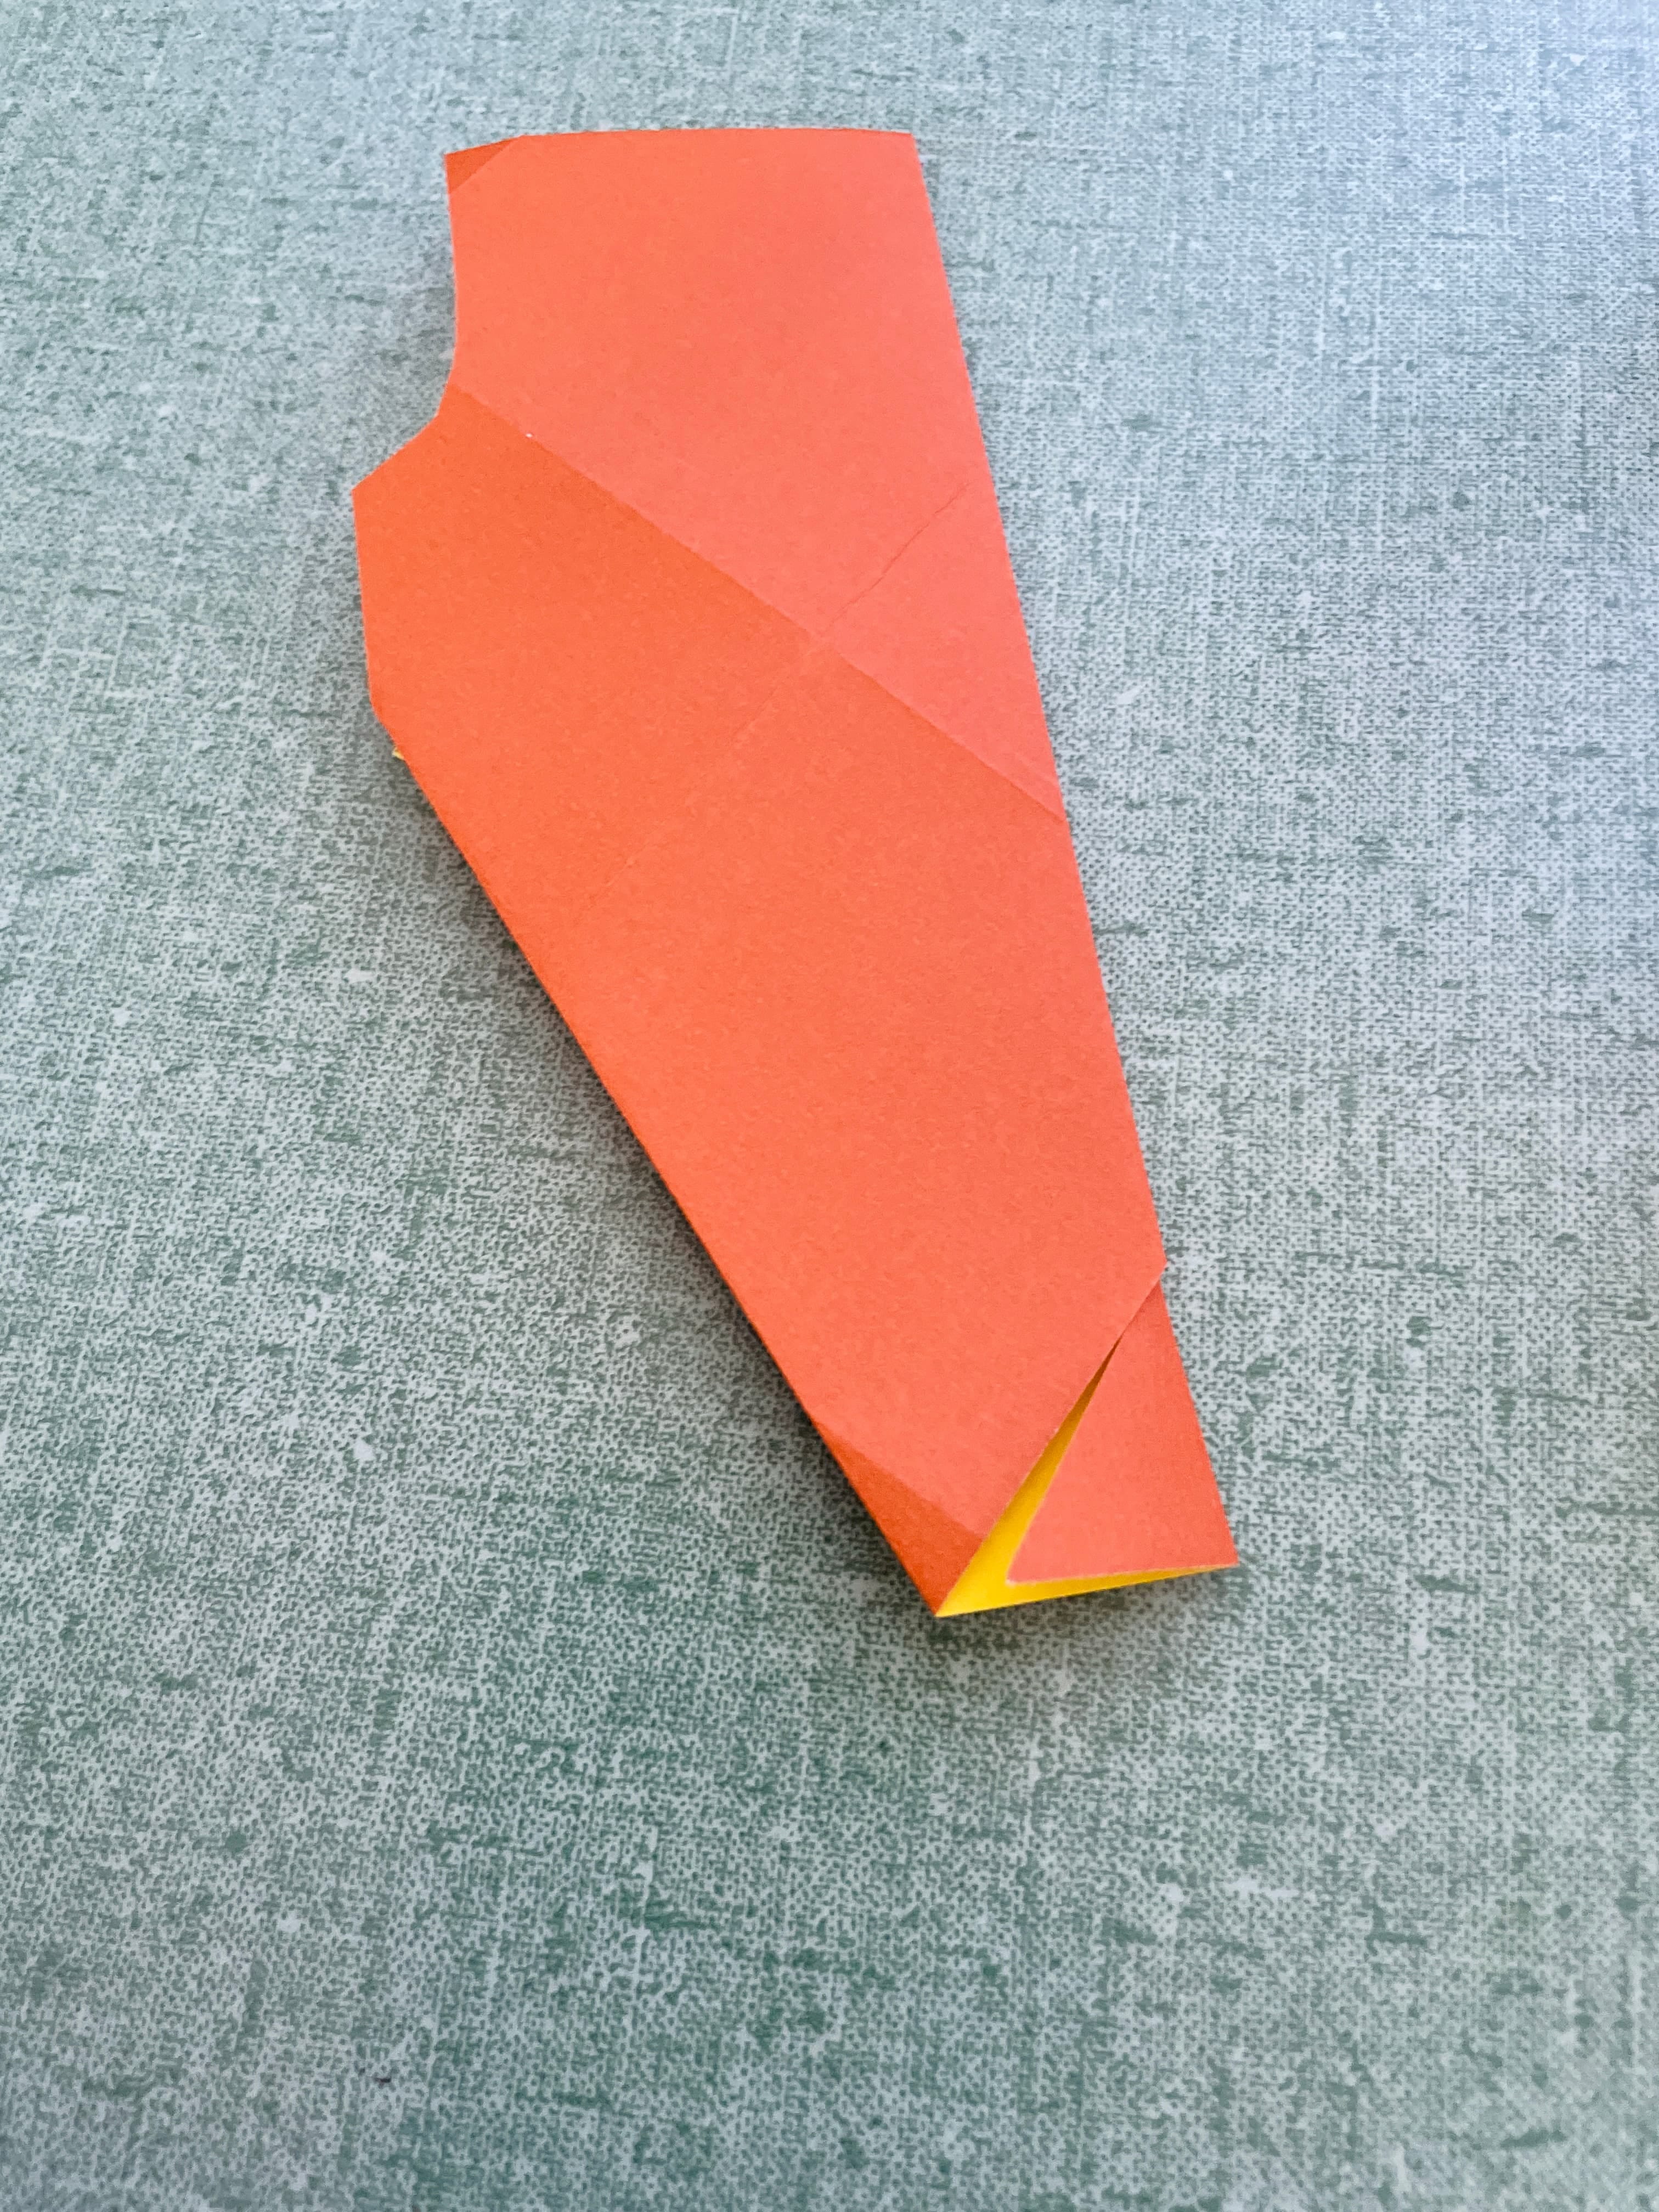
Using the same folding method we did for the 7-square wrap top sleeve ends, let’s finish the bottom of the pants.
First fold of the left pant leg.
Second fold of the left pant leg.
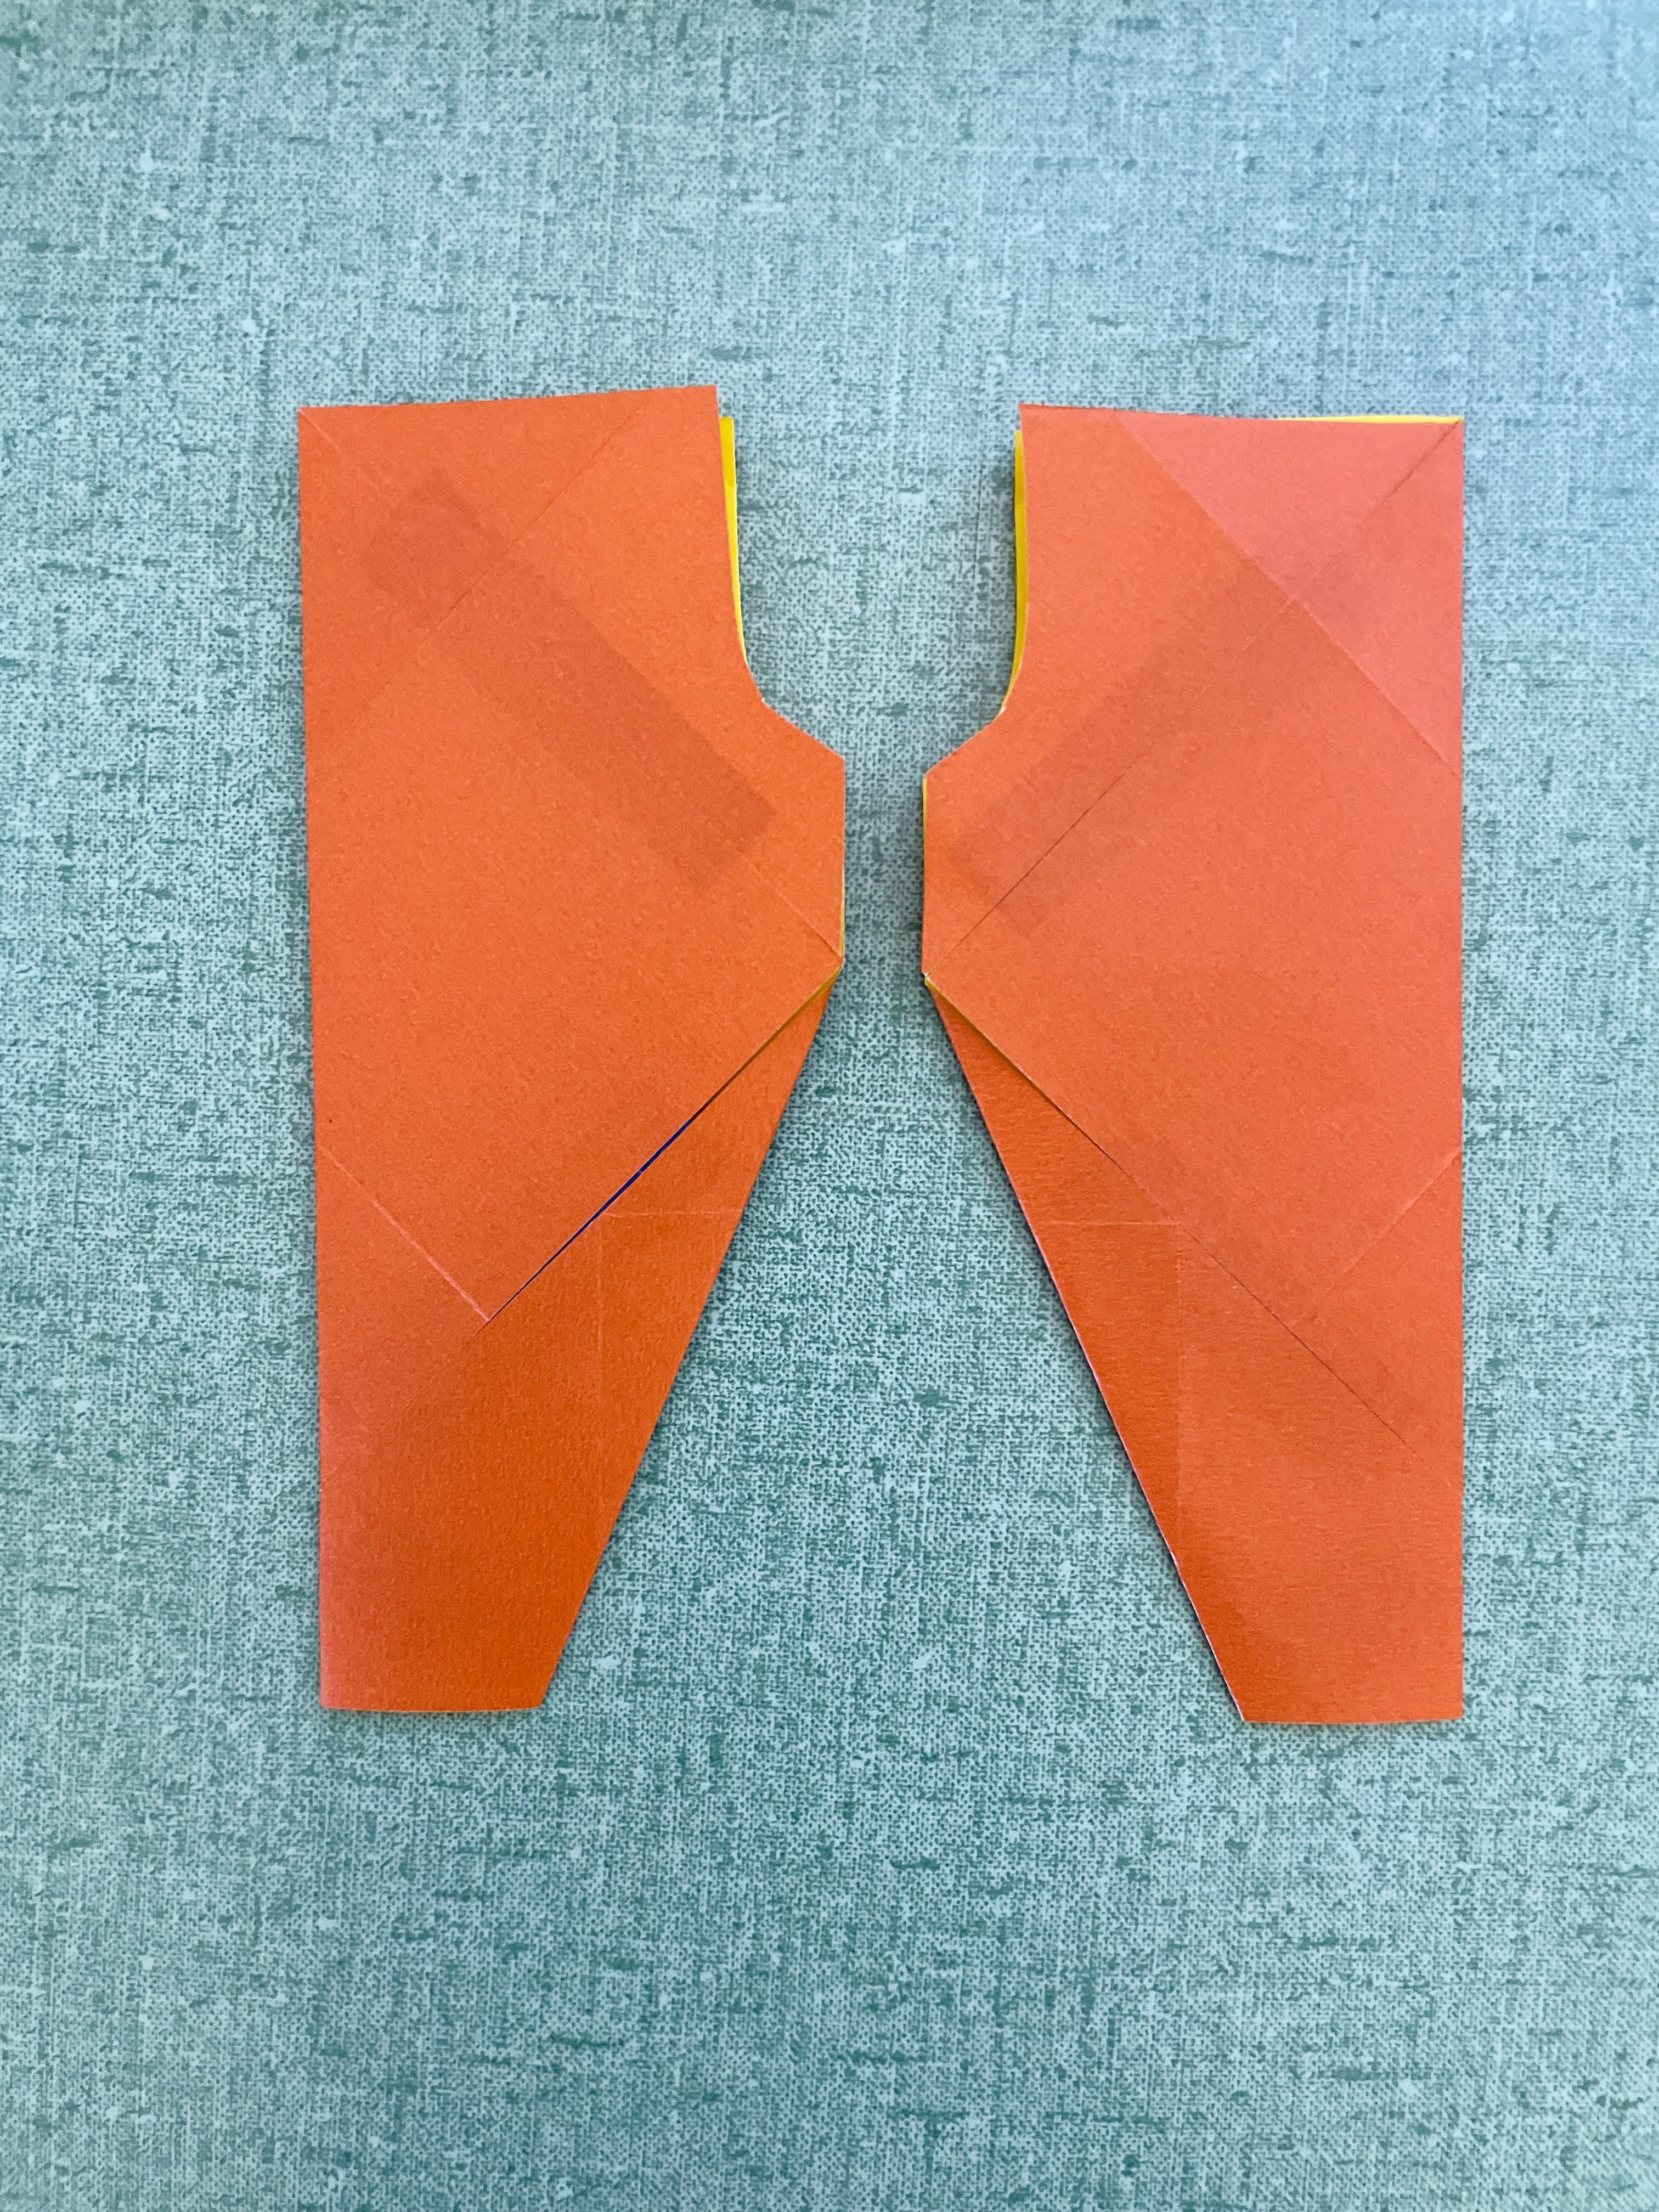
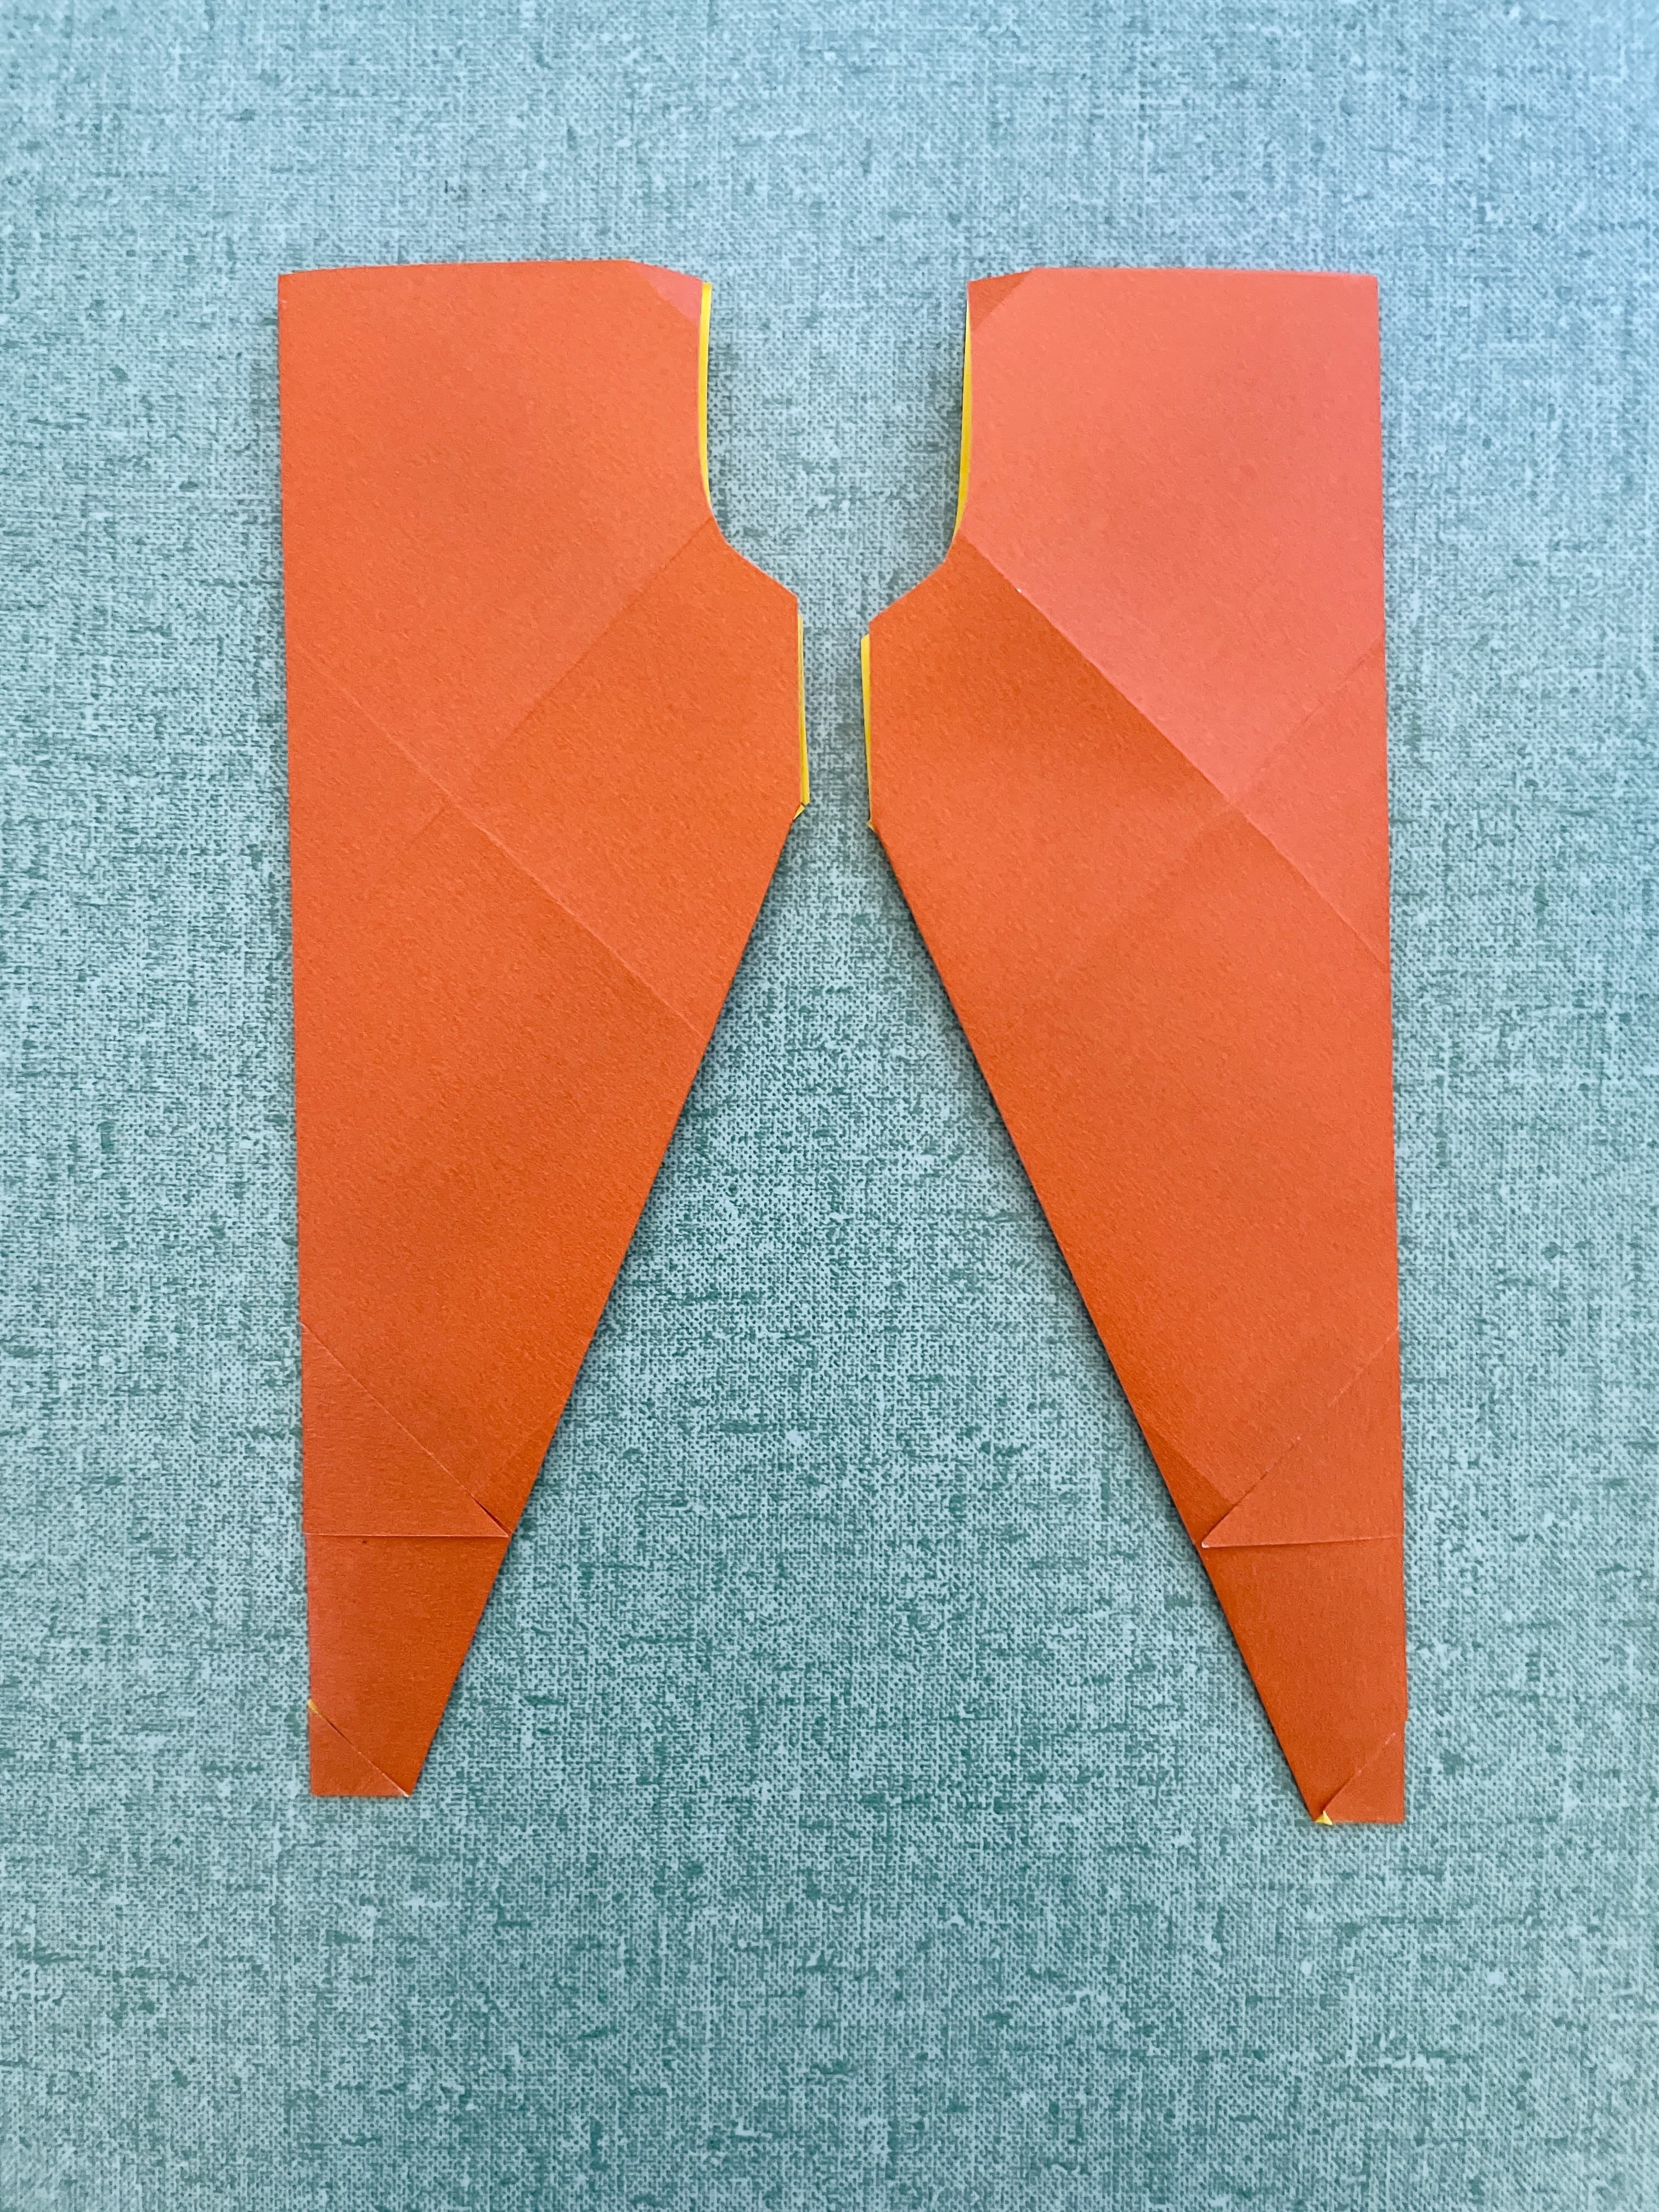
This is what both pant legs look like after the folds and tapings are done.
Wait, these pant legs seem complete!
You are absolutely right! Technically, you can finish here and make this a 9-square pants that will end below the knee or mid-calf. If this is what you want, you’re done and the exercise is finished!
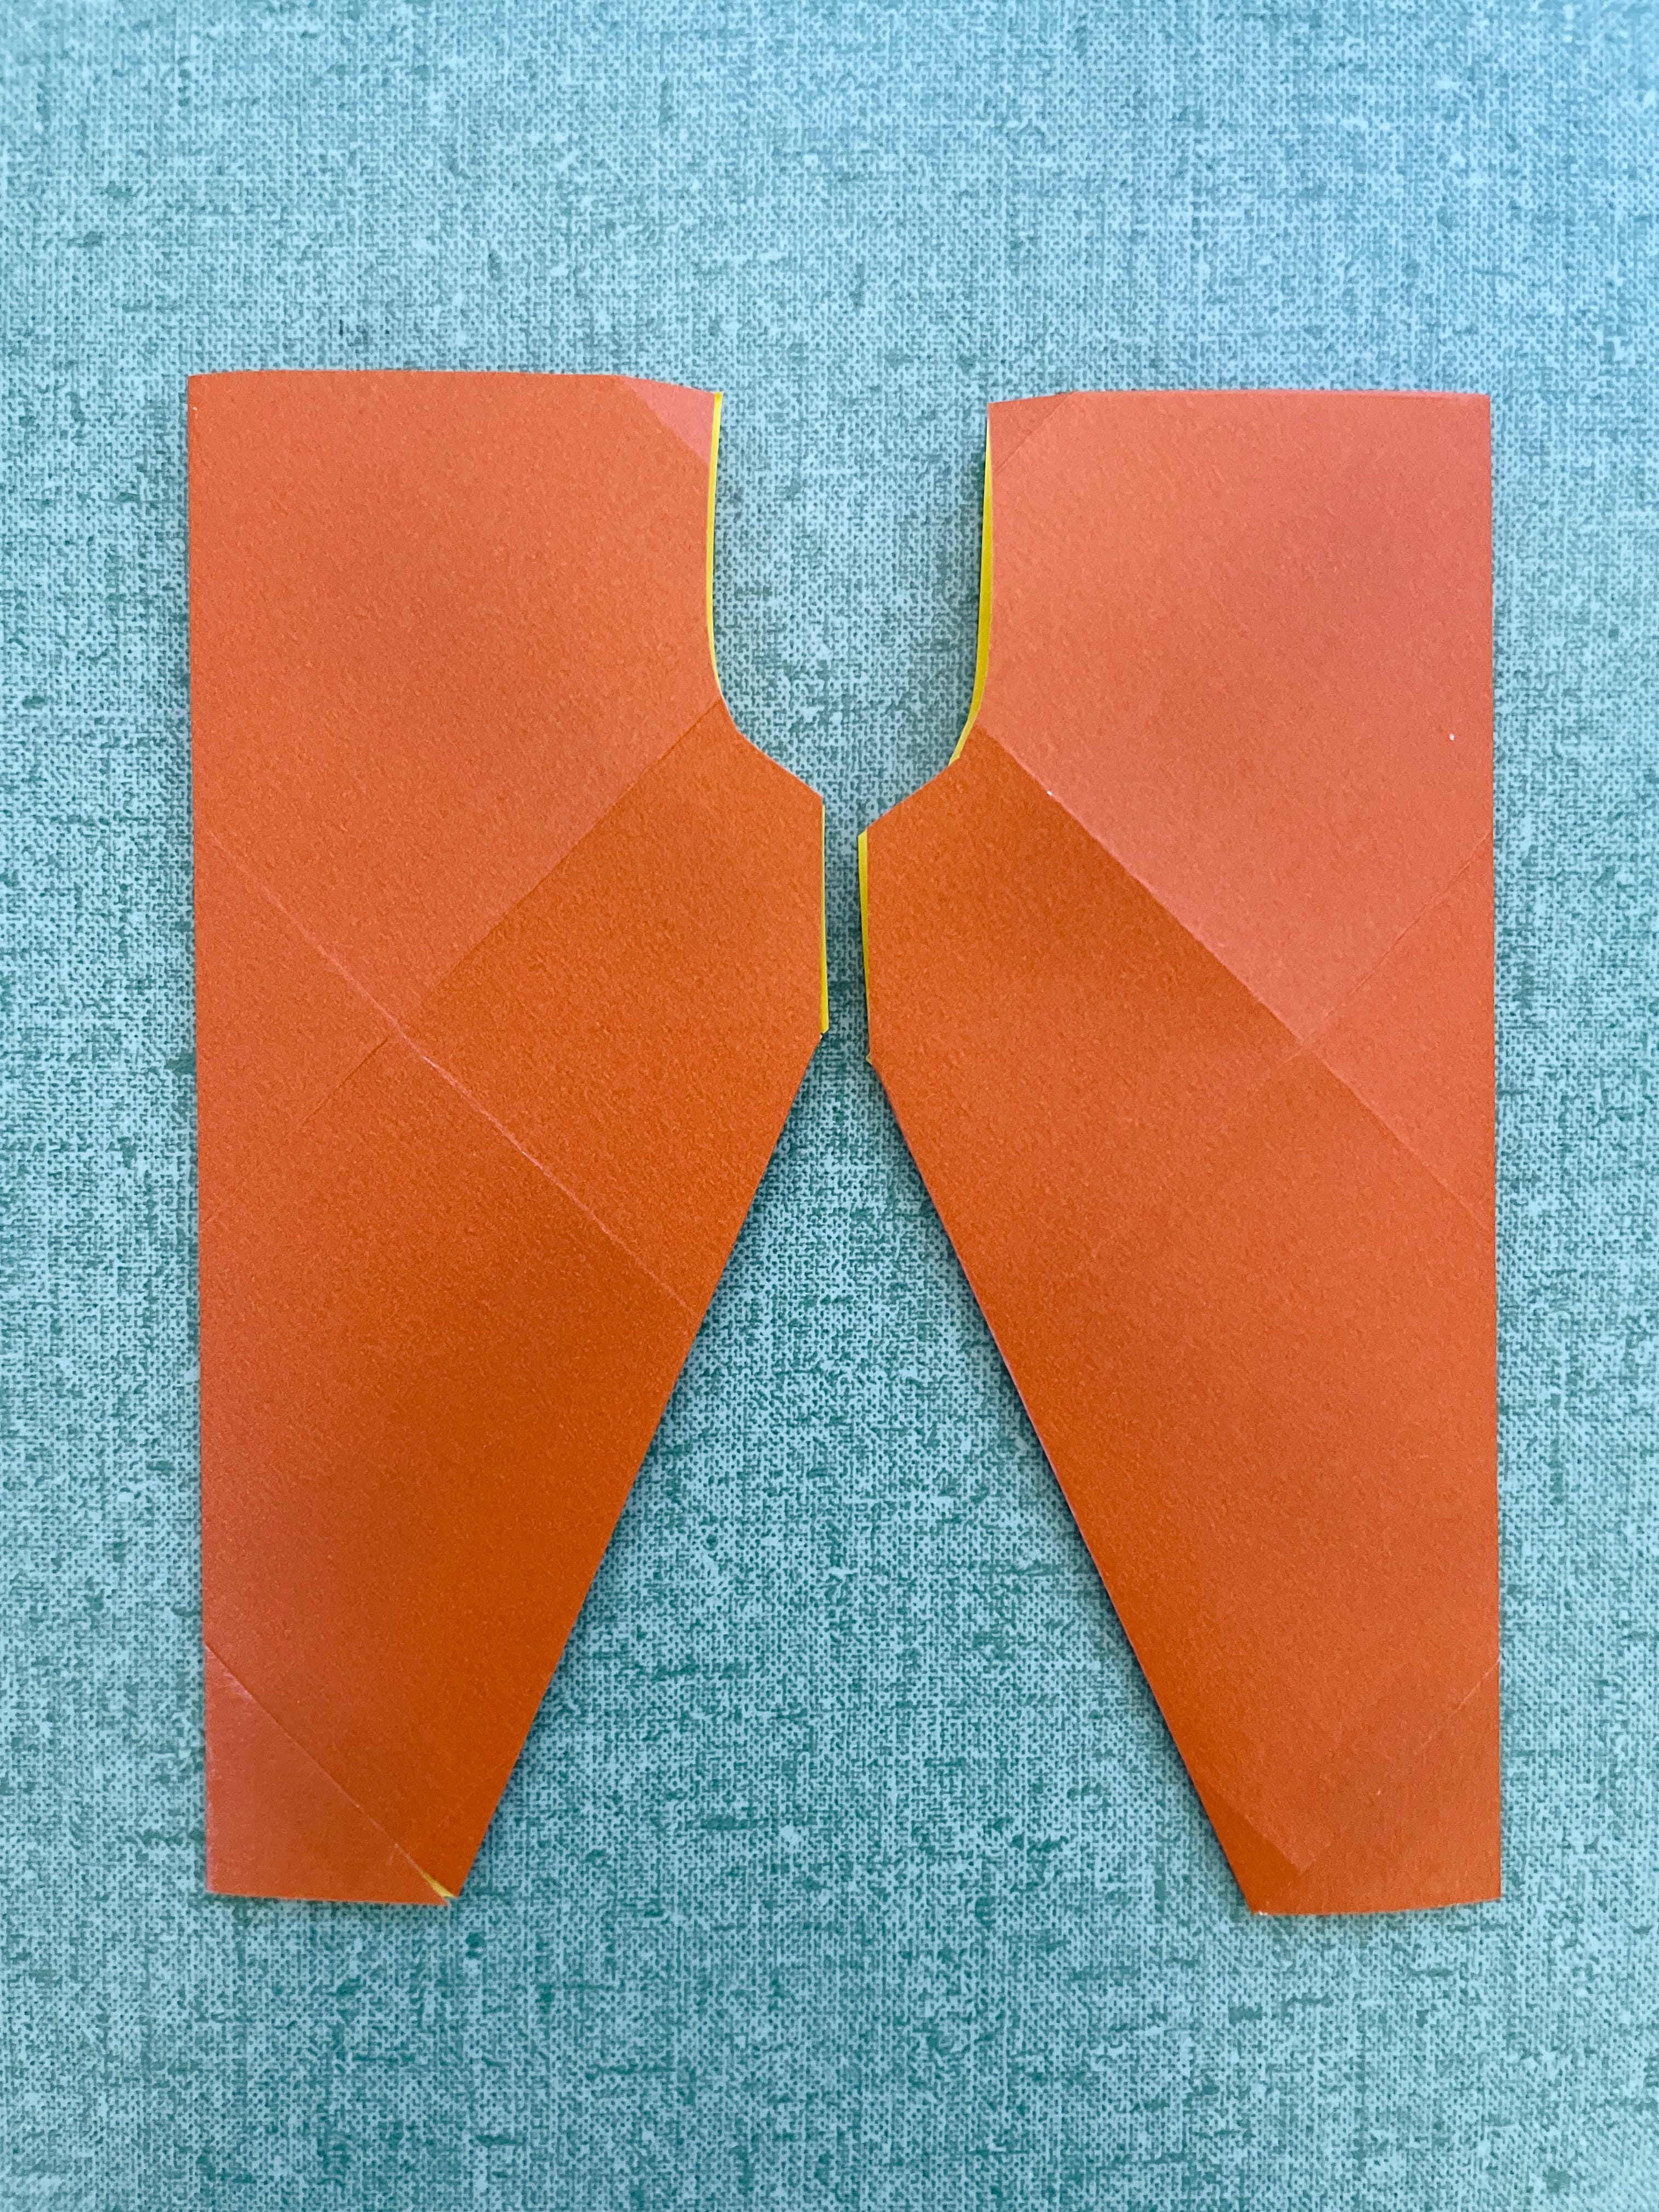
We have been working on this model from the back side (notice the V-line towards the center). Flip them and you’ll see the front side is much smoother with minimal sewing line.
Front side of the 9-square pants.
Feel free to call it a day at this point, or continue reading :)
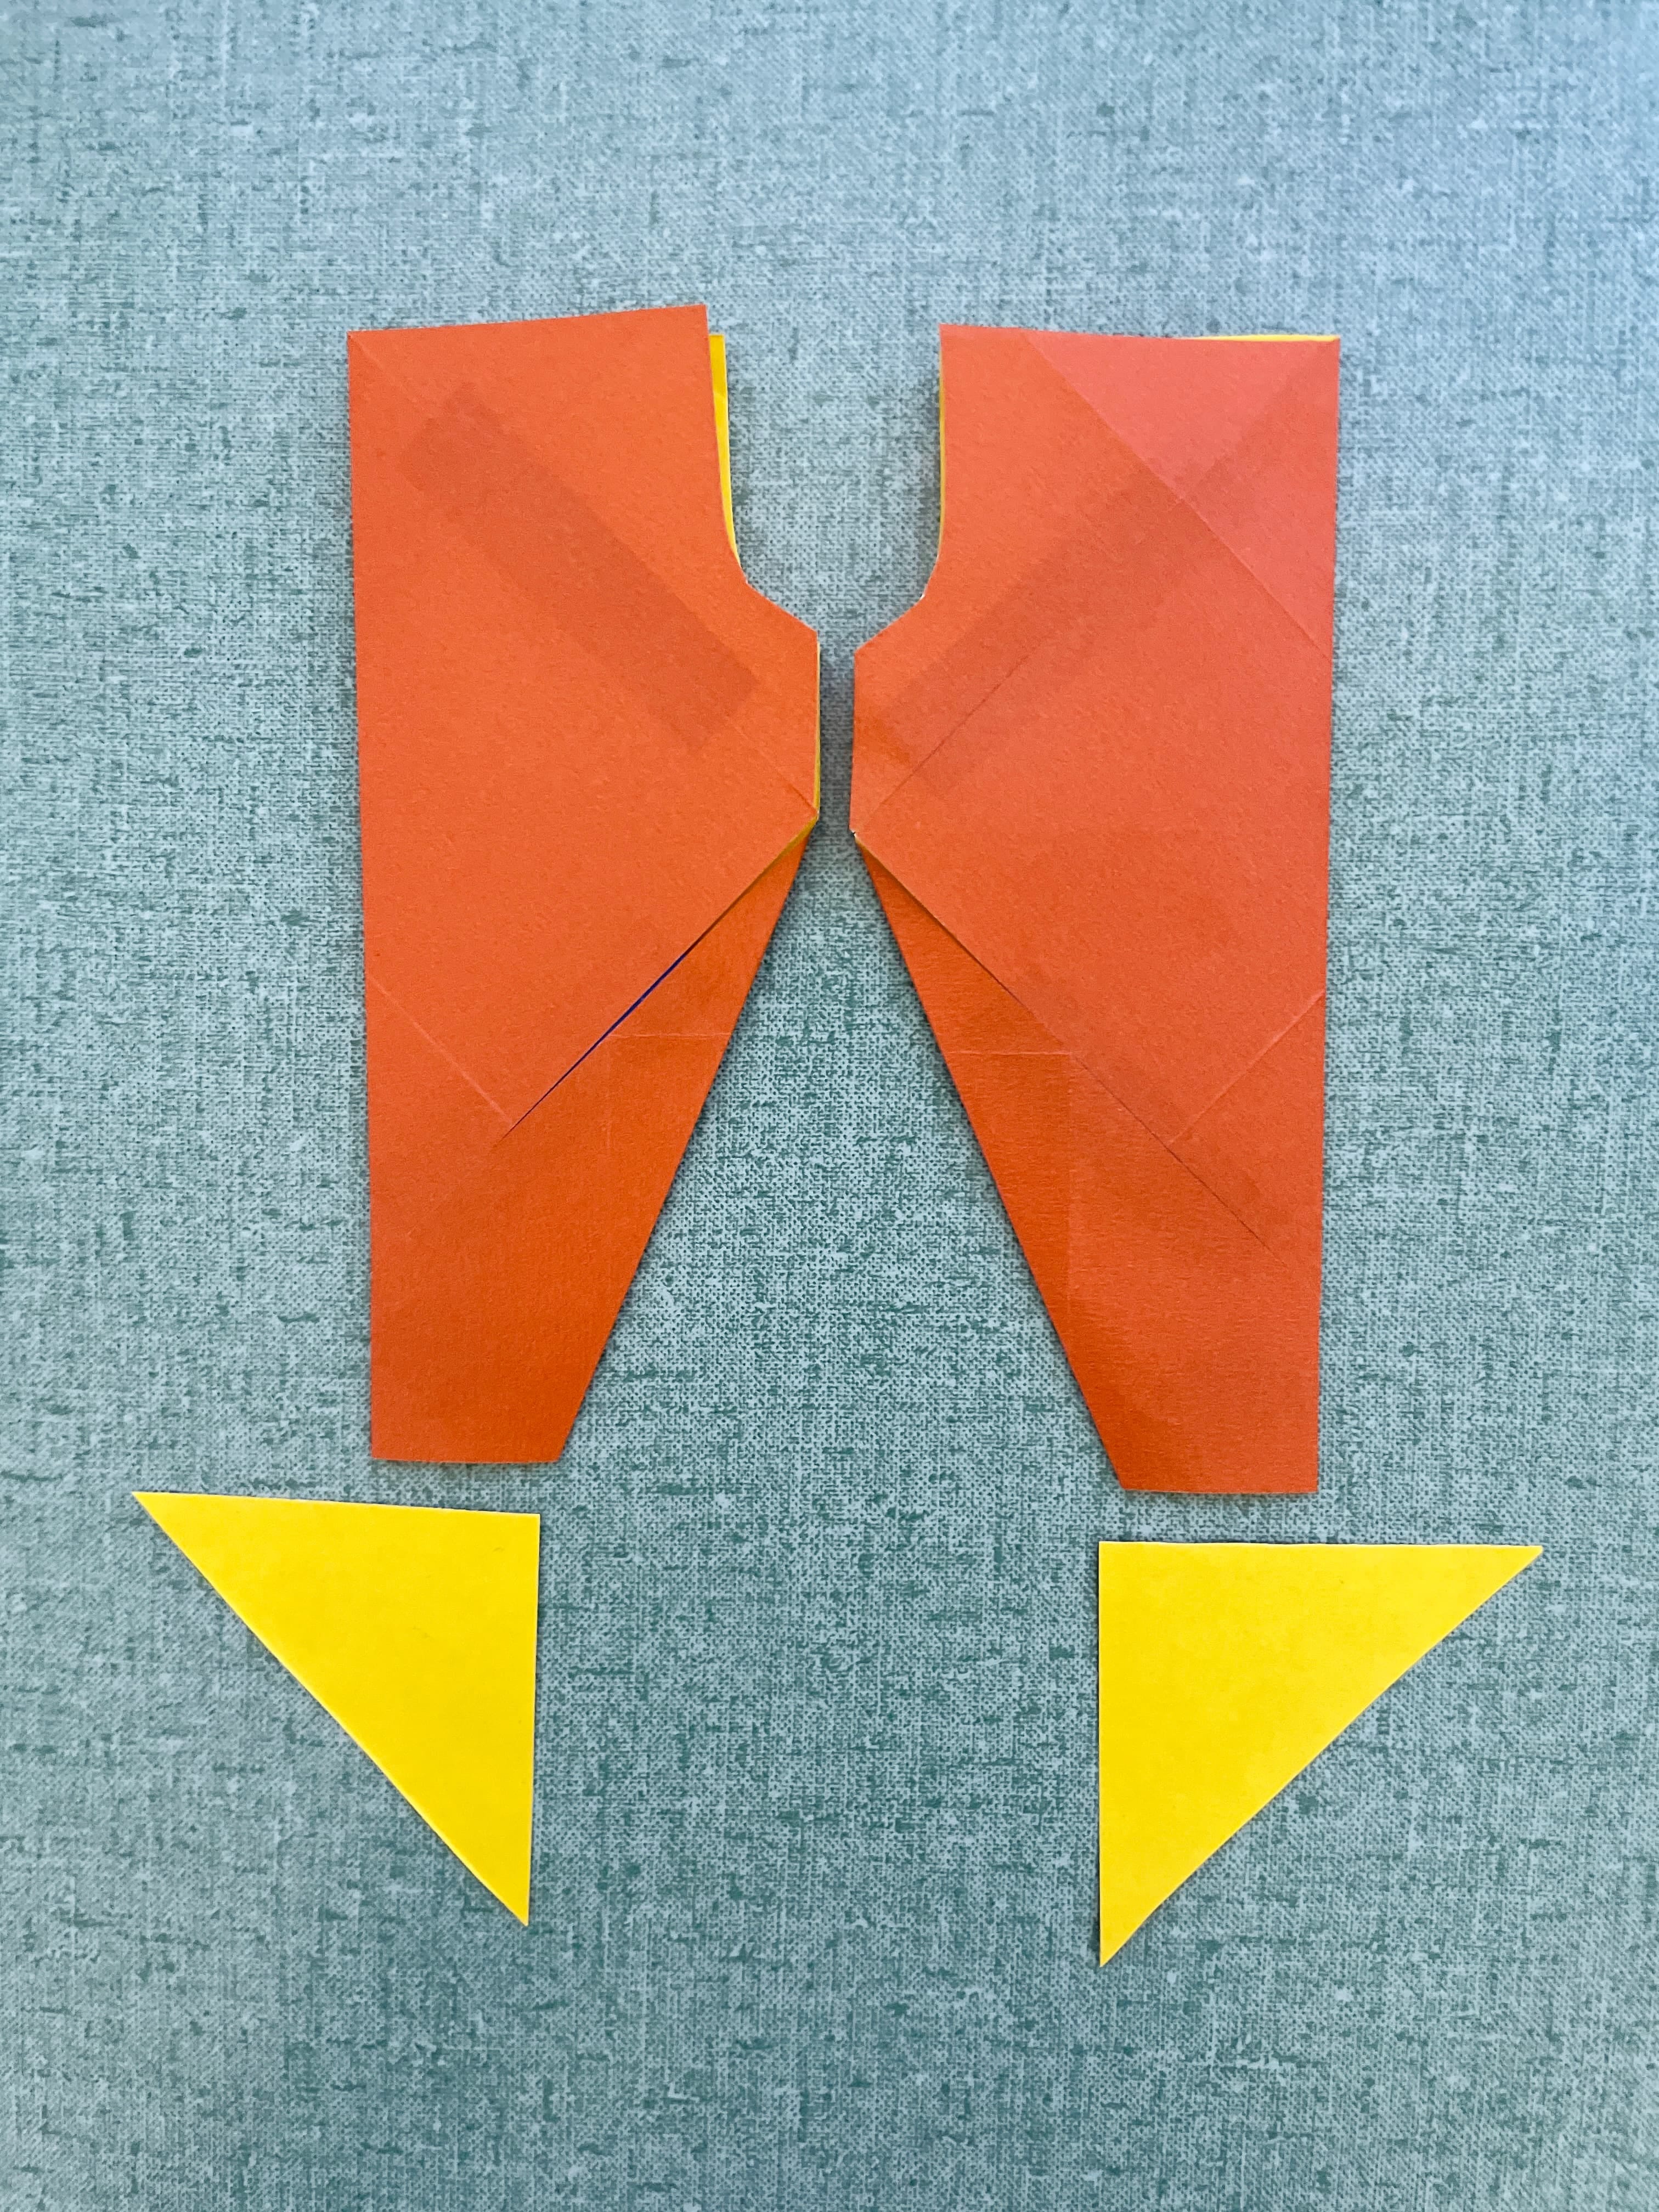
It’s time to bring back the two small triangles to finish the pants, which will make them ankle length.
Bringing back the two small triangles into the composition.
Once again, just like how we finish the sleeve ends, we will make a similar series of folds. Let’s do this on the right pant leg.
First, fold the triangle tip towards the center.
Make the second fold along the diagonal line.
Finish by making the final fold towards the center.
Do the same thing for the left leg, and you’re done!
When these extensions are added to the pant legs, this is what they look like.
Back view of the 10-square pants.
We have been working on this model from the back side (notice the V-line towards the center). Flip them and you’ll see the front side is much smoother with minimal sewing line.
Front view of the 10-square pants.
That concludes our paper model making exercise! I hope it’s been fun to tackle square-based garment construction using the paper model technique. And I hope it clears up some questions you may have about these two garments, which are not as straightforward as the 6-square top.
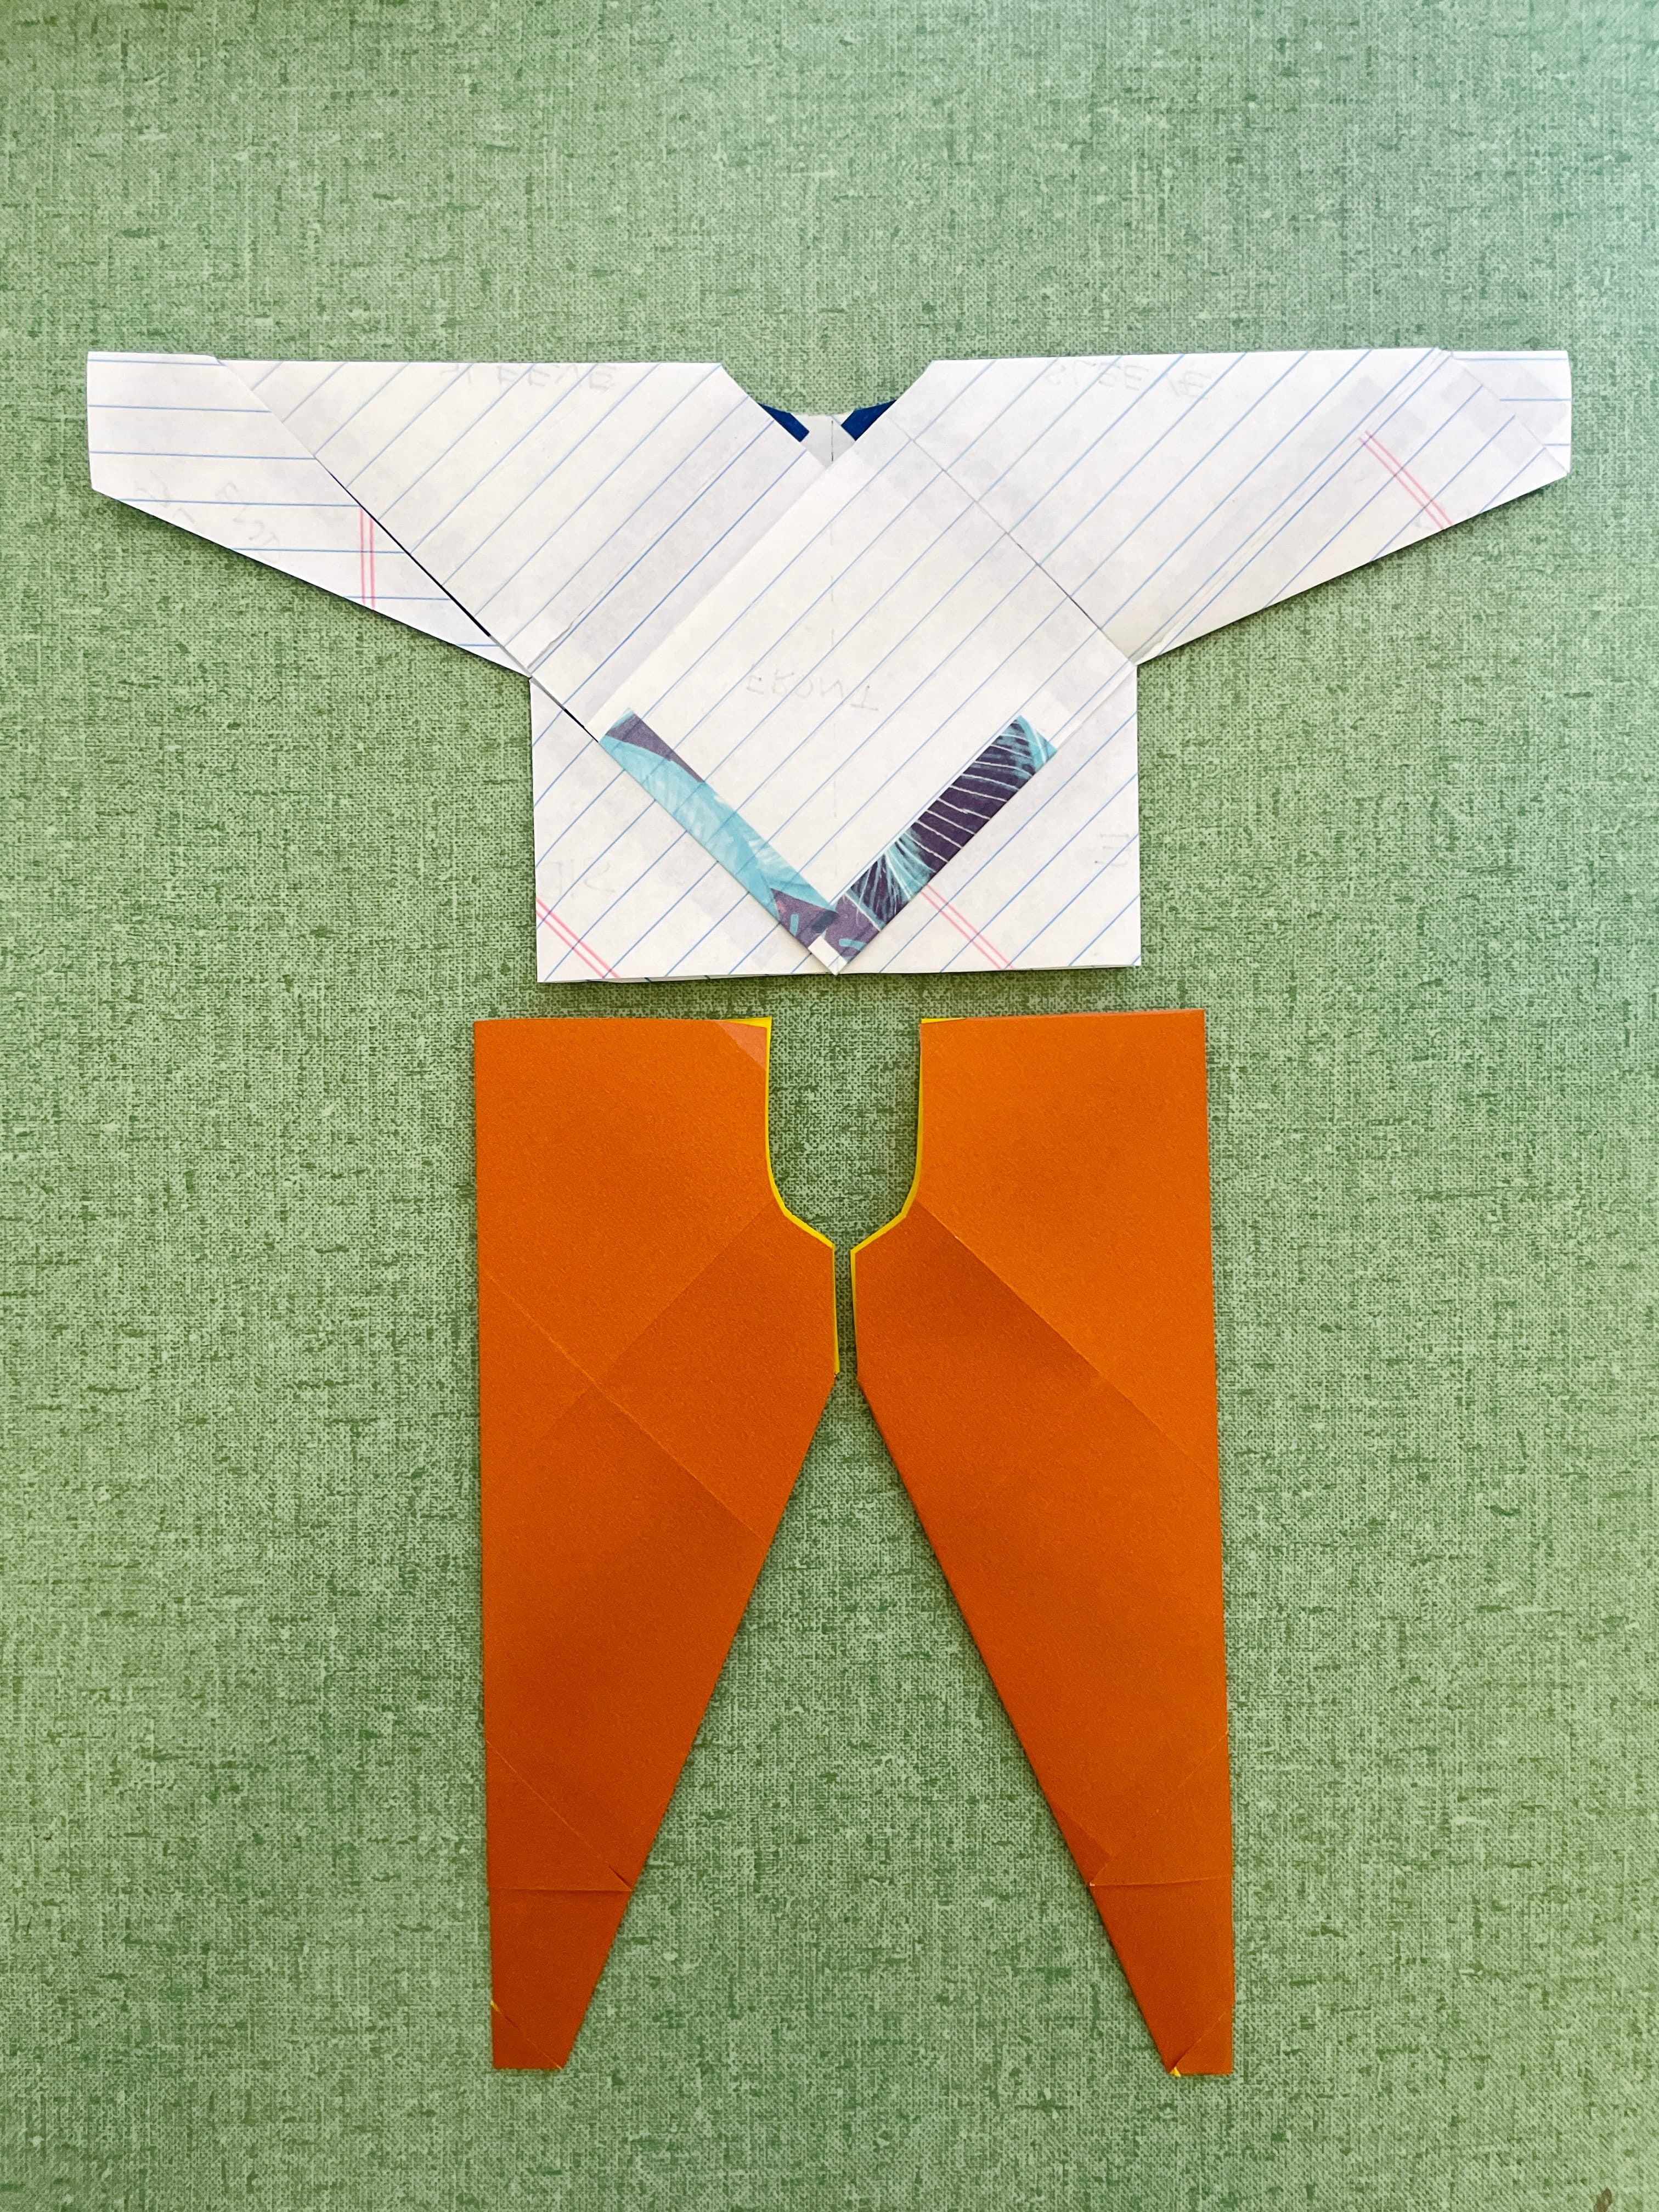
The 7-square wrap top paper models on top of the 10-square pant legs.
Feel free to message me or leave a comment if you have any questions! And please leave a comment or like this article if you find it helpful for you.


That top would be a splendid way to use up ecoprint dye samples (of which I know my students have many!)
This is so clever! Thank you for sharing!!