


Thanks, It Has Pockets! My Favorite Garment Upgrade Tutorial
Because nothing beats the satisfaction of having pockets on your dress

I have been adding pockets to clothes in my wardrobe for the past few years. Not just the ones I made, but also the ones I bought. It’s amazing to see how non-existent pockets can be in store-bought dresses and skirts. Needless to say, adding deep pockets to garments has become one of my most satisfying habits. And after doing that several times, I’m sharing my favorite way of adding pockets to dresses without altering the original silhouette. Enjoy this tutorial!
It’s true - I’m one of those people who love showing off their dress pockets. Pocket designs for women’s apparel can be puzzling, from the 4-inch-deep jean pockets, the “mock” chest or waist pockets, and those tiny pockets in skirts and dresses. Many times, dresses have no pockets at all! It’s so infuriating.
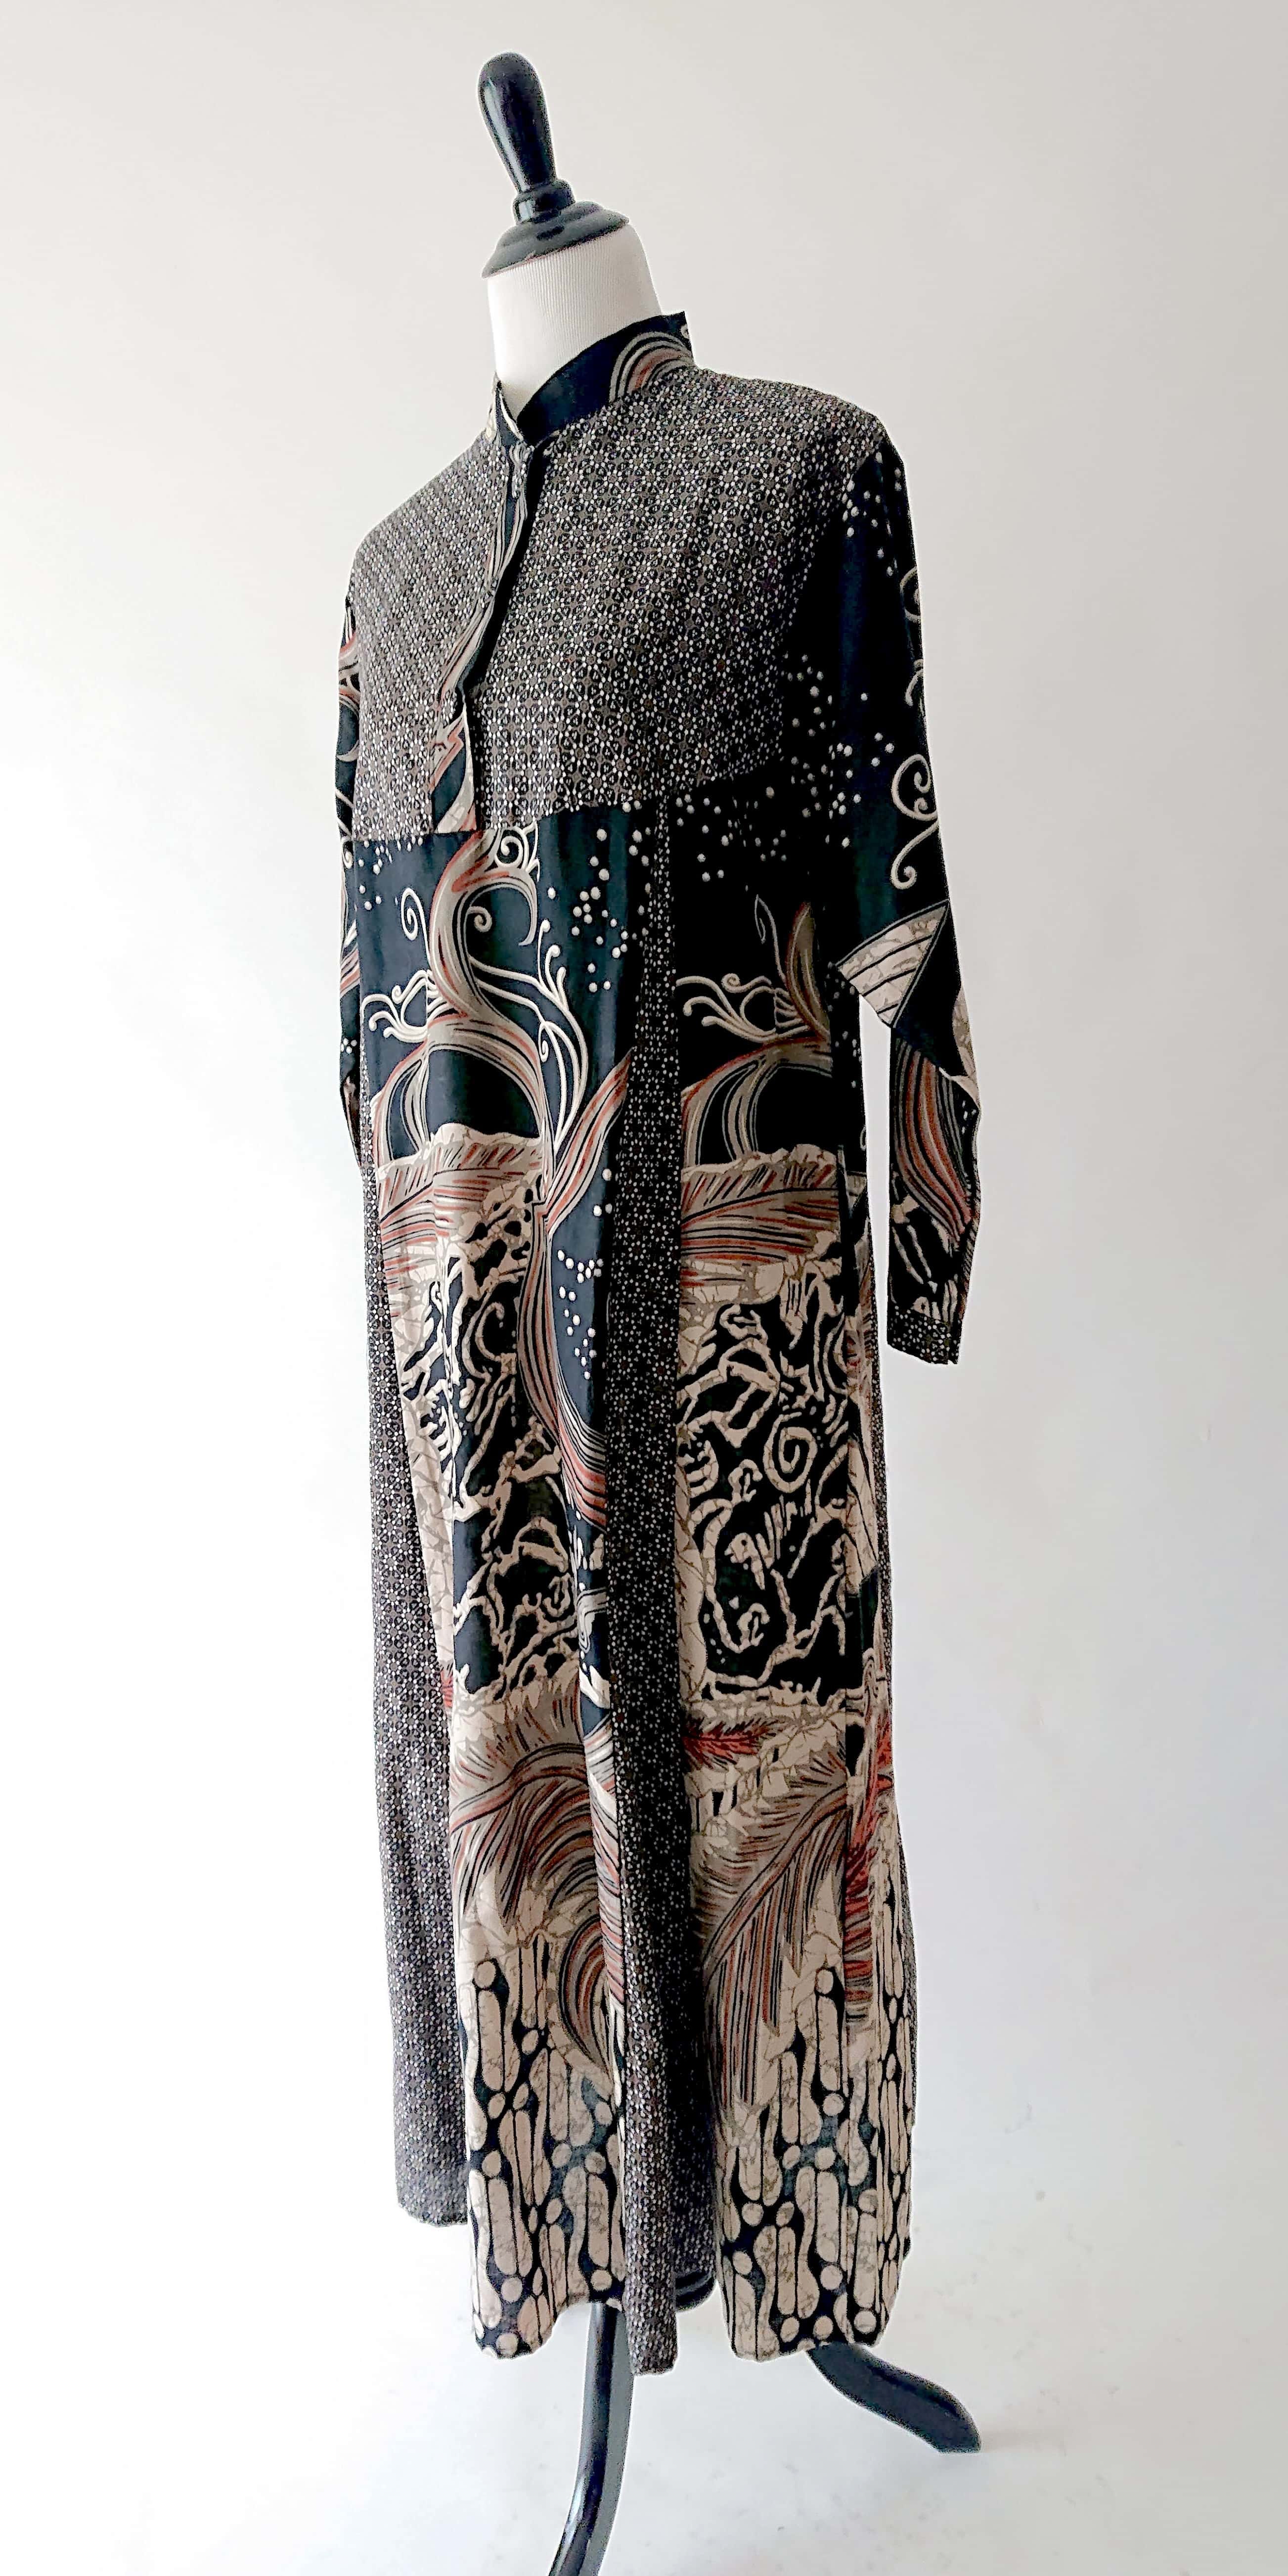
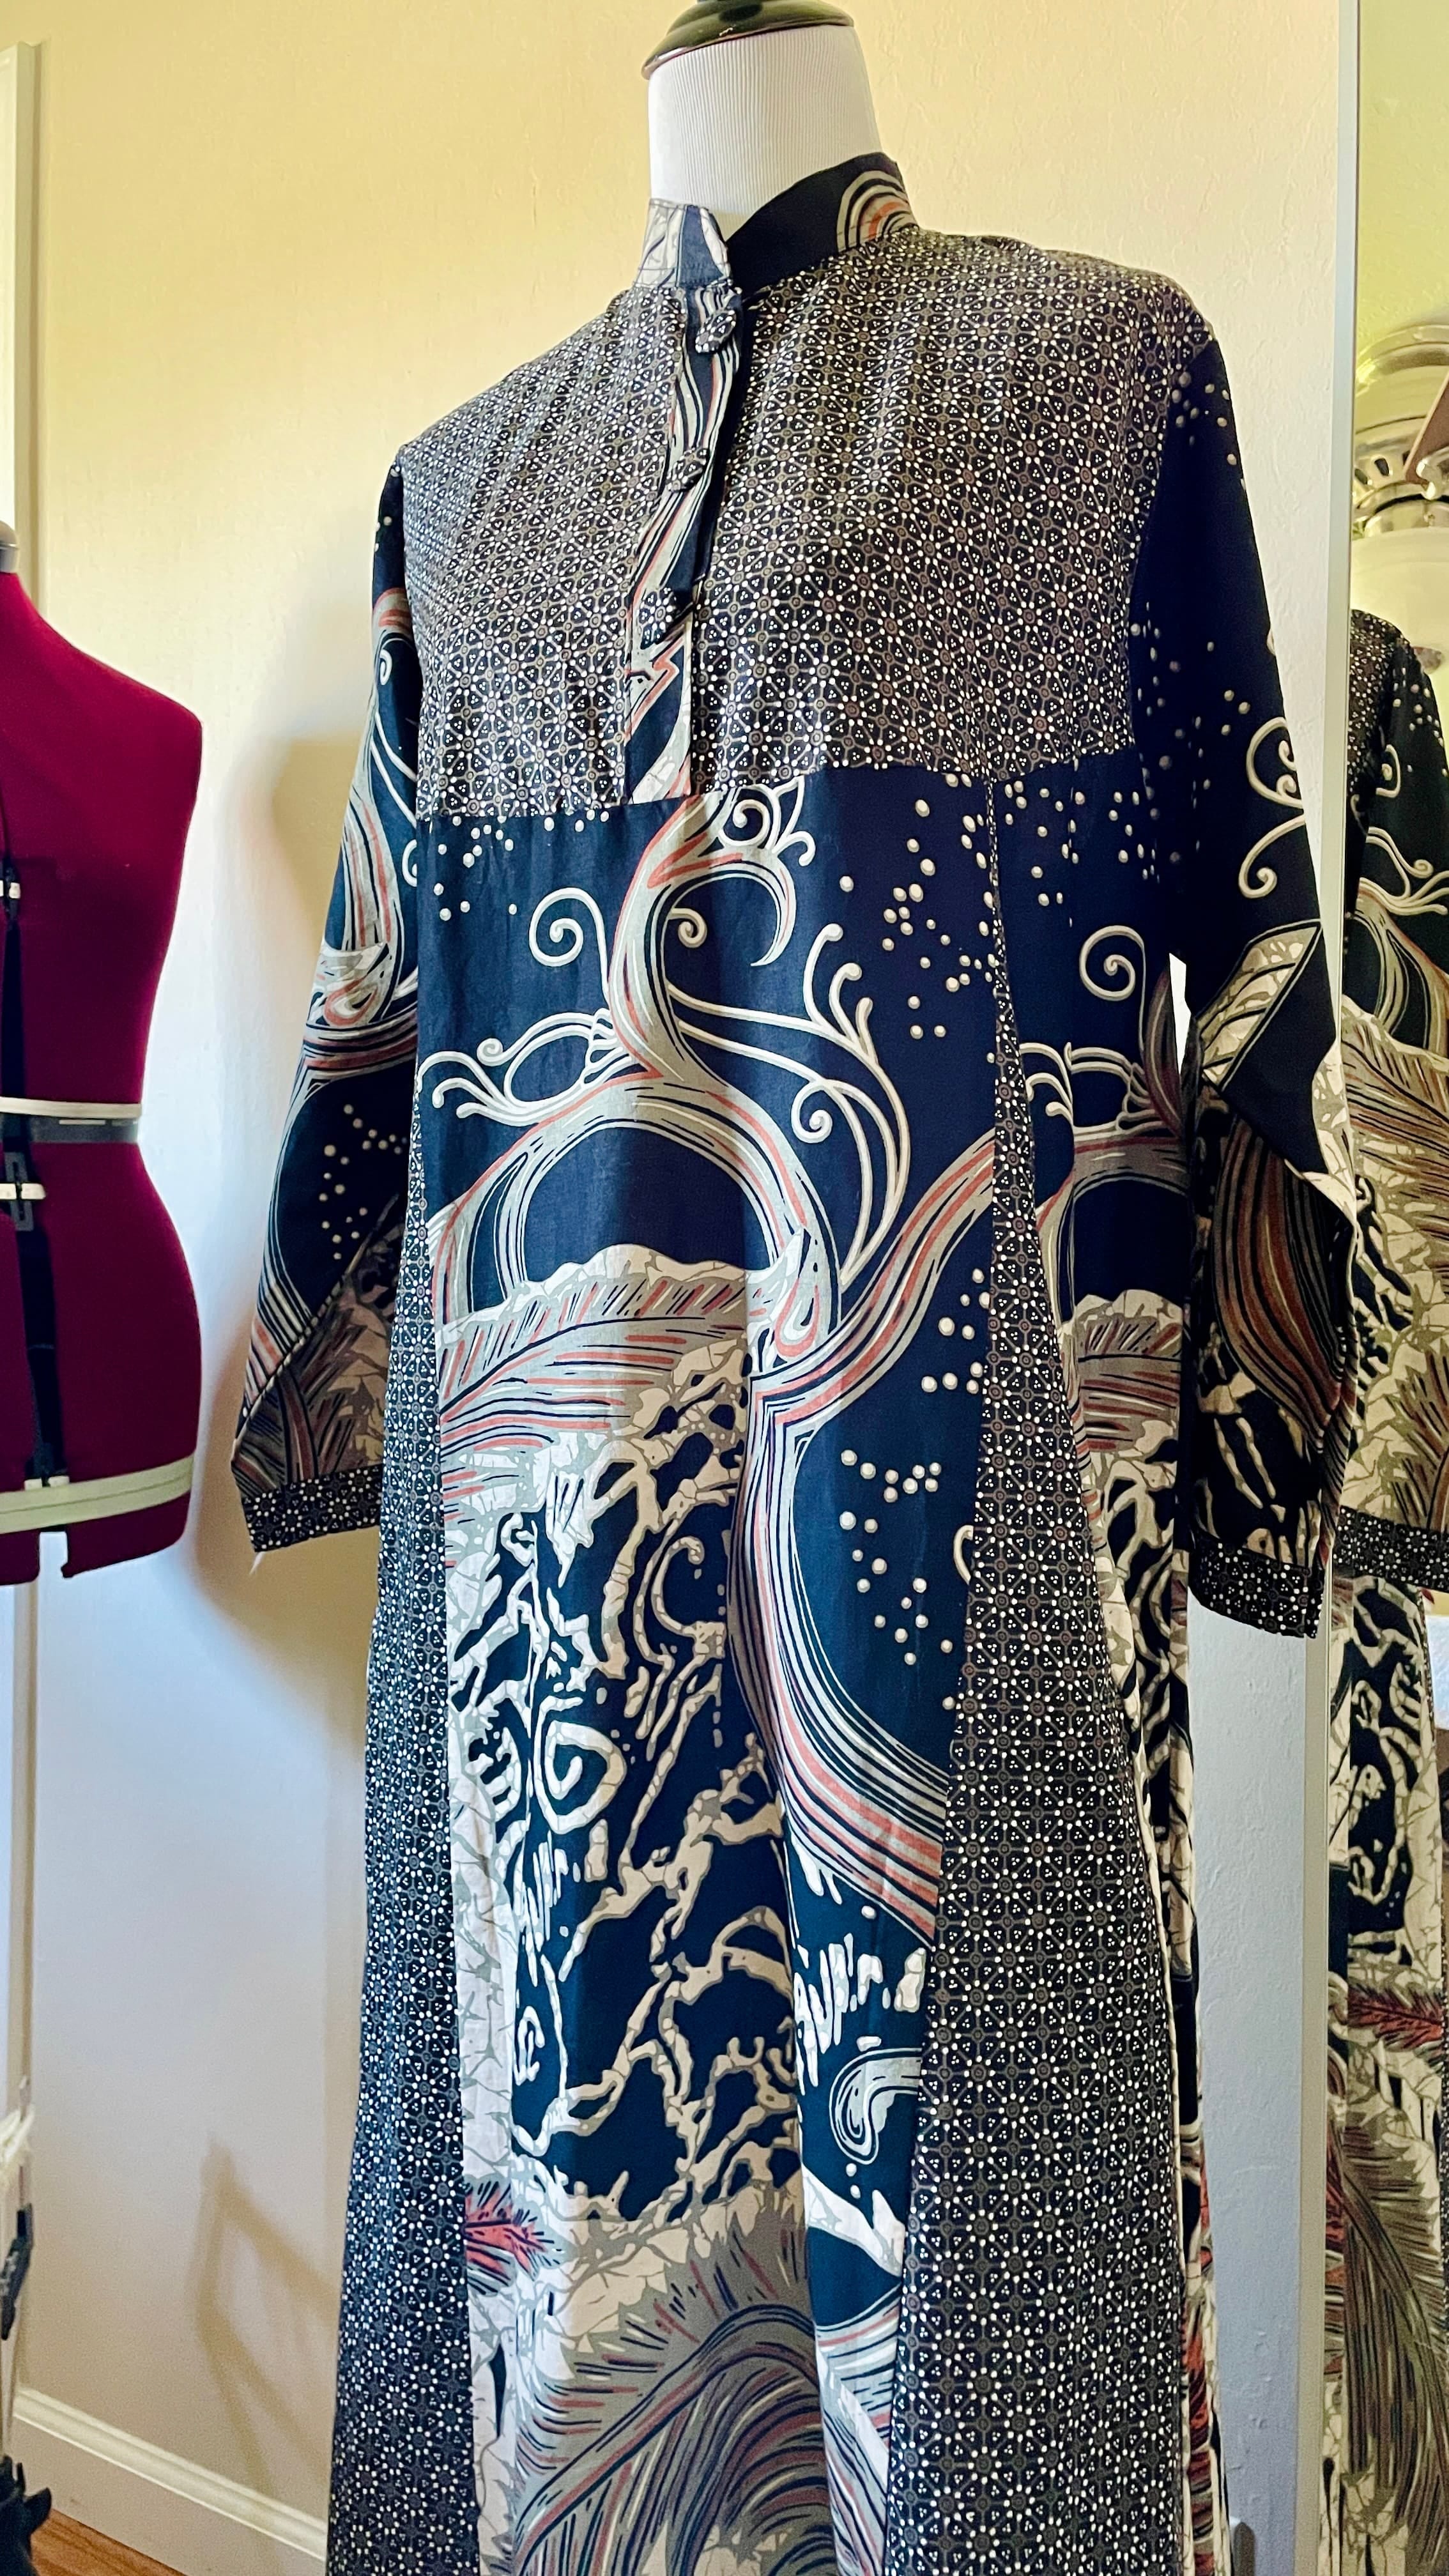
Paid subscribers may remember a long Batik dress from last year’s Javanese Batik post series conclusion. I said,
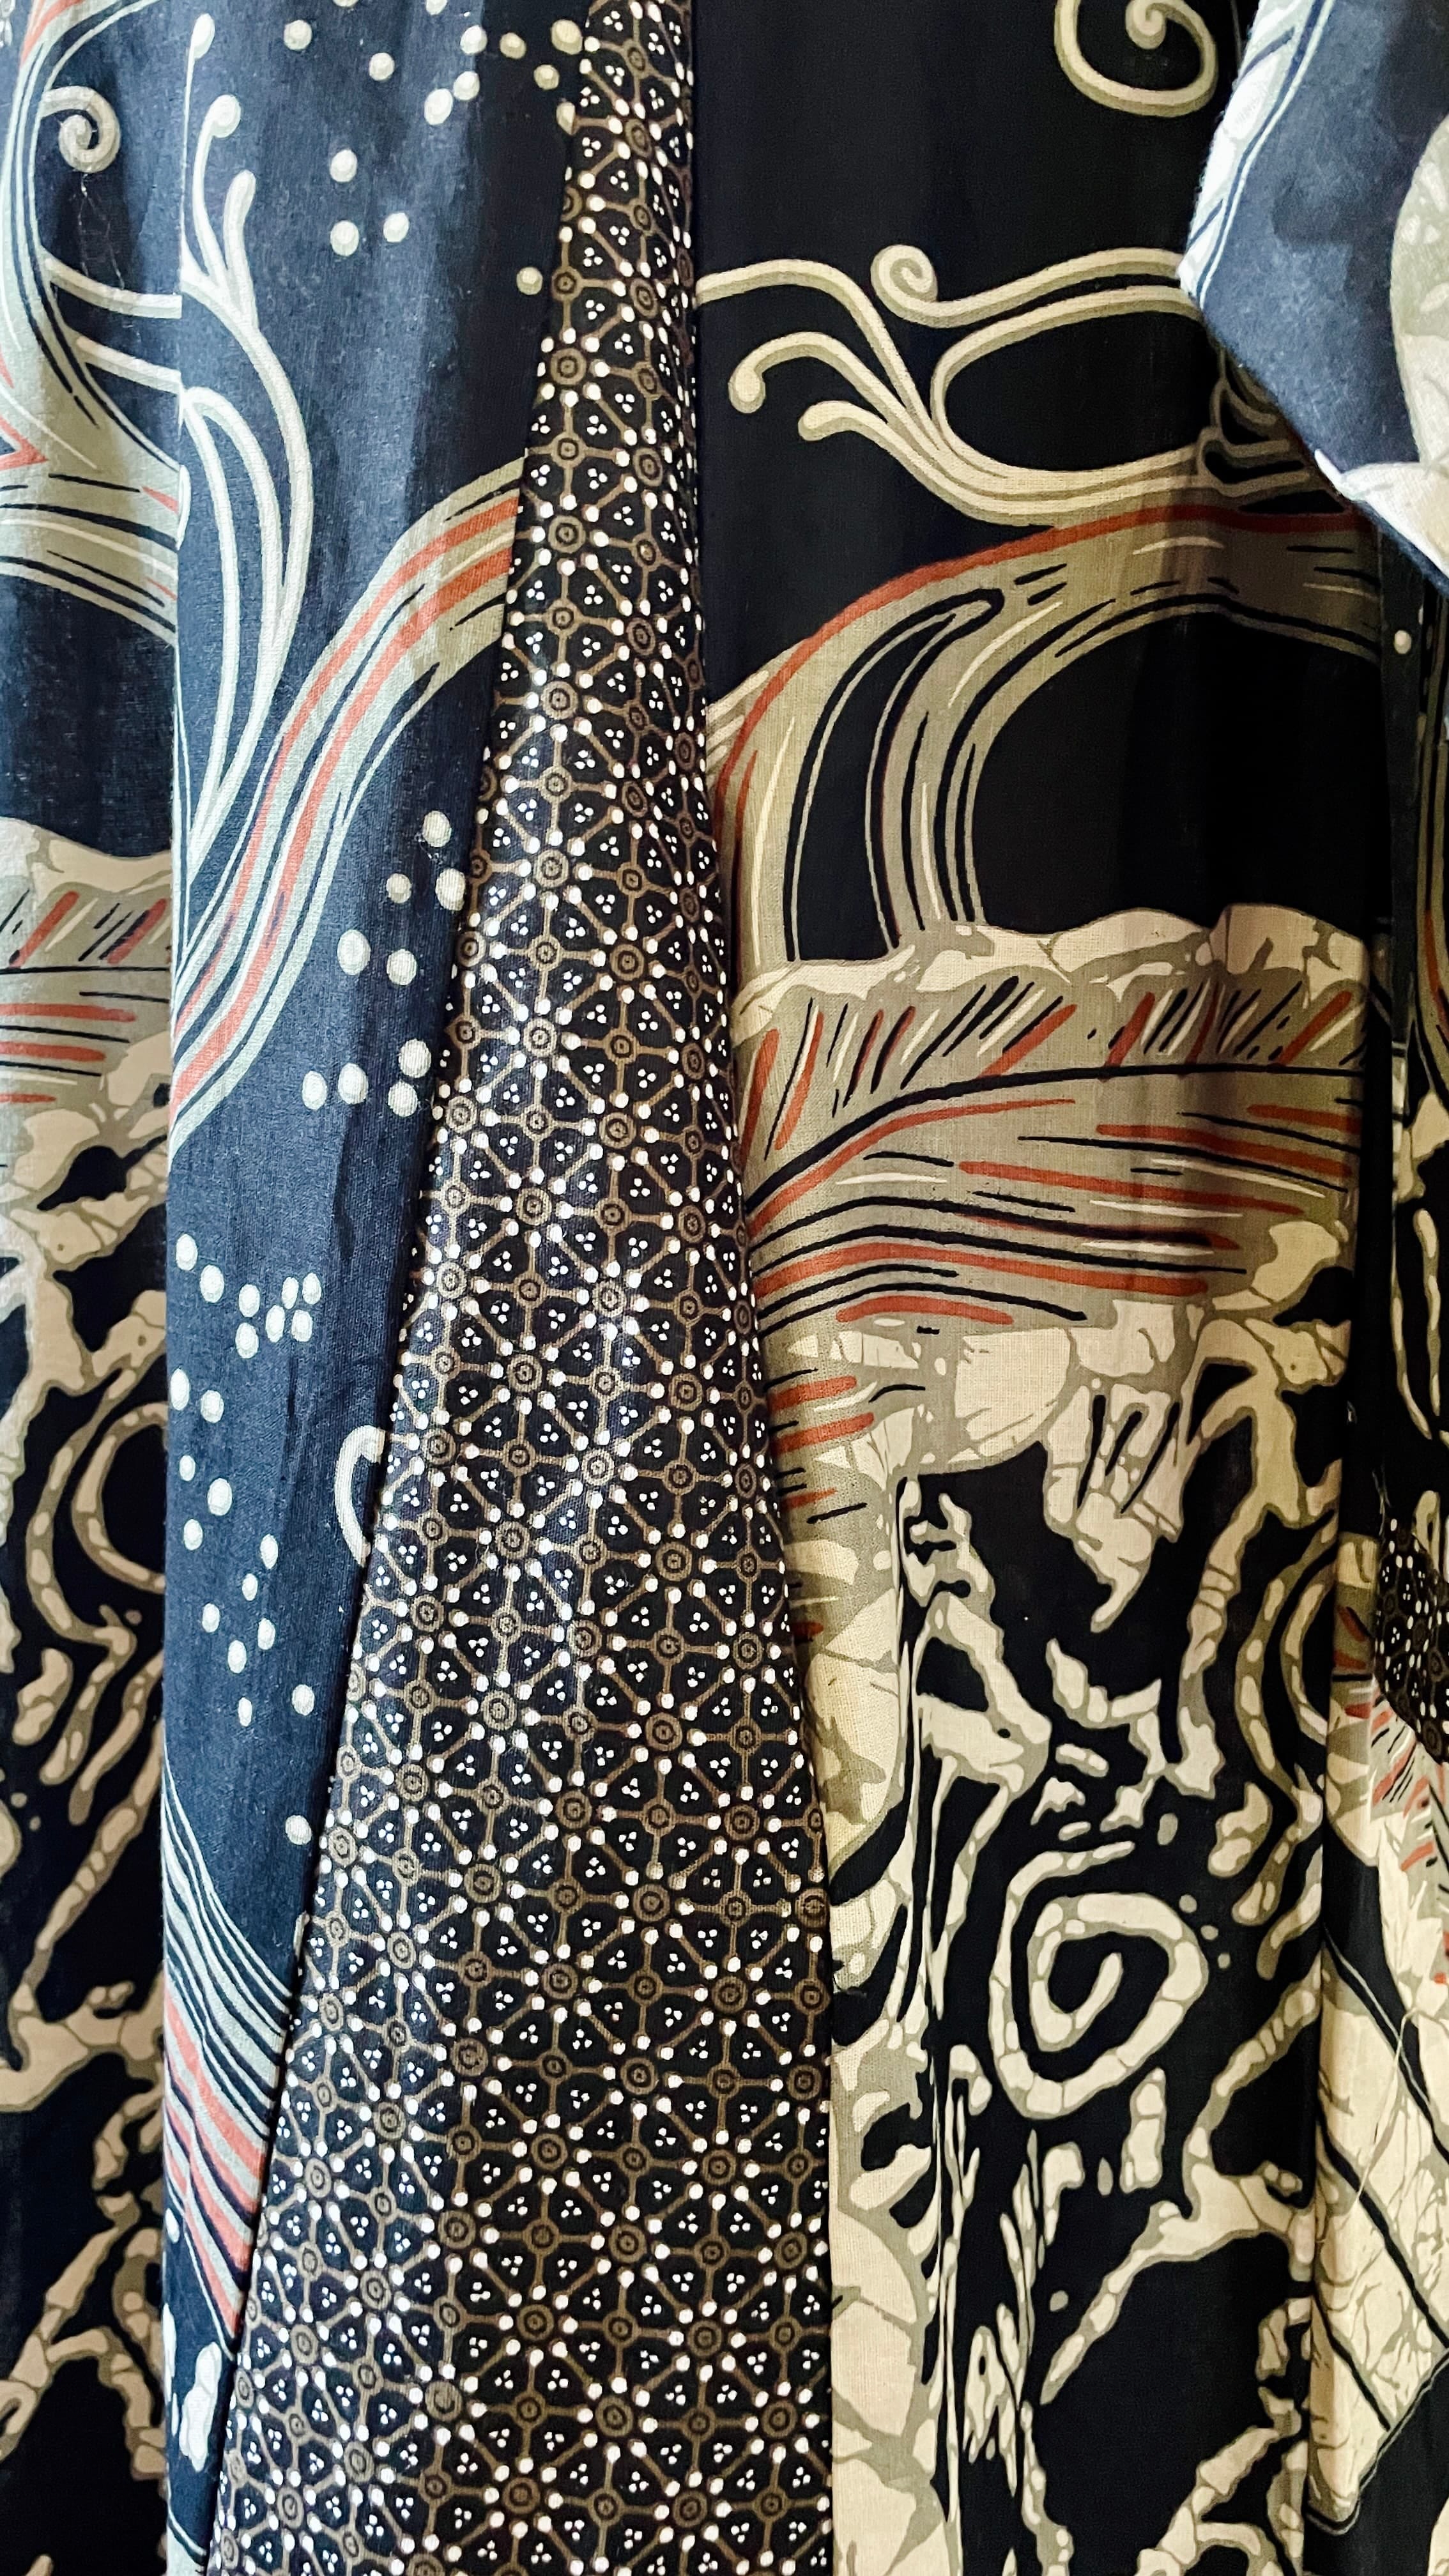
“I got this one at Pasar Beringharjo, Yogyakarta from a Pekalongan merchant. The maxi style reminds me a lot of abaya, and the yoke detail on the front chest is indicative of its European influence. The overall dark palette may seem more tough than feminine in Javanese tradition, however this is clearly a modern interpretation of Batik. Just look at the more realistic feather renditions, as well as the overall looser motifs.
By the way, I still need to add pockets to this dress.”
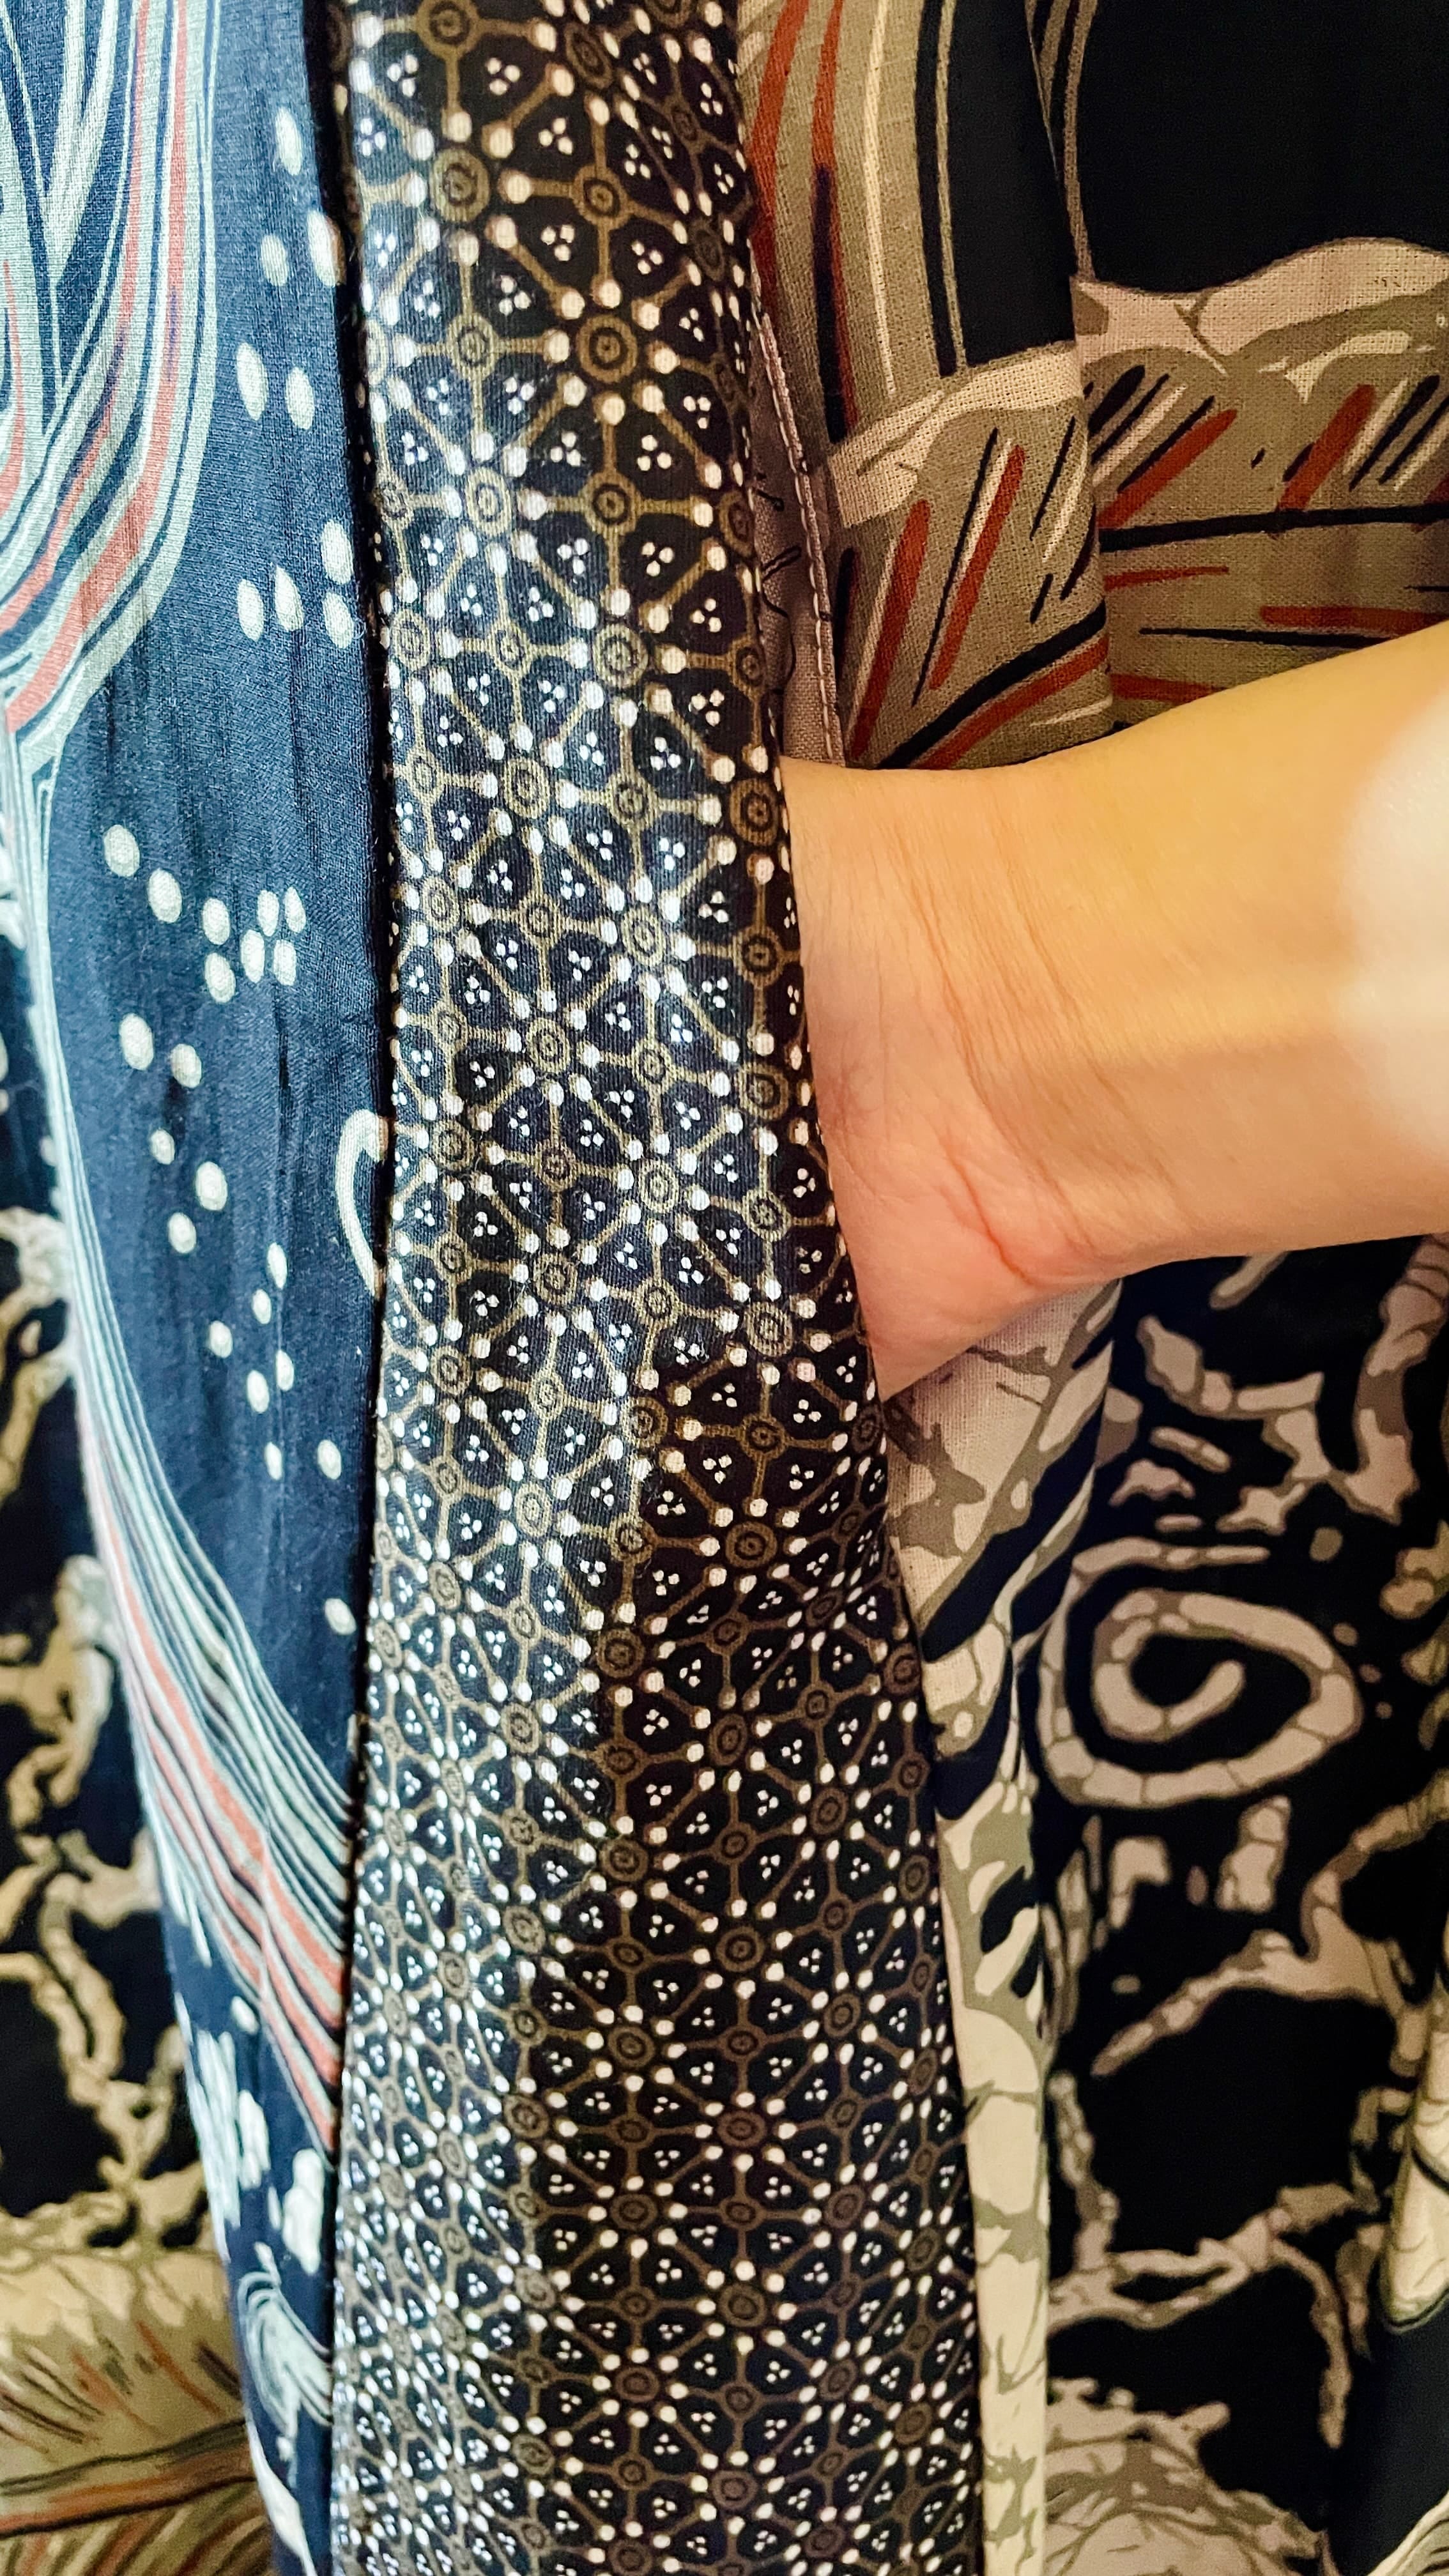
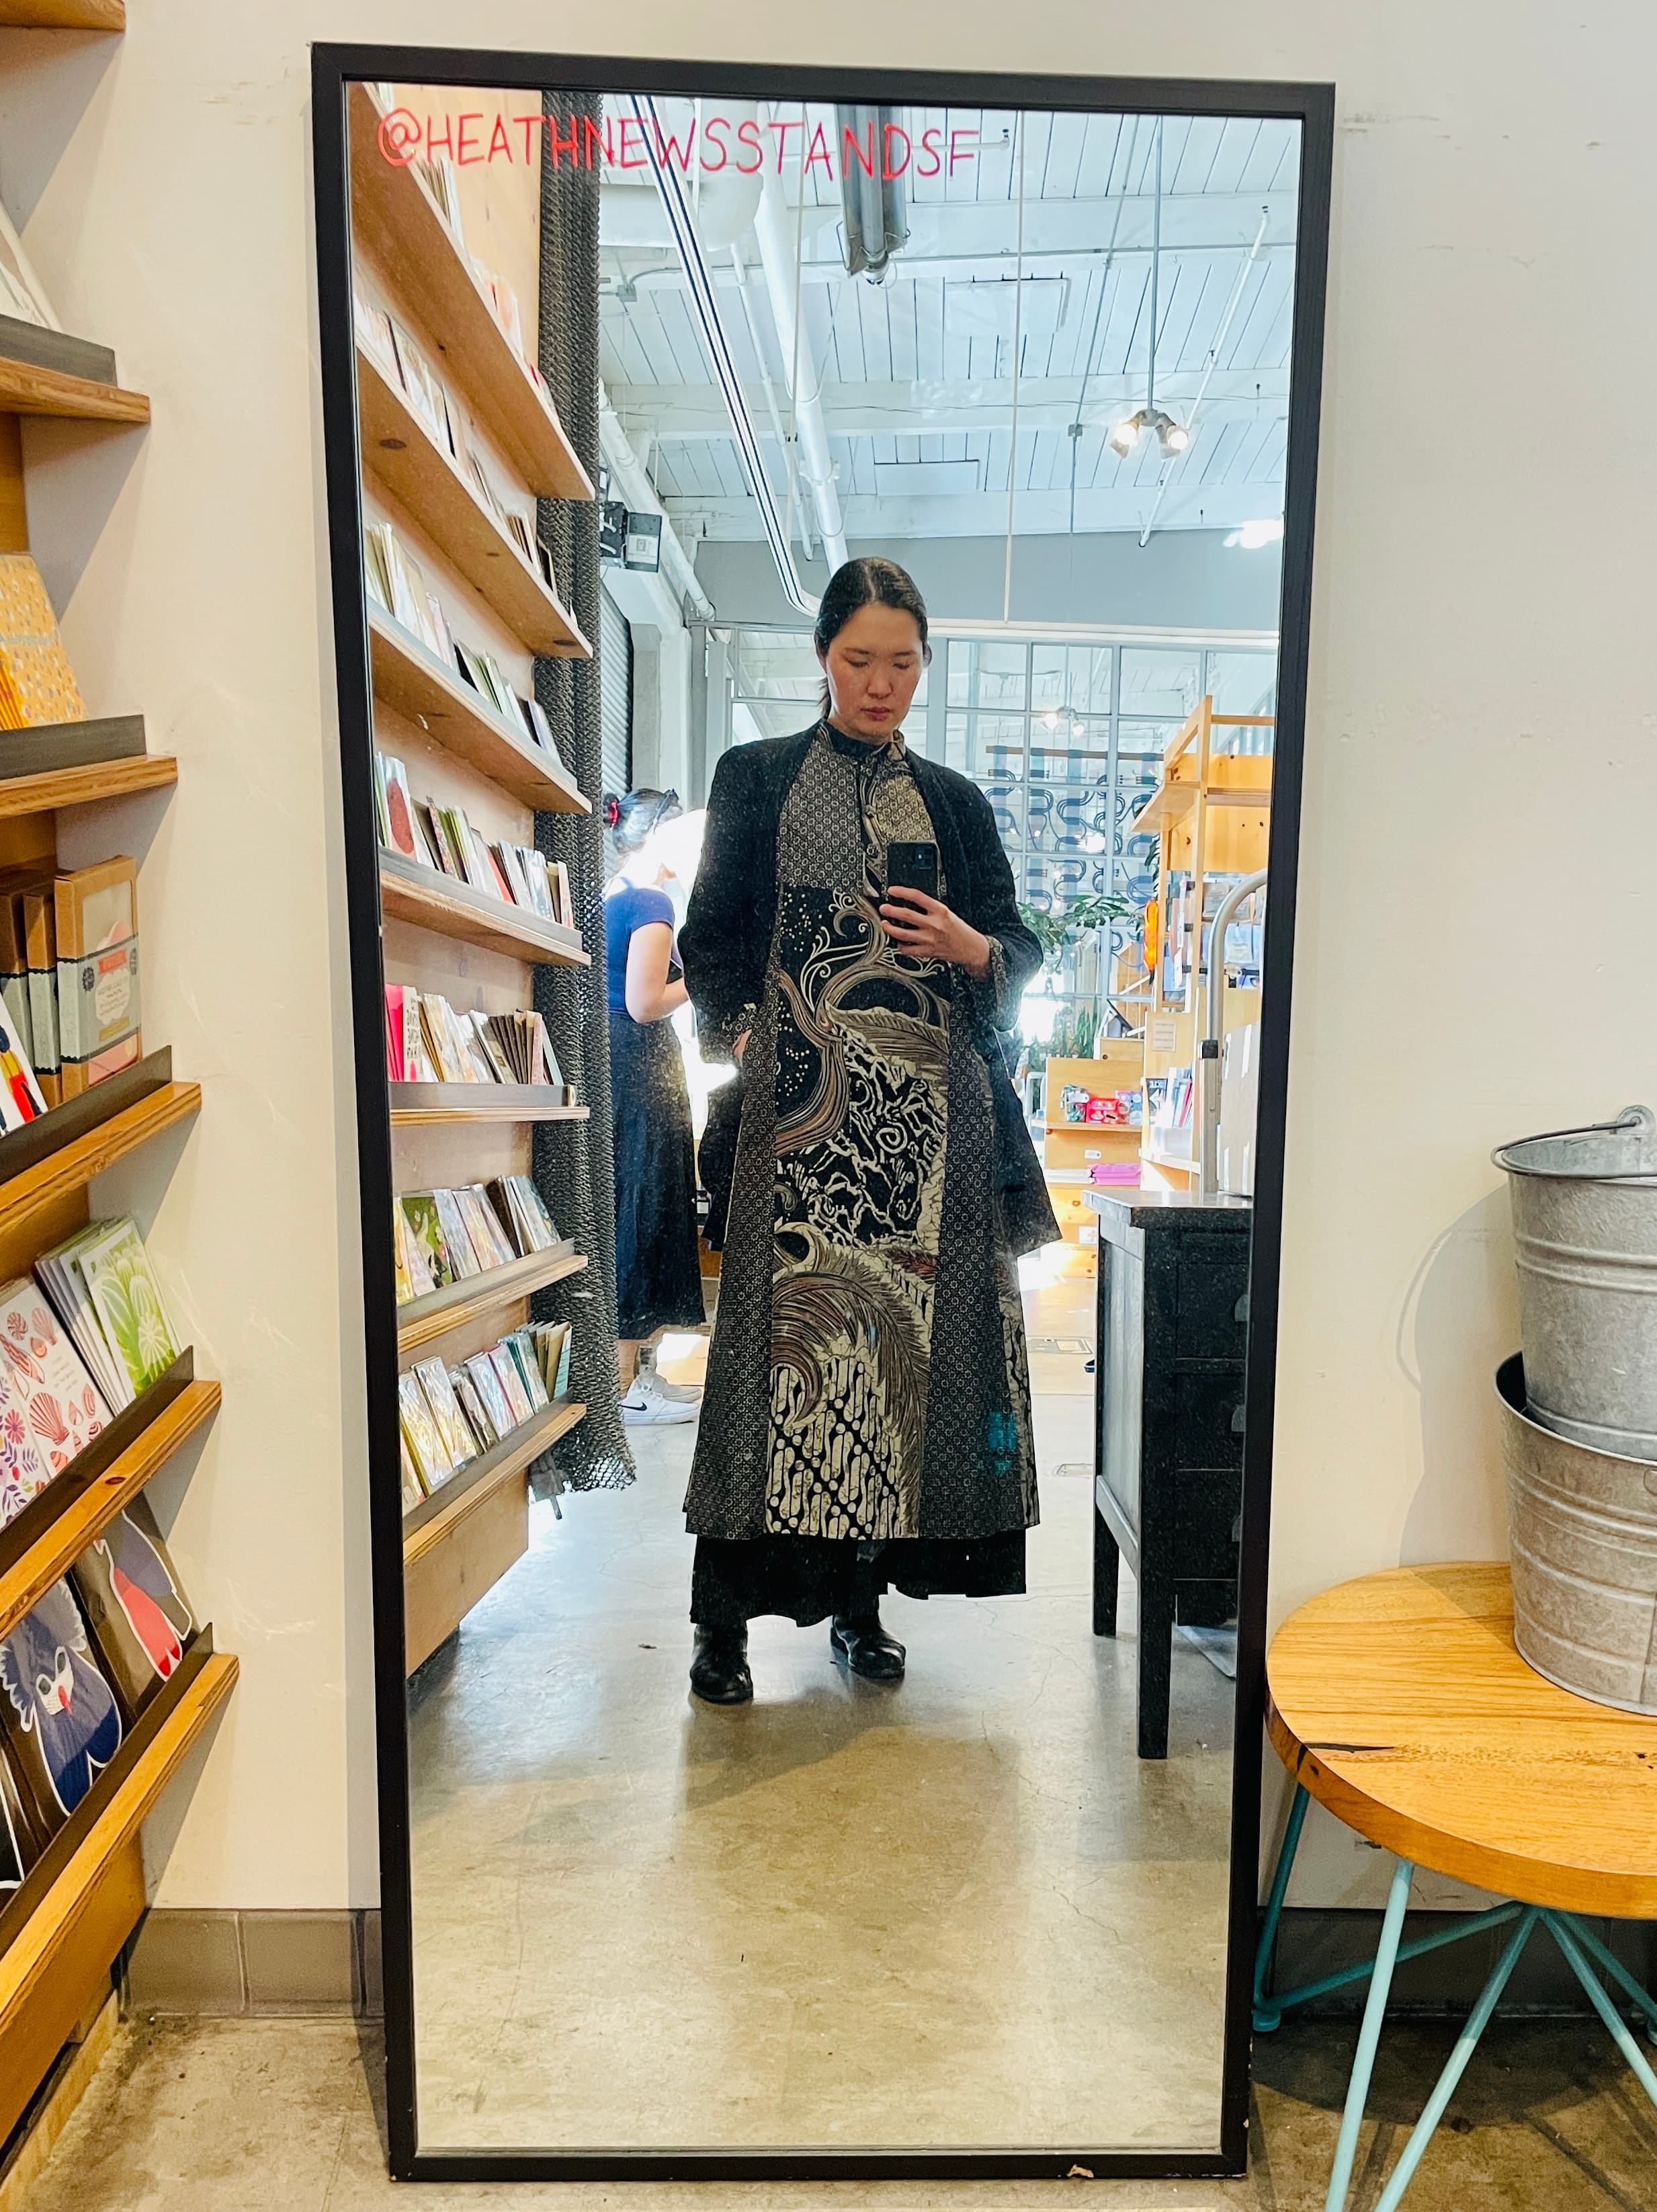
So here I am, almost one year later. A few weeks back, I finally found the time to add two inseam pockets to this dress. After the pockets were added, I immediately wore it several times within a month, and got compliments every time. It looks completely the same from the outside, but of course, it has pockets!
I’m sure you have your favorite pocket style, especially if you are a sewist. Inseam pockets are my favorite type for adding more function to an existing garment, because they don’t require much design alteration. As long as the placements can be discreet, and created using already available seam lines, the result looks no different to the outside world but makes all the difference for the wearer.
Alright, let me share with you how I went through the process of adding two deep inseam pockets to this Batik dress. I encourage you to also grab your own dress (or skirt) and add pockets to them as you read along!
Planning Pocket Placement
First things first: pocket placements. Before picking up your seam ripper, take time to evaluate your garment. The perfect spot for inseam pockets is usually along the side seams, but you'll want to consider:
Where will the pocket sit most comfortably on your body?
Is there enough ease in the garment to accommodate a pocket?
Which seams can be opened without compromising the garment's structure?
Once you've identified the ideal location, mark your pocket placement with tailor's chalk or removable fabric markers. A good rule of thumb for pocket openings is about 7” - 8” below the waistband, but adjust based on your personal preference and the garment style.
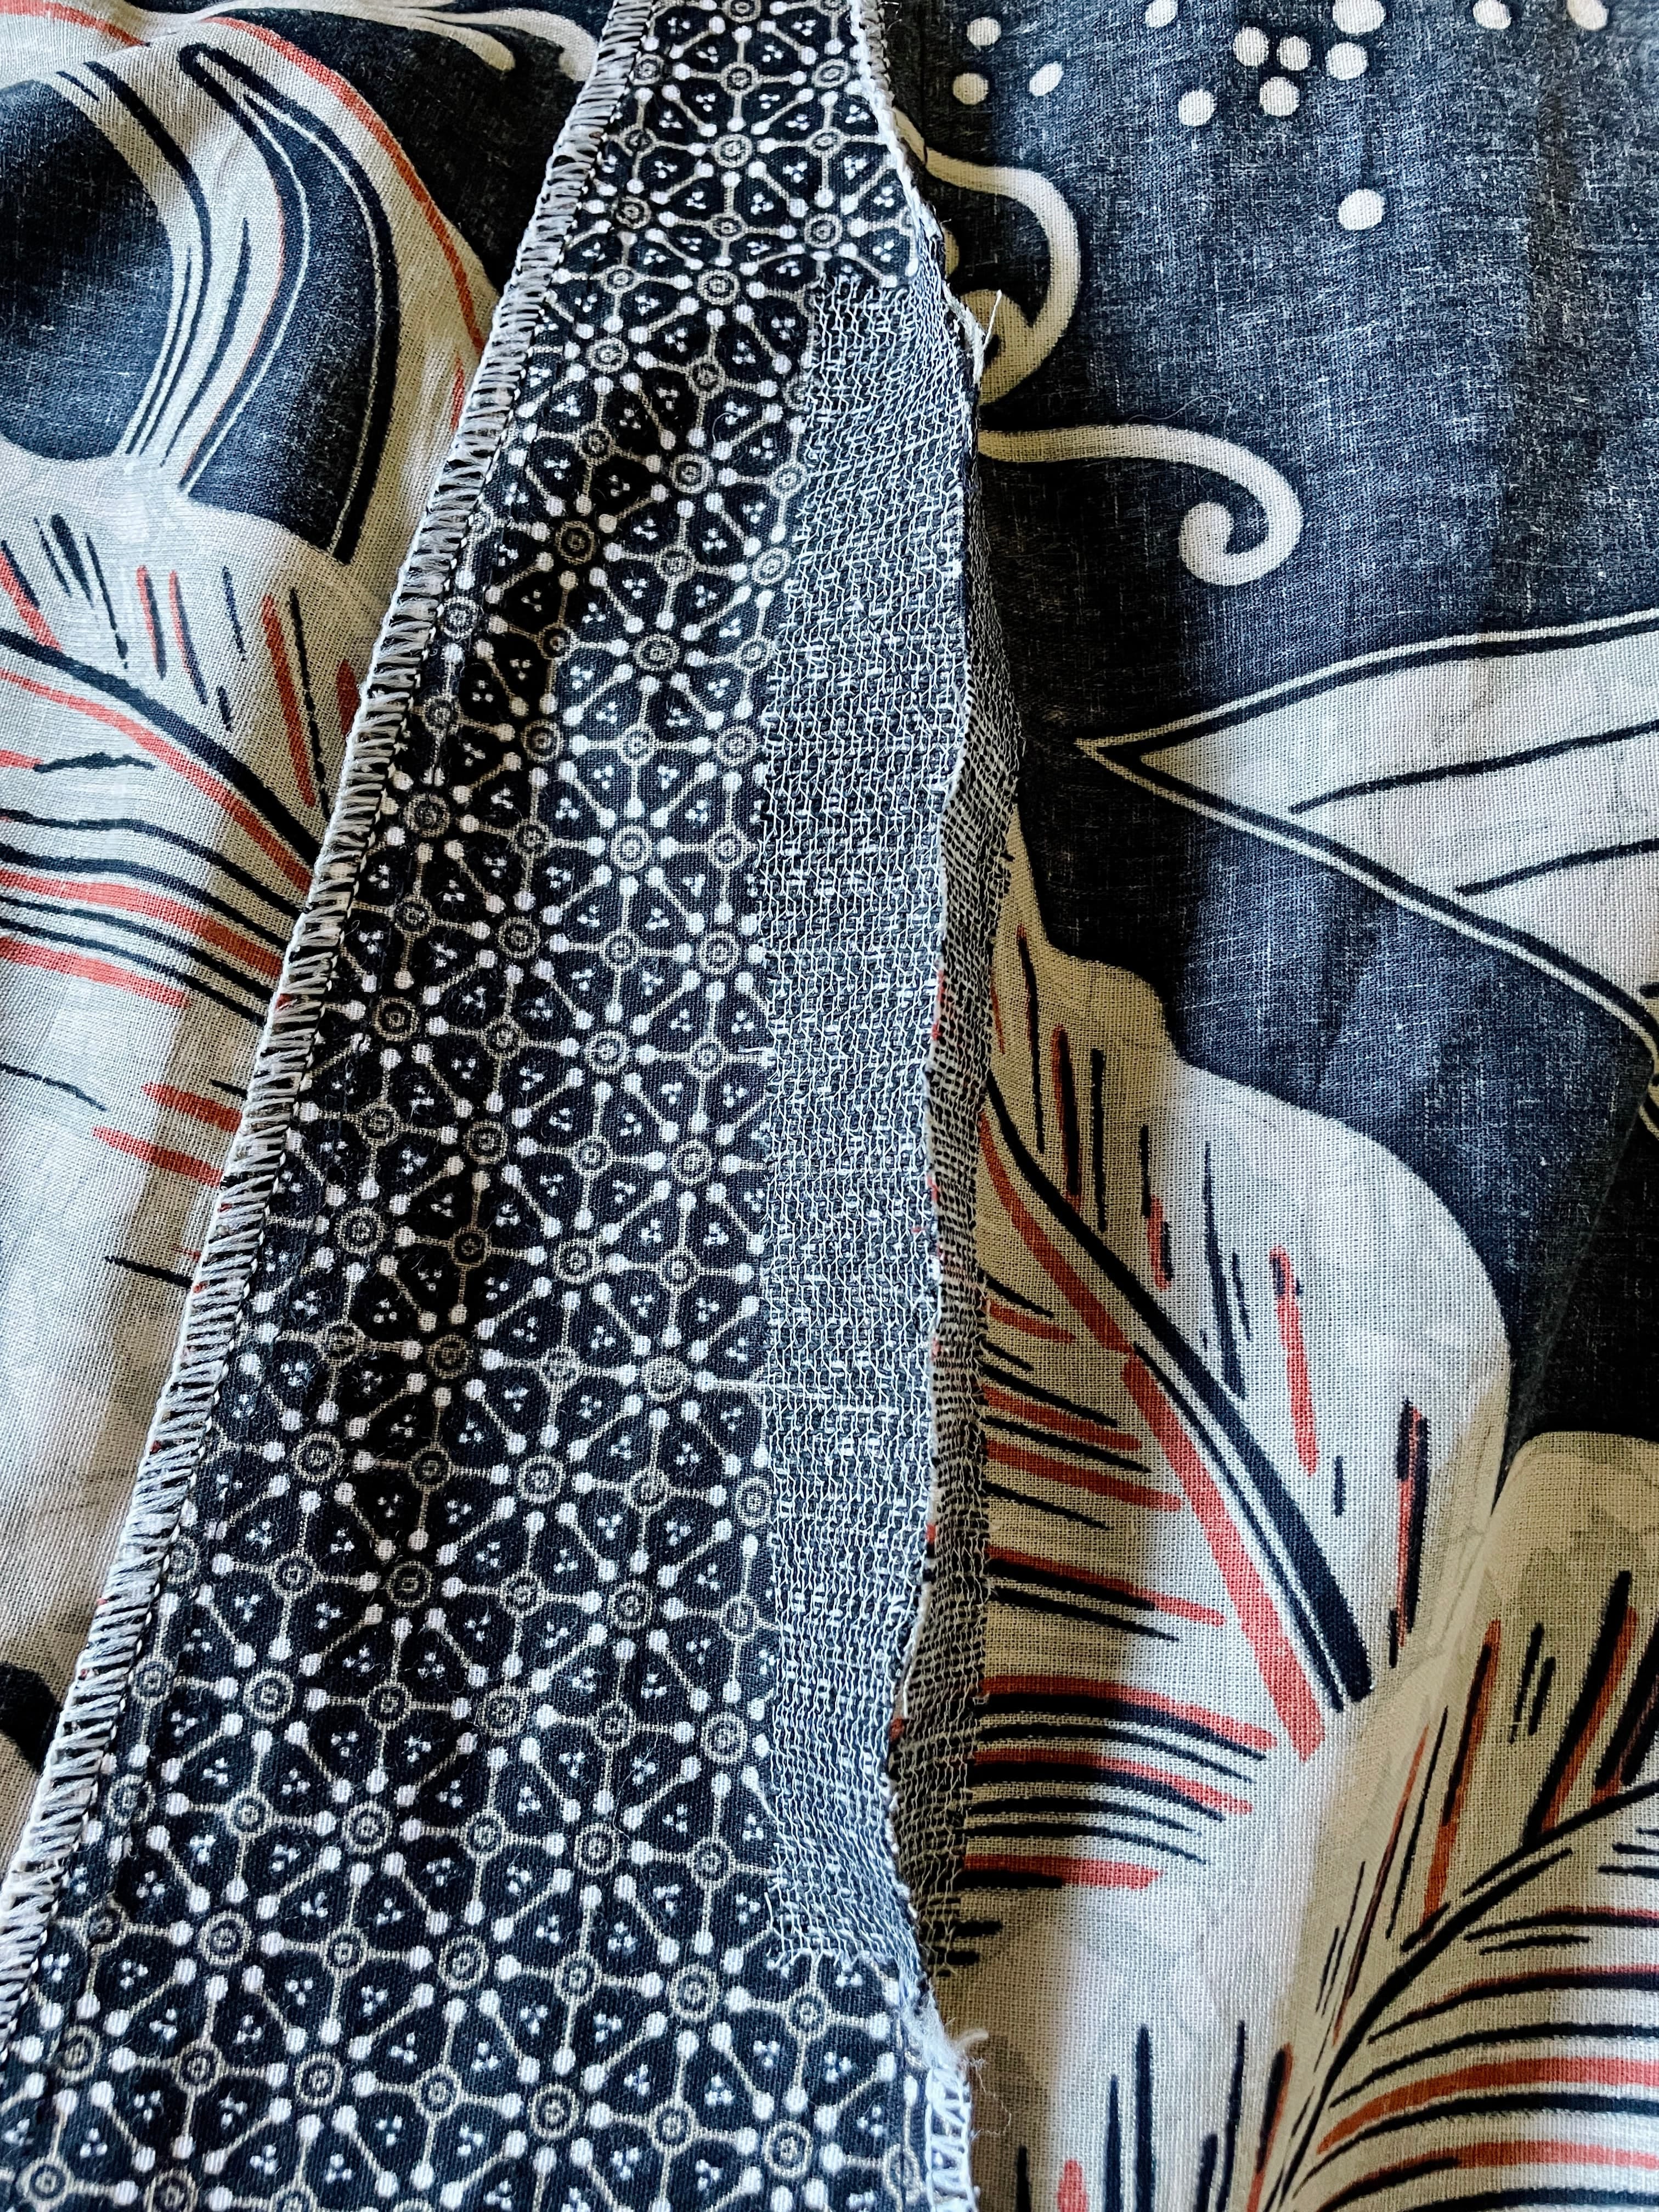
For this Batik dress, the pocket opening starts 7” below the front yoke’s seamline, along the narrow triangular inserts. After marking it, I used a seam ripper to open the selected seam, extending 1” beyond the mark on both ends. The gaping seams were approximately 8” - 9” on both sides.
Reinforcing the Seams
It took me a couple of failures to realize that this step is absolutely crucial: reinforcing the seams. Doing this will ensure your pockets will stand up to daily use. For each of the pocket openings,
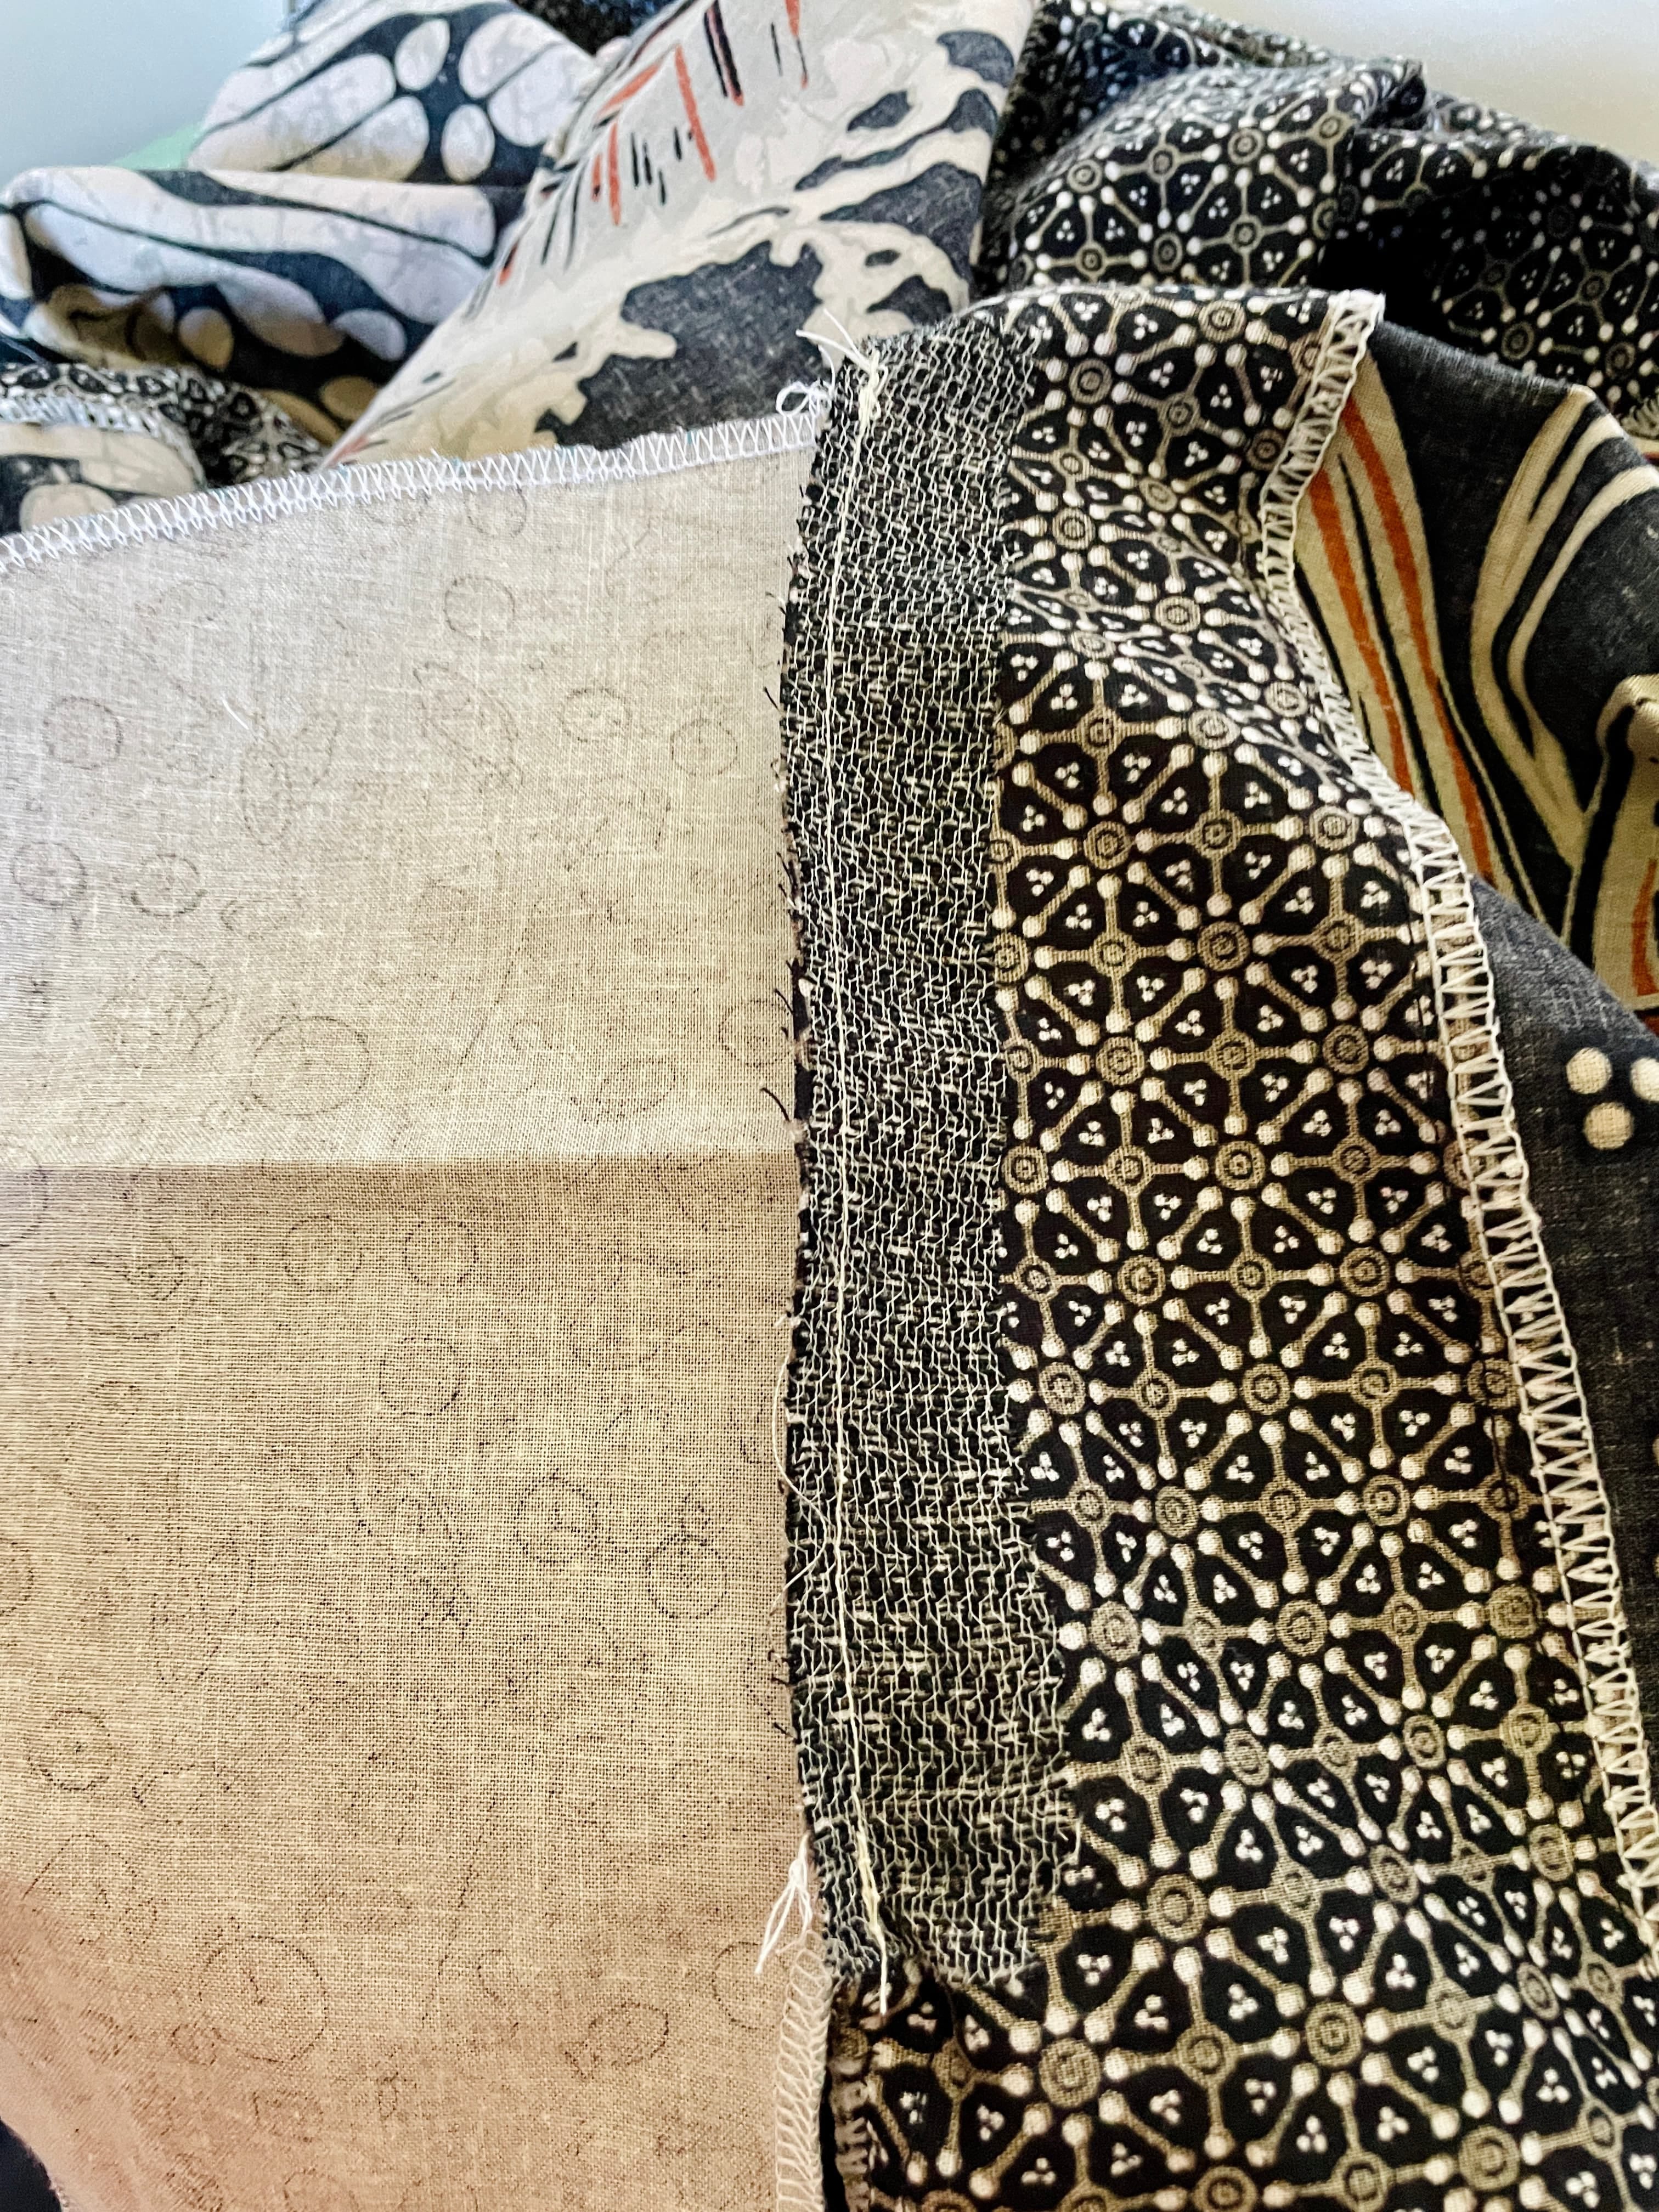
Cut small strips of weft interfacing (mine was 0.5” by 8”)
Apply the interfacing along both sides of the seam allowance where your pocket opening will be.
I applied the weft interfacing strips by pressing it using an iron. I added a thin layer of fabric scrap between the interfacing and the iron to minimize sticky accidents on the iron, which will be a pain to clean up.
This reinforcement may seem menial, but it prevents stretching and tearing when hands go in and out of pockets.
Creating Pocket Pieces
I make my pocket pieces out of scraps because I seem to have an unlimited supply of them :) But ultimately, the rule of thumb for making pocket pieces are as follows:
Select fabric that complements your garment’s weight. If it’s lightweight, then the pocket pieces also need to have similar weight. Heavier weight pocket pieces will add bulk and create unnecessary strain. Keep that in mind as you are selecting fabric for pockets.
Cut four pocket pieces using a standard pocket pattern or create your own (for example: a half-moon shape about 7” wide and 9'“ deep). I went with my preferred pocket pattern that I have used for several years now.
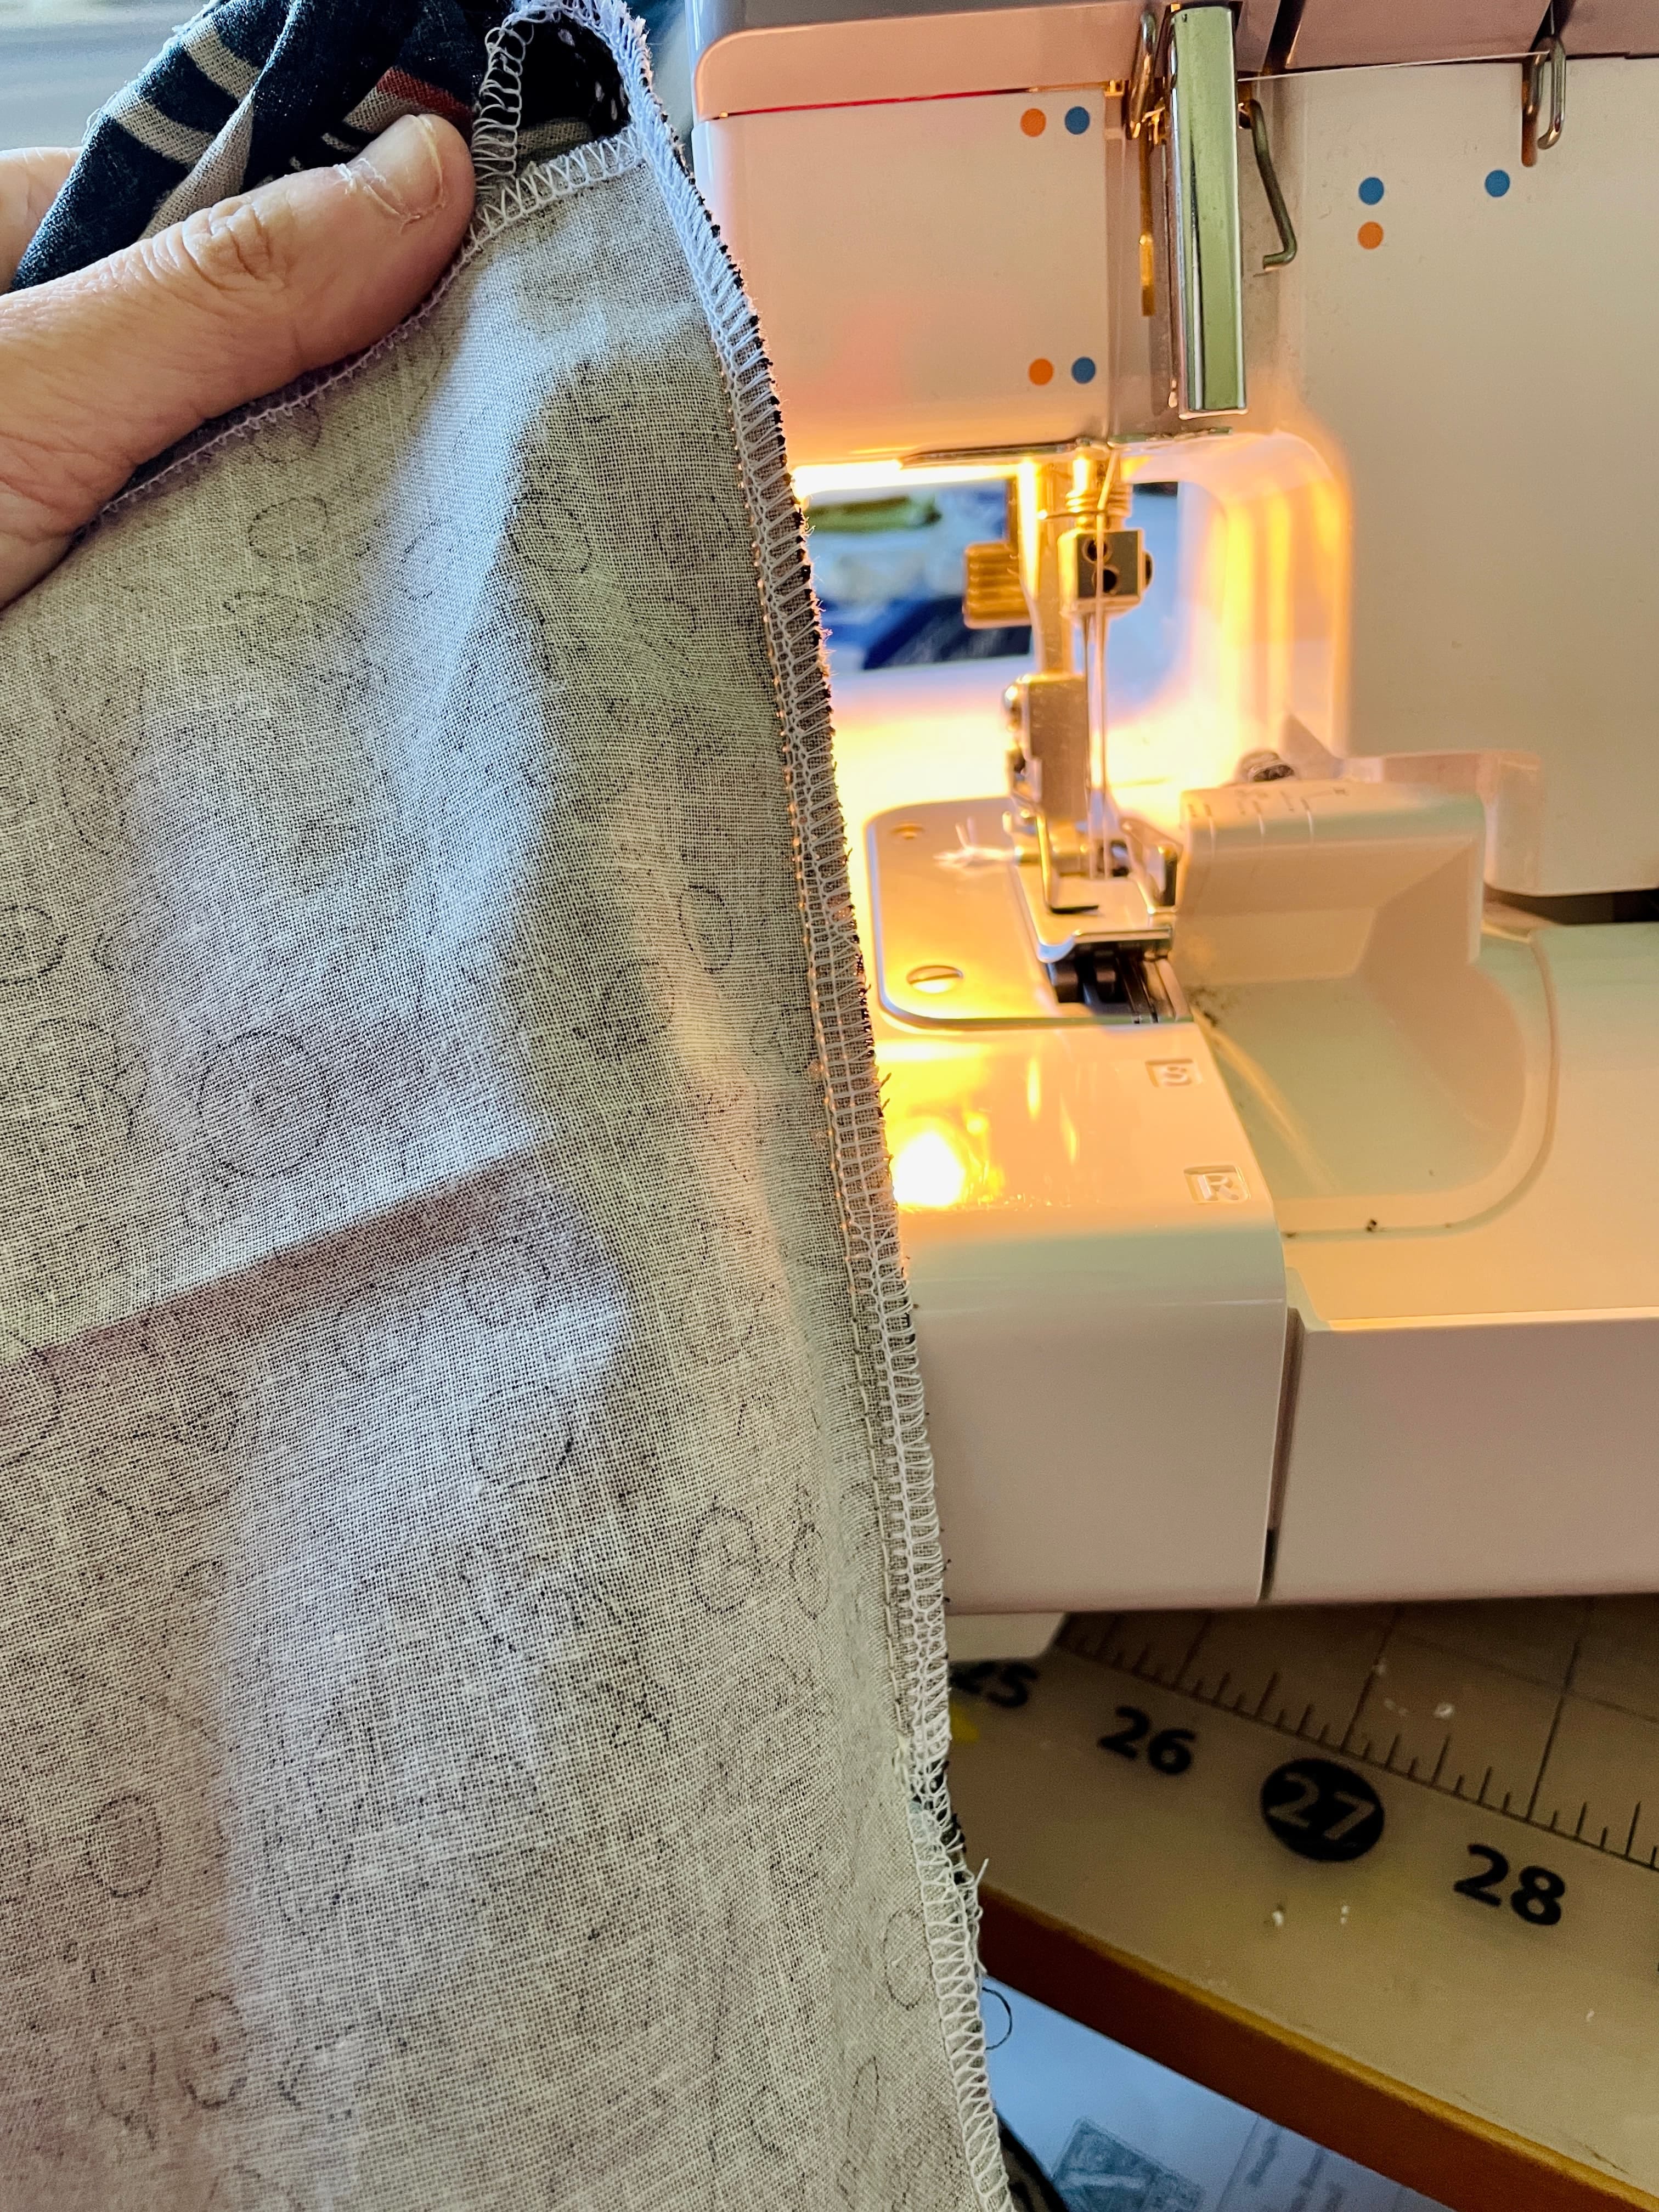
Before attaching pockets to the garment, I serged all around the raw edges of your pocket pieces to prevent fraying.

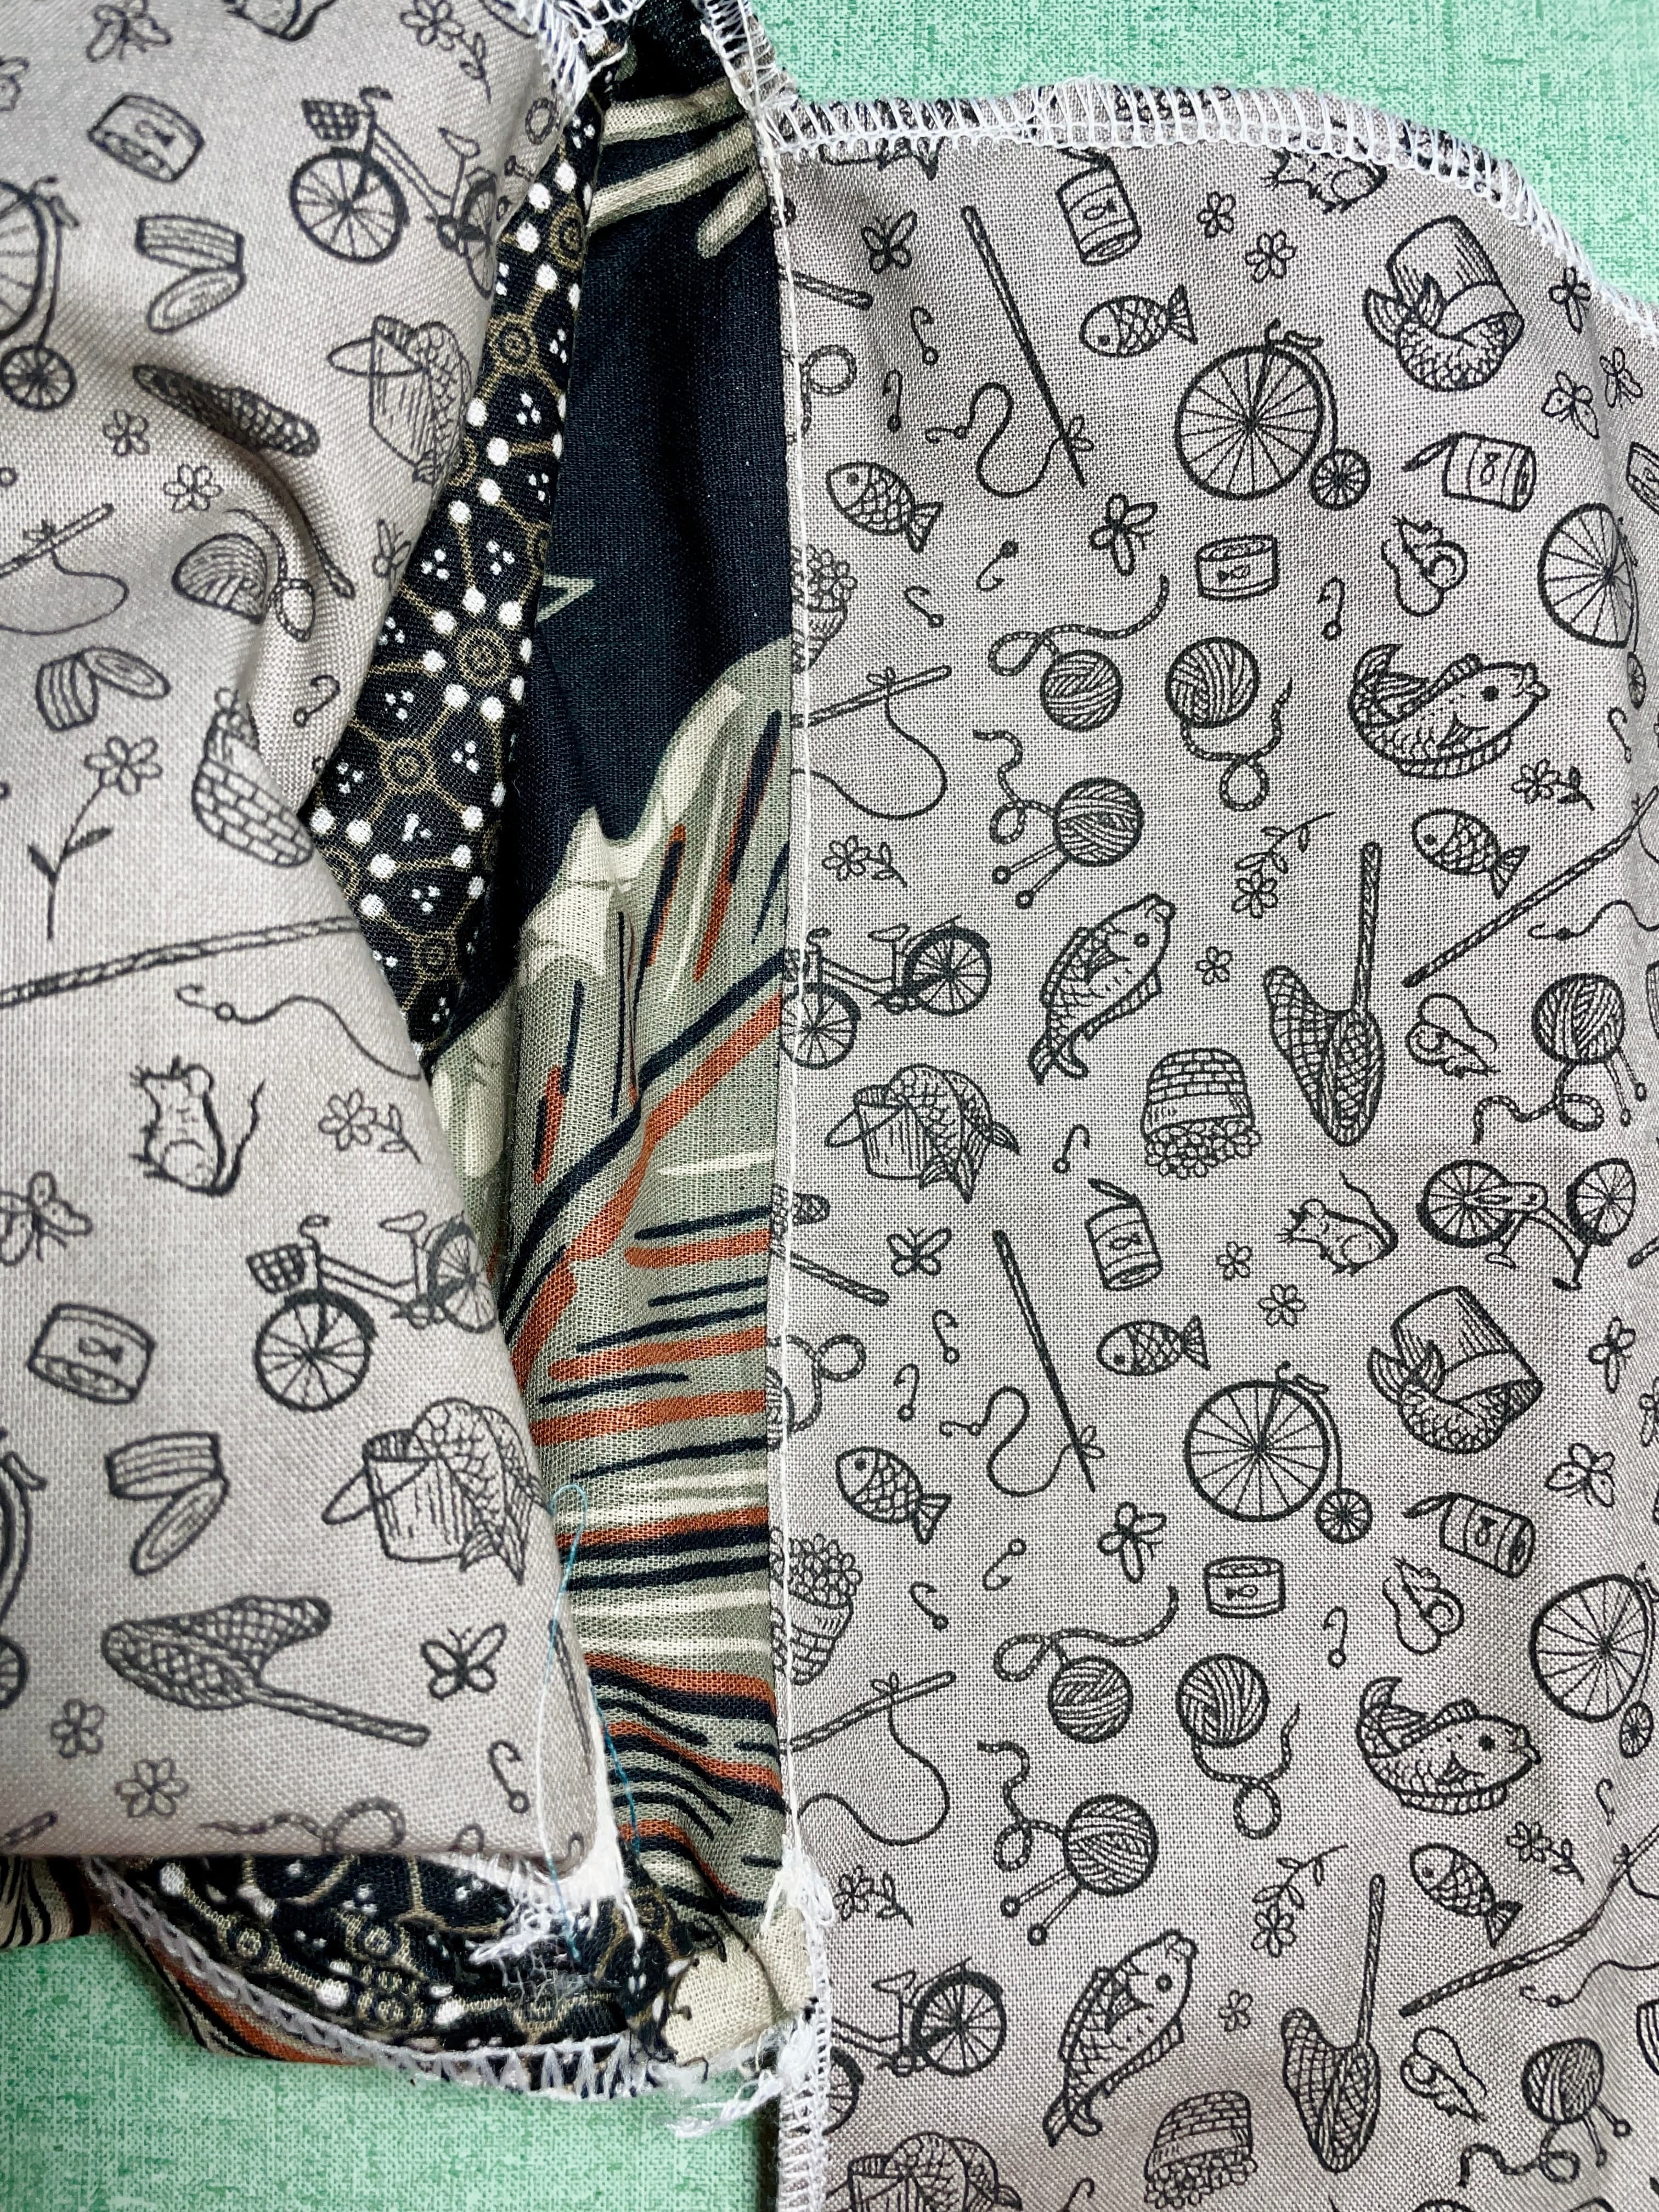
The Batik dress is made out of fabric that’s similar to quilting cotton’s weight, so I used quilting cotton scraps to make the pockets. And as you can see from the pictures, I went to create slightly longer pocket pieces to minimize waste.
The pockets end up being 6.5” wide and 13” deep. I LOVE deep pockets! And that’s another reason why the seam reinforcement step is so important.
Attaching Pockets to Your Garment, with Durability in Mind
After all the prep work, it’s time to attach the pocket pieces to the garment. It’s going to come together quickly from here on:
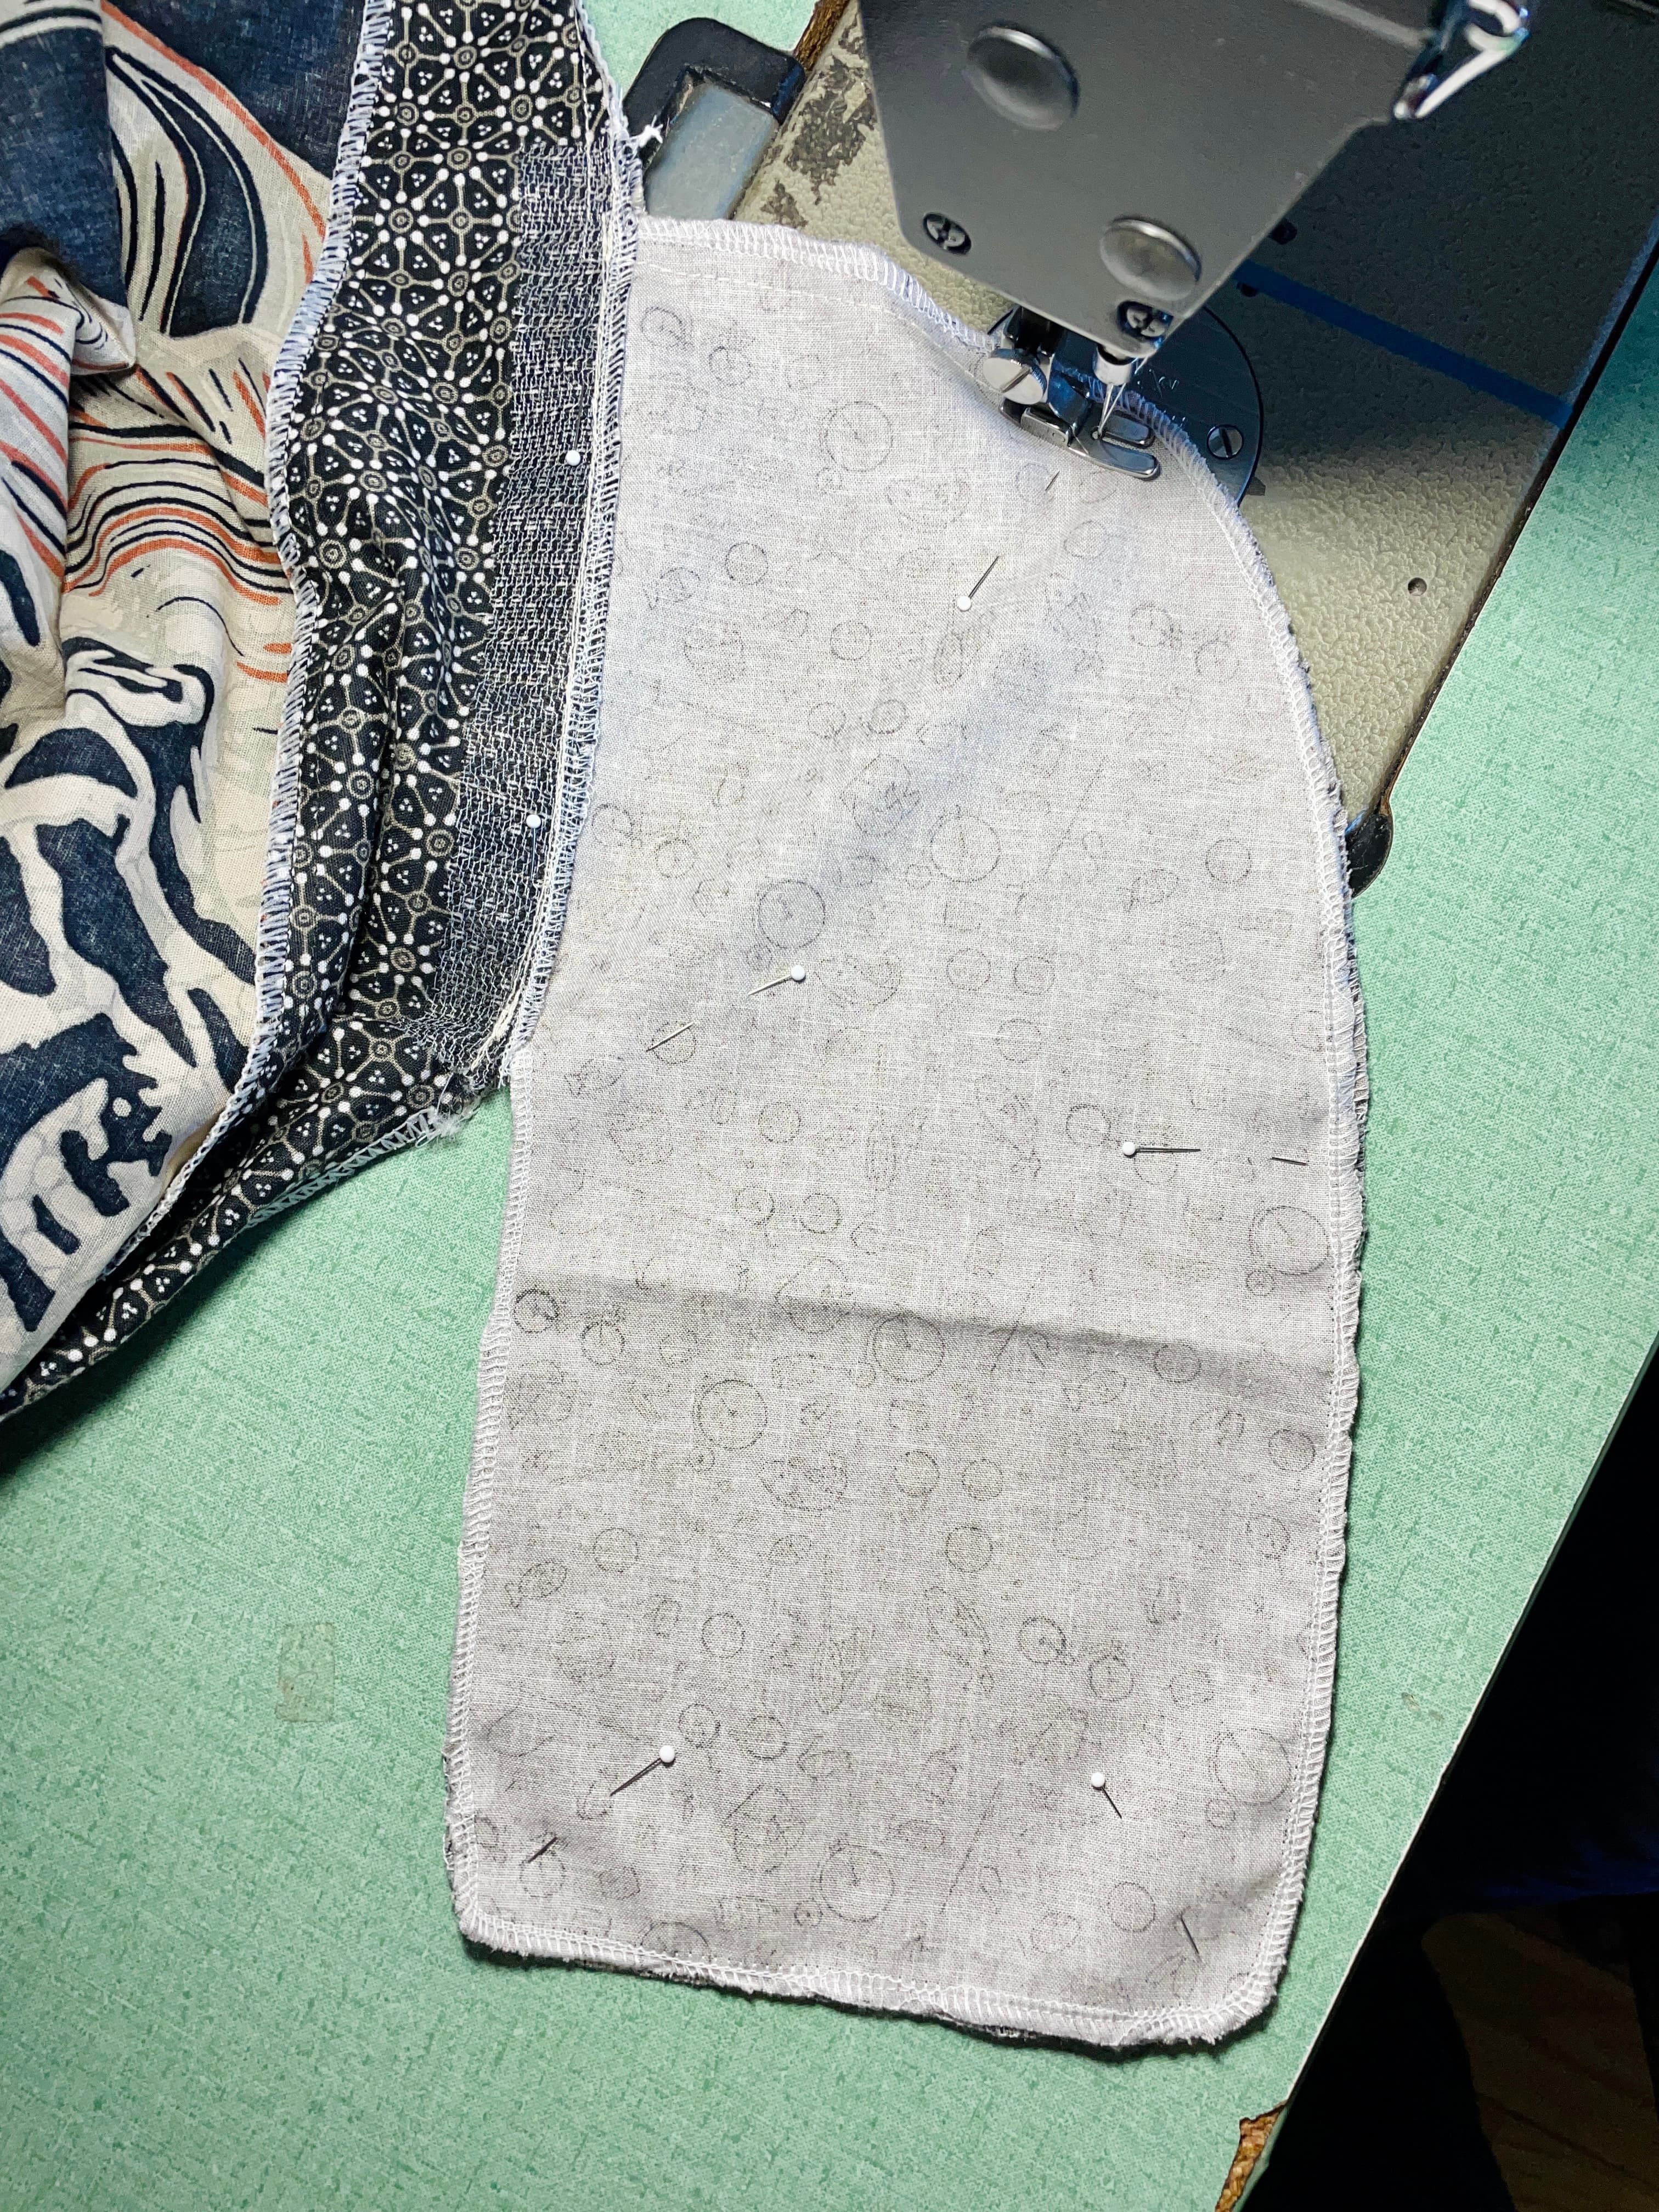
Pin one pocket piece to each side of your opened seam, right sides together, aligning the straight edge of the pocket with the seam line.
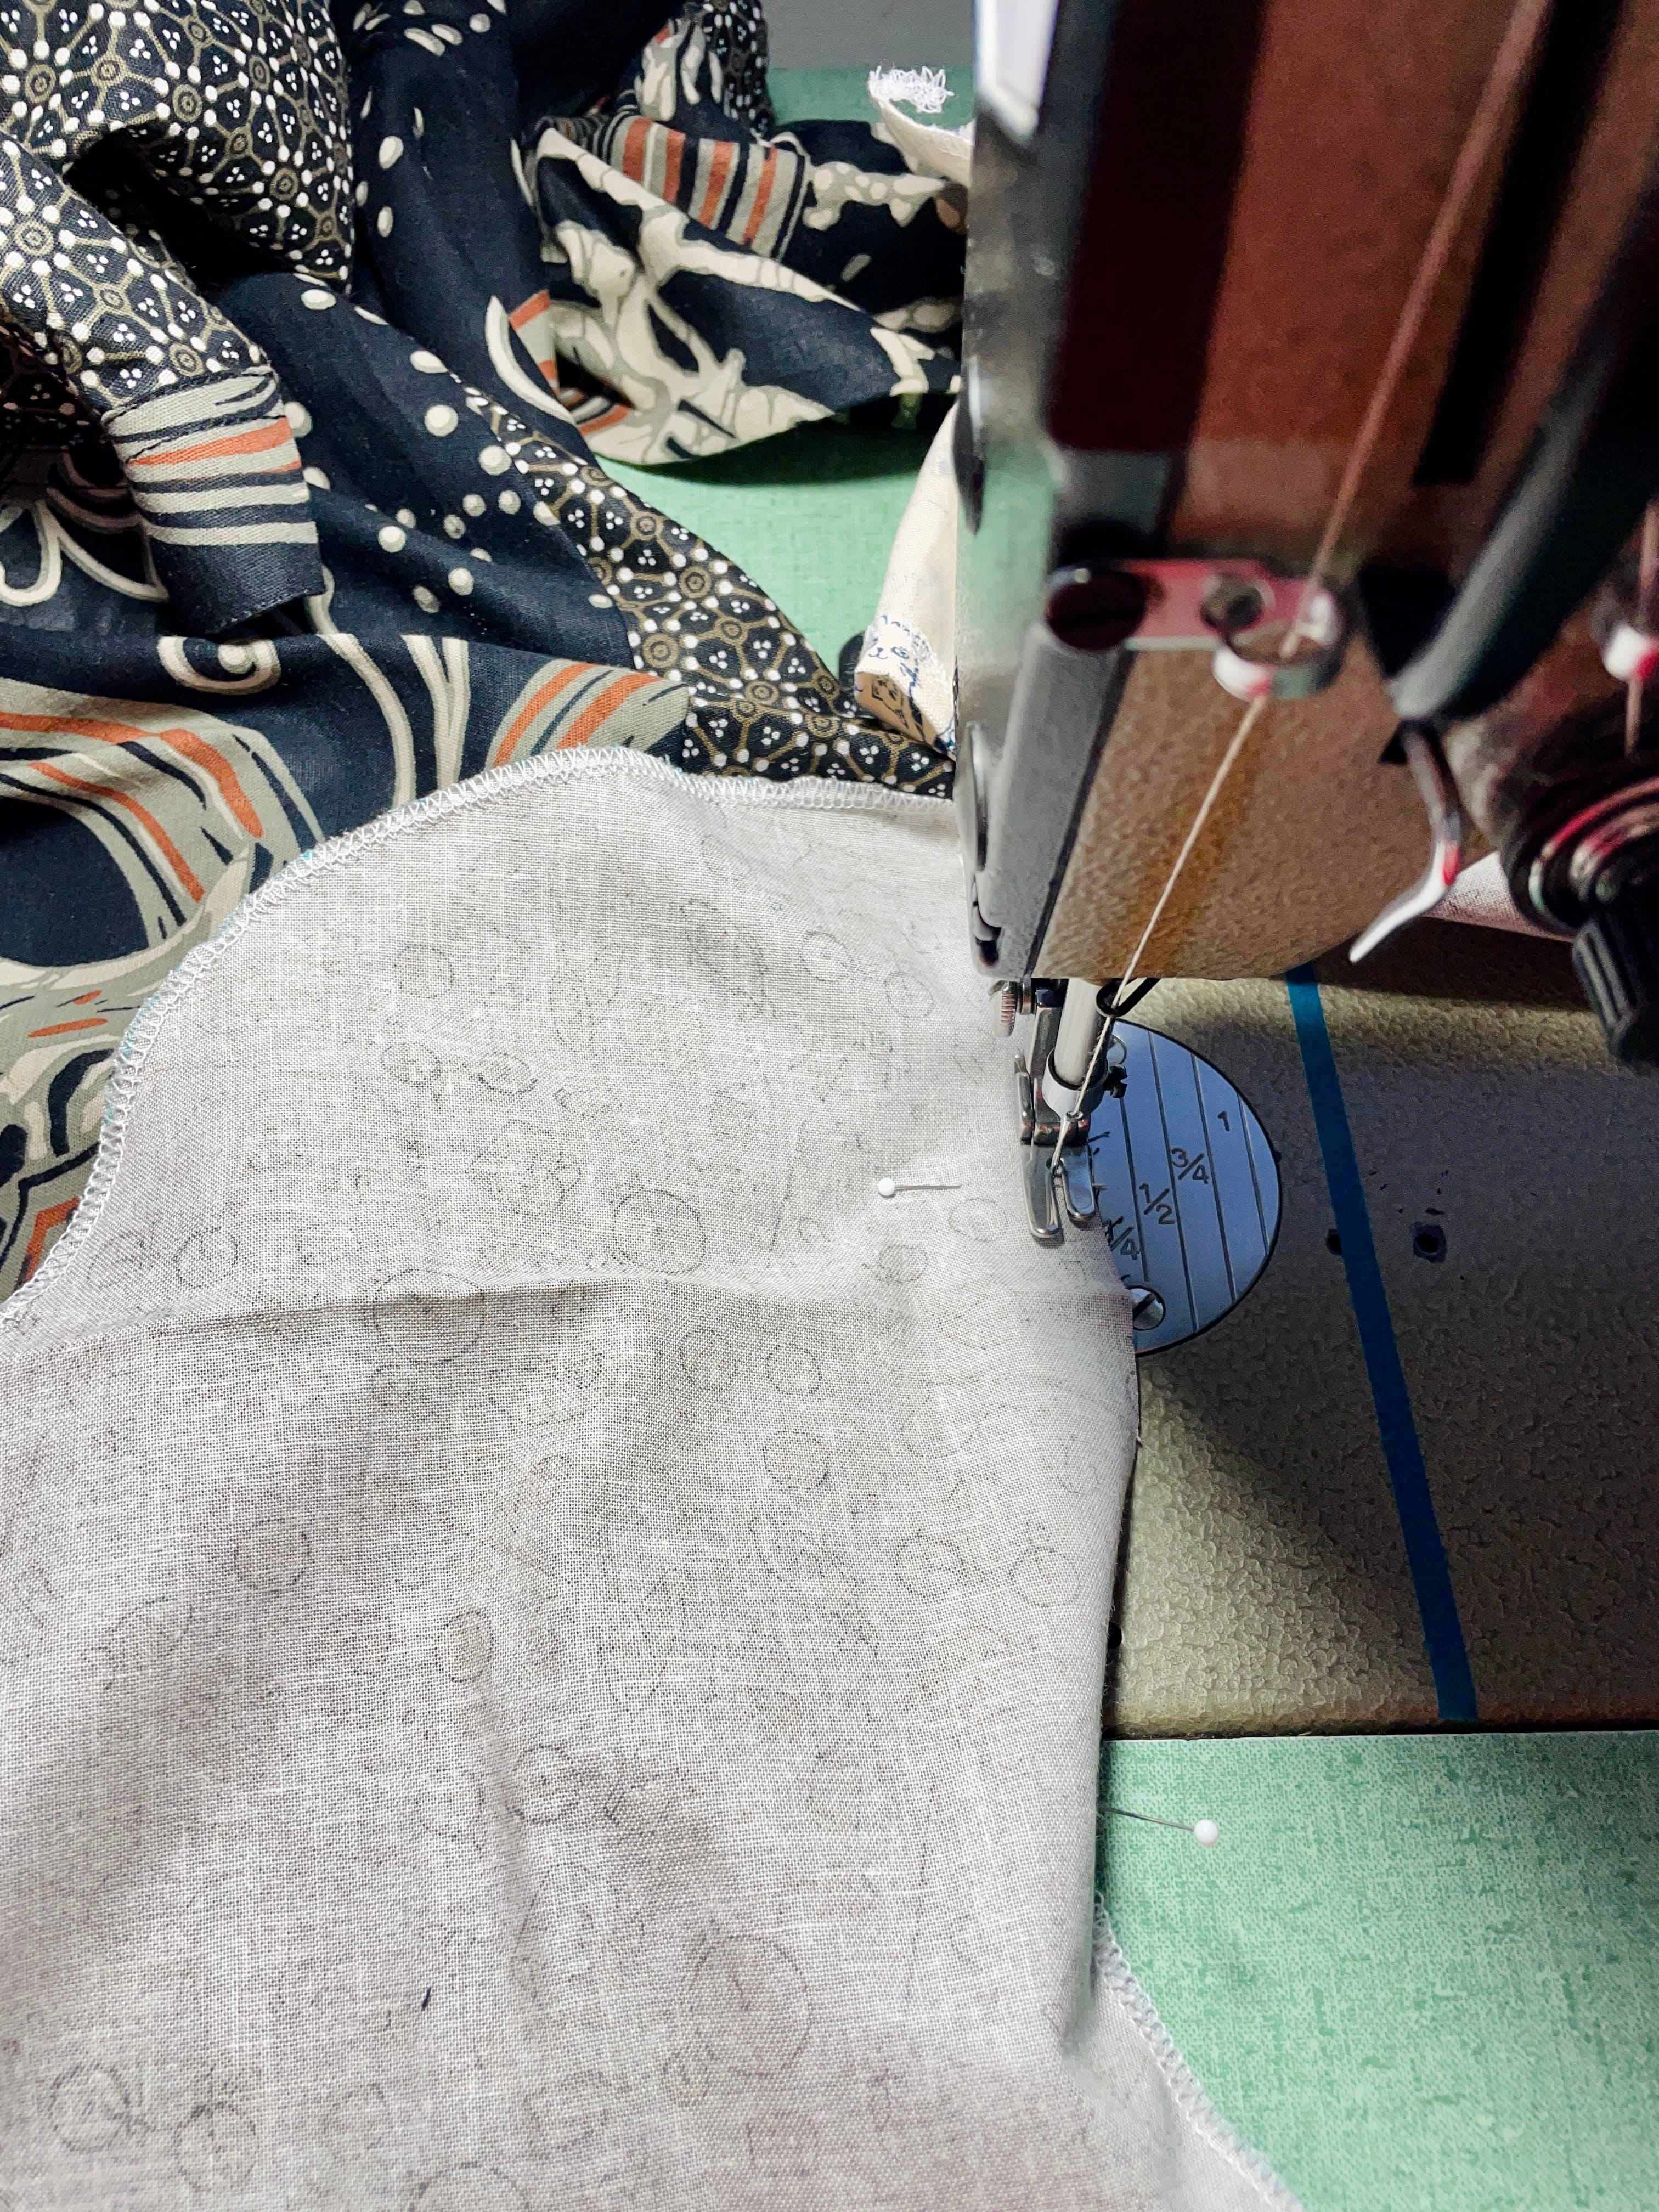
(optional) Baste in place to secure before permanent stitching.
Stitch along the seam line to attach each pocket piece to its respective side of the garment. For my dress, the seam allowance is 0.25” so that’s the distance I was aiming for.
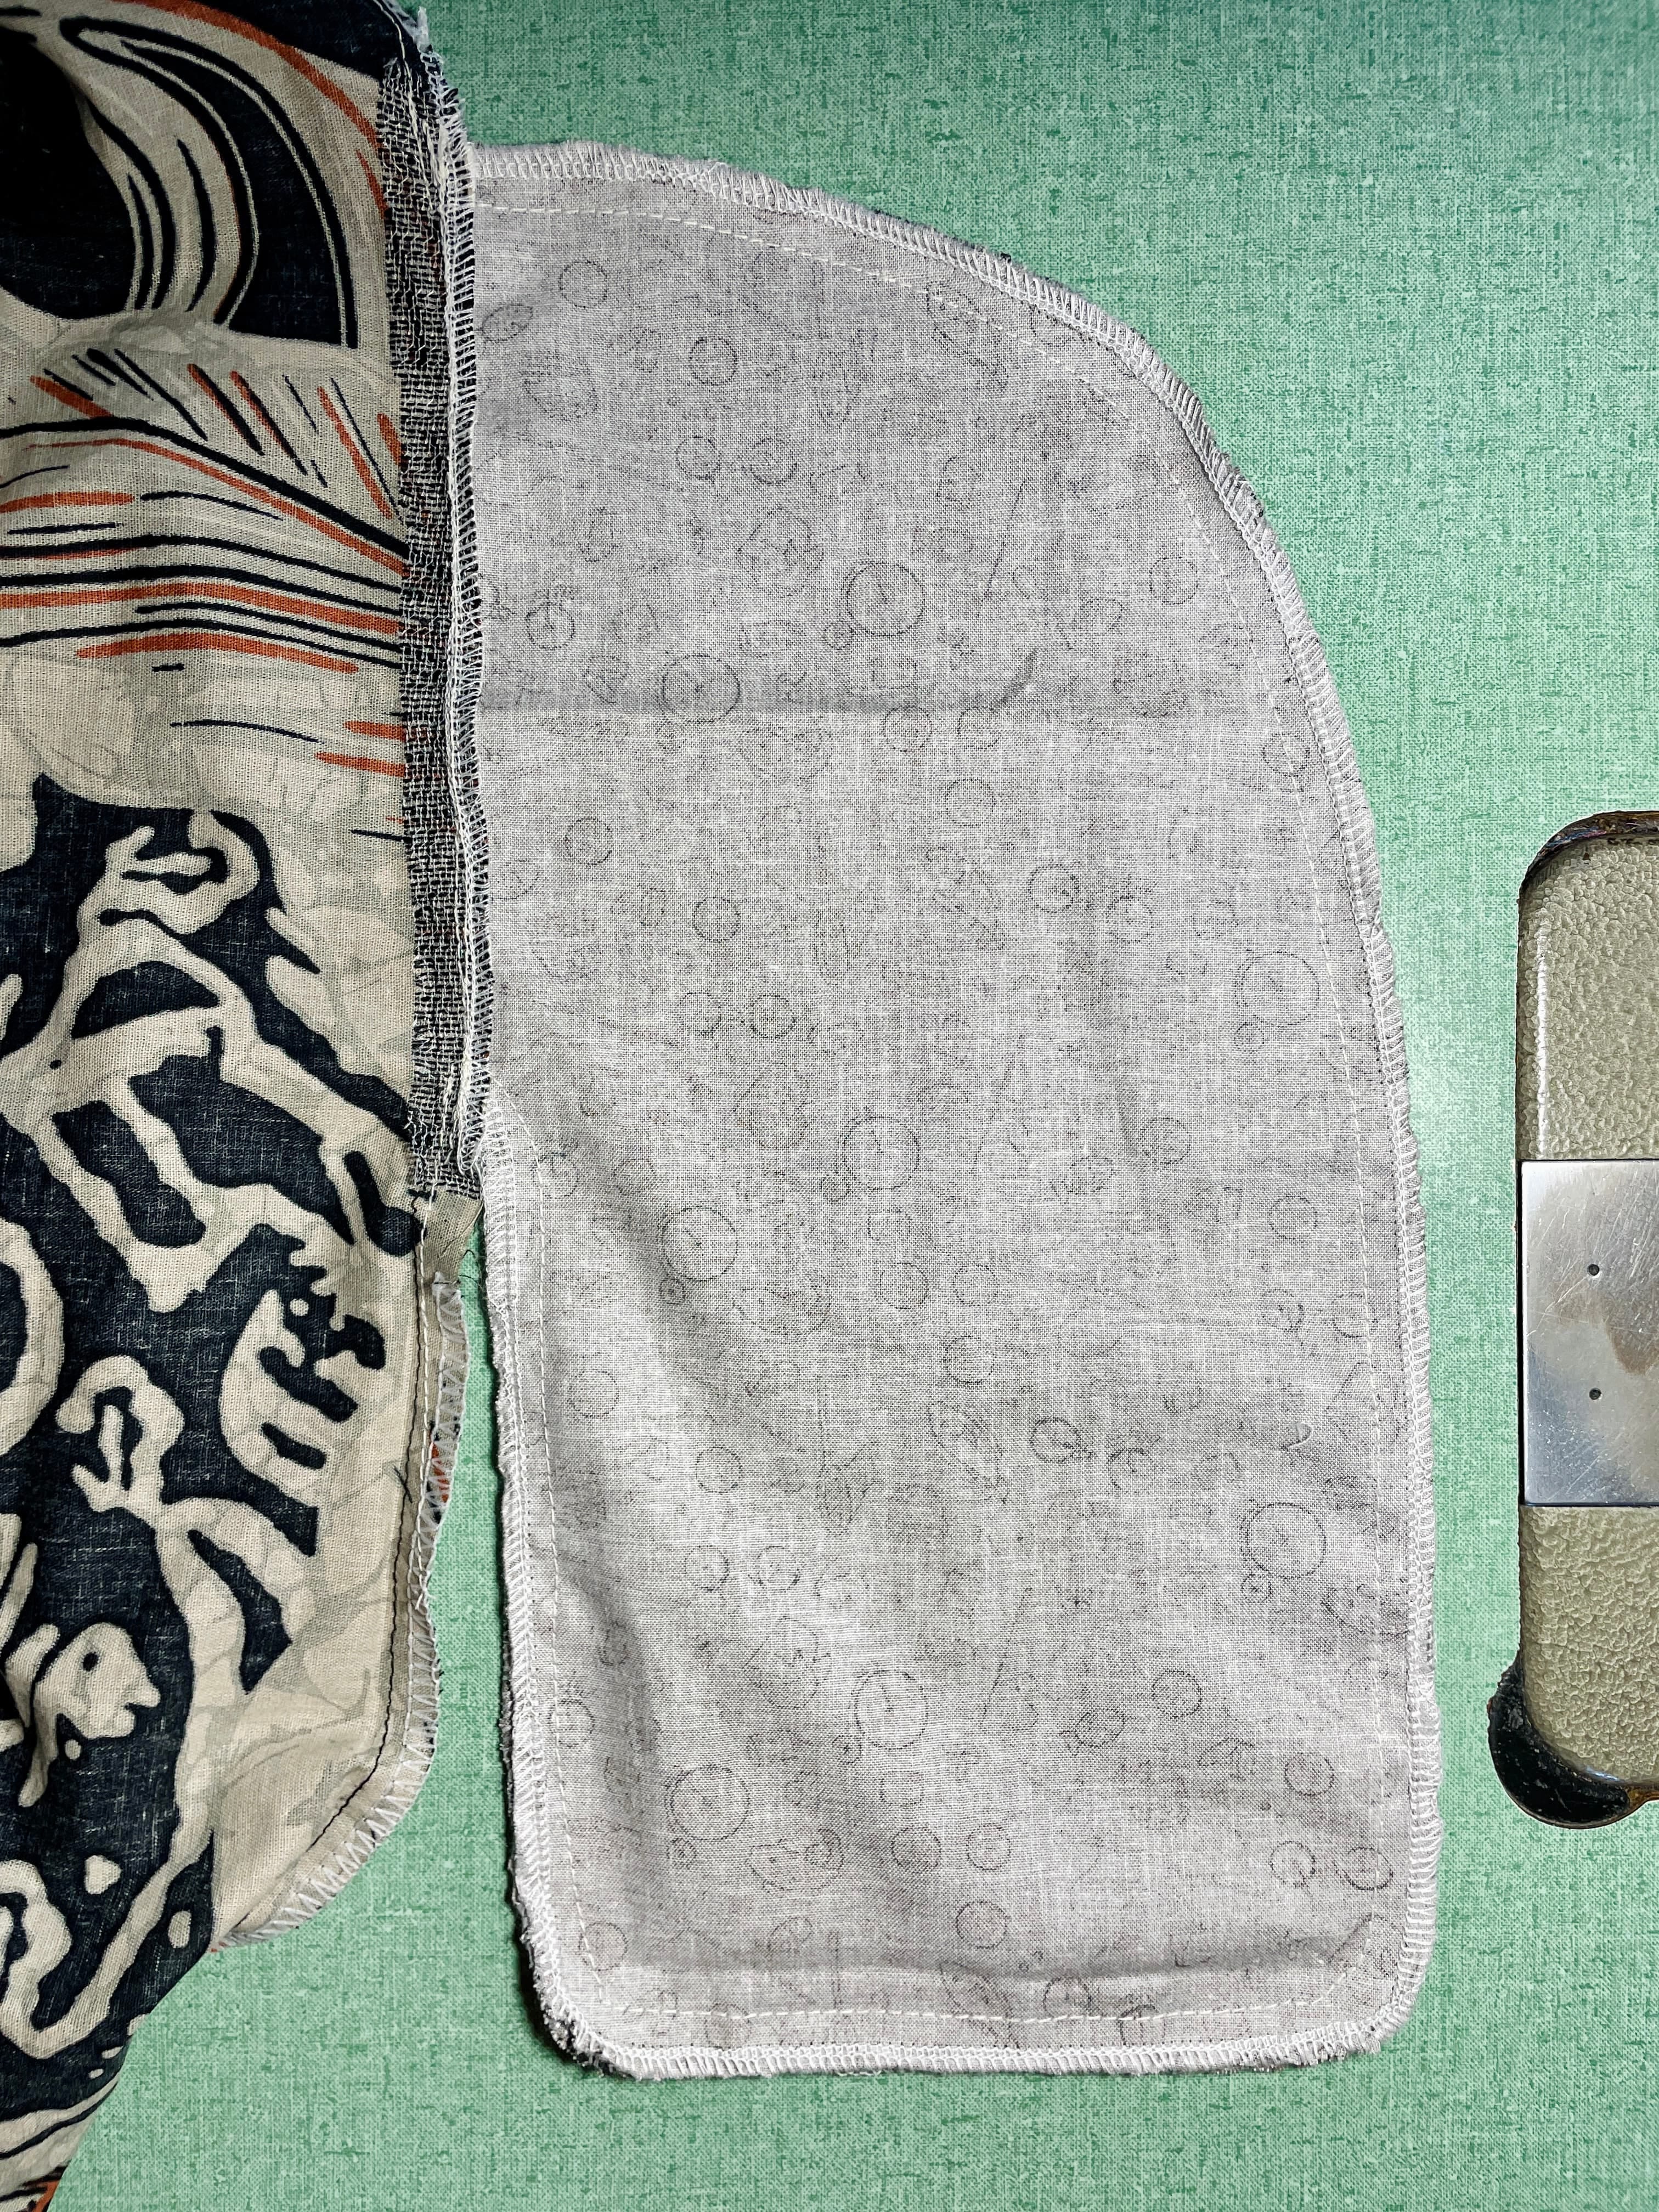
Serge the raw edge of the pocket openings for neat finishing.
Press the pocket pieces away from the garment, and then top stitch ⅛” from the seam line along both sides of the pocket opening. This will not only keep the pocket fabric from peeking out, but also reinforce the most stress-prone areas.
Completing the Pocket
Now the easy part:
With the right sides together, pin the pocket pieces to each other.
Stitch around the curved edge of the pocket, about 1/2" from the edge.
Reinforce the top and bottom of the pocket opening with a few backstitches.
Close everything up by re-stitching the garment seams above and below the pocket opening, ensuring they align perfectly with the original seam line.
The Final Result
Voilà! OMG your future self will thank you. Your garment will thank you. You will wear it so much more now that it has added functions. Sturdy inseam pockets that are strong, nearly invisible, and suit your style.
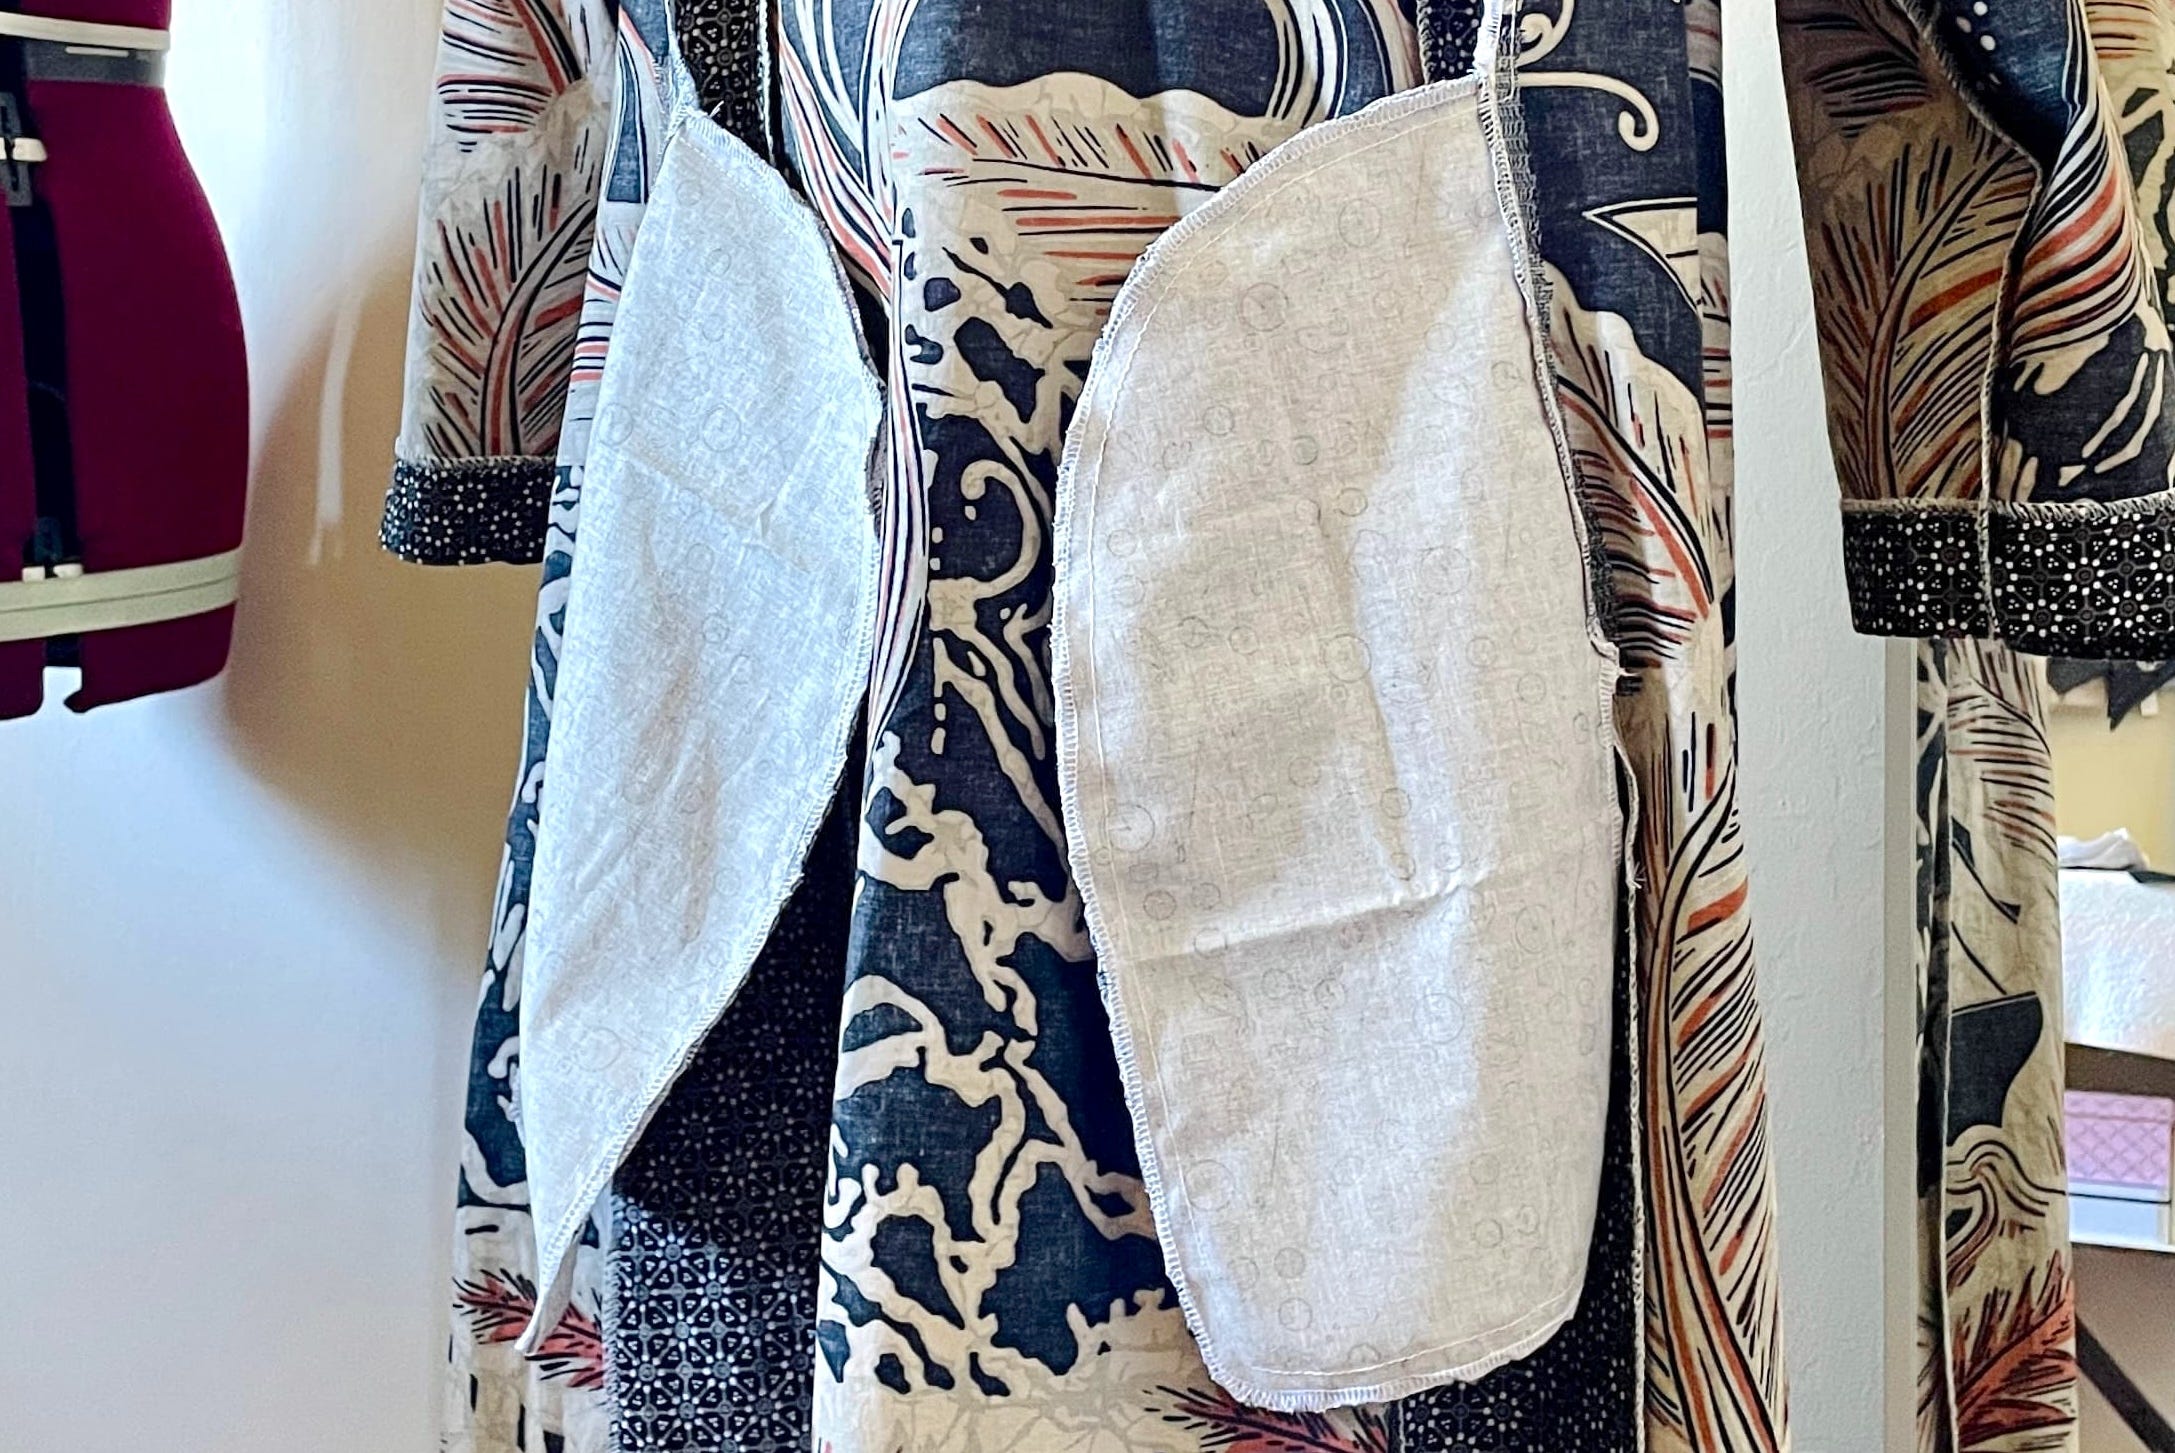
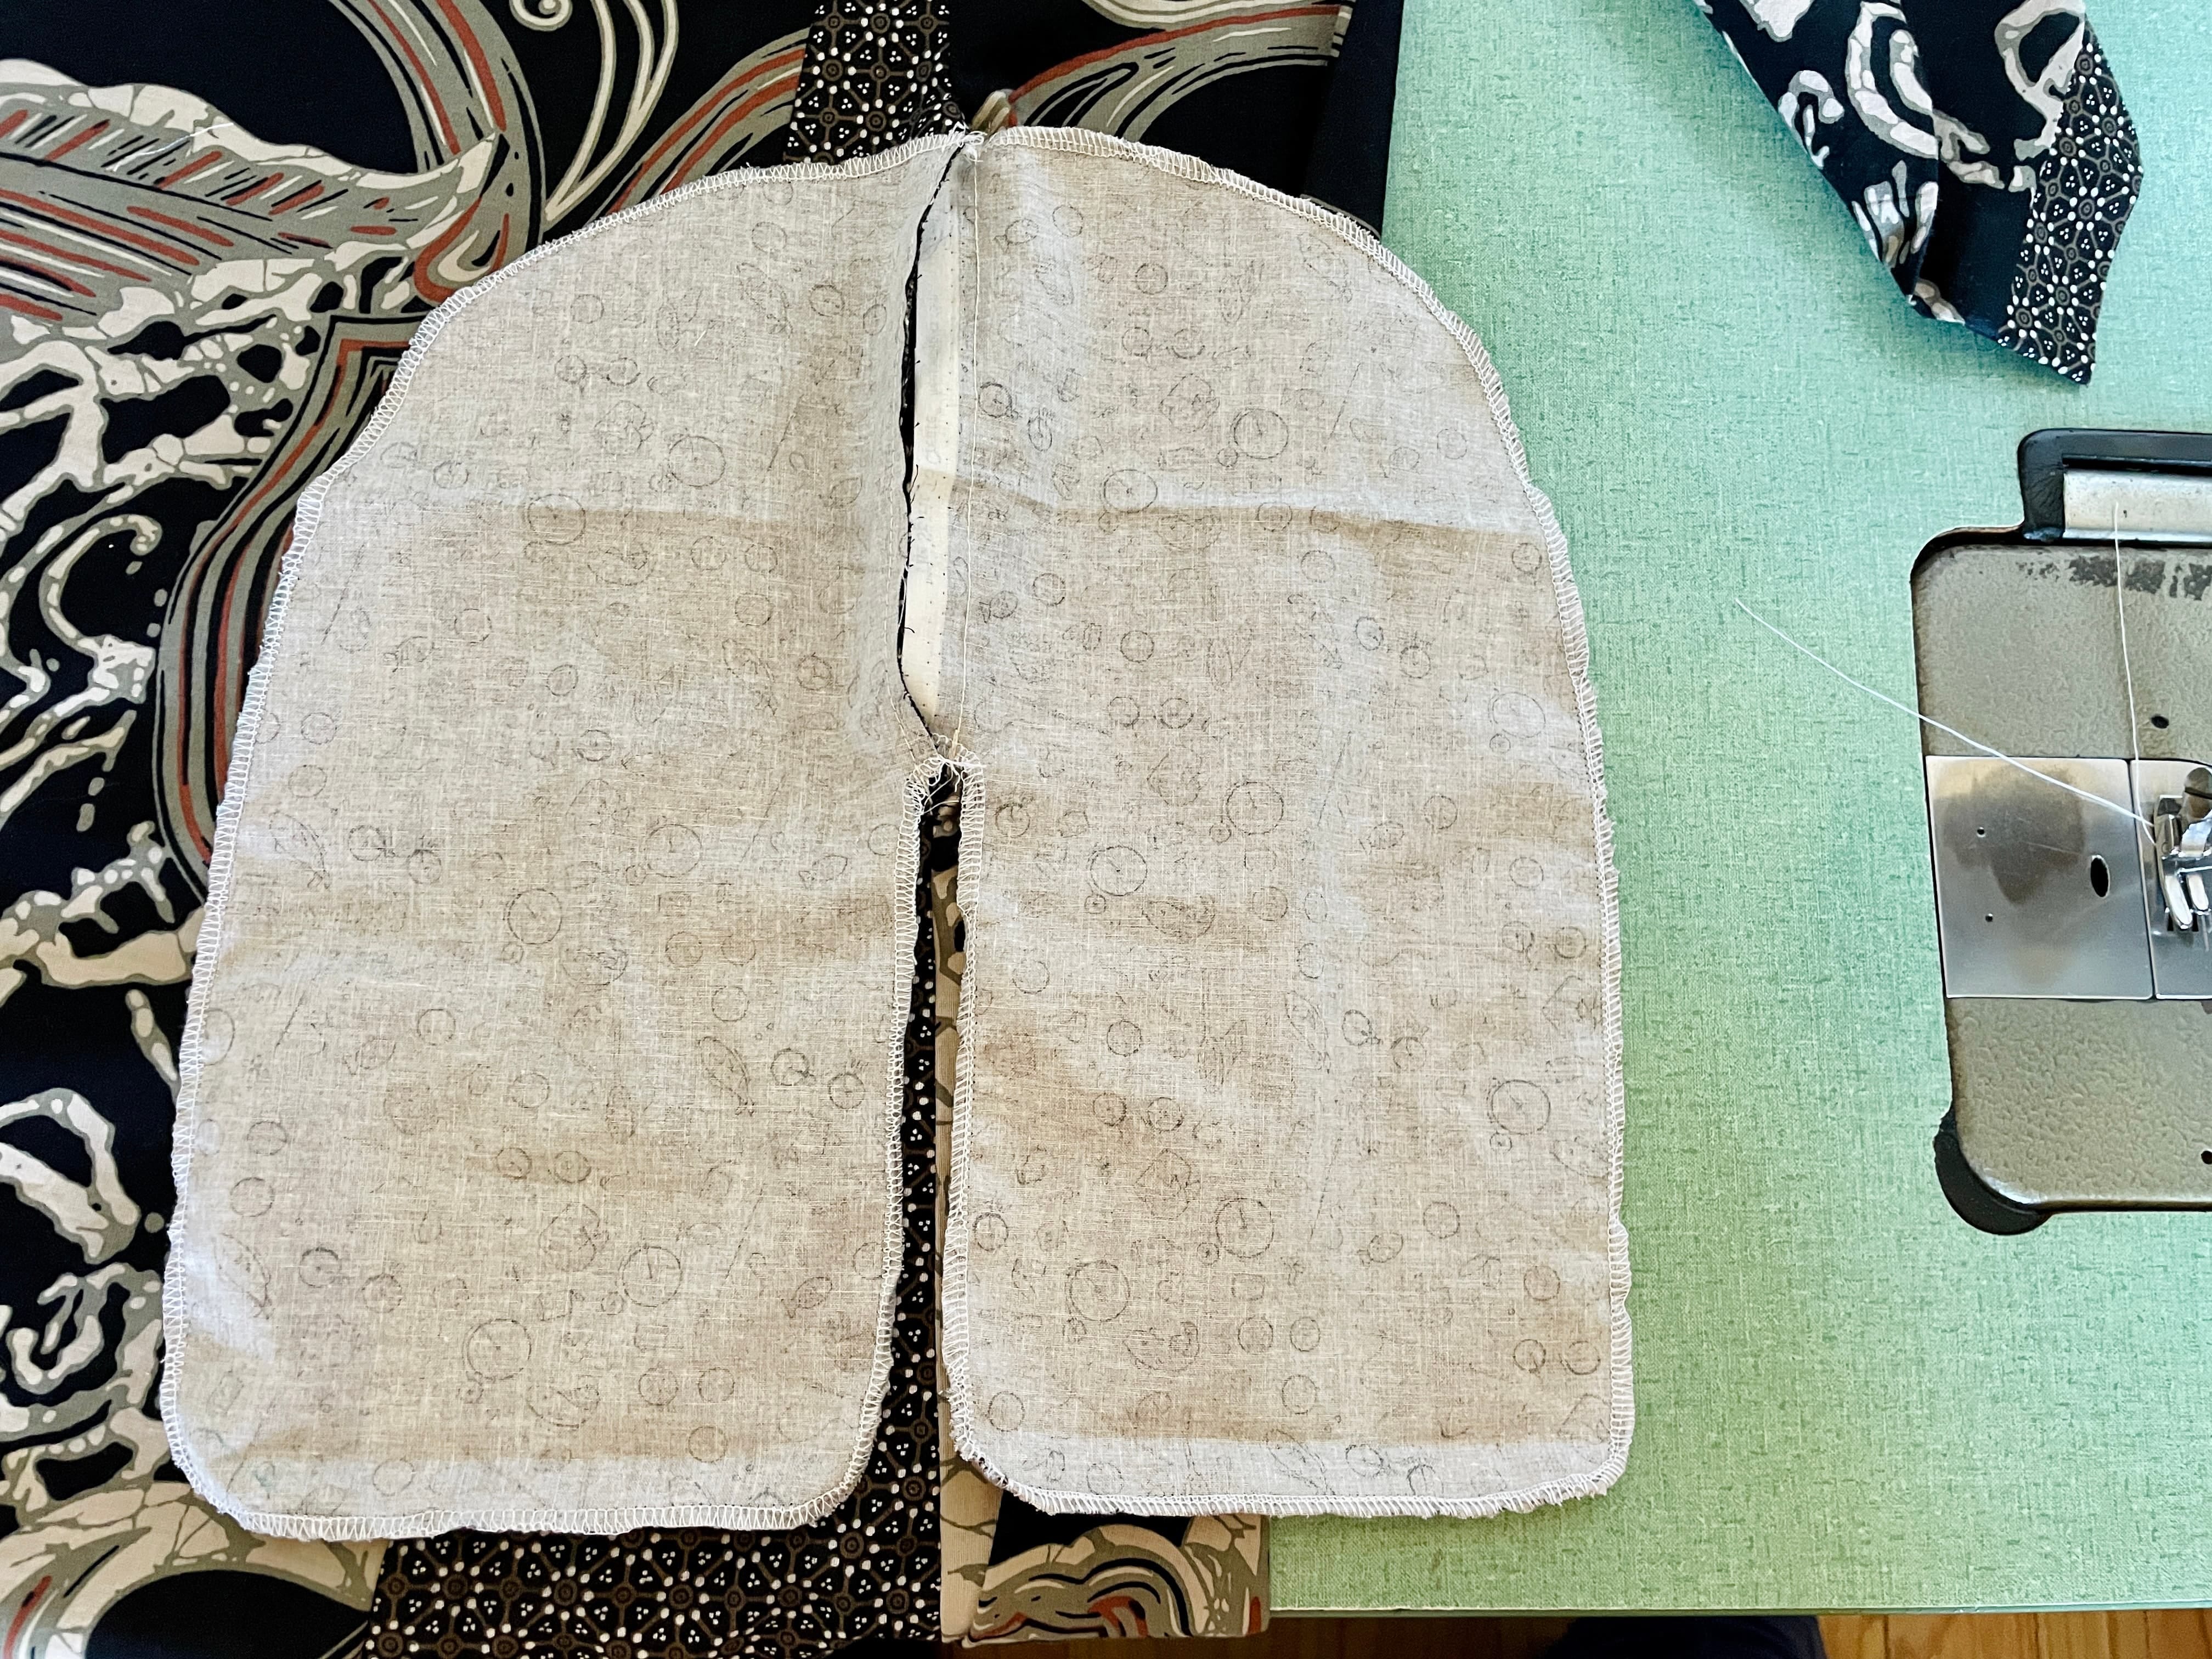
This is what the Batik dress looks like inside out:
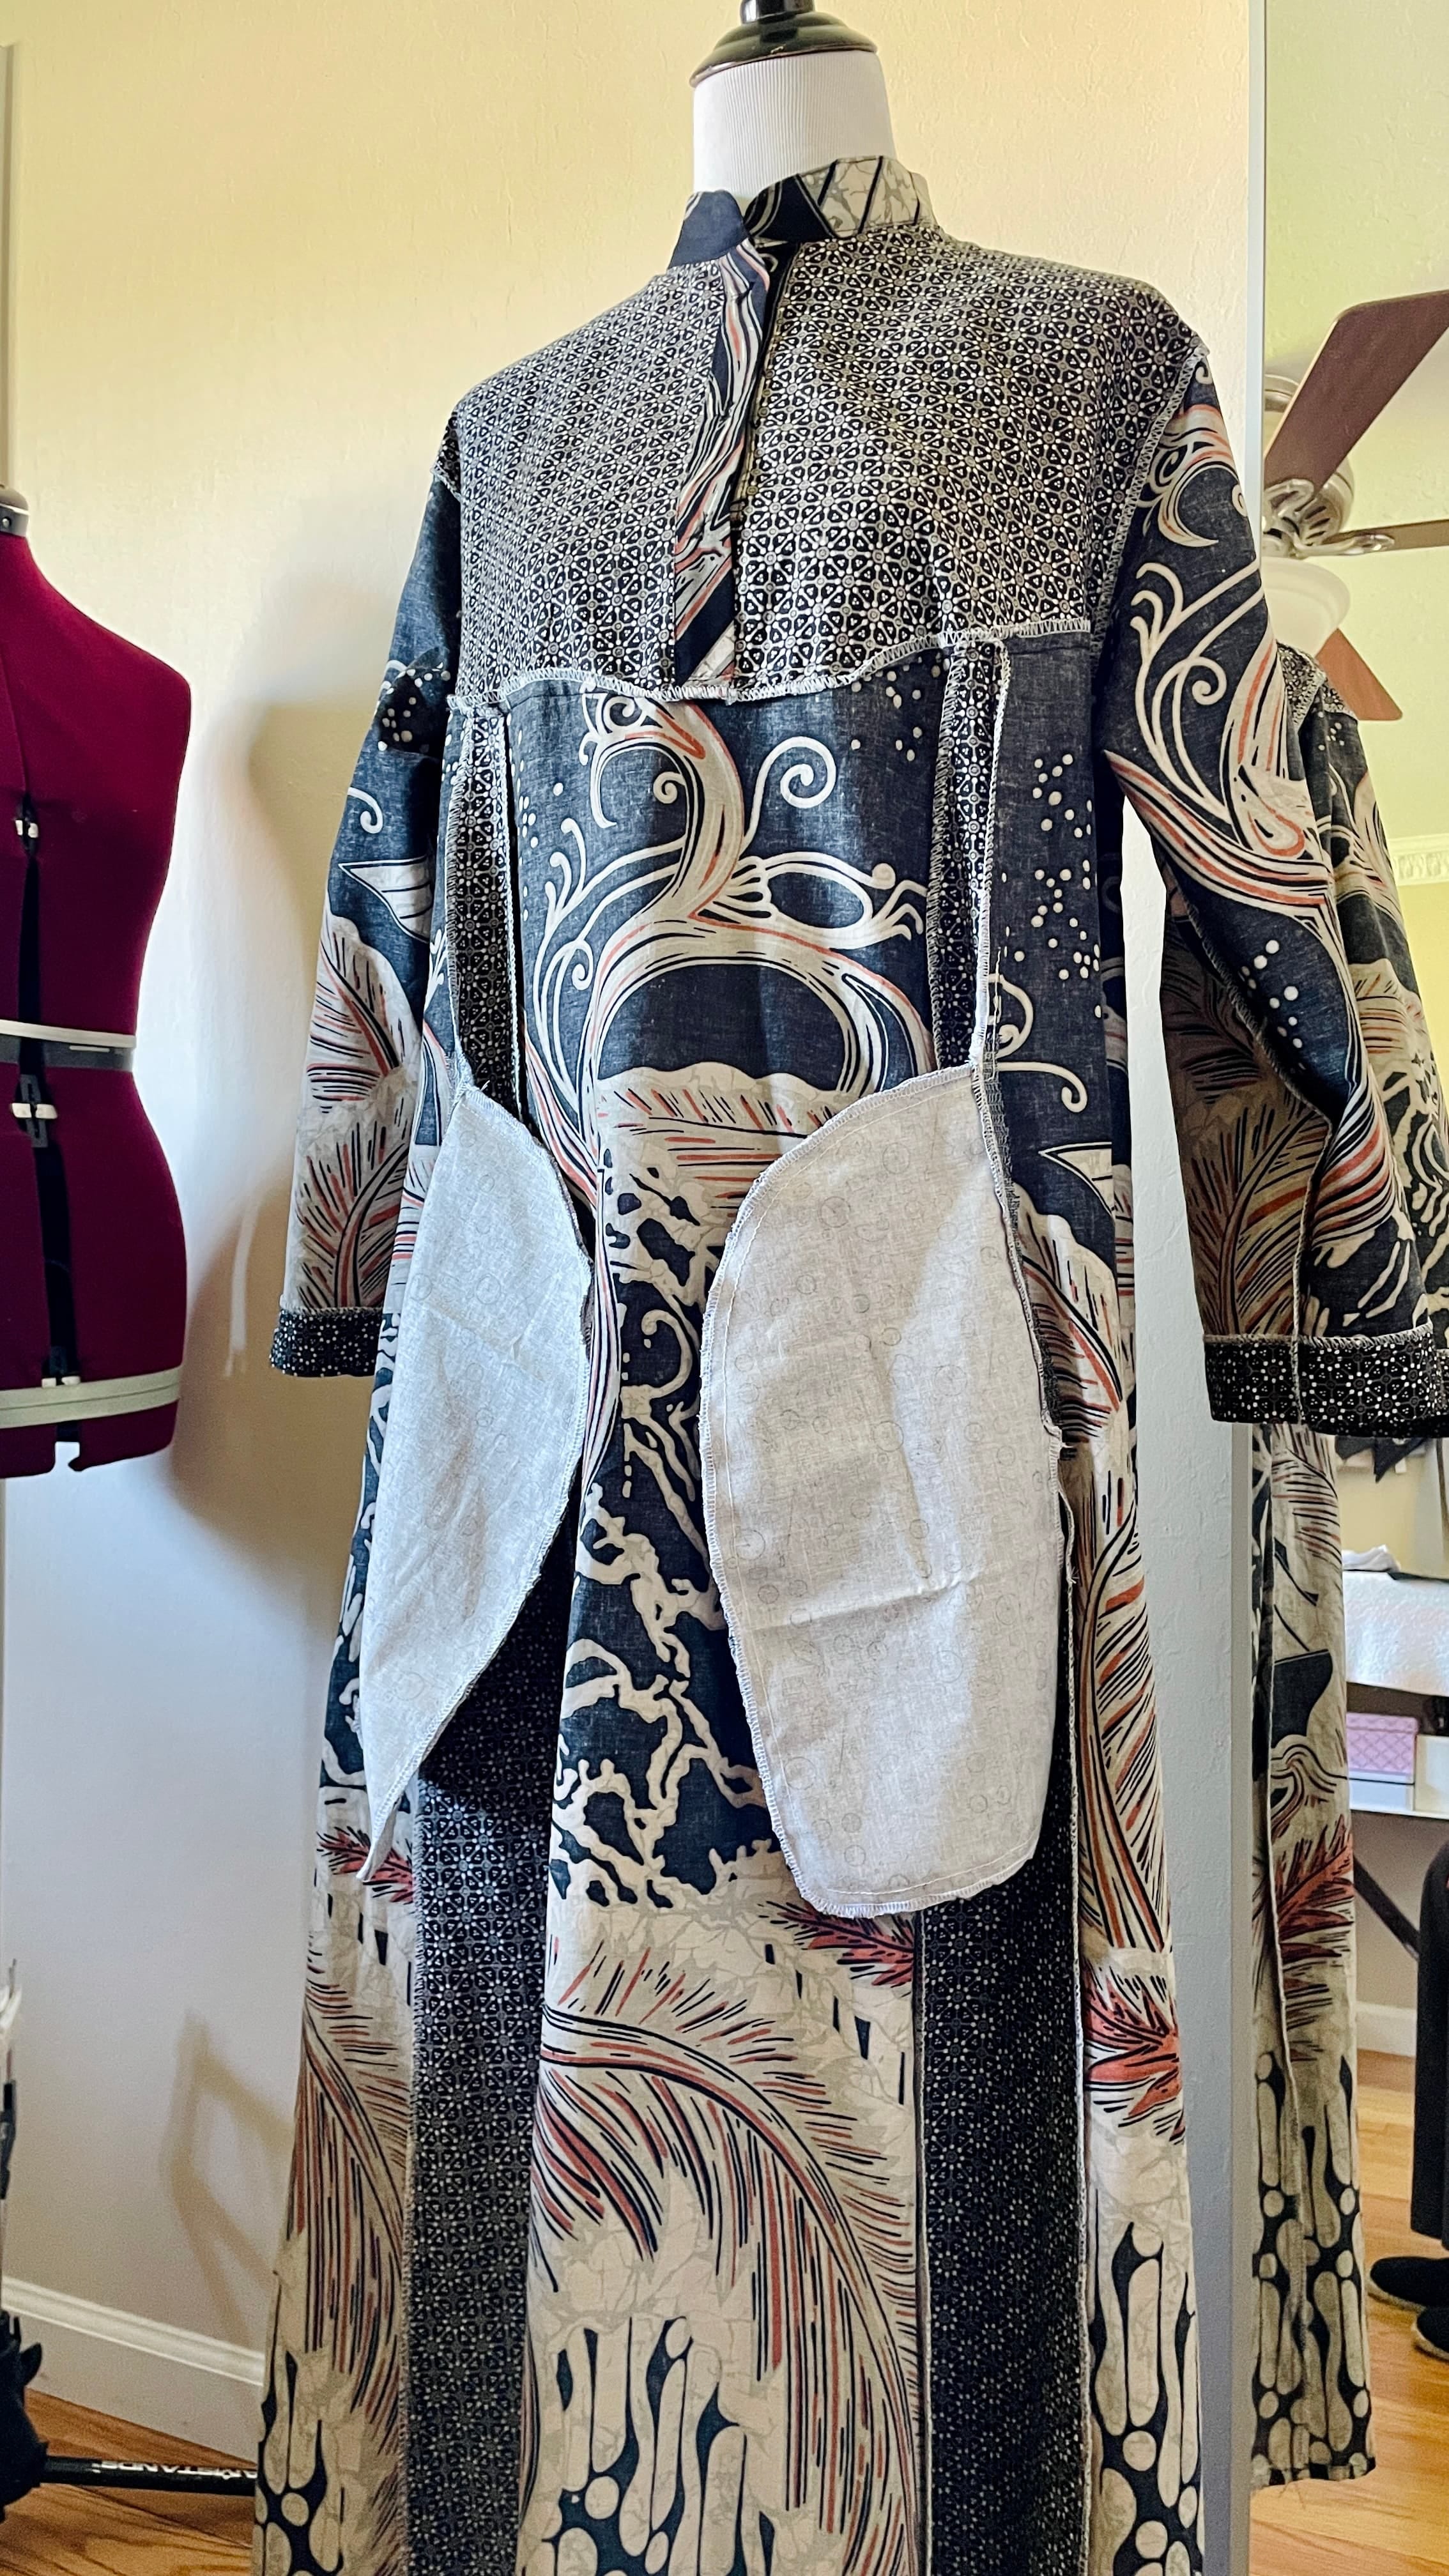
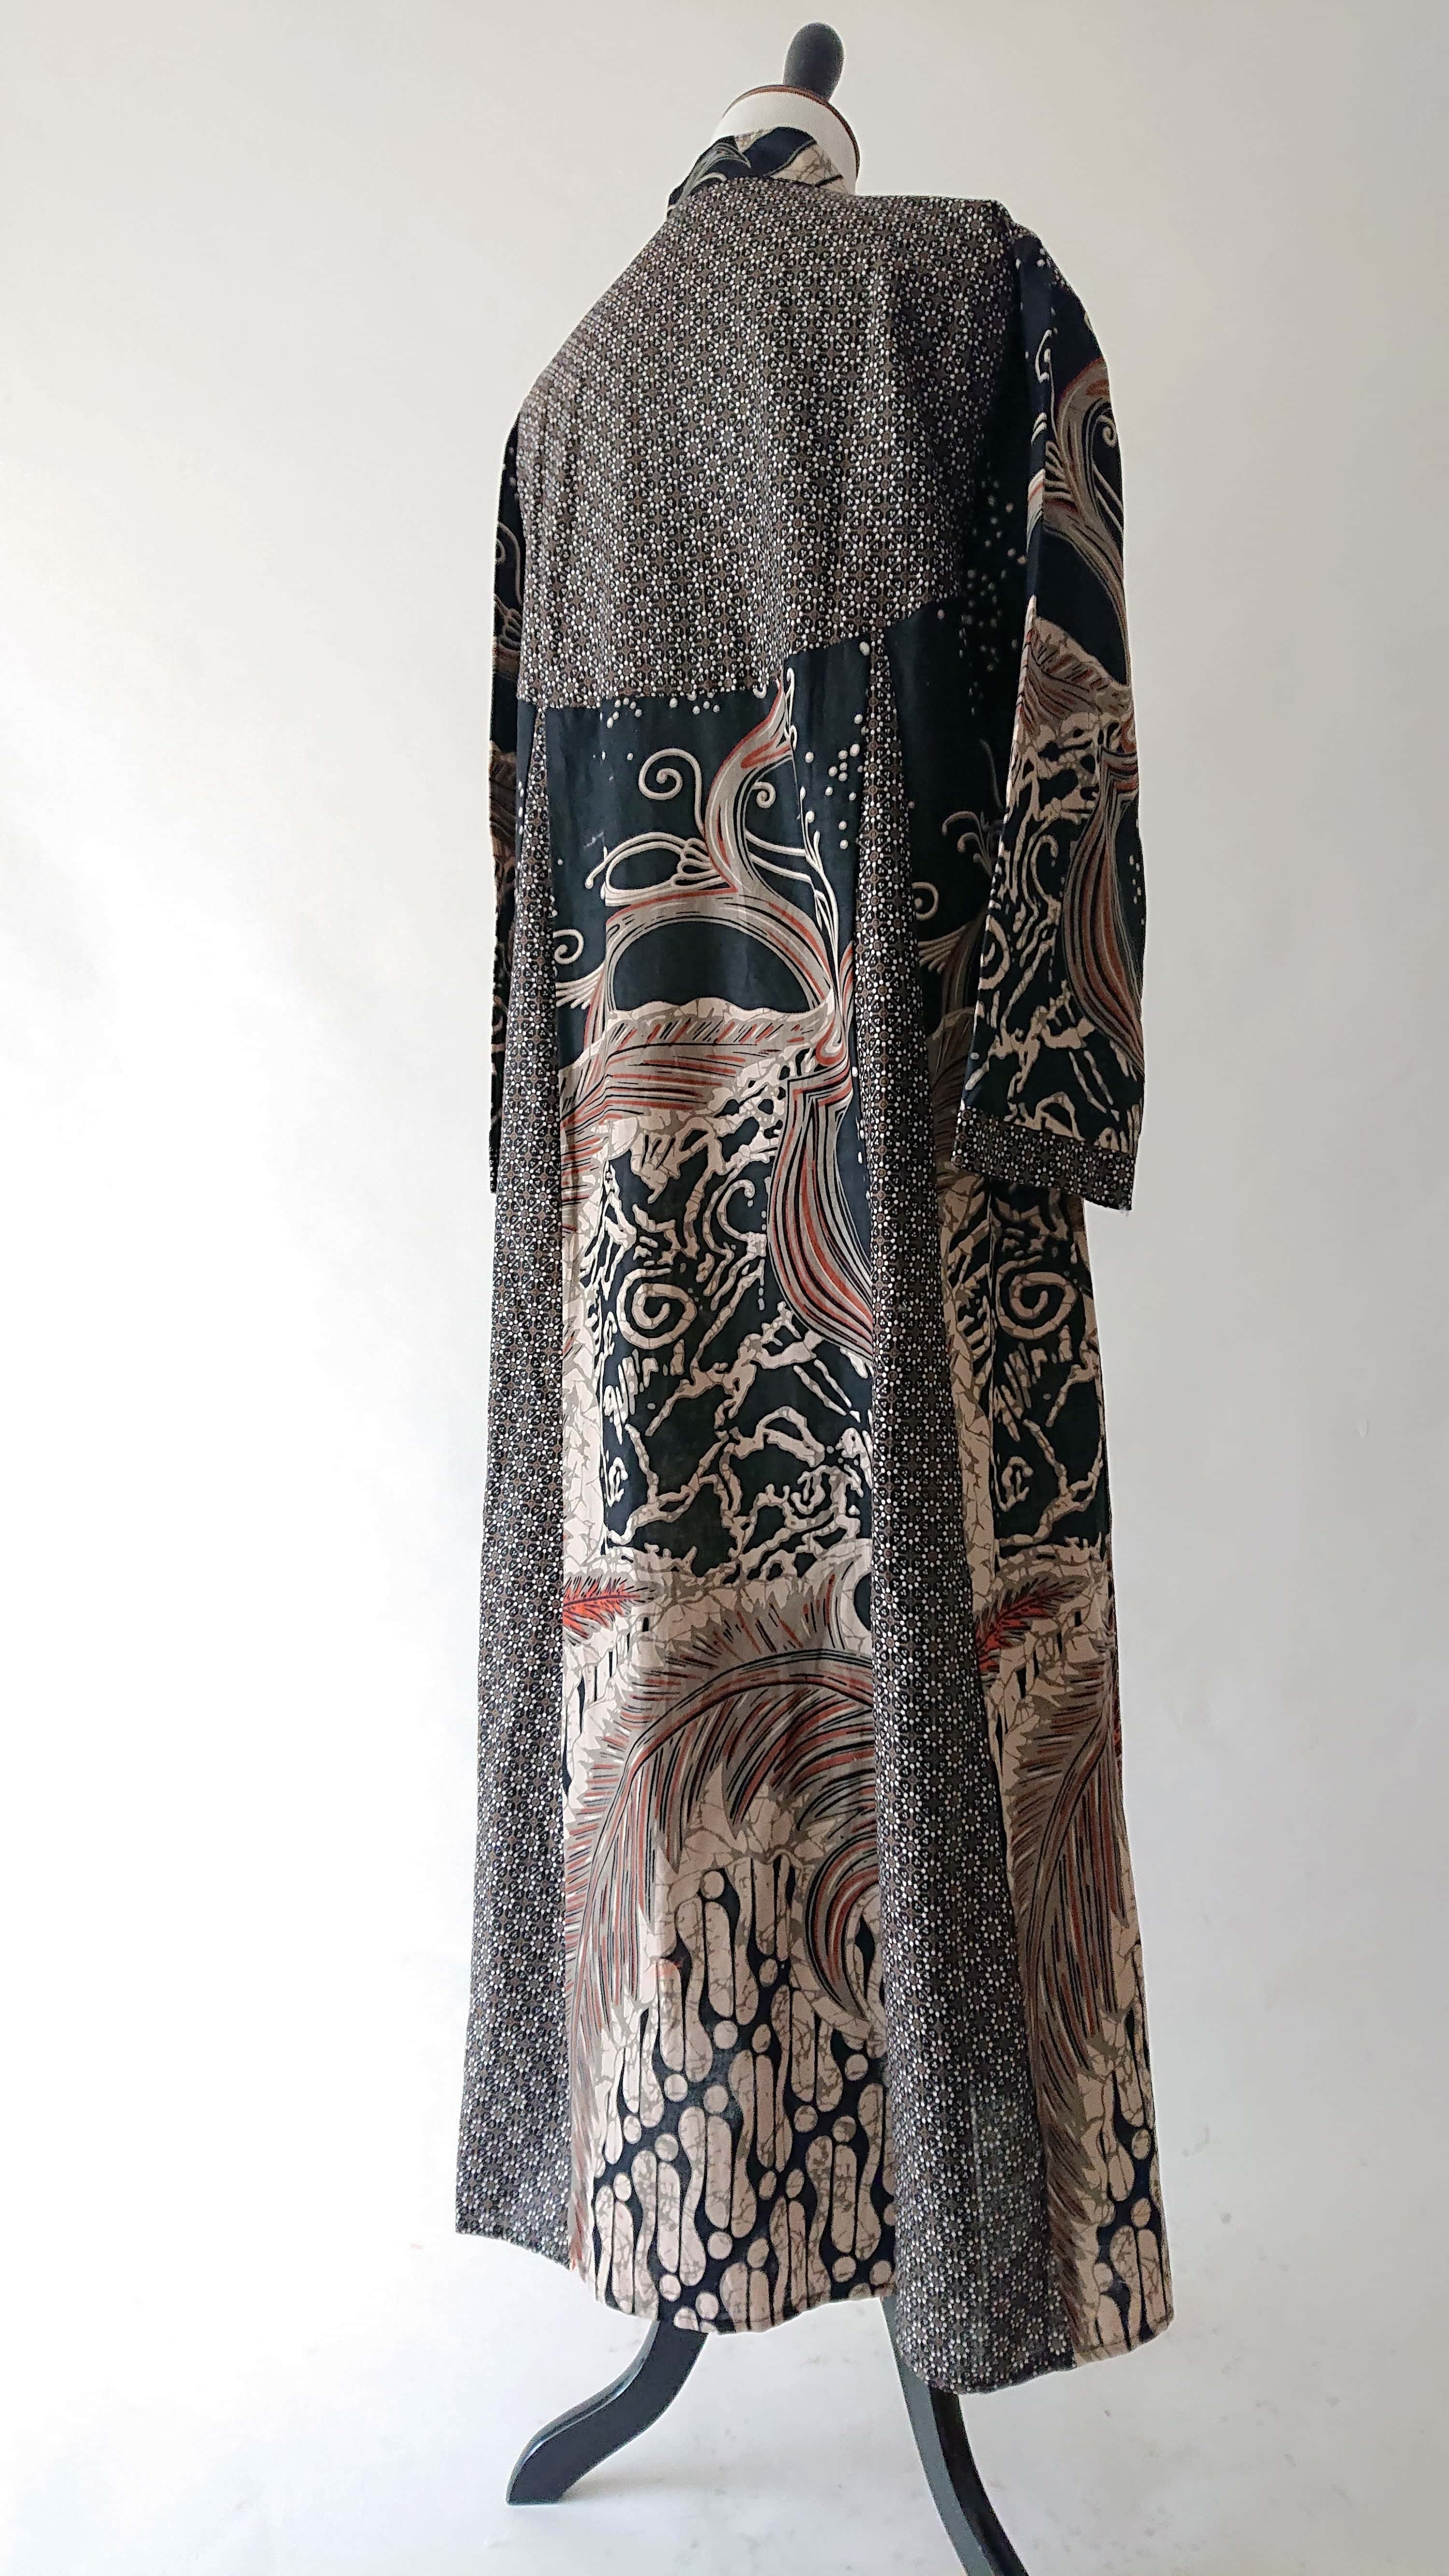
And this is what it looks like after everything’s flipped back. Can you tell where the pockets are?
The best part? No one will ever know these pockets weren't part of the original design. But I can change that if I want to — whenever I proudly answer "Yes, it has pockets!" to compliments :)
So what are you waiting for? Give your wardrobe the upgrade it deserves, one pocket at a time. And may we all stand proud like these birds when we have pockets in our dresses.

Thanks for reading; until next time,
Mira Musank
P.S.: Thank you for your patience as I’m dealing with an erratic schedule this month!
Exquisite choice of fabric for them, extending the beauty of the garment, itself. I LOVE that you are now drawing it out of the closet and into your life more often!